
Related Manuals for PowerBoss Nautilus


Summary of Contents for PowerBoss Nautilus
- Page 1 SERVICE BOOKLET NAUTILUS, NAUTILUS-HD, NAUTILUS-CE PB45DSL, PB45GAS, PB45LPG, PB45HDSL, PB45GAS, PB45LPG Training Trouble Shooting Adjustments Procedures REVISED JULY 2016...
-
Page 2: Table Of Contents
Contents Technical Specifications Page 4 Features Page 5 Safety Page 6 Transporting Machine Page 13 Preventative Maintenance (General) Page 14 Lubrication Points Page 22 Hydraulic System Page 24 Propulsion Pump Neutral Setting Page 27 Brush Pattern Adjustments Page 29 Squeegee Flare Adjustments Page 32 Brakes and Adjustments Page 35... - Page 3 Contents continued Wear Parts Quick Reference Page 59 Diagrams Torque Spec’s (Hydr.Fittings) Page 60 Hydraulics Page 61 Electrical Page 74 Timer Dip Switch Settings Page 84 MISC: Hydraulic Operations and Functions Page 85 Squeegee Retaining Plate Page 111 Front and Side Brush Skirts Page 112 Overhead Guard- Installation Page 115...
-
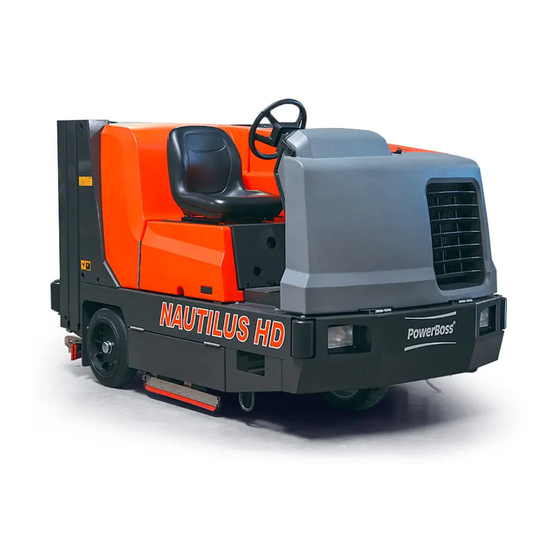
Page 4: Technical Specifications
TECHNICAL SPECIFICATIONS TECHNICAL SPECIFICATIONS Model Nautilus Rider Scrubber/Sweeper Model No. PB450DSL, PB450GAS, PB450LPG General Machine Specifications Length:......95.00 in Width with side scrub brush retracted: . -
Page 5: Features
FEATURES... -
Page 6: Safety
SAFETY INFORMATION... - Page 7 SAFETY INFORMATION...
- Page 8 SAFETY INFORMATION...
- Page 9 SAFETY INFORMATION...
- Page 10 SAFETY INFORMATION...
- Page 11 SAFETY INFORMATION...
- Page 12 SAFETY INFORMATION...
-
Page 13: Transporting Machine
TRANSPORTING MACHINE... -
Page 14: Preventative Maintenance (General)
PREVENTATIVE MAINTENANCE... - Page 15 PREVENTATIVE MAINTENANCE...
- Page 16 PREVENTATIVE MAINTENANCE...
- Page 17 PREVENTATIVE MAINTENANCE...
- Page 18 PREVENTATIVE MAINTENANCE...
- Page 19 PREVENTATIVE MAINTENANCE...
- Page 20 PREVENTATIVE MAINTENANCE...
- Page 21 PREVENTATIVE MAINTENANCE...
- Page 22 PREVENTATIVE MAINTENANCE...
- Page 23 PREVENTATIVE MAINTENANCE...
- Page 24 PREVENTATIVE MAINTENANCE...
- Page 25 PREVENTATIVE MAINTENANCE...
- Page 26 PREVENTATIVE MAINTENANCE...
- Page 27 PREVENTATIVE MAINTENANCE...
- Page 28 PREVENTATIVE MAINTENANCE...
- Page 29 PREVENTATIVE MAINTENANCE...
- Page 30 PREVENTATIVE MAINTENANCE...
- Page 31 PREVENTATIVE MAINTENANCE...
- Page 32 PREVENTATIVE MAINTENANCE...
- Page 33 PREVENTATIVE MAINTENANCE...
- Page 34 PREVENTATIVE MAINTENANCE...
- Page 35 PREVENTATIVE MAINTENANCE...
- Page 36 PREVENTATIVE MAINTENANCE...
- Page 37 PREVENTATIVE MAINTENANCE...
- Page 38 PREVENTATIVE MAINTENANCE...
- Page 39 PREVENTATIVE MAINTENANCE...
- Page 40 TROUBLESHOOTING...
-
Page 41: Troubleshooting
TROUBLESHOOTING... - Page 42 TROUBLESHOOTING...
- Page 43 TROUBLESHOOTING...
- Page 44 TROUBLESHOOTING...
- Page 45 TROUBLESHOOTING...
- Page 46 TROUBLESHOOTING...
- Page 47 TROUBLESHOOTING...
- Page 48 ADJUSTMENTS & PROCEDURES NAUTILUS MAIN BRUSH AND IMPELLER PRESSURE RELIEF ADJUSTMENTS These adjustments are necessary if the hydraulic manifolds are supplied with the relief valves set at zero or incorrectly set. MAIN BRUSH PRESSURE RELIEF ADJUSTMENT: •Install an appropriate pressure gauge at the gauge port on the main hydraulic manifold. The gauge port (GA) is located on the left side of the manifold when viewed from the front of the machine.
- Page 49 ADJUSTMENTS & PROCEDURES NAUTILUS MAIN BRUSH AND IMPELLER PRESSURE RELIEF ADJUSTMENTS IMPELLER PRESSURE RELIEF ADJUSTMENT: Install an appropriate pressure gauge at the gauge port on the impeller hydraulic manifold. The gauge port (GA) is located on the face of the manifold when viewed from the front of the machine.
- Page 50 ADJUSTMENTS & PROCEDURES NAULTILUS SCRUB BRUSH FLOOR PRESSURE ADJUSTMENT Before the scrub head floor pressure adjustment can be performed the reduction valve at the main hydraulic manifold port 4.1 must be adjusted to 450 psi (The purpose of this valve is to change the variable inlet pressure (approximately 700 psi) to a constant output pressure of 450 psi which is applied to the piston-end of the scrub head lift cylinder.
- Page 51 ADJUSTMENTS & PROCEDURES NAULTILUS SCRUB BRUSH FLOOR PRESSURE ADJUSTMENT Setting the scrub brush floor pressure controller (proportional valve driver) The floor brush pressure controller (located on the left front face of the operator console) provides three separate brush floor pressure forces by controlling the hydraulic pressure output of the proportional reduction valve located on the main hydraulic manifold at port 6.1.
- Page 52 ADJUSTMENTS & PROCEDURES NAULTILUS SCRUB BRUSH FLOOR PRESSURE ADJUSTMENT The unit must be on to input settings. Turning the right control knob scrolls through the parameters listed above. Turning the left control knob changes the settings of each parameter. The settings are saved by turning the right control knob to SA and rotating the left control knob one full turn (in either direction). CONTROLLER SETTINGS: Set P1 to 1.48 A Providing 200 lbs of brush pressure against the floor (415 psi at port BLB) Set P2 to 1.98 A Providing 300 lbs of brush pressure against the floor (730 psi at port BLB)
- Page 53 ADJUSTMENTS & PROCEDURES WITH OPTIONAL SIDE SCRUB NAULTILUS DUAL CONTROLLER ADJUSTMENT FOR MAIN SCRUB BRUSH AND OPTIONAL SIDE SCRUB BRUSH FLOOR PRESSURE ADJUSTMENT. Before the scrub head floor pressure adjustment can be performed the reduction valve at the main hydraulic manifold port 4.1 must be adjusted to 450 psi (The purpose of this valve is to change the variable inlet pressure (approximately 700 psi) to a constant output pressure of 450 psi which is applied to the piston-end of the scrub head lift cylinder.
-
Page 54: Scrub Brush Floor Pressure
Setting the main scrub brush floor pressure (Using the dual proportional valve driver) The dual floor brush pressure controller (located on the left front face of the operator console) provides three separate brush floor pressure forces for the main scrub brushes by controlling the hydraulic pressure output of the SV4 proportional reduction valve located on the main hydraulic manifold at port 6.1. - Page 55 The unit must be “on” to input settings. Turning the right control knob scrolls through the parameters listed above. Turning the left control knob changes the settings of each parameter. The settings are saved by turning the right control knob to SA and rotating the left control knob one full turn (in either direction).
- Page 56 DUAL CONTROLLER “B” (MAIN SCRUB BRUSH) SETTINGS: Set BP1 to 1.48 A Providing 200 lbs of main brush pressure against the floor (415 psi at port BLB) Set BP2 to 1.98 A Providing 300 lbs of main brush pressure against the floor (730 psi at port BLB) Set BP3 to 2.18 A Providing 400 lbs of main brush pressure against the floor (865 psi at port BLB) BP4 –...
- Page 57 Setting the side scrub brush floor pressure (Using the dual proportional valve driver) The dual floor brush pressure controller (located on the left front face of the operator console) provides three separate side brush floor pressure forces by controlling the hydraulic pressure output of the proportional reduction valve located on the SSB hydraulic manifold at port 6.2.
- Page 58 The settings are saved by turning the right control knob to SA and rotating the left control knob one full turn (in either direction). DUAL CONTROLLER “A” (SIDE SCRUB BRUSH) SETTINGS: Set AP1 to 1.60 A Providing 120 lbs of brush pressure against the floor Set AP2 to 1.70 A Providing 130 lbs of brush pressure against the floor Set AP3 to 1.85 A Providing 140 lbs of brush pressure against the floor AP4 –...
- Page 59 Cylindrical Scrub Brushes ( 2 Required ) 731090 45" Nylon Cylindrical Scrub Brush Color White / Medium Duty Scrubbing 731091 45" Poly Cylindrical Scrub Brush Color BLACK / Light Duty Scrubbing Color Blue / All Purpose (STANDARD) 731093 45" 180 Mid Grit Cylindrical Scrub Brush 731092 45"...
- Page 60 O-RING FACE SEAL ASSEMBLY TORQUES AND FFWR O.D. SAE DASH SIZE TUBE SIDE THREAD SIZE ASSEMBLY TORQUE (+10%-0) FLATS FROM WRENCH RESISTANCE(FFWR) (IN.) (MM) IN.-LB FT.-LB TUBE NUTS SWIVEL AND HOSE 9/16-18 1/4 TO 1/2 1/2 TO 3/4 8,10 11/16-16 1/4 TO 1/2 1/2 TO 3/4 13/16-16...
- Page 74 20° 675507 711373 730965 (OPERATORS) LEFT SIDE VIEW (OPERATORS) RIGHT SIDE VIEW SOURCE: 175 Anderson Street PowerBoss Aberdeen, NC 28315 CONFIDENTIAL The Power of Clean PHONE (910) 944-2105 THIS DRAWING AND ALL INFORMATION MATL: FAX (910) 944-7409 CONTAINED THEREIN ARE THE EXCLUSIVE...
- Page 75 20° 675507 711373 730965 (OPERATORS) LEFT SIDE VIEW (OPERATORS) RIGHT SIDE VIEW SOURCE: 175 Anderson Street PowerBoss Aberdeen, NC 28315 CONFIDENTIAL The Power of Clean PHONE (910) 944-2105 THIS DRAWING AND ALL INFORMATION MATL: FAX (910) 944-7409 CONTAINED THEREIN ARE THE EXCLUSIVE...
- Page 84 731224-R Timer Relay Settings 5 second delay with on full tank Delay Brush Deck UP Vacuum off Vaccum motor off 20 Second OFF delay 2 Second OFF delay 5 Second ON delay Keeps engine Running at Vacuum motor off with Delay on squeegee lift high RPM before shut manual switch off...
- Page 85 NAUTILUS HYDRAULIC MANIFOLD OPERATION MAIN HYDRAULIC MANIFOLD The main hydraulic manifold performs the following functions: Main brush system pressure relief Main brushes on and off Scrub head raise and lower Scrub head lock in the raised position Main brush scrubbing force...
- Page 86 When de-energized this valve directs flow from the rod-end of the scrub head lift cylinder to tank. When energized it directs regulated pressure to the rod-end of the scrub head lift cylinder. This valve directs the flow to the scrub head lift cylinder through port BL B. The following two main brush system solenoids receive hydraulic pressure generated by the back- pressure of the steering system and additional back pressure provided by an orifice located just before the pressure inlet of the power steering unit (a total of approximately 700 psi).
- Page 87 VACUUM IMPELLER HYDRAULIC MANIFOLD The vacuum impeller hydraulic manifold performs the following functions: Pressure relief Vacuum impeller on and off Location and operation of the individual vacuum impeller hydraulic valves: The solenoids that control vacuum impeller functions receives hydraulic pressure and flow from the center auxiliary pump which has a displacement of .66 cu.
- Page 88 The green “ALL ON-OFF” switch also provides power for the proportional valve driver which controls the Proportional reduction valve SV4 (Main brush force). The operator selects the desired brush scrubbing force by turning the brush force rotary switch, located on the instrument panel, to one of three switch positions, low, medium, and high. The rotary switch provides three separate signals to the proportional valve driver input terminals IN B and IO 2.
-
Page 89: Optional Side Scrub Brush
OPTIONAL SIDE SCRUB BRUSH HYDRAULIC MANIFOLD OPERATION The side scrub brush hydraulic manifold performs the following functions: Side brush on and off Side scrub head raise and lower Side scrub head locked in the raised position Side brush scrubbing force Side brush extend and retract Location and operation of the individual side scrub brush hydraulic valves: The following single solenoid valve that controls side brush on-off function receives hydraulic pressure... - Page 90 When energized this solenoid allows a maximum of 450 psi fluid flow (from reducing valve RV4) into and out from the rod-end of the side brush lift cylinder. This valve directs the flow to and from the piston-end of the side brush lift cylinder through port SBLB. SOLENOID VALVE SV12 (Side brush Extend-retract) in port 5.2 is a 2-position 3-way directional control valve.
- Page 91 NAULTILUS DUAL CONTROLLER ADJUSTMENT FOR MAIN SCRUB BRUSH AND OPTIONAL SIDE SCRUB BRUSH FLOOR PRESSURE ADJUSTMENT. MAIN SCRUB HEAD: Note: the following 12 steps are required only for the factory or if you are replacing the reduction valve 730702 in port 4.1. If the part number on the side of the reduction valve body (not the coil but the cartridge body) ends with the number 45 then it is already set at 450 psi and the following 12 steps can be skipped.
- Page 92 Description of the main scrub brush floor pressure settings (Using the dual proportional valve driver): The dual controller uses an “A” prefix for the optional side brush settings and a “B” prefix for the Main brush settings. The dual floor brush pressure controller or dual proportional valve driver (located on the left front face of the operator console) provides three separate brush floor pressure forces for the main scrub brushes by controlling the hydraulic pressure output of the SV4 proportional reduction valve located on the main hydraulic manifold at port 6.1.
- Page 93 DUAL CONTROLLER “B” (MAIN SCRUB BRUSH) SETTINGS: Turning the right control knob scrolls through the parameters listed above. Turning the left control knob changes the settings of each parameter. The settings are saved by turning the right control knob to SA and rotating the left control knob one full turn (in either direction).
- Page 94 If the part number on the side of the reduction valve body in port 4.2 (not the coil but the cartridge body) ends with the number 45 then it is already set at 450 psi. If this valve has already been adjusted go to “Setting the side scrub brush floor pressure controller”.
- Page 95 Description of the side scrub brush pressure settings (Using the dual proportional valve driver): The dual controller uses an “A” prefix for the optional side brush settings and a “B” prefix for the Main brush settings. AP1 – The low side brush floor pressure setting. AP2 –...
- Page 96 dI = screen orientation – no setting should be required. SA (save settings) – Turn the left control knob one full turn (in either direction). CMK 10-28-2013...
- Page 97 NAUTILUS MAIN BRUSH AND IMPELLER PRESSURE RELIEF ADJUSTMENTS For assembly line personnel These adjustments are necessary if the hydraulic manifolds are supplied with the relief valves set at zero or incorrectly set. MAIN BRUSH PRESSURE RELIEF ADJUSTMENT: 1. Install an appropriate pressure gauge at the gauge port on the main hydraulic manifold. The gauge port (GA) is located on the left side of the manifold when viewed from the front of the machine.
- Page 98 1. Remove the hydraulic hose from the outlet of the hydraulic manifold at port VF OUT located on the top of the manifold and plug (pressure tight) the fitting on the manifold and the end of the hose. 2. Loosen the lock nut and unscrew the pressure adjustment screw on the pressure relief valve RV1 located in port 9.2.
- Page 99 NAULTILUS SCRUB BRUSH FLOOR PRESSURE ADJUSTMENT Note: the following 12 steps are required only for the factory or if you are replacing the reduction valve 730702 in port 4.1. If the part number on the side of the reduction valve body (not the coil but the cartridge body) ends with the number 45 then it is already set at 450 psi and the following 12 steps can be skipped.
- Page 100 Setting the scrub brush floor pressure controller (proportional valve driver) The floor brush pressure controller or proportional valve driver (located on the left front face of the operator console) provides three separate brush floor pressure forces by controlling the hydraulic pressure output of the proportional reduction valve located on the main hydraulic manifold at port 6.1.
- Page 101 CONTROLLER SETTINGS: Turning the right control knob scrolls through the parameters listed above. Turning the left control knob changes the settings of each parameter. The settings are saved by turning the right control knob to SA and then rotating the left control knob one full turn (in either direction).
- Page 102 Adjusting the Nautilus HD lift arms CMK 11-4-2015 This sheet indicates how to correctly adjust the Nautilus HD hopper and hopper lift arm cylinders When installing the upper clevises onto the bumper and hopper lift cylinders it is important, in order not to cause the clevis to contact and cut into the lift arms, to screw the clevis onto the threaded rod of the cylinder until the end of the cylinder rod sticks out 1/8 inch beyond the top of the clevis base.
- Page 103 The high dump incorporates two separate lift arm assemblies. The rear squeegee and rear bumper is attached to the outer lift arm assembly and the hopper is attached to the inner lift arm assembly. The Nautilus high dump controls consist of three rocker switches. They are located on the left side of the operator console.
- Page 104 The rear bumper and squeegee can be raised separately from the debris hopper. This is particularly useful when inspecting or performing maintenance on the rear squeegee. If desired both of the lift arm assemblies can be raised and lowered at the same time. The outer (bumper) lift arm assembly is equipped with a solenoid-operated latch located in the lower end of the right lift arm.
- Page 105 during scrubbing operations. Just before the hopper lift arm assembly begins to raise, the hopper dump door automatically closes. If the hopper contents are emptied (by pressing the front of the hopper open door switch) the hopper door will remain open when lowered. If the hopper is lowered without opening the hopper door the door will be automatically opened by the tilt switch.
- Page 107 Adjusting the Nautilus neutral sensing switch Purpose: Floor damage can occur by operating the scrub brushes when the vehicle not in motion. To prevent floor damage a neutral sensing switch shuts off and raises the scrub brushes and turn off the solution flow whenever the vehicle remains motionless for more than 2 seconds.
- Page 108 NAUTILUS DIRECTIONAL CONTROL ADJUSTMENT. For correct operation the directional control adjustments must be made in the order shown below. Note: Step one is necessary only when replacing the Hydroback pump centering unit 731181 or the directional control cable 730356. DIRECTIONAL CONTROL CABLE INSTALLATION AND ADJUSTMENT.
- Page 109 Thread the 1/4 -28 rod end .38-inch onto the cable end. Bolt the rod end to the correct side of the directional control pedal arm. Mount the directional control cable onto the floor plate and adjust the 5/8 jam nuts so that the heel of the directional control pedal is .75-inch above the floor.
- Page 110 Adjusting the Nautilus reverse sensing switch Purpose: The lowered rear squeegee can be damaged by being forced into the floor when the vehicle is moving in reverse. To prevent squeegee damage a reverse sensing switch causes the rear squeegee to raise whenever the vehicle moves in reverse.
- Page 111 Installation instructions for Nautilus squeegee retaining plate CMK 1-12-2015 This instruction sheet explains how to install the rear squeegee inner strap retainer 731375. Required material: Inner strap retainer 731375 – Quantity 1 Reference manual pages: Squeegee group 730118 Squeegee linkage group 730158...
- Page 112 Field installation of the Nautilus long front skirt and side scrub head skirt This installation sheet is intended to be used with the following Nautilus parts manual pages: Scrub head group 730112 - Rev E Scrub head lift group 730113 – Rev B The 730325 HOLE TEMPLATE drawing is required.
- Page 113 If a lift is not available use the following instructions: 1. Locate the six plastic fasteners 600965 holding the front flap in place. These fasteners are removed by first pulling out their center pin. The right three plastic fasteners can be accessed from the right scrub brush opening and the left three fasteners can be accessed from the rear scrub brush opening.
- Page 114 6. Bring the rear half of the side skirt to the outside of the scrub head side plate. 7. Insert two plastic fasteners 600965 through the two holes in the rear (longer) skirt retainer bar 731363 and through the front of the side skirt (see scrub head lift group 730113 parts manual pages).
- Page 115 Nautilus Overhead guard installation instructions These instructions are meant to be used along with the Nautilus overhead guard parts manual pages 730003. 1. Remove the front cover, the battery, the seat mount, and the right front corner roller. 2. On the right front frame lift the front edge of step pad 730967 to expose the right front overhead guard mounting hole (on the frame approximately 9”...
- Page 116 13. Reinstall the corner roller, then the battery, front cover, and seat mount. 14. After installing any optional safety lights install the top and back sound insulation panels 730388 and 730389. This completes the installation of the overhead guard. CMK 5-23-2014...
-
Page 117: Tires
CHANGING SOLID TIRES NOTE: The procedures that follow apply to SOLID TIRES ONLY. Front Tire: 1. Remove the tire from the vehicle by removing the 5 lug nuts. 2. Press the tire from the rim. 3. Press the new tire onto the rim. 4.
Need help?
Do you have a question about the Nautilus and is the answer not in the manual?
Questions and answers