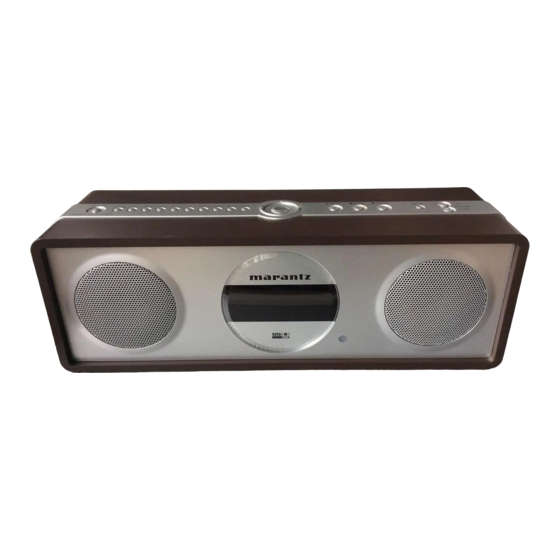
Marantz ZC4001 Service Manual
Network audio player
Hide thumbs
Also See for ZC4001:
- User manual (15 pages) ,
- Release note (3 pages) ,
- Full line catalog (39 pages)
Table of Contents
Advertisement
Service
Manual
SECTION
1. TECHNICAL SPECIFICATIONS ........................................................................................... 1
2. TECHNICAL DESCRIPTION ................................................................................................ 1
3. DISASSEMBLE PROCEDURE ............................................................................................. 4
4. SERVICE MODE .................................................................................................................. 5
5. UPDATE FIRMWARE .......................................................................................................... 6
[A] SOFTWARE (fdtv30300.exe) DOWNLOAD AND INSTALL PROCEDURE ................... 6
[B] WRITING AND UPDATE SOFTWARE ..........................................................................21
Mode 1 : Update MAIN CPU's software to internal Flash-ROM ................................... 22
Mode 2 : Update PLC's firmware to PLC MODULE ...................................................... 33
6. WIRING DIAGRAM ............................................................................................................ 37
7. BLOCK DIAGRAM ............................................................................................................. 39
8. SCHEMATIC DIAGRAM .....................................................................................................41
9. PARTS LOCATION ............................................................................................................ 45
10. IC DATA .............................................................................................................................. 49
11. EXPLODED VIEW AND PARTS LIST ................................................................................ 55
12. ELECTRICAL PARTS LIST ................................................................................................. 58
Please use this service manual with referring to the user guide ( D.F.U. ) without fail.
/U Version only
TABLE OF CONTENTS
ZC4001
ZC4001 /
N1M/U1M
Audio Client
PAGE
Part no. 90M10CW855010
First Issue 2006.04
MZ
Advertisement
Table of Contents

Subscribe to Our Youtube Channel
Related Manuals for Marantz ZC4001


Summary of Contents for Marantz ZC4001
-
Page 1: Table Of Contents
Service ZC4001 / N1M/U1M Manual Audio Client /U Version only TABLE OF CONTENTS SECTION PAGE 1. TECHNICAL SPECIFICATIONS ................... 1 2. TECHNICAL DESCRIPTION ....................1 3. DISASSEMBLE PROCEDURE ..................... 4 4. SERVICE MODE ........................5 5. UPDATE FIRMWARE ......................6 [A] SOFTWARE (fdtv30300.exe) DOWNLOAD AND INSTALL PROCEDURE .... - Page 2 MARANTZ Parts for your equipment are generally available to our National Marantz Subsidiary or Agent. ORDERING PARTS : Parts can be ordered either by mail or by Fax.. In both cases, the correct part number has to be specifi ed.
-
Page 3: Technical Specifications
1. TECHNICAL SPECIFICATIONS AUDIO SECTION GENERAL Power Output ....10 W + 10 W (JEITA, 1 kHz, 6 ohms) Power Requirement ......AC 230 V 50/60 Hz [ /N ] ..7 W + 7 W (20 Hz - 20 kHz, THD = 0.05 %, 6 ohms) ...... - Page 4 CD, TAPE DECK, or other analog source component. CONNECTING AC POWER CABLE Connect the AC power cable of the ZC4001 to a wall electrical outlet. Also connect the AC power cable of the ZR6001 to a wall electrical outlet.
- Page 5 • At the time of purchase, all ZC4001 and ZR6001 are set to the same Group ID. If used with this same Group ID, you risk having your music listened into by others. Therefore, set the Group ID as explained herein.
-
Page 6: Disassemble Procedure
3.DISASSEMBLE PROCEDURE 1. Disassemble of the rear panel 1) Remove 11 screws from the rear panel and remove the rear panel. 2) The Inside case is locked 2 hooks ( A and B). Remove 2 hooks from hole and lift off the Inside case. 2) Disconnect a connector of Mains cord. -
Page 7: Service Mode
HOW TO RESET THE UNIT Should the operation or display seem to be abnormal, reset the unit with the following procedure. The ZC4001 is turned on, press and hold the MUTE and STOP buttons simultaneously for 3 seconds or more. -
Page 8: Update Firmware
5. UPDATE FIRMWARE [A] SOFTWARE (fdtv30300.exe) DOWNLOAD AND INSTALL PROCEDURE DOWNLOADS OF THE SOFTWARE (Flash Development Toolkit: the rest is FDT) Download the software for update of the MAIN CPU. Launch the browser. Type http://www.renesas.com/ into an address. And press Enter. NOTE : This site is managed by RENESAS. - Page 9 Click the Software download for tools on Support.
- Page 10 Check the Agree on AGREEMENT. And click Submit.
- Page 11 Click Evaluation Software.
- Page 12 Click Flash and PROM Programming.
- Page 13 Click Flash Development Toolkit.
- Page 14 Click Download. Save the fdtv30300.exe on your PC’s hard disc. NOTE : A file name is changed by improvement.
- Page 15 INSTALLS OF THE SOFTWARE (Flash Development Toolkit Ver.3.3) Open the folder with the downloaded file. And double click the fdtv30300.exe.
- Page 16 Click Next >. Choose the language. And click Next >.
- Page 17 Click Yes. Click Next >.
- Page 18 Click Customise. Check to the all check box. And click OK. Click Next >.
- Page 19 Check to the all check box. And click Next >. Click Next >.
- Page 20 Click Next >. Click Next >.
- Page 21 Click Next >. Click Install.
- Page 22 The status bar appears. Click Finish.
-
Page 23: [B] Writing And Update Software
[B] WRITING AND UPDATE SOFTWARE Software for MAIN CPU and PLC firmware can be updated. Have update application software. ("fdtv30300.exe (FDT3.3) or latest version" and "PlcFirmUpdate.exe") There are two mode of download, regarding to the target of software as bellow. •... -
Page 24: Mode 1: Update Main Cpu's Software To Internal Flash-Rom
2. Click Start, Programs, Renesas, Flash Development Toolkit 3.3 and Flash Development Toolkit 3.3. 3. Check Create a new project workspace, and click OK. Note: It is needs setup for ZC4001. When you have already setup, please move on to "Writing Procedure for SUB CPU". - Page 25 4. ZC4001_MAIN_CPU is inputted into the Workspace name. (It is simultaneously inputted into Project Name.) Click OK. Choose the H8/3687F in Select Device. Click Next.
- Page 26 6. Choose the Serial port No. in the Select Port. Click Next. 16.0000 is inputted into the Enter the CPU crystal frequency for the selected device. Click Next.
- Page 27 8. Check The BOOT Mode in Select Connection. Check Recommended Speeds and Use Default, and click Next. Check the Automatic in Protection. Check the Advanced in Messaging. Click Finish.
- Page 28 Writing Procedure for MAIN CPU Do not connect the mains Cord of the unit to wall socket. 2. Connect SERVICE ONLY (3.5mm jack) on rear panel of the unit and Serial Port of windows PC with RS-232C D-sub9 pin to 3.5mm stereo plug cable. 3.
- Page 29 Check Browse to another project workspace, and click OK. 8. Choose ZC4001_MAIN_CPU.AWS in ZC4001_MAIN_CPU folder under workspace folder. And click Open.
- Page 30 Right button of mouse click on the ZC4001_MAIN_CPU, and select the Add Files... in a menu. 10. Choose the ZC4001_yymmddcvv.mot, and click Add. NOTE: yy is two digits of year. mm is month. dd is date. cvv is version.
- Page 31 11. Click Device in the menu bar and select Connect to Device. 12. Press right button of mouse on the ZC4001_yymmddcvv.mot, and select the Download File in a menu.
- Page 32 13. Software is written into the MAIN CPU. 14. The writing of software takes about 20 seconds.
- Page 33 15. Click Device in the menu bar and select Disconnect. 16. Click File and select Exit in menu, when ending writing software.
- Page 34 17. Disconnect the mains cord from the wall socket. And disconnect the RS-232C Dsub-9 pin to 3.5mm stereo plug cable. 18. Insert a thin rot to the hole and push the switch (SW41) inside to turn off the switch. SERVICE ONLY 3.5mm jack Push 19.
-
Page 35: Mode 2: Update Plc's Firmware To Plc Module
Mode 2: Update PLC’s firmware to PLC MODULE Do not connect the mains Cord of the unit to wall socket. 2. Connect SERVICE ONLY (3.5mm jack) on rear panel of the unit and Serial Port of windows PC with RS-232C D-sub9 pin to 3.5mm stereo plug cable. - Page 36 8. Double click RxPlcUpdate folder. Double click the PlcFirmUpdate.exe. And Launch the PLC Firmware Update.
- Page 37 10. Click Connect. 11. When "CONNECTED" appear in STATUS, connection is success. Click UPDATE. Then "START WRITNG" is shown on FLD. 12. Firmware is written into the PLC MODULE. The writing of firmware takes about 1 minute.
- Page 38 13. Click OK. 14. Click QUIT. 15. Disconnect the mains cord from the wall socket. And disconnect the RS-232C Dsub-9 pin to 3.5mm stereo plug cable. 16. Update PLC’s firmware is completed.
-
Page 39: Wiring Diagram
6. WIRING DIAGRAM MAIN PWB PLC MODULE (RX) (MLD011RM) MAINS CORD POWER PWB FRONT (CONTROL) PWB AUDIO PWB TACT SW PWB... -
Page 40: Block Diagram
7. BLOCK DIAGRAM... -
Page 41: Schematic Diagram
8. SCHEMATIC DIAGRAM TO FRONT (CONTROL) PWB POWER PWB SPEAKER FRONT (CONTROL) T902 AUDIO DUMMY AC IN PLC MODULE (RX) MAINS CORD N VER : T 630mA L 250V FROM U VER : T 1A L 250V FRONT (CONTROL) MAIN PWB FRONT (CONTROL) FRONT... -
Page 43: Parts Location
9. PARTS LOCATION Lead-free Solder When soldering, use the Lead-free Solder (Sn-Ag-Cu). - Page 44 About this PWB (MODULE) repair: There are no component parts for repair. Please replace this PWB ASSY (PLC MODULE) with the new one. PLC (RX) MODULE A PLC (RX) MODULE B Lead-free Solder When soldering, use the Lead-free Solder (Sn-Ag-Cu).
-
Page 45: Ic Data
10. IC DATA IC21 : HD64F3687G Port Setting Port Setting port port use STBY Name Note use STBY Name Note mode = 7 Act. init Act. init PB6/AN6 MODE_SEL0 (to GND) P62/FTIOC0 _LED_POWER PB7/AN7 MODE_SEL1 (to GND) P61/FTIOB0 _LED_IR Avcc AVcc _MNI _FW_SW... - Page 46 IC22 : TC74VHCT08AFT IC23 : TC74VHC08TTR IC25 : ST202EBW +5V INPUT +10V +5V TO +10V VOLTAGE DOUBLER -10V +10V TO -10V VOLTAGE INVERTER RS 232 OUTPUTS TTL / CMOS INPUTS RS 232 INPUTS TTL / CMOS OUTPUTS PIN DESCRIPTION PIN No SYMBOL NAME AND F UNCTION Positive Terminal for the first Charge Pump Capacitor...
- Page 47 IC41 : NJW1180AFP1 PLC (RX) MODULE : MLD 011RM SYMBOL FUNCTION OUTw Sub Woofer ch Output SRSFIL1 Surround Filter Pop Noise Reduction for Surround ON/ FCSFIL1a Ach Focus Filter FCSFIL2a Ach Focus Filter CFCS Pop Noise Reduction for Focus ON/OFF IN1a Ach Input 1 IN2a...
-
Page 48: Exploded View And Parts List
11. EXPLODED VIEW AND PARTS LIST N VERSION U VERSION TACT SW PWB FRONT (CONTROL) PWB POWER PWB F901 U Only MAIN PWB PLC (RX) MODULE AUDIO PWB... - Page 49 CQX1A1082Z /U1M 00M10CW851250 USER GUIDE USER GUIDE U CQX1A1083Z NOT STANDARD SPARE PART 00M10CW801010 PACKING CASE PACKING CASE ZC4001 CPG1A810Z 00M10CW809010 CUSHION CUSHION ZC4001 CPS1A728 NOTE : "nsp" PART IS LISTED FOR REFERENCE ONLY, MARANTZ WILL NOT SUPPLY THESE PARTS.
-
Page 50: Electrical Parts List
12. ELECTRICAL PARTS LIST PARTS INFORMATION NOTE ON SAFETY FOR FUSIBLE RESISTOR : RESISTORS The suppliers and their type numbers of fusible resistors 1) 00MGD05 × × × 140, Carbon film fixed resistor, ±5% 1/4W are as follows; 2) 00MGD05 × × × 160, Carbon film fixed resistor, ±5% 1/6W 1. - Page 51 10K OHM 1/10W J CRJ10DJ103T AUDIO WF21 CONN. 13P WAFER CARD CABLE CJP13GB113ZY FRONT (CONTROL) PWB (CUP11878Z-1) FRONT BRACKET BRACKET FLT CMD1A468 FRONT BK41 BRACKET BRACKET PWB CMD1A387 NOTE : "nsp" PART IS LISTED FOR REFERENCE ONLY, MARANTZ WILL NOT SUPPLY THESE PARTS.
- Page 52 HCUS1H103KC FRONT D201 90M-HD201800R DIODE 1SS355 HVD1SS355T FRONT D202 90M-HD201800R DIODE 1SS355 HVD1SS355T FRONT D203 90M-HD201800R DIODE 1SS355 CVD1SS355T FRONT D205 90M-HD201800R DIODE 1SS355 HVD1SS355T NOTE : "nsp" PART IS LISTED FOR REFERENCE ONLY, MARANTZ WILL NOT SUPPLY THESE PARTS.
- Page 53 120 OHM 1/10W J CRJ10DJ121T FRONT R253 00MNN05103610 CHIP RES. 10K OHM 1/10W J CRJ10DJ103T FRONT R255 00MNN05473610 CHIP RES. 47K OHM 1/10W J CRJ10DJ473T NOTE : "nsp" PART IS LISTED FOR REFERENCE ONLY, MARANTZ WILL NOT SUPPLY THESE PARTS.
- Page 54 CN91 CONN. 7.92MM(YUNHO) CJP02KA060ZY MAIN CN93 CONN. 6P WAFER CJP06GA01ZY MAIN CN95 CONN. 2P WAFER CJP02GA89ZY MAIN D501 00MHD30511000 00MHD30511000 ZENER DIODE 5.1V 1/2W HVDMTZJ5.1BT NOTE : "nsp" PART IS LISTED FOR REFERENCE ONLY, MARANTZ WILL NOT SUPPLY THESE PARTS.
- Page 55 C3A206 MAIN J616 CORD SN95/PB5, 0.6 C3A206 MAIN J701 CORD SN95/PB5, 0.6 C3A206 MAIN J702 CORD SN95/PB5, 0.6 C3A206 MAIN J704 CORD SN95/PB5, 0.6 C3A206 NOTE : "nsp" PART IS LISTED FOR REFERENCE ONLY, MARANTZ WILL NOT SUPPLY THESE PARTS.
- Page 56 RES. 15K OHM 1/4W J CRD25TJ153T MAIN R912 /U1M 90M-GG000010R RES. ! 3.3M OHM 1/10W J HRDERC12UGK335T MAIN RY51 90M-LY000400R 90M-LY000400R RELAY REALY (TYCO) HSL3A016ZE NOTE : "nsp" PART IS LISTED FOR REFERENCE ONLY, MARANTZ WILL NOT SUPPLY THESE PARTS.
- Page 57 00MBA20001000 TRS. KRC102M HVTKRC102MT POWER Q904 90M-HT800040R 90M-HT800040R TRS. KSC2316Y HVTKSC2316YT POWER Q905 00MBA20001000 00MBA20001000 TRS. KRC102M HVTKRC102MT POWER Q906 00MBA20001000 00MBA20001000 TRS. KRC102M HVTKRC102MT NOTE : "nsp" PART IS LISTED FOR REFERENCE ONLY, MARANTZ WILL NOT SUPPLY THESE PARTS.
- Page 58 CST1A012ZT TACT S818 90M-SP001210R 90M-SP001210R SW SKHV10910G TACT CST1A012ZT TACT S819 90M-SP001210R 90M-SP001210R SW SKHV10910G TACT CST1A012ZT TACT S820 90M-SP001210R 90M-SP001210R SW SKHV10910G TACT CST1A012ZT NOTE : "nsp" PART IS LISTED FOR REFERENCE ONLY, MARANTZ WILL NOT SUPPLY THESE PARTS.
- Page 59 POS. NO. PART NAME DESCRIPTION NAME COLOR (FOR EUR) (MZ) TACT S821 90M-SP001210R 90M-SP001210R SW SKHV10910G TACT CST1A012ZT TACT S822 90M-SP001210R 90M-SP001210R SW SKHV10910G TACT CST1A012ZT NOTE : "nsp" PART IS LISTED FOR REFERENCE ONLY, MARANTZ WILL NOT SUPPLY THESE PARTS.
Need help?
Do you have a question about the ZC4001 and is the answer not in the manual?
Questions and answers