Table of Contents
Advertisement
Quick Links
WARNING
!
You are required to thoroughly read all installation instructions and product
safety information before beginning the installation of this product. FAILURE
TO COMPLY WITH PROPER INSTALLATION AND MAINTENANCE
INSTRUCTIONS COULD RESULT IN PRODUCT FAILURE WHICH CAN
CAUSE PROPERTY DAMAGE, PERSONAL INJURY AND/OR DEATH.
Watts is not responsible for damages resulting from improper installation and/or
maintenance.
Local building or plumbing codes may require modifications to the information
provided. You are required to consult the local building and plumbing codes prior
to installation. If this information is not consistent with local building or plumbing
codes, the local codes should be followed.
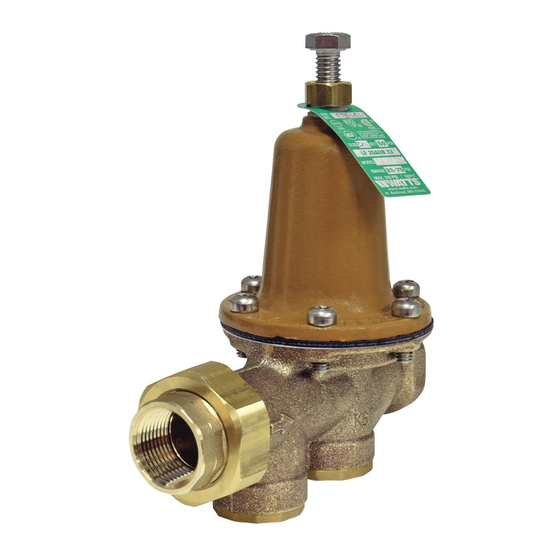
Installation Instructions
1. The valve should be installed by a
6. Regulator may be installed vertically
licensed contractor in accordance
or horizontally (upright or inverted).
with local codes and ordinances.
7. Start Up — Open cold water supply
2. This valve should be installed where
then hot water supply. Inspect for
it is accessible with sufficient clear-
leaks.
ance for cleaning, service, or adjust-
NOTICE
ment.
To tighten valve, first hand tighten fol-
3. Before installing the valve, be sure
lowed by
1
⁄
-1 turn, using wrench.
that the pipe ends are reamed and
4
threads are cut to size. For valves
The valve should be inspected annually
with Quick-Connect tailpieces refer
to assure maximum life and performance.
to "Quick-Connect Installation"
Product is for interior or exterior applica-
instructions below.
tions. Product should not be buried direct-
4. Flush the lines to remove all loose
ly in the ground. For exterior applications
scale, dirt and other foreign matter
where the valve will be situated in a vault
that can damage or clog the valve.
or pit or be in contact with the ground, the
5. Install the regulator with the arrow on
valve should be installed in a meter box/
the body pointing in the direction of
vault, accessible for repair and adjustment,
the flow.
per local code.
Maintenance Instructions
• To clean strainer; shut off inlet water pressure, remove strainer plug (2),
remove and clean strainer.
• To replace seat disc; shut off supply, loosen nut (51) and back off adjusting
screw (53) remove spring cage (3), spring (52) and washer (62). Remove
bottom plug (12) and gasket (101). Insert and hold screw driver in slot on top
of stem while loosening seat disc holder (47) from bottom of stem (27).
• To replace diaphragm; loosen lock nut (48) and remove lock washer (46),
diaphragm plate (60) and diaphragm (20).
• When reassembling apply a drop of low strength thread lock to disc holder.
• Open inlet water supply slowly.
Adjustment
Regulator is factory preset to 50psi (344 kPa) in a static condition. To adjust
pressure setting, loosen the lock nut and turn the adjusting bolt clockwise to
increase pressure, counterclockwise to decrease pressure.
WARNING
!
Any time a reducing valve is adjusted, use a pressure gauge to verify correct pressure setting.
Do not bottom out adjusting screw on spring cage.
Bypass Feature*
This regulator has a built-in
(53)
- Adjusting Screw
thermal expan-sion bypass
(51)
- Lock Nut
feature. This feature
(3)
- Spring Cage
prevents downstream
(61)
- Spring Washer
pressure from rising to
* Bypass Valve Assembly for
(52)
- Spring
more than 10psi above
1
1
⁄
" - 2" is replaceable as
(48)
- Lock Nut
4
the supply pressure.
a sub assembly.
(46)
- Lock Washer
(60)
- Diaphragm Plate
* The bypass feature will
(20)
- Diaphragm †
not prevent the pressure
(77) - Strainer
(102) - Bypass Valve Gasket*
relief valve from opening
(116) - Bypass Valve Assembly*
on the hot water
(103) - O-Ring†
supply system
(27)
- Stem
withpressure above
(16)
- Seat†
150psi (10.3 bar).
(42)
- Washer
(37)
- Disc†
(47)
- Disc Holder
(104) - Strainer Plug Gasket†
(104) -
(2)
- Strainer Plug
Strainer Plug Gasket
†
(6)
- Bypass Ball**
(2) - Strainer Plug
** (6) - Bypass Ball for
(77)
- Strainer
⁄
" - 1" sizes only are
1
(101) - Bottom Plug Gasket†
2
† Rubber Parts
non-replaceable.
(12)
- Bottom Plug
* Replaceable
Repair Kits
** Non-Replaceable
†
Kit for Series LF25AUB-Z3 includes all items shown above
ORDERING CODE
KIT NO.
SIZE (DN)
in
mm
0864941
1
⁄
" LF25AUB-RK
1
⁄
15
2
2
When Ordering, Specify:
0864943
3
⁄
" LF25AUB-RK
3
⁄
20
4
4
1. Ordering Code
0864942
1" LF25AUB-RK
1
25
2. Size of Valve
0864944
1
⁄
" LF25AUB-RK
1
⁄
32
1
1
4
4
3. Type Number
0864945
1
1
⁄
" LF25AUB-RK
1
1
⁄
40
2
2
0864946
2" LF25AUB-RK
2
50
4. Model shown on Nameplate
Typical Installation
WATTS
PRESSURE GAUGE
(2 PLACES)
WATER
METER
SUPPLY
WATTS
WATTS
WATTS
TO FIXTURES
SHUTOFF VALVE
BACKFLOW
PRESSURE
(2 PLACES)
PREVENTER
REGULATOR
Series Installation
Series installations are recommended where very high supply
pressure must be reduced to a very low downstream pressure.
Reducing the pressure in stages eliminates whistling and noise.
WATTS
PRESSURE GAUGE
(2 PLACES)
WATER
METER
SUPPLY
WATTS
WATTS
WATTS
TO FIXTURES
SHUTOFF VALVE
BACKFLOW
PRESSURE
(2 PLACES)
PREVENTER
REGULATOR
(2 PLACES)
Parallel Installation
Parallel installations are recommended where high flow or low flow
demand is intermittent/occasional. They are also used for installations
where service cannot be interrupted.
WATTS
PRESSURE GAUGE
(2 PLACES)
WATER
METER
SUPPLY
WATTS
WATTS
WATTS
TO FIXTURES
SHUTOFF VALVE
BACKFLOW
PRESSURE
(2 PLACES)
PREVENTER
REGULATOR
(2 PLACES)
WARNING
WARNING
!
!
For valves with CPVC or PEX end connections, do not exceed the
For valves with CPVC or PEX end connections, do not exceed the
tubing manufacturers pressure and temperature ratings. Refer to the
tubing manufacturers pressure and temperature ratings. Refer to the
tubing manufacturers product specifications for that information.
tubing manufacturers product speci cations for that information.
Quick-Connect Installation
To Connect:
1
1
⁄
in. (38.1mm)
2
PEX tubing only
1
⁄
in.Pipe (12.7mm)
2
1
3
⁄
in. (44.45mm)
4
⁄
in.Pipe (19.05mm)
3
4
1
7
⁄
in. (47.63mm)
8
1 in.Pipe (25.4mm)
Pipe Stiffener
Tail Piece
1. Mark pipe as shown.
3. If using PEX tubing, insert pipe
This is pipe insertion depth.
stiffener (provided) into end of pipe.
2. Clean pipe end.
4. Push tubing into tailpiece up to mark.
5. Insert collet clip.
To Disconnect:
1. Remove collet clip.
2. Depress collet.
WARNING
!
3. Pull tubing from tailpiece.
Troubleshooting
High System Pressure
If the downstream system pressure is higher than the set pressure
under no flow conditions, the cause could be thermal expansion,
pressure creep or dirt/debris on the seat.
Thermal expansion occurs whenever water is heated in a closed
system. The system is closed when supply pressure exceeds
150psi, or a check valve or backflow preventer is installed in the
supply piping.
You must make provisions for pressure relief protection of your
plumbing system and components. The use of a relief valve
276H300
such as the Watts 530C, BRV, Governor 80, or 3L or potable water
expansion tank such as the Watts DET, PLT or DETA may be required.
To determine if this is the result of thermal expansion, try briefly opening the cold
water tap. If the increased pressure is caused by thermal expansion, the pressure
will immediately be relieved and the system will return to the set pressure. Watts
offers a pressure test gauge, model 276H300 to assist you in determining if you
have high water pressure.
The 276H300 when attached to a hose bibb registers the highest pressure reading
over the period of time it is left on the system.
Advertisement
Table of Contents

Subscribe to Our Youtube Channel
Related Manuals for Watts LF25AUB-Z3 Series


Summary of Contents for Watts LF25AUB-Z3 Series
- Page 1 (47) from bottom of stem (27). 0864943 ⁄ " LF25AUB-RK ⁄ will immediately be relieved and the system will return to the set pressure. Watts 1. Ordering Code For valves with CPVC or PEX end connections, do not exceed the 0864942 1" LF25AUB-RK...
- Page 2 REGULADOR 276H300 tornillo de ajuste (53), quite el compartimiento del resorte (3), el resorte (52) y la arandela 3L o un tanque de expansión de agua potable como el Watts DET, PLT o DE CIERRE WATTS CONTRAFLUJO DE PRESIÓN WATTS CÓDIGO DE PEDIDO...
Need help?
Do you have a question about the LF25AUB-Z3 Series and is the answer not in the manual?
Questions and answers
Can I remove the adjusting bolt to make installation possible in a close quarter install. And then put it back in when installed
Yes, the adjusting bolt of the Watts LF25AUB-Z3 Series can be removed for installation in tight spaces and reinstalled afterward.
This answer is automatically generated
Can I remove the adjusting bolt to make the installation easier in a close quarter installation? And then put it back in and use normally. I don't have the room to unscrew the prv with the bolt in place. Thanks.