Advertisement
Available languages
Available languages
Quick Links
2-in-1
IMPORTANT SAFETY
4. Never operate appliance if it has a damaged cord
or plug, or if it is not working properly, if it has been
INSTRUCTIONS
dropped or damaged, or dropped into water. Return
appliance to a service center for examination and
When using electrical appliances, especially
repair.
COMPLETE GROOMING SYSTEM
when children are present, basic safety
5. Keep cord away from heated surfaces.
precautions should always be taken, including
6. Never drop or insert any object into any opening
the following:
on this appliance.
READ ALL INSTRUCTIONS
7. Do not place appliance on any surface while it is
operating.
BEFORE USING
8. Do not use this appliance with a damaged or bro-
ken comb or with teeth missing from the blades, as
FOR HOUSEHOLD USE ONLY
injury may occur. Before use, make certain blades
are aligned properly. (See "Care of Your Clippers.")
KEEP AWAY FROM WATER
9. Do not operate outdoors or where aerosol (spray)
products are being used or oxygen is being admin-
DANGER –
istered.
Any appliance is electrically
10. Never operate the appliance with the air openings
live, even when the switch is off. To reduce the risk of
blocked or while on a soft surface, such as a bed or
death or injury by electric shock:
couch, where the air openings may be blocked. Keep
1. Unplug this appliance before cleaning.
the air openings free of lint, hair, and the like.
2. Do not place or store appliance where it can fall or be
11. Always attach plug to appliance first, then to out-
pulled into a tub or sink.
let. To disconnect, turn all controls to "OFF"; remove
3. Do not use while bathing or in a shower.
plug from outlet.
4. Do not place in, or drop into water or other liquids.
12. Avoid skin contact with moving blades.
5. Do not reach for an appliance that has fallen into
13. Always check for tangles or kinks in the cord. If
water. Unplug immediately.
the cord does become tangled during use, turn unit
6. Always unplug this appliance from electrical outlet
off, unplug from electric outlet, and straighten cord
immediately after using.
before operating.
WARNING –
To the reduce the risk
SAVE THESE
of burns, electrocution, fire, or injury to persons:
1. This appliance should never be left
INSTRUCTIONS
unattended when plugged in. Do not pull, twist,
or wrap line cord around appliance.
Instructions for Care and Use
2. This appliance should not be used by, on, or near
children or individuals with certain disabilities.
MODEL HCT420R
3. Use this appliance only for its intended purpose as
described in this manual. Do not use attachments not
®
recommended by the manufacturer. Do not use an
extension cord to operate this appliance.
OPERATING
GUIDE TO CUTTING HAIR AT HOME
Attach combs by hold-
ing them teeth up, then
Before you start:
INSTRUCTIONS
1. Inspect your clipper. Make sure it's free of hair and
snapping them onto the
bottom of the clipper
dirt, is properly oiled, and running smoothly.
This appliance is intended for household use. Use on
blade.
2. Place cape around the neck of the person getting
Alternating Current (120V AC 60Hz) only. This appli-
a haircut.
ance has a polarized plug (one blade is wider than
3. Seat the person so that his or her head is at
the other). As a safety feature, this plug will fit in the
your eye level. This gives you greater visibility and
outlet only one way. If the plug does not fit fully in the
To remove comb attach-
control.
ments, place index finger
outlet, reverse the plug. If it still does not fit, contact
4. First, comb hair until it's tangle free. Then hold
a qualified electrician. Do not attempt to defeat this
and thumb as illustrated;
clipper in a comfortable grip. Now you're ready
safety feature.
then pull out and up.
to cut.
Your new Conair® Complete Grooming System has
MEDIUM TO LONG CUT
everything you need to achieve professional haircuts,
NOTE: Never push or shove the clipper through
beard trimming and detailing at home. It features a
To begin with, cut only a small amount
the hair to make it move more quickly.
powerful clipper with adjustable taper control and
of hair until you become used to the length each
Professional experience shows that the clipper
stainless steel blades for cutting precision. Also
attachment leaves the hair. Try the longest attach-
works most efficiently when it cuts through the
included are 7 attachment combs; 1/8" (3mm), 1/4"
ment comb and put the taper control in the highest
hair at its own speed.
(6mm), 3/8" (9.5mm), 1/2" (13mm), 5/8" (16mm),
setting. If you want a shorter cut, you can then use
3/4" (19mm), 7/8" (22mm) for different hair lengths,
To begin cutting hair:
shorter combs.
barber scissors, barber cape, deluxe storage case
1. The hair should be combed in its natural
•
Short attachment comb (#1) cuts hair to 1/8".
and a barber comb with straight teeth. It also comes
direction.
with lubricating oil and a blade guard for easy
•
Medium-Short attachment comb (#2) cuts hair to 1/4".
2. Using the largest attachment comb, trim sides
maintenance of the clipper blades.
from the bottom upward. Hold clip per lightly against
•
Medium-Long attachment comb (#3) cuts hair to 3/8".
the hair with teeth of the attach-
•
Long attachment comb (#4) cuts hair to 1/2".
ment comb pointing up ward,
Long attachment comb (#5) cuts hair to 5/8".
•
yet flat against the head.
•
Long attachment comb (#6) cuts hair to 3/4".
Gradually lift the clip per upward
•
Long attachment comb (#7) cuts hair to 7/8".
and outward through the hair,
trimming just a little at a time.
Repeat around sides and back
it against the skin at the length desired, move the
than on the top of the head.
of head.
clipper downward.
5. With the taper control in the #5 position, the
blade is as close as it can be to the head. Now
If you want hair to be even
repeat the above process, virtually removing all hair.
shorter:
Begin at the base of the scalp and blend toward
A) Apply more pressure to
the fade line. The goal is to blend the hair so there
the head with the attach-
is no real line, just a perfect fade from bald on the
ment comb that is in place.
sides to very short hair on the top. Continue blend-
This takes a little practice,
ing – remember to comb or brush hair against the
STOP. COMB. CHECK.
of course.
natural growth to remove cuttings as you go until
OR
For best results, do as the professionals do: Comb
you achieve the desired look.
B) Just switch to a shorter
hair often, and check clipping results as you comb.
FOR THE BALD CUT
attachment comb.
This way you avoid uneven sides, bangs, neckline,
etc.
Follow the instructions for the FADE CUT, cut-
Remember, it's better to leave
ting hair progressively shorter with each pass of
too much hair than too little.
FOR ULTRA-CLOSE FADE STYLES:
the clipper. For a bald effect, remove all comb
For longer hair on top, use the
attachments and move the taper control to the #5
A fade cut is a haircut that starts with very short hair
styling comb and lift hair on
(almost bald) on the sides of the head, but lengthens
position. To receive maximum closeness, overlap
the top of the head, cutting
strokes in a crisscross pattern. To achieve a
as it nears the top.
over the comb, or hold the hair
smooth bald look, we recommend you finish by
1. Start with clean, dry hair. If hair is fairly long, use
between the fingers and cut to
a long comb attachment (ideally #4) to remove the
using a razor with lather to shave entire head.
desired length. Always working
bulk of your hair before starting the fade cut.
from the front to the back of the
SHORTCUTS TO PERFECT
2. Using the long comb attachment, trim hair, cut-
head, gradually cut the hair shorter by reducing the
FLATTOPS, CREW CUTS, ETC.
ting against the growth of your hair (from base
space between the comb or fingers and the head.
of neck up toward top of head). At first, until you
Always cut from the back of the neck to the crown,
Comb often to check for uneven strands, and to get
become familiar with the different attachments,
using the longest comb setting. Hold the comb
rid of trimmed hair.
begin with a longer one. You can always go back
attachment flat against the head and slowly move
Equipped with a turbo switch, this unit is designed to
and make your hair a little shorter. Brush or comb
the clipper up through the hair.
provide extra power making it easier to cut thicker,
away cuttings as you go. Do not force the blades
Use the same technique for the
coarser hair.
through the hair. Let the trimmer do the work. Using
sides, cutting from the bottom
the #1 comb attachment, you can cut hair as short
to the upper side of the head.
OUTLINING
as 1/8".
For the front to the crown, cut
Outlining requires no attachments. Comb hair into
3. Gradually trim hair from entire head, rotating
the hair against the direction in
the desired style. Position the clipper between the
trimmer when necessary. Keep cutting against the
which it grows, then even it up
sideburns and the ear (see illustration), making sure
natural growth of your hair.
with the sides.
the corner edge of the blade is against the hairline.
4. Establish the fade line. Remove comb attach-
With the outline of the hair as your guide, slowly
For a flattop, use the flat comb,
ments. With the taper control in position #1, start
not the attachment comb. Just
move the clipper over, around and behind the ears.
by blending the hair at the fade line by trimming up
cut hair on top of the head over
For the back of the neck and the sideburns, hold the
and out, repeating as you rotate around the head.
flat comb (see illustration).
clipper upside down (see illustration) and, holding
Cut hair shorter on the sides and base of the head
SPECIAL OIL
blades. Packed-in hair can slow down any clipper.
To taper hair down to the neckline, use
To maintain the blades of your Conair
clipper,
To remove it without removing the blades, take your
attachment comb #1. Comb hair and check for
®
cleaning brush and brush the hair from the blades.
oil them after every three or four haircuts. Gently
uneven spots. Outline sideburns and neck areas
place a few drops of oil on the teeth of the blades,
If you do this after every clipping, especially with
(see "Outlining").
using the special Conair oil included with your set.
heavy hair cutting, the blades should remain free
USER MAINTENANCE
Turn the clipper on for
of cut hair. If clipper stops cutting and this action
a minute, then turn off.
doesn't help, try loosening the blades to remove
This light, natural oil
the hair.
CARE OF YOUR CLIPPERS
was formulated spe-
Any other servicing should be performed by an
cifically for the Conair
®
authorized service representative. The appliance
DETACHABLE BLADE SET
high-speed clipper. Be cause it is the right oil to use,
has no user serviceable parts. The product is for
This clipper comes with a detachable blade set. To
it will not slow down the blades. Never use any
household use (see note).
remove the blades follow these steps:
other product. There is no substitute for Conair oil.
KEEP OIL OUT OF REACH OF CHILDREN.
1. Hold the front part of the
If clipper stops cutting, check to see if there is a
clipper with your thumb press-
clump of hair lodged between the blades. If that is
ADJUSTABLE 5 POSITION
ing on the blade and place
the problem, unplug the clipper and then loosen the
another hand against the
TAPER CONTROL
blades to remove the hair.
blade. (see Fig. 1)
Just like levers on professional clippers, the Conair
®
2. When pressing the blade
taper control is positioned at the back of the unit,
If the clipper stops cutting but does not stop
forward, the blade is detached.
running, you will need to check the blades.
(see Fig. 2)
which functions for both the clipper and trimmer
blade so you can hold the clipper in your hand and
For new blades, send check or money order
TO REPLACE BLADE:
adjust the lever at the same time...while you're
for
$6.50,
which
includes
postage
1. Set the Taper Control Button
clipping/trimming. This taper control eliminates the
handling, to:
to lowest position "1" (see
need in some situations for an attachment comb,
Fig. 3).
Conair Corporation
because it lets you gradually adjust the closeness
150 Milford Rd.
2. Place the blade onto the
of the cut. For the closest cut and the shortest hair,
clipper body by inserting the
East Windsor, NJ 08520
push taper control up as far as it will go to level
"Blade Tongue" down below
#1. To increase cutting length, slowly push control
the "Lock Tap." (see Fig. 4)
down. If you push to the lowest position level #5 or
3. Snap the blade down. The
#4, it will leave hair about the same length as the
NOTE: Never pull on the clipper cord. Never
blade is now fixed onto the
short attachment comb.
twist or wrap the cord around the clipper.
clipper body. (see Fig. 5)
To store your clipper, lay it flat with the
Because a different cutting edge is used in each
Use
these
instructions
cord coiled up, then place in cylinder.
setting, the taper lever lengthens the life of your
to
switch
between
the
clipper and beard trimmer
blades and back.
Detachable
5-position taper
Turbo button
control switch
ON/OFF
Switch
and
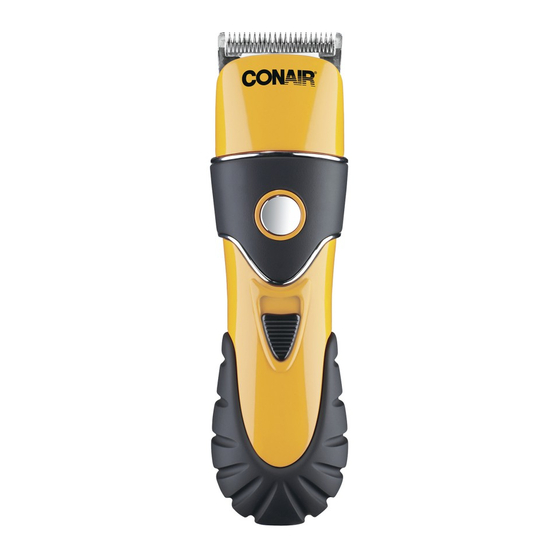
Front view
Back view
Oil
Trimmer blade
for neckline, sideburns,
facial hair
blade set
Advertisement

Related Manuals for Conair HCT420R


Summary of Contents for Conair HCT420R
- Page 1 Begin at the base of the scalp and blend toward repair. 2. Place cape around the neck of the person getting using the special Conair oil included with your set. heavy hair cutting, the blades should remain free COMPLETE GROOMING SYSTEM...
- Page 2 4. Empiece a cortar su mayor comodidad durante el corte y la bolsa de Favor de incluir un cheque o giro postal a nombre de Conair. Sentimos no poder aceptar dinero en efectivo, estampillas, Conair Corporation PERO NO LIMITADAS A LA GARANTÍA IMPLÍCITA DE Subtotal con precisión para un uso específico, y deben...
Need help?
Do you have a question about the HCT420R and is the answer not in the manual?
Questions and answers