Advertisement
Quick Links
IMPORTANT SAFETY
WARNING –
air openings may be blocked. Keep the air
To reduce the risk of
openings free of lint, hair, and other debris.
burns, electric shock, fire, or injury to persons:
INSTRUCTIONS
11. Always attach plug to appliance first, then
1. This appliance should never be left
to outlet. To disconnect, turn all controls to
When using electrical appliances, especially
unattended when plugged in. Do not pull,
when children are present, take basic safety
OFF, then remove plug from outlet.
twist, or wrap line cord around appliance.
precautions, including the following:
12. Avoid skin coming into contact with
2. This appliance should not be used by, on
moving blade.
READ ALL INSTRUCTIONS
or near children or individuals with certain
13. When using the appliance with its cord,
disabilities.
BEFORE USING
be mindful of tangles or kinks in the cord. If
3. Use this appliance only for its intended
the cord does become tangled during use,
KEEP AWAY FROM WATER
purpose as described in this manual. Do not
turn the unit off and straighten cord before
use attachments not recommended by the
FOR HOUSEHOLD USE ONLY
operating again.
manufacturer. Do not use an extension cord to
14. Do not short the polarity (output cord) –
operate this appliance.
DANGER –
ensure jack is plugged into the unit before
any appliance is electrically
4. Never operate this appliance if it has a
plugging the adapter into outlet.
live, even when the switch is off.
damaged cord or plug, if it is not working
15. This power unit is intended to be correctly
To reduce the risk of death or injury by electric
properly or if it has been dropped or
oriented in vertical floor mount position.
shock:
damaged, or dropped into water. Return the
appliance to a service center for examination
16. CAN ICES-3(B).
1. Unplug this appliance before cleaning.
and repair.
WARNING: Changes or modifications to this
2. Do not place or store appliance where it can
unit not expressly approved by the party
fall or be pulled into a tub or sink.
5. Keep the cord away from heated surfaces.
responsible for compliance could void the
3. Do not use while bathing or in a shower.
6. Never drop or insert any object into any
user's authority to operate the equipment.
opening on this appliance.
4. Do not place in, or drop into water or other
7. Do not place appliance on any surface while
liquids.
it is operating.
5. Do not reach for an appliance that has
8. Do not use this appliance with a damaged
fallen into water. Unplug immediately. For
or broken comb or with teeth missing from the
dry location use only. Do not expose to liquid,
vapor or rain.
blades as injury may occur. Before use, make
certain blades are aligned properly.
6. Except when charging, always unplug this
9. Do not use outdoors or operate where
appliance from electrical outlet immediately
after using.
aerosol (spray) products are being used or
where oxygen is being administered.
10. Never operate the appliance with the
air openings blocked or while on a soft
surface, such as a bed or couch, where the
SAVE THESE
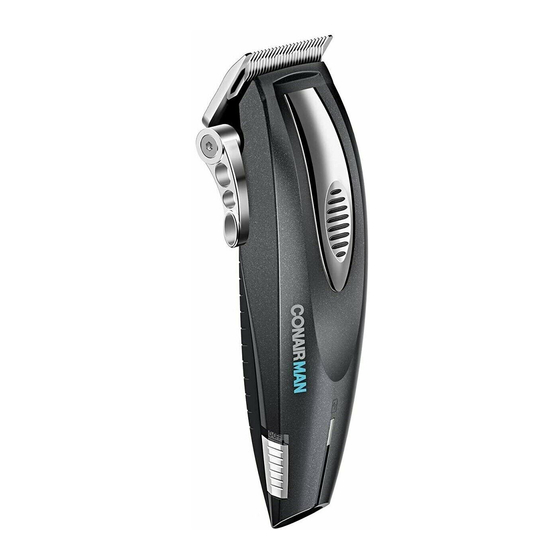
FEATURES
INSTRUCTIONS
• Cord or cordless operational clipper – use
INSTRUCTIONS
FOR USE
corded for continuous power while plugged
into the outlet or use cordless for total flexibility
CHARGING THE APPLIANCE
OPERATING
and control.
• Lithium-ion technology with lightweight DC
IMPORTANT
INSTRUCTIONS
motor for powerful cutting action and sustained
Use only the adapter supplied with this
power performance.
appliance. This clipper is easy to use, but
USER MANUAL
• Precision-engineered high-grade hardened
before you do anything you must take your
Before using the Class 2 Power Supply, read
time to charge the unit for 3 hours before its
steel blades with unique super-sharp cutting
these instructions carefully.
first use. Even if you want to use it plugged in
angle for smooth, effortless cutting.
Rated input voltage: 100–240V AC, 50/60Hz,
straight from an outlet, this initial supercharge
• Lightweight for easy handling during use.
0.2A Max
ensures optimum power performance to give
• Taper control for custom settings.
Rated output: 4.5 VDC, 1000mA
smooth, fast cutting every time. Maximum
• 3-hour full charge for approximately 75
battery capacity will be reached only after
OPERATION
minutes of use.
3 charging/discharging cycles. A full
• 20-minute quick charge for approximately
1. For dry location use only. Do not expose to
charge will provide approximately 75 minutes
water.
10 minutes of use.
use. When the clipper is about to run out of
2. When not in use, unplug unit completely.
Also included are 10 comb attachments for
power, the charging indicator will flash and
different hair lengths (including left and right
you will have approximately 3 minutes of use
3. Unit will become warm during operation.
remaining. A 20-minute quick charge will
ear taper combs), barber scissors, a barber
CAUTION
comb with straight teeth, styling comb with
provide approximately 10 minutes use.
1. Dry location use only. Do not expose to liq-
angled teeth, a full-length barber cape, and a
The red LED light will go on when charging the
deluxe case for easy storage. It also comes
uid, vapor or rain.
appliance and the green LED light will go on
with lubricating oil, a cleaning brush and a
when fully charged.
2. Ensure jack is plugged into the trimmer unit
blade guard for easy maintenance and
before plugging the adapter into the outlet.
WARNING: If the charging light suddenly starts
protection of the clipper blades.
to flash rapidly, the appliance is faulty. If this
3. Do not operate any appliance that has a
happens, please stop charging and remove the
damaged output cord or housing.
adapter from the outlet and contact our
4. Always unplug the unit before cleaning or
Customer Care Center for further advice (see the
when not in use.
Warranty section of the information booklet).
5. This power unit is intended to be correctly
oriented in a vertical or floor mount position.
6. Be sure voltage is in correct voltage before
plugging in.
PRESERVING THE BATTERIES
CORDED OPERATION
your clipper more than necessary, as this could
damage the motor. (Never attempt to oil the
In order to maintain the optimum capacity of the
• Ensure the appliance is switched off.
motor bearing, as it is permanently lubricated.)
rechargeable batteries, the appliance has to be
• Connect the adapter to the base of the
KEEP OIL OUT OF REACH OF CHILDREN.
fully discharged approximately every 6 months.
appliance and plug the adapter into a suitable
Then recharge the appliance to full capacity,
outlet.
again for 3 hours.
FIG. 1
• The red LED charging light will go on when
OIL BOTH AREAS
the adapter is correctly inserted into the
THE CONAIR GUIDE TO CUTTING
appliance and connected to an outlet.
HAIR AT HOME
• The appliance is now ready for use.
FIG. 2
Before you start:
CORDLESS OPERATION
OIL BOTH AREAS
1. Inspect your clipper. Make sure it's free of hair
and dirt, properly oiled and running smoothly.
• Insert the adapter into the base of the
appliance, plug into a suitable outlet.
2. Place a towel around the neck of the person
whose hair is to be cut.
• Unplug the adapter from the outlet once the
3. Seat the person so that his or her head is at
green LED charging light goes on, as the
appliance is now fully charged.
your eye level. This gives you greater visibility
FIG. 3
and control.
OILING INSTRUCTIONS
4. First, comb hair until it's tangle-free. Then
IMPORTANT! It is highly recommended before
hold clipper in a comfortable grip. Now you're
each use to oil the blades with the oil provided.
ready to cut.
This ensures optimum cutting performance.
For the first use you will need to use the oil
supplied with the product. Unscrew the cap
and cut off the very end of the plastic tube with
a pair of scissors to release the oil.
To oil the blades ensure that the unit is
switched on. Gently squeeze the oil tube and
apply 2 drops of oil to the blades (see FIG. 1, 2,
and 3). Leave the unit on for a few seconds to
allow the oil to thoroughly spread the length of
the blades. Switch off the unit and remove any
excess oil by gently dabbing with a cloth.
Be careful not to use too much oil and don't oil
MEDIUM TO LONG CUT
Attach combs by
To begin cutting hair:
To begin, cut only a small amount of hair until
holding them teeth
you become used to the length each attachment
up, then snapping
leaves the hair. Try the longest attachment on
onto the bottom of
the clipper first. If you want a shorter cut, you
the clipper blade.
can then use shorter combs.
• Short comb attachment (number 1) cuts hair
to 1/8" (3mm).
To remove comb
• Medium-Short comb attachment (number 2)
attachments, place
cuts hair to 1/4" (6mm).
index finger and
• Medium-Long comb attachment (number 3)
thumb as illustrat-
cuts hair to 3/8" (9.5mm).
ed; then pull out
• Long comb attachment (number 4) cuts hair to
and up.
1/2" (12.5mm).
NOTE: Never push or shove the clipper
• Long comb attachment (number 5) cuts hair to
through the hair to make it move more
5/8" (16mm).
quickly. Professional experience shows
• Long comb attachment (number 6) cuts hair to
that the clipper works most efficiently
3/4" (19mm).
when it cuts through the hair at its own
• Long comb attachment (number 7) cuts hair to
speed.
7/8" (22mm).
• Long comb attachment (number 8) cuts hair to
1" (25mm).
• Left ear comb attachment lightly tapers over
left ear.
• Right ear comb attachment lightly tapers over
right ear.
1. The hair should be
combed in its natural
direction.
2. Using the largest
comb attachment, trim
sides from the bottom
upward. Hold clipper
lightly against the hair
with teeth of the comb
attachment pointing
up ward, yet flat against
the head. Gradually lift
the clipper upward and
outward through the hair,
trimming just a little at
a time.
Repeat around sides and
back of head.
If you want hair to be
even shorter:
A) Apply more pressure to
the head with the comb
attachment that is in
place. This takes a little
practice, of course. OR
B) Just switch to a shorter
comb attachment.
Advertisement

Subscribe to Our Youtube Channel
Related Manuals for Conair SuperClipper HC1100LIC


Summary of Contents for Conair SuperClipper HC1100LIC
- Page 1 READ ALL INSTRUCTIONS or near children or individuals with certain the adapter is correctly inserted into the THE CONAIR GUIDE TO CUTTING to 1/8" (3mm). 13. When using the appliance with its cord, power performance. appliance. This clipper is easy to use, but upward.
- Page 2 4. Position the extreme left-hand tooth of the situations for a comb attachment because FLAT TOPS, CREW CUTS, ETC. in this product, please contact our Conair Customer Care Line. $7.50 for postage and handling. In the absence fingers and the head. Comb often to check for...
Need help?
Do you have a question about the SuperClipper HC1100LIC and is the answer not in the manual?
Questions and answers