Advertisement
Quick Links
Congratulations on your purchase of the
• The meter is pre-set to measure objects
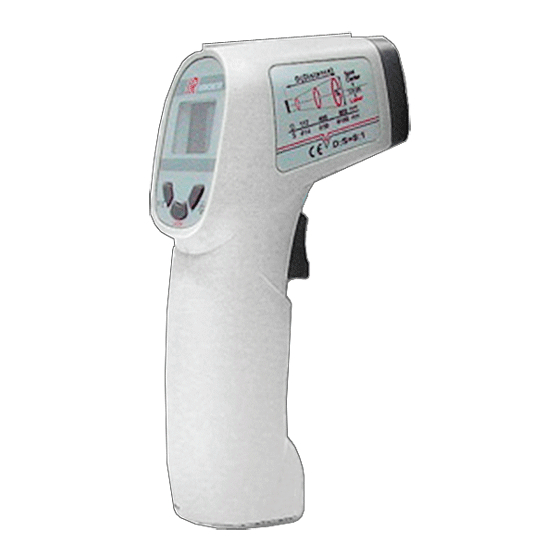
Mannix Infrared Thermometer, model IRT2.
with an emissivity of 0.95. This will
The compact size lets you get into tight places
accommodate the majority of items
while its convenient laser targeting and high
measured without compensating for higher
distance-to-spot ratio give you accurate
or lower value. In most cases there will be
readings on distant targets .
little difference in measurements, even if an
object's emissivity is higher or lower than
• Precise non-contact measurements
this pre-set value. Compare and confirm
• ˚F/˚C switch
with known values if in doubt.
• Data hold
• Laser target pointer
! Use extreme caution when the laser beam is
turned on.
! Do not point the laser toward the eyes or face
of a person or animal. Laser's potential to
cause damage is retained for hundreds of
feet.
! Be careful not to let the beam on a reflective
surface strike your eye.
! Do not use near any flammable items or
• The meter provides simple one hand opera-
gases.
tion and time saving temperature measure-
ment. Be sure the measured object fills the
"spot" seen by the aperture.
• There will be a delay of approximately one
second between the time you initially press
the button and the time the display comes
on.
• Not recommended for measuring on shiny
surfaces. The smaller the target, the closer
the unit should be to it. To avoid thermal
shock, do not store the meter below
freezing.
1
SPECIFICATIONS
Measuring Range: -4 to 500˚F (-20 to 260˚C)
Resolution: 1˚F (1˚C)
Accuracy: ±3˚C or ±3%
(whichever is greater)
Accuracy Notes:
1) Accuracy stated is for ambient temperature
CAUTION
2) Accuracy stated is for emissivity of 0.95
Emissivity: 0.95 fixed
Distance Factor: D:S = Approx. 6:1
Sampling Rate: 1 second (approx.)
Display: LCD display with backlight
Power Off: Automatic shut off after 4 seconds
Operating Temp.: 32 to 122˚F (0 to 50˚C)
Operating Humidity: Maximum of 80% RH
Power Supply: 9-volt battery
UNIT DESCRIPTION
Power Current: 10mA DC (approx.)
Display Size: 1.05" x 0.69"
1. LCD display
Weight: 6.4 oz.
2. ˚F/˚C button
3. Laser button
Dimensions: 6.3" x 2" x 1.3"
4. IR sensor
5. Laser pointer beam
6. Backlight button
7. Measurement trigger
8. Battery compartment
2
DISPLAY INDICATION
8.8.8
˚F
˚C
1. Laser Icon
2. Digital Readout
3. ˚C (Celsius)
4. ˚F (Fahrenheit)
MEASUREMENT OPERATION
A. Power ON/OFF
The meter automatically powers up when the
measurement trigger is pulled. The meter
powers off automatically approximately 4 sec-
onds after the measurement trigger is
released.
B. LCD Backlight
Select backlight by first pulling the measure-
ment trigger and then pressing the BACK-
LIGHT button. Repeat the procedure to turn
the backlight off.
C. Laser Pointer
To turn the laser pointer on, first pull the
measurement trigger then press the LASER
button while continuing to pull the measure-
ment trigger. Repeat the procedure to turn
the laser OFF
3
4
D. Data Hold
The meter automatically hold the last tempera-
1
ture reading on the LCD for five seconds after
2
the trigger has been released. No additional
3
key presses are necessary to freeze the last
4
displayed reading.
E. Measurement Considerations
While holding the meter, point the IR Sensor
toward the object whose temperature is to be
measured. The meter automatically compen-
sates for temperature deviations from ambient
temperature.
Keep in mind that it will take up to 30 minutes
to adjust to wide ambient temperature
changes. When low temperatures are to be
measured followed by high temperature meas-
urements, some time (several minutes) is
required after the low (and before the high)
temperature measurements are made. This is
a result of the cooling process which must take
place for the IR sensor.
BATTERY REPLACEMENT
To replace the battery open the Battery com-
partment on the bottom of the unit and remove
the battery, then install a new battery and
replace the cover.
5
TROUBLESHOOTING
? Meter does not turn on - Check voltage and
relace low battery. Or check time delay
which is allowed 1 second for data to
appear on-screen.
? Data flashing or laser comes on but no
data appears - Check battery voltage and
then replace low battery.
? Dashes appear on-screen - Check extreme
temperature, measure surrounding area to
see if the target exceeds the limit.
MAINTENANCE
Case cleaning:
Clean the exterior housing of the unit with a
damp cloth (use caution). Ensure no water or
soap is allowed inside the meter or on the
infrared lens.
Lens cleaning:
WARNING: We recommend cleaning the lens
periodically to ensure the reading accuracy. To
remove any particles on the lens use low pres-
sure compressed. If the contamination cannot
be removed with air, use a soft cotton swab.
The swab should be slightly damp and very
light pressure should be applied. Do not use
solvents to clean the lens.
6
Advertisement

Related Manuals for General IRT2


Summary of Contents for General IRT2
- Page 1 SPECIFICATIONS TROUBLESHOOTING DISPLAY INDICATION The meter automatically hold the last tempera- Mannix Infrared Thermometer, model IRT2. with an emissivity of 0.95. This will Measuring Range: -4 to 500˚F (-20 to 260˚C) ture reading on the LCD for five seconds after...
- Page 2 CERTIFICATION OPERATION MANUAL This standard package contains: The meter complies with FDA radiation per- MODEL IRT2 • IRT2 infrared thermometer formance standard 21CFR subchapter J. • Battery (9.0 volt) • Operation manual Mini Infrared Thermometer Mannix Testing & Measurement is a •...
Need help?
Do you have a question about the IRT2 and is the answer not in the manual?
Questions and answers