
Related Manuals for Formech 686


Summary of Contents for Formech 686
- Page 1 Floor Standing Vacuum . . . Forming Machine Installation, Operating and Service Manual For Parts, Service & Technical Assistance Telephone: +44 (0) 1582 469 797 Fax: +44 (0) 1582 469 646 Rev 8.8...
-
Page 2: Table Of Contents
Basic operation using default settings Manual operation screen The vacuum forming process Operation - Settings Memory settings Select the memory slot Function settings Heater zone settings Heater standby settings Heater settings Save settings Default heater settings Manual - Formech 686PT - Rev 8.8... - Page 3 Auto-levelling system Vacuum Vacuum system Pneumatics Table cylinder maintenance Clamp & table seals To replace a damaged or worn seal Panel seals Cleaning Lubrication Electrical Circuit Information Becker Pump VT 4.16 EC Certificate Manual - Formech 686PT - Rev 8.8...
-
Page 4: Safety
11) This machine is fitted with a dry running vacuum pump. Do not lubricate. Do not allow any liquid to enter the vacuum system. Severe damage may be caused if the above is not observed. Manual - Formech 686PT - Rev 8.8... - Page 5 BE EXTRA CAUTIOUS WHEN DEALING WITH COMPRESSED AIR. EVEN AFTER MAIN SUPPLY HAS BEEN SHUT OFF DANGEROUS RESIDUAL PRESSURE MAY STILL BE PRESENT WITHIN THE SYSTEM. NEVER ATTEMPT TO OVERIDE ANY CONTROL SYSTEM INTERLOCK OR SAFETY RELATED CONTROL SYSTEM SUCH AS THE 2 HANDED CONTROL SYSTEM. Manual - Formech 686PT - Rev 8.8...
- Page 6 Ensure that you DO NOT work on your own when working at height. ENSURE THAT LOCAL LIFTING HANDLING AND HIGH LEVEL WORKING PROCEDURES ARE APPLIED AND MONITORED BY A PERSON RESPONSIBLE FOR HEALTH AND SAFETY. Manual - Formech 686PT - Rev 8.8...
- Page 7 WHAT IS CONSIDERED TO BE FORESEEABLE MISSUSE. THE USE OF THIS MACHINE MUST BE ASSESSED, MONITORED AND CONTROLLED BY THE PERSON RESPONSIBLE FOR THE HEALTH AND SAFTEY IN THE ORGANISATION THAT OWNS AND OPERATES THIS MACHINE. Manual - Formech 686PT - Rev 8.8...
-
Page 8: Introduction
• Optional cooling bolster. • Optional vacuum tank configuration. This manual is the original user instructions for the Formech 686PT. It informs the user on machine safety, assembly, operation and maintenance. A more comprehensive guide to the vacuum forming process is avai- lable from Formech. -
Page 9: General Arrangement
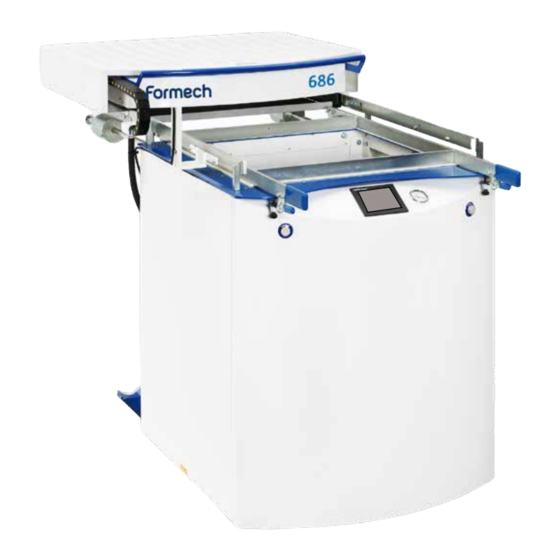
General Arrangement Machine footprint (Dimensions are in mm) 1932 1165 1190 1157 Manual - Formech 686PT - Rev 8.8... - Page 10 6- Vacuum Gauge 7- Heater Handle 8- Heater Transit Lock 9- Heater Guard 10- Counter Balance Weights 11- Self-adjusting Clamps Springs 12- Control Box with Main Switch 13- Heater Rear Supports Manual - Formech 686PT - Rev 8.8...
-
Page 11: Electrical Specifications
Noise emissions on the Formech 686PT are less than 70dB(A). Machine storage The Formech 686PT must be stored in a dry environment. If the machine is not used for a long period of time, run the pump periodically (once a month). -
Page 12: Installation
Neutral and each phase in turn. The voltage between each phase and the neutral should measure 220 – 240V ac. Once this is confirmed the Electrical box cover may be fitted and the isolator switch turned on. Manual - Formech 686PT - Rev 8.8... -
Page 13: Phase Connections / Motor Rotation
ENSURE THAT LOCAL LIFTING AND HANDLING PROCEDURES ARE APPLIED AND MONITORED BY A PERSON RESPONSIBLE FOR HEALTH AND SAFETY. Remove the transit lock screw on both sides of the heater. Manual - Formech 686PT - Rev 8.8... -
Page 14: Fitting Of The Stabiliser / Support Arrangement
RELATING TO SAFETY AND THE SAFETY HAZARDS SPECIFIC TO THIS MACHINE BEFORE INSTALLING AND OPERATING. OPERATING PROCEDURES FOR THIS MACHINE MUST BE ASSESSED, MONITORED AND CONTROLLED BY THE PERSON RESPONSIBLE FOR HEALTH AND SAFETY. Manual - Formech 686PT - Rev 8.8... -
Page 15: Counterbalance Arms And Weights
CAN CAUSE CRUSHING IF MISSHANDLED, MISSUSED OR IF DROPPED. WHEN LOADING AND UNLOADING COUNTERWEIGHTS ALWAYS ENSURE THE END STOP LOCKING SPLIT PIN AND WASHER IS REPLACED AT THE END OF THE COUNTERWEIGHT ARM. Manual - Formech 686PT - Rev 8.8... -
Page 16: Optional - Cooling System
Connect the feed and return pipes of the temperature controlled water supply to the 2 fittings mounted on the rear of the machine. Fitting are are 3/8” BSP. Manual - Formech 686PT - Rev 8.8... -
Page 17: Optional - Fitting The Reducing Windows
Adjust the toggle clamps to 12mm Baseboard in position weight with a 13mm spanner accomodate the extra thickness for tool mounting (9). sliding it to the rear of the ma- of the reducing window (8). chine (7). Manual - Formech 686PT - Rev 8.8... -
Page 18: Optional - Vacuum Tank Configuration
Optional – Castors Castors may be fitted to the 686 to allow the machine to be moved and relocated easily. If the machine is supplied with the castor option then the two rear castors will be pre-mounted to the rear stabiliser crossmember. -
Page 19: Operation - Main Menu Functions
Simply press the button on the HMI to initialize. Touch Screen arrangement & operation The main functions of the Formech 686PT are operated from the touch screen. Main Menu Allows entry to the Editing Mode. -
Page 20: Operation - Manual Functions
These and other settings can be edited and saved as the same or other title at memory slot. The timer values stored in memory can be changed by accessing the settings screen using the settings but- ton on the operation screen or the main screen. Manual - Formech 686PT - Rev 8.8... -
Page 21: Icons Descriptions
When this feature is enabled the vacuum will be turned on automatically when the table is driven up. The switch position is adjustable. Settings This button provides access to the settings screen where the operating parameters may be adjusted. Manual - Formech 686PT - Rev 8.8... -
Page 22: Language Options
The 686PT incorporates a ‘HELP’ feature accessible by pressing the Descriptions of the screen icons and buttons are shown on these screens in the language selected. Use the FORWARD button to scroll though these screens. Manual - Formech 686PT - Rev 8.8... -
Page 23: Basic Operation Using Default Settings
The Auto-level and Auto-vacuum may be enabled as required – buttons will show green when enabled. The Save button will use the settings of the timers shown and import them to the settings screen to edit and save as required. The following section explains the vacuum forming process. Manual - Formech 686PT - Rev 8.8... -
Page 24: The Vacuum Forming Process
Release the clamp frame to remove the moulding for inspection. • Review the results and determine the parameters required to produce the forming. Use the settings mode to set and record the values for later recall. Manual - Formech 686PT - Rev 8.8... -
Page 25: Operation - Settings
The 2 timers are set by pressing on the timer value and entering the new value using the pop-up keypad. The Auto-level & Auto-vacuum icons are toggle buttons – Press & change to green to set ON. The heater settings button will open the Heater Settings screen. Manual - Formech 686PT - Rev 8.8... -
Page 26: Heater Zone Settings
+/- buttons. Heater standby power level is adjustable in 5% increments. The back button will return to the settings screen. The heater settings screen can be accessed from the main operation screen by pressing the settings button and the heater settings button Manual - Formech 686PT - Rev 8.8... -
Page 27: Save Settings
Default heater settings The default settings are as follows: Zone 1 Zone 2 Zone 3 Zone 4 Zone 5 Zone 6 Standby To change the default heater settings Contact Formech if this function is required. Manual - Formech 686PT - Rev 8.8... -
Page 28: Operation - Options
The Auto-vac function will operate as normal. The 686 is designed so that the pump does not run continuously when the machine is idle. The pump will run to evacuate the tank for a default time of 6 minutes if the machine is not used or if the heater is not used. -
Page 29: Heating Pyrometer Option
Low air pressure indicator on the main and operating screens. When the 686 is operated in the manual mode, the heater icon will show the pyrometer temperature and the timer value. -
Page 30: Operation - Heater Settings
& environment temperature / conditions. When the heater is in the standby position (rear position) the quartz heater may be set to idle at a lower level to reduce the machine power consumption. Manual - Formech 686PT - Rev 8.8... -
Page 31: Operation - Other Controls And User Adjustments
The front material clamps are manually adjustable. Loosen the black thumb screw nut at the base to allow appropriate adjustment of the top thumbscrew nut. Tighten the lower thumb screw and test that the setting is correct. Re-adjust as required. Adjustment is required for varying material thickness and reducing plates. Manual - Formech 686PT - Rev 8.8... -
Page 32: Counterweight Adjustment, Loading & Unloading
RELATING TO SAFETY AND THE SAFETY HAZARDS SPECIFIC TO THIS MACHINE BEFORE OPERA- TING. OPERATING PROCEDURES FOR THIS MACHINE MUST BE ASSESSED, MONITORED AND CONTROLLED BY THE PERSON RESPONSIBLE FOR HEALTH AND SAFETY. Manual - Formech 686PT - Rev 8.8... -
Page 33: Tools
Repairs to the vacuum circuit can be costly. The use of talc as a release agent is not recommended. It may clog the vacuum pump, valves and hoses. MDF Baseboard Aluminium Baseboard Manual - Formech 686PT - Rev 8.8... - Page 34 (platen) Centre of board position 92.5mm (3.64”) 307.5mm (12.10”) R15mm (0.59”) 615mm (24.21”) 596mm (23.46”) 641mm (25.23”) 12mm (1/2”) 686 standard base board 7mm (.275”) Diameter holes Manual - Formech 686PT - Rev 8.8...
- Page 35 R15mm (0.59”) 615mm (24.21”) 596mm (23.46”) 12mm (1/2”) Attach MDF baseboard to steel plate with screws or high strength double sided 641mm (25.23”) tape 686 reducing window base board 7mm (.275”) Diameter holes Manual - Formech 686PT - Rev 8.8...
-
Page 36: Plastics
Formech has available a Vacuum Forming Guide which will cover some of these topics in more details. Please contact Formech to gain access to this guide. -
Page 37: Post Forming Operations
Formech has available a Vacuum Forming Guide which will cover some of these topics in more details. Please contact Formech to gain access to this guide. -
Page 38: Warranty
Warranty Reliability and a long service life are synonymous with the Formech brand. However, as with any machinery, certain parts will require periodic replacement and regular maintenance and care will prolong machinery life. Clamp seals The silicone seals applied to the mould table and to the top aperture of the machine (clamp) are seen as being consumable parts, their service life will depend on how the machine is treated and how often it is used. -
Page 39: Fault Diagnostics / Maintenance
A logical approach to detecting the fault begins with a complete assessment of the fault sce- nario. Much time can be wasted looking in the wrong areas for faults. See also section dealing with electrical circuit information. Manual - Formech 686PT - Rev 8.8... -
Page 40: Heater
If all appears OK then set the defective zone to 100% and check the voltage at the zone using a suitable volt meter. 3- If no voltage is present then contact Formech for service and advice. If a single element is found to be faulty then it will require replacement. See the following page. -
Page 41: Replacing A Heating Element
At this stage check that all the element wires and Remove cap from terminal block associated with interconnecting wires are fully tightened and the faulty element using an 8mm spanner. that the fault was not merely a loose connection. Manual - Formech 686PT - Rev 8.8... - Page 42 Position your hand underneath to catch the ele- Remove the loose insulation sleeves. ment as it is released. Feed the element wires through the holes Catch the element. in the tray. Manual - Formech 686PT - Rev 8.8...
- Page 43 It also shows the wattage + volts. Fitting the new element is a reversal of the pre- Tighten all connections securely. vious procedure. Replace bracket with bushes on the top side. Replace heater cover and tighten all 16 screws. Manual - Formech 686PT - Rev 8.8...
-
Page 44: Auto-Levelling System
If it is still not working, please contact Formech. Manual - Formech 686PT - Rev 8.8... -
Page 45: Vacuum
Activate that is normal. A lower reading indicates the vacuum and check the reading on poor vacuum where attention is required your vacuum gauge. (see following page). Manual - Formech 686PT - Rev 8.8... -
Page 46: Pneumatics
• Internal leaks within valves & cylinder – Repair with new seals or replace. Please specify cylinder/ valve number & model when ordering any pneumatic spare parts. Many problems can be caused by water in the pneumatic system. Manual - Formech 686PT - Rev 8.8... -
Page 47: Clamp & Table Seals
These are regarded as a consumable part and should be replaced when signs of wear become apparent. See section dealing with Vacuum. Formech supply a kit comprising the necessary seals and sealant for the Formech 686PT. We recommend that only the correct silicone seals and sealant are used to give an effective seal. -
Page 48: To Replace A Damaged Or Worn Seal
4. With a sharp blade cut a 45° mitre joint at all corners. Fill gaps in the joints with sealant. Remove the masking tape before the sealant has set. For best performance leave seal to set overnight. Manual - Formech 686PT - Rev 8.8... -
Page 49: Panel Seals
The 686PT requires minimum lubrication. The main lubrication area is the table guide bars situated on either side of the table. Apply general purpose grease when required to assist with table movement and prevent unnecessary wear. Manual - Formech 686PT - Rev 8.8... -
Page 50: Electrical Circuit Information
686 PT Wiring 3Phase HV 1-c. 686 PT Wiring 3Phase Delta HV 686 PTVT Wiring 1&2Phase HV 686 PTVT Wiring 3Phase HV 686 PTVT Wiring 3Phase – 1P pump HV 2-a. 686 PT Wiring LV 2-b. 686 Manual Wiring LV... - Page 51 P1a. 686 PT Wiring 1&2Phase HV Manual - Formech 686PT - Rev 8.8...
- Page 52 P1b. 686 PT Wiring 3Phase HV Manual - Formech 686PT - Rev 8.8...
- Page 53 P1c. 686 PT Wiring 3Phase Delta HV Manual - Formech 686PT - Rev 8.8...
- Page 54 P1d. 686 PTVT Wiring 1&2Phase HV Manual - Formech 686PT - Rev 8.8...
- Page 55 P1e. 686 PTVT Wiring 3Phase HV Manual - Formech 686PT - Rev 8.8...
- Page 56 P1f. 686 PTVT Wiring 3Phase – 1P pump HV Manual - Formech 686PT - Rev 8.8...
- Page 57 P2a. 686 PT Wiring LV Manual - Formech 686PT - Rev 8.8...
- Page 58 P2b. 686 Manual Wiring LV Manual - Formech 686PT - Rev 8.8...
- Page 59 P2c. 686 PT Pyrometer Wiring LV Manual - Formech 686PT - Rev 8.8...
- Page 60 P2d. 686 PTVT Wiring LV Manual - Formech 686PT - Rev 8.8...
- Page 61 P2e. 686 PTVT Pyrometer Wiring LV Manual - Formech 686PT - Rev 8.8...
- Page 62 P3b. 686 PT Pneumatics Manual - Formech 686PT - Rev 8.8...
- Page 63 MPP31 2 Handed ctrl module Cat I EE94 Grey Button non-illuminated EE98 N.O / N.C. Switch body EE97 Auto Vacuum Reed switch 2/2 Air Valve 1/2" 2/2 Vacuum Valve 1/2" Air silencer 1/2" Manual - Formech 686PT - Rev 8.8...
- Page 64 P4. Major Parts Listing 686 (continuation) Qty Description Part No Cylinder100Bore 320 Stroke (table) 5/3 valve Sol Pilots for 5/3 valve, 24VDC P11-24VDC Exhaust control reg 3/8" bore PVC tube (m) 1/2" bore PVC tube (m) 50mm Vacuum gauge Vacuum Pump & filter unit, VT4.16...
-
Page 65: Becker Pump Vt 4.16
Becker Pump VT 4.16 Spare parts list VT 4.16 Manual - Formech 686PT - Rev 8.8... - Page 66 SPACING COLLAR 945323 00000 SOCKET HEAD SCREW 949451 00000 WASHER 968104 00000 RUBBER SLEEVE 029600 16300 BOLT 736001 99613 VACUUM REGULATING VALVE 727502 06000 BLOW-OFF VALVE 951232 00000 SCREW PLUG 951224 00000 SCREW PLUG Manual - Formech 686PT - Rev 8.8...
-
Page 67: Ec Certificate
Is in conformity with the provisions of the following other EC Directives: 2014/35/EU 2014/30/EU 2011/65/EU Technical File Compiled by: A. Berry at address below. Formech International Limited, Unit 4, Thrales End Farm, Thrales End Lane, Harpenden ………………………………………………………………………………………………………… Hertfordshire AL5 3NS, United Kingdom ………………………………………………………………………………………………………… Significant harmonised standards applied:... - Page 68 South America Telephone: 608.424.2524 spares@formechinc.com Formech International Limited Unit 4, Thrales End Farm, Thrales End Lane, Harpenden, Hertfordshire, AL5 3NS U.K. Tel: +44 (0)1582 469 797 Fax: +44 (0)1582 469 646 Email: info@formech.com Manual - Formech 686PT - Rev 8.8...
Need help?
Do you have a question about the 686 and is the answer not in the manual?
Questions and answers