
Related Manuals for Formech Compac Mini


Summary of Contents for Formech Compac Mini
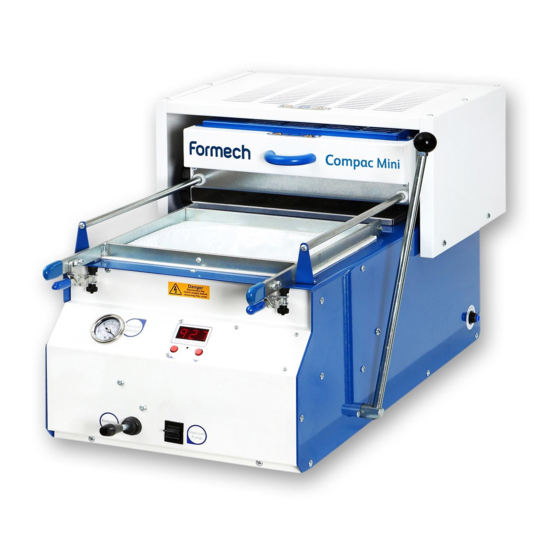
- Page 1 Desktop Vacuum . . . Forming Machine Compac Mini Installation, Operating and Service Manual For Parts, Service & Technical Assistance Telephone: +44 (0) 1582 496 797 Fax: +44 (0) 1582 496 646...
-
Page 2: Table Of Contents
Seals Heating elements Vacuum system Service / Repair Replacing seals Replacing a heating element Electrical troubleshooting Vacuum / Pressure System Cleaning Lubrication Spare Parts Listing Wiring Diagram Formech Mini Vacuum Pump D351VM EC Machinery Directive Manual - Formech Compac Mini... -
Page 3: Safety
> Daily repetitive use of this or any other machine may lead to a) fatigue and loss of concentration b) pos- sible strains. > Operators should be trained in the use of correct lifting techniques in order to minimise these effects. > Users of this machine should complete regular competence tests. Manual - Formech Compac Mini... -
Page 4: Introduction And Initial Assembly
Introduction and initial assembly Your Formech machine is supplied with: Desktop Vacuum . . . Forming Machine Compac Mini Installation, Operating and Service Manual For Parts, Service & Technical Assistance Telephone: +44 (0) 1582 496797 Fax: +44 (0) 1582 496646... -
Page 5: General Arrangement
General Arrangement Machine footprint (Dimensions are in mm) 439.40 Power inlet socket Manual - Formech Compac Mini... -
Page 6: Electrical Specifications
Noise emissions on the Formech Compac Mini are less than 70dB(A). Machine storage The Formech Compac Mini must be stored in a dry environment. If the machine is not used for a long period of time, run the pump periodically (once a month). -
Page 7: Machine Arrangement
At the end of the cycle the table is returned to the lower position by pushing the handle back and away. NOTE: A mechanical interlock designed to prevent a mould being raised into the heating elements stops the table being raised unless the heater box is fully back. Manual - Formech Compac Mini... - Page 8 This is situated on the top LHS of the front panel and gives indication of the vacuum level achieved at the table mould area during moulding. It is usual to expect approx 20”Hg / -680mbar of vacuum. If such levels are not achieved check your mould / table configuration & clamp / plastic sealing. Manual - Formech Compac Mini...
-
Page 9: Reducing Windows (Optional)
4. Then locate it at the front of the clamp frame. frame at the rear. 5. Fit the bolt and the nut to secure the window 6. Reducing windows correctly fitted to the clamp frame. to the machine. Manual - Formech Compac Mini... -
Page 10: Operating Procedure
If you know the cycle time, then press rial clamps to properly grip the plastic. the ‘Up’ button to the right time. Manual - Formech Compac Mini... - Page 11 11. If the plastic is still too soft when you try to 12. Finally, release the material clamps to remove release it, some distortion may occur. Make sure the finished moulding. the mould is not stuck in the moulding when you lower the table. Manual - Formech Compac Mini...
-
Page 12: Operating Techniques
The heater is then pushed back. The set time is stored until it is altered. If you don’t want to use the timer, set the time to zero. Manual - Formech Compac Mini... -
Page 13: Optional Extras
For more information please contact our sales department. 3. The Formech machine trolley allows you to easily move your Compac Mini machine. The 2 locking castors assure the trolley remains in position all the time. Underneath there is also space to store plastic material and moulds. -
Page 14: Tools
Repairs to the vacuum circuit can be costly. The use of talc as a release agent is not recommended. It may clog the vacuum pump, valves and hoses. MDF Baseboard Aluminium Baseboard Manual - Formech Compac Mini... - Page 15 The baseboard has to be 4mm shorter in both directions than the forming aperture of the machine e.g. Forming aperture 15mm 280mm x 230mm = baseboard size 276mm x 226mm. 19-20mm Manual - Formech Compac Mini...
-
Page 16: Plastics
Formech has available a Vacuum Forming Guide which will cover some of these topics in more details. Please contact Formech to gain access to this guide. -
Page 17: Post Forming Operations
Formech has available a Vacuum Forming Guide which will cover some of these topics in more details. Please contact Formech to gain access to this guide. -
Page 18: Warranty
Warranty Reliability and a long service life are synonymous with the Formech brand. However, as with any machinery, certain parts will require periodic replacement. Seals The silicon seals applied to the mould table and to the top aperture of the machine (clamp) are seen as being consumable parts, their service life will depend on how the machine is treated and how often it is used. -
Page 19: Service / Repair
4. With a sharp blade cut a 45° mitre joint at all corners. Fill gaps in the joints with sealant. Remove the masking tape before the sealant has set. For best performance leave seal to set overnight. Manual - Formech Compac Mini... -
Page 20: Replacing A Heating Element
The difference in temperature will quickly become noticeable. If one or more elements fail to heat then follow below. 1- Unplug the machine from the 2- Remove the cover on top of the heater. mains. Bring the heater completely forward and remove the fours screws retaining the cover. Manual - Formech Compac Mini... - Page 21 7- Bring the heater forward and remove the 8- Loosen and remove the element wires cap from the terminal block associated with the from the appropriate connector block. faulty element using a cross head screw driver. Manual - Formech Compac Mini...
- Page 22 12- Feed the element wires through the be a two person job. holes in the tray and catch the element. 13- Fit the new element. 14- Replace the two nuts and washers that secure the element to the tray. Manual - Formech Compac Mini...
- Page 23 18- Replace the terminal block cover and 19- Tighten the two screws at the back of make sure all is fully tightened. the machine and make sure that the two bars are correctly lined up with the back of the machine. Manual - Formech Compac Mini...
-
Page 24: Electrical Troubleshooting
If neither the fuse nor the mains supply are faulty then turn off the machine. Unplug the machine from the mains and remove the iec plug from the side of the machine and follow below: Remove the 6 self-tapping screws retaining the rear panel. Manual - Formech Compac Mini... - Page 25 See wiring diagram if any have fallen out. If the fault still cannot be found, then check the front of the machine: Remove the 2 self-tapping screws on each side of Remove the 4 self-tapping screws retaining the the machine. front panel. Manual - Formech Compac Mini...
- Page 26 If the vacuum pump motor does not run, check the electrical supply. If the motor smells strongly of burnt lacquer then it is probably burnt out and the entire pump/motor assembly needs replacing. If the supply is present but the motor does not run, the capacitor may be faulty. Manual - Formech Compac Mini...
-
Page 27: Vacuum / Pressure System
If the pump does not run, refer to the ELECTRICAL TROUBLE SHOOTING section above. • A pipe is loose, damaged or blocked. • The pump filter is blocked • The vacuum/pressure valve is blocked or corroded. • The vacuum pump is blocked or corroded. Manual - Formech Compac Mini... - Page 28 Unplug the machine from the mains and remove the iec plug from the side of the machine. Remove the 6 self-tapping screws securing the back panel. You will see the cylindrical vacuum filter with a pipe attached to each end. Discard the blocked filter and fit a new one. Manual - Formech Compac Mini...
-
Page 29: Cleaning
If you are unable to cure any problem relating to your machine, or if you wish to order spare parts please contact us at the below address, stating the model (Compac mini) the serial No. (on specification plate) and a full description of the fault or parts you need. -
Page 30: Spare Parts Listing
C14 IEC Fused, Switched Socket EE72 BS1363/A 3Pin Plug to C13 IEC Power Lead, 5A EE55 EU(Shuko) Plug to C13 IEC Power Lead, 5A EE54 NEMA6/15(N America) Plug to C13 IEC Power Lead, 5A EE73 Manual - Formech Compac Mini... -
Page 31: Wiring Diagram Formech Mini
9. Ceramic Connector Block (2 No.) 10. Pump ON\OFF Switch 8- 125W FSF Heating Element (2 No.) 11. Mains ON\OFF Illuminated Switch 9- Ceramic Connector Block (2 No.) 10- Pump ON/OFF Switch 11- Mains ON/OFF Illuminated Switch Manual - Formech Compac Mini... -
Page 32: Vacuum Pump D351Vm
> Easily changed from pressure to vacuum and vice versa > All models 240V single phase Specifications Model Typical Applications Typical Performance Max Pressure D351VM Air supply for flame photometer 15l/min at 15psi 8l/min at 30psi Manual - Formech Compac Mini... - Page 33 Vacuum Pump D351VM Typical arrangement Manual - Formech Compac Mini...
-
Page 34: Ec Machinery Directive
2004 / 108/EC - EMC 2006 / 95/EC - LVD Technical File Compiled by: Andrew Berry at address below Formech International Limited, Unit 4, Thrales End Farm, Thrales End Lane, Harpenden Hertfordshire AL5 3NS, United Kingdom Significant harmonised standards applied:... - Page 35 Telephone: 312.396.4072 Fax: 312.396.4073 spares@formechinc.com Formech International Limited Unit 4, Thrales End Farm, Thrales End Lane, Harpenden, Hertfordshire, AL5 3NS U.K. Tel: +44 (0) 1582 469 797 Fax: +44 (0) 1582 469 646 Email: info@formech.com Manual - Formech Compac Mini...
Need help?
Do you have a question about the Compac Mini and is the answer not in the manual?
Questions and answers