Advertisement
Quick Links
Please read this manual fi rst
Basic operations
AST21
■
Using keys
Setting Guide
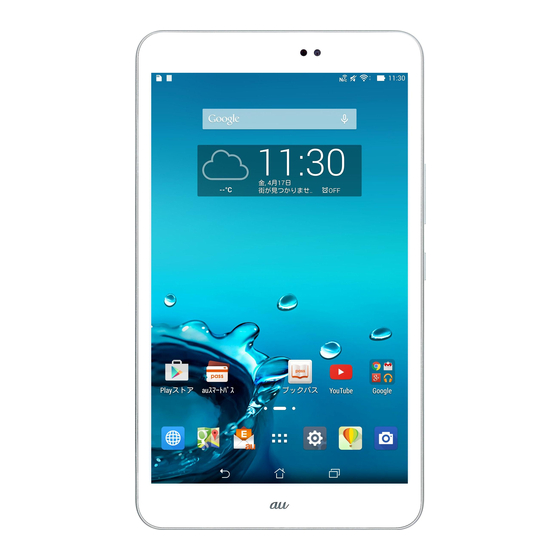
Thank you for purchasing the ASUS MeMO Pad™ 8 AST21 (simply called
the "product" from here on).
This manual explains the settings and basic operations for using the product.
Volume key
For explanation of other settings and operations, refer to the "Basic Manual
application" that can be used on your product or "Basic Manual" on the au
Adjust the volume.
homepage.
Power key
●
Basic operations
●
Backing up E-mails
Press and hold for two seconds
Explains the basic operations.
Back up E-mail data to a microSD
or more to power on, or hold
card.
down for one second or more
●
STEP 1 au Easy Setting
Explains au ID settings, etc.
●
Importing / exporting contacts
to activate / deactivate Silent
Restore / backup contacts data.
mode or power off.
●
STEP 2 Setup Wizard
Explains how to set up network
●
Transferring data to a microSD
connection, Google account,
card
ASUS account and date and
Back up data to a microSD card.
Back
Home
Recently used apps
time, etc.
●
Saving battery power
Return to
Go back to
Display recently used
Turning off functions not in use
the previous
the home
apps on a list.
●
E-mail initial settings
Make initial settings for E-mail
can save battery power.
screen.
screen.
(@ezweb.ne.jp).
Lock screen operation
※
Company names and product names referred to in this manual are
■
trademarks or registered trademarks of respective companies. The ® or ™
Lock screen prevents erroneous operation. It appears when
marks may be omitted in this manual.
In this manual, "microSD™ memory card (commercially available)",
turning the power on, etc. Pressing
during operation
※
"microSDHC™ memory card (commercially available)" and "microSDXC™
activates sleep mode whereas pressing
while in
memory card (commercially available)" are abbreviated as "microSD card".
sleep mode displays the lock screen.
※
This manual uses the abbreviation 'app' in place of "application".
Slide (swipe) the lock screen in any direction to unlock the
August 2014, 1st Edition
screen.
Sold by: KDDI CORPORATION, OKINAWA
CELLULAR TELEPHONE COMPANY
Imported by: ASUS JAPAN Inc.
Manufactured by: ASUSTeK Computer Inc.
Using the display (touch panel)
■
Switching the input method
■
On the character input screen, operate as follows to switch
Tap / Double Tap
Long Touch
between input methods:
Tap: Gently touch a screen
Touch and hold an item
and then immediately release
with your fi nger . Used for
your fi nger . Double tap: Touch
displaying pop-up menus,
the same position twice.
etc.
Tap
or
to switch between input methods
10 key keyboard
Drag
Slide (swipe)
Keyboard with keys arranged in the same order as those
Touch and hold an item or
Lightly touch and move it in
on cell phones.
icon, move it to the desired
the desired direction. Used
QWERTY keyboard
location.
for unlocking the screen or
Keyboard with keys arranged in the same order as those
scrolling to view the items
on computers.
that do not fi t on the screen.
●
Tap
Menu
to select the hand writing input, Japanese syllabic keyboard,
or voice input mode.
STEP 1 au Easy Setting
When you power on this product for the fi rst time after purchase,
au
(Welcome to au) screen appears. Follow the on-
へようこそ
screen instruction to make each setting.
■
1-1 au ID Registration
By setting an au ID, you can use various services provided
by au such as "au
かんたん決済
" (au Simple Payment Service)
which allows you to purchase apps from the au Market or
Google Play.
Confi rm the
au ID
を設定する
Tap
au ID
の設定 ・
Enter your security code
An au ID that is already used by another user cannot be registered.
●
●
When an au ID is newly created, your own phone number
※
will be
content
→
次へ
(Register "au ID")
保 存
(Set / Save
(security password)
registered as au ID. You can change your au ID to something you like.
(Next)
→
次へ
(Next)
au ID)
※
Security code is a four
※
Your au Micro IC Card (LTE) contains your phone number as
digit number chosen by the
customer information.
customer and noted on the
●
If your au ID was registered on another device, it can still be used on
application form.
this product (integrated au ID).
■
1-2 Update
■
1-3 Terms of Use of au Services
Update pre-installed apps to the latest versions.
Confi rm the Terms of Use and the outline of each service.
アップデートする
(Update)
→
次へ
(Next)
Confi rm the Terms of Use and the outline of the service
→
同意する
(Agree)
→
次へ
(Next)
→
同意する
(Agree)
※
The
データの復元
(Restoration of backups) screen appears if you have any
data to restore. Follow the on-screen instruction to restore data.
■
1-5 Recommended apps
■
1-6 Completion of registration
You can download and install recommended apps.
※
Tick the
次回電源
ON
時に
au
かんたん設定を自動起動しない
(Do not launch
"au Easy Setting" automatically at power on) checkbox not to show this
Tick the app you want to install
→
次へ
(Next)
screen next time.
Tap
終了する
(Finish) to complete registration
STEP 2 Setup Wizard
After au Easy Setting is complete, Setup Wizard screen
appears.
2-1 Setting the language
■
Enter a password
Tap
終了
(Finish)
→
OK
Confi rm Terms
→
※
When setting
of Use
→
設定
the information
necessary to reissue
(Set)
a password, tap
au ID
設定メニューへ
(Go to
From Language, select
English
→
au ID settings menu).
■
1-4 Automatic backup settings
■
2-3 Setting up a Google account
Set an automatic backup of your address book, photos and
●
If you have created Google account on another device, it can still be
used on this product.
videos.
●
When you create Google account on this product, Gmail mail address
Tick the data to be backed up automatically
→
次へ
(Next)
"(user name)@gmail.com" will be created and set as main E-mail
address in Google account.
※
The
アプリの復元
(Restoration of apps) screen appears if you have any
●
A recovery E-mail address is an alternate E-mail address used by
app to restore. Follow the on-screen instruction to restore data.
Google to communicate with you in case you forgot your password,
etc. If you have no another mail address, leave it blank.
■
2-2 Setting Internet connection
※
You can also set the
connection by tapping
When connected
Wi-Fi Easy Settings
If you select a
※
to the access
and answering the
network without
point,
Connected
questions.
security setting,
appears on the
※
If the connecting
this screen does
selected network.
access point is not
not appear.
detected, register
→
the access point
manually. To register
manually, tap
Add
network
and enter
Select an Internet
Tap an access
Enter a password
network SSID and
connection
point you want to
security information.
(security key) set
method
connect to
in the access point
→
→
Connect
※
If you already
have a Google
account, tap
Yes
and follow
the on-screen
instructions.
Tap
No
Tap
Get an account
Enter your name and family name
Continued to
in order from the top
→
the next page
Advertisement

Related Manuals for Asus MEMO Pad 8 AST21


Summary of Contents for Asus MEMO Pad 8 AST21
- Page 1 You can also set the Tap: Gently touch a screen Touch and hold an item ■ Thank you for purchasing the ASUS MeMO Pad™ 8 AST21 (simply called connection by tapping When connected and then immediately release with your fi nger . Used for Wi-Fi Easy Settings the "product"...
- Page 2 Transferring data to a microSD card Saving battery power ■ 2-4 Setting up an ASUS account Changing your E-mail address Use Contacts to export contacts data to a microSD card Data saved in the internal storage of the product can be When you want to use the product continuously for a longer To use E-mail (@ezweb.ne.jp), application to LTE NET is required.
Need help?
Do you have a question about the MEMO Pad 8 AST21 and is the answer not in the manual?
Questions and answers