Table of Contents
Advertisement
Quick Links
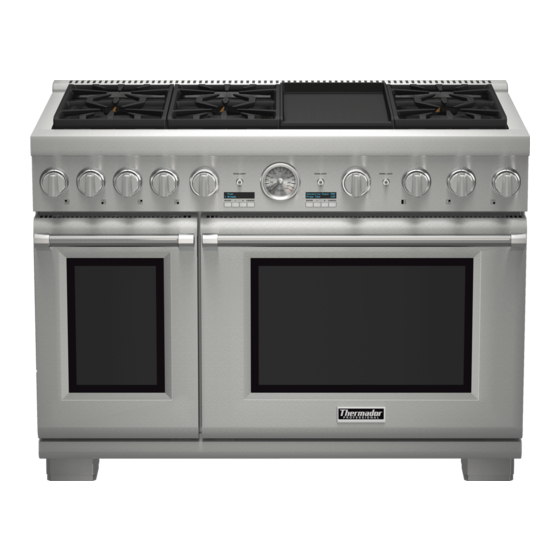
Service Manual for the Thermador Pro Grand Next Generation 48-Inch Natural Gas and LP Gas Ranges, Models:
TABLE OF CONTENTS
1
General .................................................................................................... 5
1.1
Technical Documents to Read Prior to Servicing .......................................... 5
1.2
Data Rating Plate .......................................................................................... 5
1.3
Wiring Diagram ............................................................................................. 6
1.4
Recommended Tools and Supplies .............................................................. 6
1.5
Important Safety Information ......................................................................... 7
1.5.1
Safety Symbols Used In This Manual .................................................... 7
1.5.2
Safety Precautions to Know Prior to Servicing ....................................... 7
2
Operation and Controls ....................................................................... 10
2.1
Knobs and Controls ..................................................................................... 10
2.1.1
Standard Burner Knob ......................................................................... 10
2.1.2
ExtraLow (XLO) and ExtraHi (XHI) Burner Knobs ................................ 10
2.1.3
Griddle / Grill Control Knob .................................................................. 10
2.1.4
Temperature / Function Selector Knob for Large Oven ....................... 10
2.1.5
Temperature / Function Selector Knob for Small Oven ........................ 11
2.1.6
Oven Light and Panel Light Switches .................................................. 11
2.2
LED Indicators............................................................................................. 11
2.3
Automatic Re-Ignition .................................................................................. 11
2.4
Operation during a Power Outage ............................................................... 11
2.5
Rangetop Burner Assembly and Maintop Components .............................. 11
3
Ignition ................................................................................................... 12
3.1
Before Testing ............................................................................................. 12
3.2
Rangetop Burner Characteristics ................................................................ 12
3.3
Rangetop Flame Characteristics ................................................................. 13
3.4
Testing Ignition for Burners ......................................................................... 14
58300000159722_ARA_EN_D
PRG486JDG/01, PRL486JDG/01
3.4.1
Time to Ignite ....................................................................................... 14
3.4.2
3.4.3
Testing Ignition for XLO Burner Settings .............................................. 14
3.4.4
Testing Broil Burner Ignition ................................................................. 14
3.4.5
Testing Bake Burner Ignition ................................................................ 14
3.5
Adjusting Bake Burner Flame with the Air Shutter ...................................... 14
3.6
Adjusting Rangetop Burner Valves Manually .............................................. 15
3.6.1
Special Tools Needed .......................................................................... 15
3.6.2
Adjusting the Bypass Screws ............................................................... 16
3.7
Troubleshooting Burners, Flame, and Ignition ............................................ 16
3.7.1
Burner and Flame Diagnostics for Rangetop Burners .......................... 16
3.7.2
Ignition Diagnostics for Rangetop Burners ........................................... 16
4
Lights, Temp Sensors .......................................................................... 18
4.1
HSI and Element Diagnostics ..................................................................... 18
4.1.1
Cycle/Circuit Specification.................................................................... 18
4.1.2
Safety Practices for HSI and Element Diagnostics .............................. 18
4.1.3
HSI and Element Diagnostic Tips ........................................................ 18
4.2
Oven Light Diagnostics ............................................................................... 18
4.3
Oven Temperature Sensor Diagnostics ...................................................... 20
4.3.1
20
5
Fault Messages ..................................................................................... 21
6
Service and Repair ............................................................................... 22
6.1
Preparing the Range for Servicing .............................................................. 22
6.2
Component Removal Videos ...................................................................... 22
6.3
Accessing Components under the Maintop ................................................. 22
6.3.1
Heat Shields, Burner Support Rails ..................................................... 22
Page 2 of 92
Advertisement
Table of Contents
Troubleshooting

Related Manuals for Thermador PRG486JDG/01


Summary of Contents for Thermador PRG486JDG/01
-
Page 1: Table Of Contents
Service Manual for the Thermador Pro Grand Next Generation 48-Inch Natural Gas and LP Gas Ranges, Models: PRG486JDG/01, PRL486JDG/01 TABLE OF CONTENTS 3.4.1 Time to Ignite ..................14 3.4.2 Testing Ignition for Standard Burner Settings (HI, MEDIUM, SIM) ..14 General .................... - Page 2 Service Manual for the Thermador Pro Grand Next Generation 48-Inch Natural Gas and LP Gas Ranges, Models: PRG486JDG/01, PRL486JDG/01 6.3.2 Removing the Maintops ............... 24 6.7.21 Griddle / Grill Thermostat Removal and Replacement ......58 6.3.3 Removing the Heat Shields..............25 6.7.22 Oven Display Module and Light Switch –...
- Page 3 Service Manual for the Thermador Pro Grand Next Generation 48-Inch Natural Gas and LP Gas Ranges, Models: PRG486JDG/01, PRL486JDG/01 6.9.7.3 Bake Burner Orifice and Elbow Connector for Large Oven – Removal and Replacement ............82 6.9.8 Bake Burner Components (Small Oven) – Removal and Replacement 84 6.9.8.1...
-
Page 4: General
Service Manual for the Thermador Pro Grand Next Generation 48-Inch Natural Gas and LP Gas Ranges, Models: PRG486JDG/01, PRL486JDG/01 GENERAL 1.2 Data Rating Plate The data rating plate shows the model, serial, and FD number. It is This manual provides servicing instructions for the following... -
Page 5: Wiring Diagram
Service Manual for the Thermador Pro Grand Next Generation 48-Inch Natural Gas and LP Gas Ranges, Models: PRG486JDG/01, PRL486JDG/01 1.3 Wiring Diagram 1.4 Recommended Tools and Supplies The wiring diagram is located on the back side of the kick panel The following are recommended to use when servicing this appliance: (see Figure 2). -
Page 6: Important Safety Information
Service Manual for the Thermador Pro Grand Next Generation 48-Inch Natural Gas and LP Gas Ranges, Models: PRG486JDG/01, PRL486JDG/01 1.5 Important Safety Information Before starting to service an appliance, familiarize yourself with all Fire / Explosion Hazards safety information and precautions contained in this manual. - Page 7 Service Manual for the Thermador Pro Grand Next Generation 48-Inch Natural Gas and LP Gas Ranges, Models: PRG486JDG/01, PRL486JDG/01 ■ With electrical power off, carefully check for gas leaks at each gas component that was removed, replaced, or otherwise serviced...
- Page 8 Service Manual for the Thermador Pro Grand Next Generation 48-Inch Natural Gas and LP Gas Ranges, Models: PRG486JDG/01, PRL486JDG/01 ■ Clean the range with caution. Do not use flammable cleaners to clean the range. Avoid steam burns; do not use a wet sponge or cloth to clean the range while it is hot.
-
Page 9: Operation And Controls
Service Manual for the Thermador Pro Grand Next Generation 48-Inch Natural Gas and LP Gas Ranges, Models: PRG486JDG/01, PRL486JDG/01 2.1.2 ExtraLow (XLO) and ExtraHi (XHI) Burner Knobs Caution XLO and XHI knobs can be set anywhere between the XLO and XHI markings for a variable range of heat;... -
Page 10: Temperature / Function Selector Knob For Small Oven
Service Manual for the Thermador Pro Grand Next Generation 48-Inch Natural Gas and LP Gas Ranges, Models: PRG486JDG/01, PRL486JDG/01 2.1.5 Temperature / Function Selector Knob for Small Oven 2.5 Rangetop Burner Assembly and Maintop Components The Temperature/Function Selector Knob for the small oven enables selecting a temperature from 150°... -
Page 11: Testing, Adjusting, And Troubleshooting Rangetop Burners And Ignition
Service Manual for the Thermador Pro Grand Next Generation 48-Inch Natural Gas and LP Gas Ranges, Models: PRG486JDG/01, PRL486JDG/01 TESTING, ADJUSTING, AND TROUBLESHOOTING 3.2 Rangetop Burner Characteristics RANGETOP BURNERS AND IGNITION If one or more rangetop burner blows out, the respective igniter electrode automatically re-ignites the flame. -
Page 12: Rangetop Flame Characteristics
Service Manual for the Thermador Pro Grand Next Generation 48-Inch Natural Gas and LP Gas Ranges, Models: PRG486JDG/01, PRL486JDG/01 3.3 Rangetop Flame Characteristics Natural gas: The rangetop burner flame color should be blue with no yellow on the tips (see Figure 5). It is not uncommon to see orange in the flame color;... -
Page 13: Testing Ignition For Burners
Service Manual for the Thermador Pro Grand Next Generation 48-Inch Natural Gas and LP Gas Ranges, Models: PRG486JDG/01, PRL486JDG/01 3.4.4 Testing Broil Burner Ignition 3.4 Testing Ignition for Burners Set the mode to BROIL. After less than a minute (depending on the model) the burner should ignite. -
Page 14: Adjusting Rangetop Burner Valves Manually
Service Manual for the Thermador Pro Grand Next Generation 48-Inch Natural Gas and LP Gas Ranges, Models: PRG486JDG/01, PRL486JDG/01 1. First remove the bake burner from the burner box. For the large 3.6 Adjusting Rangetop Burner Valves Manually oven, see Bake Burner Components (Large Oven) – Removal and Although pre-adjusted, if you need to set the valves for the lowest Replacement, page 78. -
Page 15: Adjusting The Bypass Screws
Service Manual for the Thermador Pro Grand Next Generation 48-Inch Natural Gas and LP Gas Ranges, Models: PRG486JDG/01, PRL486JDG/01 3.6.2 Adjusting the Bypass Screws 3.7 Troubleshooting Burners, Flame, and Ignition 3.7.1 Burner and Flame Diagnostics for Rangetop Burners Caution If a rangetop burner clicks (sparks) constantly or if burner doesn’t light... - Page 16 Service Manual for the Thermador Pro Grand Next Generation 48-Inch Natural Gas and LP Gas Ranges, Models: PRG486JDG/01, PRL486JDG/01 Figure 9: Diagnostic Flowchart for Rangetop Burner Ignition Page 17 of 92 58300000159722_ARA_EN_D...
-
Page 17: Diagnosing Hot Surface Igniters, Griddle / Grill Element, Oven Lights, Temp Sensors
Service Manual for the Thermador Pro Grand Next Generation 48-Inch Natural Gas and LP Gas Ranges, Models: PRG486JDG/01, PRL486JDG/01 ü Bake mode: The power to the bake burner cycles on and off at DIAGNOSING HOT SURFACE IGNITERS, GRIDDLE / pre-set intervals when the bake burner is preheating (preheating... - Page 18 Service Manual for the Thermador Pro Grand Next Generation 48-Inch Natural Gas and LP Gas Ranges, Models: PRG486JDG/01, PRL486JDG/01 OVEN LIGHT DIAGNOSTICS 1 Make sure plunger doesn’t get stuck Turn light switch OFF and Is oven light Close oven door and Is oven light in closed position.
-
Page 19: Oven Temperature Sensor Diagnostics
Service Manual for the Thermador Pro Grand Next Generation 48-Inch Natural Gas and LP Gas Ranges, Models: PRG486JDG/01, PRL486JDG/01 4.3 Oven Temperature Sensor Diagnostics With electrical power OFF, you can perform a resistance reading (and simultaneous temperature reading) to check the oven temperature sensor. -
Page 20: Fault Messages
Service Manual for the Thermador Pro Grand Next Generation 48-Inch Natural Gas and LP Gas Ranges, Models: PRG486JDG/01, PRL486JDG/01 FAULT MESSAGES Page 21 of 92 58300000159722_ARA_EN_D... -
Page 21: Service And Repair
Service Manual for the Thermador Pro Grand Next Generation 48-Inch Natural Gas and LP Gas Ranges, Models: PRG486JDG/01, PRL486JDG/01 SERVICE AND REPAIR 6.3 Accessing Components under the Maintop This section contains the steps required to gain access to the components located under the maintop(s). - Page 22 Service Manual for the Thermador Pro Grand Next Generation 48-Inch Natural Gas and LP Gas Ranges, Models: PRG486JDG/01, PRL486JDG/01 4. Remove and retain the two T-30 screws securing each brass burner base onto the pedestal (see Figure 12). Figure 13: Lifting the Burner Base off the Pedestal...
-
Page 23: Removing The Maintops
Service Manual for the Thermador Pro Grand Next Generation 48-Inch Natural Gas and LP Gas Ranges, Models: PRG486JDG/01, PRL486JDG/01 6.3.2 Removing the Maintops Caution Be sure to check QuickFinder for relevant information, Fragile Component documentation, and the correct part number when replacing this component. -
Page 24: Removing The Heat Shields
Service Manual for the Thermador Pro Grand Next Generation 48-Inch Natural Gas and LP Gas Ranges, Models: PRG486JDG/01, PRL486JDG/01 6.3.3 Removing the Heat Shields 6.3.4 Removing the Burner Support Rails Be sure to check QuickFinder for relevant information, This procedure is for the removal of the burner support rail with... - Page 25 Service Manual for the Thermador Pro Grand Next Generation 48-Inch Natural Gas and LP Gas Ranges, Models: PRG486JDG/01, PRL486JDG/01 7. Use a large flat-blade screwdriver to push one side of the burner support rail to the other side of the chassis, until the 2 prongs come out from their slots on the chassis (see Figure 20).
-
Page 26: Griddle / Grill Removal And Replacement
Service Manual for the Thermador Pro Grand Next Generation 48-Inch Natural Gas and LP Gas Ranges, Models: PRG486JDG/01, PRL486JDG/01 4. Remove the backguard (see Backguard Removal and 6.4 Griddle / Grill Removal and Replacement Replacement, page 61 The griddle / grill removal requires access from the back and the 5. - Page 27 Service Manual for the Thermador Pro Grand Next Generation 48-Inch Natural Gas and LP Gas Ranges, Models: PRG486JDG/01, PRL486JDG/01 8. If the element needs replacing, first remove and retain the two screws securing the ends of the element onto the range (see Figure 24).
-
Page 28: Side Panel Removal And Replacement
Service Manual for the Thermador Pro Grand Next Generation 48-Inch Natural Gas and LP Gas Ranges, Models: PRG486JDG/01, PRL486JDG/01 6.5 Side Panel Removal and Replacement This procedure is for both the right and left side panels. Figure 26: Removing the Insulation 16. - Page 29 Service Manual for the Thermador Pro Grand Next Generation 48-Inch Natural Gas and LP Gas Ranges, Models: PRG486JDG/01, PRL486JDG/01 1. Follow all safety precautions and steps in Preparing the Range for 4. Remove and retain the screws that secure the side panel (see Servicing, page 22.
- Page 30 Service Manual for the Thermador Pro Grand Next Generation 48-Inch Natural Gas and LP Gas Ranges, Models: PRG486JDG/01, PRL486JDG/01 Figure 31: Removing a Nut & Lockwasher using a Rachet with Swivel Extension Figure 30: Nuts with Lockwashers Upper nut with lockwasher (1) on screw...
-
Page 31: Control Panel Removal And Replacement
Service Manual for the Thermador Pro Grand Next Generation 48-Inch Natural Gas and LP Gas Ranges, Models: PRG486JDG/01, PRL486JDG/01 6.6 Control Panel Removal and Replacement Be sure to check QuickFinder for relevant information, documentation, and the correct part number when replacing this component. - Page 32 Service Manual for the Thermador Pro Grand Next Generation 48-Inch Natural Gas and LP Gas Ranges, Models: PRG486JDG/01, PRL486JDG/01 8. Cover the door with protective matting, and then close the door to provide a support for the control panel when it is removed (see Figure 37).
-
Page 33: Removal And Replacement Of Top-Accessible Components
Service Manual for the Thermador Pro Grand Next Generation 48-Inch Natural Gas and LP Gas Ranges, Models: PRG486JDG/01, PRL486JDG/01 6.7.1 Jet Holder Assembly Removal and Replacement This procedure is for removing and replacing the jet holder assembly from the burner support rail. The assembly includes the jet holder, as well as the orifice (jet) which is an integral part of the assembly, and is not available separately. - Page 34 Service Manual for the Thermador Pro Grand Next Generation 48-Inch Natural Gas and LP Gas Ranges, Models: PRG486JDG/01, PRL486JDG/01 Figure 39: Wire Guard Clip (Shown Removed) Figure 40: Removing Jet Holder Assembly 5. Use a flat-bladed screwdriver to pry the jet holder assembly out until the alignment boss is disengaged from the circular receptacle on the burner support rail.
-
Page 35: Standard Valve Removal And Replacement
Service Manual for the Thermador Pro Grand Next Generation 48-Inch Natural Gas and LP Gas Ranges, Models: PRG486JDG/01, PRL486JDG/01 6.7.2 Standard Valve Removal and Replacement 7. Use a T-10 driver to remove and retain the screw on the microswitch (see Figure 43) and then pull the microswitch off the alignment pin on the standard valve. -
Page 36: Microswitch Removal And Replacement
Service Manual for the Thermador Pro Grand Next Generation 48-Inch Natural Gas and LP Gas Ranges, Models: PRG486JDG/01, PRL486JDG/01 6.7.3 Microswitch Removal and Replacement 6.7.4 Solenoid Valve Removal and Replacement The microswitches are for the standard burners only, and are The solenoid valves are used for burners with XLO or XHI accessed from the top and front of the range. - Page 37 Service Manual for the Thermador Pro Grand Next Generation 48-Inch Natural Gas and LP Gas Ranges, Models: PRG486JDG/01, PRL486JDG/01 6. First make a note of how the wires are connected to the solenoid valve terminals, and then remove the wires from the terminals.
-
Page 38: Xlo Valve Removal And Replacement
Service Manual for the Thermador Pro Grand Next Generation 48-Inch Natural Gas and LP Gas Ranges, Models: PRG486JDG/01, PRL486JDG/01 6.7.5 XLO Valve Removal and Replacement 6. From under the manifold, use a 1/4 inch wrench to remove and retain the valve screw that secures the XLO valve onto the manifold. -
Page 39: Potentiometer Removal And Replacement
Service Manual for the Thermador Pro Grand Next Generation 48-Inch Natural Gas and LP Gas Ranges, Models: PRG486JDG/01, PRL486JDG/01 6.7.6 Potentiometer Removal and Replacement The potentiometer (also known as the simmer control Gas Leaks potentiometer) is used for simmer (XLO) and also XHi functionality. It... - Page 40 Service Manual for the Thermador Pro Grand Next Generation 48-Inch Natural Gas and LP Gas Ranges, Models: PRG486JDG/01, PRL486JDG/01 3. Remove all knobs from their respective valve stems by slowly pulling the knobs straight out, away from control panel. 4. Remove the backguard (see Backguard Removal and Replacement, page 61).
- Page 41 Service Manual for the Thermador Pro Grand Next Generation 48-Inch Natural Gas and LP Gas Ranges, Models: PRG486JDG/01, PRL486JDG/01 9. Remove and retain the screw that attaches the manifold pipe 12. Remove the potentiometers by sliding them off the valve shafts bracket onto the manifold pipe (see Figure 54).
-
Page 42: Manifold For Bake And Broil Burners - Removal And Replacement
Service Manual for the Thermador Pro Grand Next Generation 48-Inch Natural Gas and LP Gas Ranges, Models: PRG486JDG/01, PRL486JDG/01 6.7.8 Manifold for Bake and Broil Burners – Removal and 4. Remove the back panel(s). See Back Panel for Small Oven –... - Page 43 Service Manual for the Thermador Pro Grand Next Generation 48-Inch Natural Gas and LP Gas Ranges, Models: PRG486JDG/01, PRL486JDG/01 8. Use an adjustable wrench to remove the flared adapter from the elbow connecting piece (see Figure 57). 9. Remove and retain the two screws holding each manifold bracket...
-
Page 44: Regulator Removal And Replacement
Service Manual for the Thermador Pro Grand Next Generation 48-Inch Natural Gas and LP Gas Ranges, Models: PRG486JDG/01, PRL486JDG/01 6.7.9 Regulator Removal and Replacement 1. Follow all safety precautions and steps in Preparing the Range for Servicing, page 22. Before replacing the regulator, first check QuickFinder for service 2. -
Page 45: Bi-Metal Gas Valves - Removal And Replacement
Service Manual for the Thermador Pro Grand Next Generation 48-Inch Natural Gas and LP Gas Ranges, Models: PRG486JDG/01, PRL486JDG/01 1. Follow all safety precautions and steps in Preparing the Range for Servicing, page 22. 2. Follow all steps in Accessing Components under the Maintop, page 22. -
Page 46: Oven Lamp Transformer Removal And Replacement
Service Manual for the Thermador Pro Grand Next Generation 48-Inch Natural Gas and LP Gas Ranges, Models: PRG486JDG/01, PRL486JDG/01 6.7.11 Oven Lamp Transformer Removal and Replacement There are two oven lamp transformers in this model range. NOTE: Before replacing the oven lamp transformer, see Figure 10, page 19 to diagnose problems with the oven lamp. -
Page 47: Selector Switch For Oven Function And Oven Temperature - Removal And Replacement
Service Manual for the Thermador Pro Grand Next Generation 48-Inch Natural Gas and LP Gas Ranges, Models: PRG486JDG/01, PRL486JDG/01 5. First make a note how the wires are connected to the transformer 4. At the front of the control panel, remove and retain the two T-10 terminals, and then detach the five wire connectors. -
Page 48: Oven Temperature Gauge Removal And Replacement
Service Manual for the Thermador Pro Grand Next Generation 48-Inch Natural Gas and LP Gas Ranges, Models: PRG486JDG/01, PRL486JDG/01 6.7.13 Oven Temperature Gauge Removal and Replacement The temperature gauge is for the large oven only. Assess is from the top and front of the range. -
Page 49: Control Boards For Large And Small Ovens - Removal And Replacement
Service Manual for the Thermador Pro Grand Next Generation 48-Inch Natural Gas and LP Gas Ranges, Models: PRG486JDG/01, PRL486JDG/01 5. At the front of the range, pull the temperature gauge outward to remove it, and then detach the wire connector (see Figure 68). -
Page 50: Simmer Control Board Removal And Replacement
Service Manual for the Thermador Pro Grand Next Generation 48-Inch Natural Gas and LP Gas Ranges, Models: PRG486JDG/01, PRL486JDG/01 6.7.15 Simmer Control Board Removal and Replacement There are two simmer boards; one for the two XLO burners on the right, and another for the two XLO burners on the left. -
Page 51: Led Indicator Removal And Replacement
Service Manual for the Thermador Pro Grand Next Generation 48-Inch Natural Gas and LP Gas Ranges, Models: PRG486JDG/01, PRL486JDG/01 6.7.16 LED Indicator Removal and Replacement Be sure to check QuickFinder for relevant information, documentation, and the correct part number when replacing this component. -
Page 52: Lighting Bar For Control Panel - Removal And Replacement
Service Manual for the Thermador Pro Grand Next Generation 48-Inch Natural Gas and LP Gas Ranges, Models: PRG486JDG/01, PRL486JDG/01 5. While holding the two sides of a wire connector, rotate them to 6.7.17 Lighting Bar for Control Panel – Removal and detach (see Figure 72, page 52). -
Page 53: Ignition (Spark) Module Removal And Replacement
Service Manual for the Thermador Pro Grand Next Generation 48-Inch Natural Gas and LP Gas Ranges, Models: PRG486JDG/01, PRL486JDG/01 6.7.18 Ignition (Spark) Module Removal and Replacement Be sure to check QuickFinder for relevant information, documentation, and the correct part number when replacing this component. -
Page 54: Door Latch Removal And Replacement
Service Manual for the Thermador Pro Grand Next Generation 48-Inch Natural Gas and LP Gas Ranges, Models: PRG486JDG/01, PRL486JDG/01 6.7.19 Door Latch Removal and Replacement Removing and replacing the door latch requires access from both the top and front of the range. - Page 55 Service Manual for the Thermador Pro Grand Next Generation 48-Inch Natural Gas and LP Gas Ranges, Models: PRG486JDG/01, PRL486JDG/01 7. Remove and retain the two T-20 screws under the front control 9. Detach the spade wire connectors from the latch and the white panel (see Figure 78).
-
Page 56: Plunger Switch Removal And Replacement
Service Manual for the Thermador Pro Grand Next Generation 48-Inch Natural Gas and LP Gas Ranges, Models: PRG486JDG/01, PRL486JDG/01 1. First follow steps 1–8 of the Door Latch Removal and Replacement procedure, starting on page 55. 2. First make a note how the wire connectors are attached to each terminal on the plunger switch. -
Page 57: Griddle / Grill Thermostat Removal And Replacement
Service Manual for the Thermador Pro Grand Next Generation 48-Inch Natural Gas and LP Gas Ranges, Models: PRG486JDG/01, PRL486JDG/01 6.7.21 Griddle / Grill Thermostat Removal and Replacement Be sure to check QuickFinder for relevant information, documentation, and the correct part number when replacing this component. -
Page 58: Oven Display Module And Light Switch - Removal And Replacement
Service Manual for the Thermador Pro Grand Next Generation 48-Inch Natural Gas and LP Gas Ranges, Models: PRG486JDG/01, PRL486JDG/01 6.7.22 Oven Display Module and Light Switch – Removal and Replacement This procedure is for both ovens. To replace an oven light switch and/or display module, access is from the top of the range. -
Page 59: Removal And Replacement Of Back-Accessible Components
Service Manual for the Thermador Pro Grand Next Generation 48-Inch Natural Gas and LP Gas Ranges, Models: PRG486JDG/01, PRL486JDG/01 Figure 88: Removing Oven Light Switch from Display Module 6.8 Removal and Replacement of Back-Accessible Components Figure 87: Oven Light Switch Bezel... -
Page 60: Backguard Removal And Replacement
Service Manual for the Thermador Pro Grand Next Generation 48-Inch Natural Gas and LP Gas Ranges, Models: PRG486JDG/01, PRL486JDG/01 6.8.1 Backguard Removal and Replacement This procedure applies for all backguard models (Lowback, High Backguard with and without shelf, and Island Trim). -
Page 61: Back Panel For Small Oven - Removal And Replacement
Service Manual for the Thermador Pro Grand Next Generation 48-Inch Natural Gas and LP Gas Ranges, Models: PRG486JDG/01, PRL486JDG/01 6.8.2 Back Panel for Small Oven – Removal and Replacement Be sure to check QuickFinder for relevant information, documentation, and the correct part number when replacing this component. -
Page 62: Back Panel For Large Oven - Removal And Replacement
Service Manual for the Thermador Pro Grand Next Generation 48-Inch Natural Gas and LP Gas Ranges, Models: PRG486JDG/01, PRL486JDG/01 6.8.3 Back Panel for Large Oven – Removal and Replacement Be sure to check QuickFinder for relevant information, documentation, and the correct part number when replacing this component. -
Page 63: Electrical Wiring Connections At The Terminal Block
Service Manual for the Thermador Pro Grand Next Generation 48-Inch Natural Gas and LP Gas Ranges, Models: PRG486JDG/01, PRL486JDG/01 6.8.5 Electrical Wiring Connections at the Terminal Block For electrical wiring requirements and safety precautions, refer to the Installation Manual for this appliance. -
Page 64: Removal And Replacement Of Front-Accessible Components
Service Manual for the Thermador Pro Grand Next Generation 48-Inch Natural Gas and LP Gas Ranges, Models: PRG486JDG/01, PRL486JDG/01 6.9.1 Oven Temperature Sensor for Large and Small Ovens – Removal and Replacement For the oven temperature sensors, access is required from the front and side of the range. -
Page 65: Meat Probe Receptacle Components - Removal And Replacement
Service Manual for the Thermador Pro Grand Next Generation 48-Inch Natural Gas and LP Gas Ranges, Models: PRG486JDG/01, PRL486JDG/01 6.9.2 Meat Probe Receptacle Components – Removal and 1. Follow all safety precautions and steps in Preparing the Range for Replacement Servicing, page 22. -
Page 66: Rack Support Removal And Replacement
Service Manual for the Thermador Pro Grand Next Generation 48-Inch Natural Gas and LP Gas Ranges, Models: PRG486JDG/01, PRL486JDG/01 8. From the side of the range, detach the wire connector, and then 6.9.3 Rack Support Removal and Replacement remove the receptacle (see Figure 100 and Figure 101). -
Page 67: Oven Lamp Assembly And Bulb - Removal And Replacement
Service Manual for the Thermador Pro Grand Next Generation 48-Inch Natural Gas and LP Gas Ranges, Models: PRG486JDG/01, PRL486JDG/01 6.9.3.1 Oven Lamp Assembly and Bulb – Removal and Replacement The oven lamp is located inside the oven cavity. To replace the oven lamp assembly, access is from both the front and top of the range. -
Page 68: Removing The Bulb
Service Manual for the Thermador Pro Grand Next Generation 48-Inch Natural Gas and LP Gas Ranges, Models: PRG486JDG/01, PRL486JDG/01 6.9.3.2 Removing the Bulb 6.9.3.3 Removing the Lamp Assembly 1. Follow all safety precautions and steps in Preparing the Range for Servicing, page 22. -
Page 69: Oven Door Removal, Installation, And Alignment
Service Manual for the Thermador Pro Grand Next Generation 48-Inch Natural Gas and LP Gas Ranges, Models: PRG486JDG/01, PRL486JDG/01 7. From inside the oven cavity, remove and retain the screw that 6.9.4 Oven Door Removal, Installation, and Alignment holds the lamp onto the oven cavity (see Figure 106). -
Page 70: Installing The Door
Service Manual for the Thermador Pro Grand Next Generation 48-Inch Natural Gas and LP Gas Ranges, Models: PRG486JDG/01, PRL486JDG/01 5. When the door is lifted sufficiently to clear the hinge hooks, pull 6.9.4.2 Installing the Door the door straight out (see Figure 108), and place it in a safe location. -
Page 71: Aligning The Door
Service Manual for the Thermador Pro Grand Next Generation 48-Inch Natural Gas and LP Gas Ranges, Models: PRG486JDG/01, PRL486JDG/01 6.9.4.3 Aligning the Door 6.9.5 Convection Components – Removal and Replacement On models that have an alignment mechanism as a part of the... - Page 72 Service Manual for the Thermador Pro Grand Next Generation 48-Inch Natural Gas and LP Gas Ranges, Models: PRG486JDG/01, PRL486JDG/01 5. Wearing gloves, rotate the nut clockwise, and then remove the 7. Label, and then detach the two spade connectors on the motor nut, convection fan and shim ring (see Figure 111).
- Page 73 Service Manual for the Thermador Pro Grand Next Generation 48-Inch Natural Gas and LP Gas Ranges, Models: PRG486JDG/01, PRL486JDG/01 Figure 116: Bracket (Three Screws Secured to Motor Shown) Figure 114: Removing Four Bracket Screws on Rear Cover Shield Figure 115: Bracket and Insulation...
-
Page 74: Broil Burner Components - Removal And Replacement
Service Manual for the Thermador Pro Grand Next Generation 48-Inch Natural Gas and LP Gas Ranges, Models: PRG486JDG/01, PRL486JDG/01 6.9.6 Broil Burner Components – Removal and Replacement 6.9.6.1 Hot Surface Igniter for Broil Burner – Removal and Replacement The removal and replacement procedures for the broil burner and the broil burner hot surface igniter (HSI) each require access from the front and back of the range. - Page 75 Service Manual for the Thermador Pro Grand Next Generation 48-Inch Natural Gas and LP Gas Ranges, Models: PRG486JDG/01, PRL486JDG/01 7. From inside of the range, use a 9 mm open end wrench to remove and retain the two nuts with lock washers that secure the HSI retaining bracket onto the broil burner studs and then detach the HSI retaining bracket (see Figure 120).
-
Page 76: Broil Burner Removal And Replacement
Service Manual for the Thermador Pro Grand Next Generation 48-Inch Natural Gas and LP Gas Ranges, Models: PRG486JDG/01, PRL486JDG/01 6.9.6.2 Broil Burner Removal and Replacement 1. Follow all safety precautions and steps in Preparing the Range for Servicing, page 22. -
Page 77: Bake Burner Components (Large Oven) - Removal And Replacement78
Service Manual for the Thermador Pro Grand Next Generation 48-Inch Natural Gas and LP Gas Ranges, Models: PRG486JDG/01, PRL486JDG/01 10. While supporting the broil burner with your hand, first pull it 6.9.7 Bake Burner Components (Large Oven) – Removal and... -
Page 78: Bake Burner Hsi For Large Oven - Removal And Replacement
Service Manual for the Thermador Pro Grand Next Generation 48-Inch Natural Gas and LP Gas Ranges, Models: PRG486JDG/01, PRL486JDG/01 6.9.7.1 Bake Burner HSI for Large Oven – Removal and 4. At the back of the range detach both HSI wire connectors (see Replacement Figure 125). - Page 79 Service Manual for the Thermador Pro Grand Next Generation 48-Inch Natural Gas and LP Gas Ranges, Models: PRG486JDG/01, PRL486JDG/01 8. Remove the reflector from the burner box (see Figure 127). Figure 127: Reflector Figure 128: Bake Burner Brackets 9. Remove and retain the two screws on the straight bracket, and U-shaped bracket (remains fixed on burner box) then remove the straight bracket.
-
Page 80: Bake Burner For Large Oven - Removal And Replacement
Service Manual for the Thermador Pro Grand Next Generation 48-Inch Natural Gas and LP Gas Ranges, Models: PRG486JDG/01, PRL486JDG/01 6.9.7.2 Bake Burner for Large Oven – Removal and Replacement For replacing the bake burner, access is from the front and back of the range. -
Page 81: Bake Burner Orifice And Elbow Connector For Large Oven - Removal And Replacement
Service Manual for the Thermador Pro Grand Next Generation 48-Inch Natural Gas and LP Gas Ranges, Models: PRG486JDG/01, PRL486JDG/01 3. Replace the bake burner, or adjust air shutter as needed (see 3. At the back of the range, from under the range chassis, use an Figure 130, page 81). - Page 82 Service Manual for the Thermador Pro Grand Next Generation 48-Inch Natural Gas and LP Gas Ranges, Models: PRG486JDG/01, PRL486JDG/01 5. From inside the bake burner box, remove and retain the two 8. Replace the orifice and/or elbow connector if needed.
-
Page 83: Bake Burner Components (Small Oven) - Removal And Replacement
Service Manual for the Thermador Pro Grand Next Generation 48-Inch Natural Gas and LP Gas Ranges, Models: PRG486JDG/01, PRL486JDG/01 6.9.8 Bake Burner Components (Small Oven) – Removal and 6.9.8.1 Bake Burner HSI for Small Oven – Removal and Replacement Replacement... - Page 84 Service Manual for the Thermador Pro Grand Next Generation 48-Inch Natural Gas and LP Gas Ranges, Models: PRG486JDG/01, PRL486JDG/01 5. Remove oven door (see Removing the Door, page 70). 6. Remove all the oven racks. 7. Remove kick panel (see Kick Panel Removal and Replacement, page 91).
-
Page 85: Bake Burner For Small Oven - Removal And Replacement
Service Manual for the Thermador Pro Grand Next Generation 48-Inch Natural Gas and LP Gas Ranges, Models: PRG486JDG/01, PRL486JDG/01 Figure 139: Removing the HSI Screws Figure 138: Bracket and Screws (Shown from Under Cavity) 6.9.8.2 Bake Burner for Small Oven – Removal and... -
Page 86: Bake Burner Orifice And Elbow Connector For Small Oven - Removal And Replacement
Service Manual for the Thermador Pro Grand Next Generation 48-Inch Natural Gas and LP Gas Ranges, Models: PRG486JDG/01, PRL486JDG/01 1. Perform steps 1–12 of the Bake Burner HSI for Small Oven – 6.9.8.3 Bake Burner Orifice and Elbow Connector for Small Removal and Replacement procedure, page 84. -
Page 87: Door Interior Cleaning
Service Manual for the Thermador Pro Grand Next Generation 48-Inch Natural Gas and LP Gas Ranges, Models: PRG486JDG/01, PRL486JDG/01 4. At the back of the range, from under the range chassis use an 10. When installing the bake burner, make sure that it fits correctly... -
Page 88: Oven Door Components - Removal And Replacement
Service Manual for the Thermador Pro Grand Next Generation 48-Inch Natural Gas and LP Gas Ranges, Models: PRG486JDG/01, PRL486JDG/01 6.9.10 Oven Door Components – Removal and Replacement Be sure to check QuickFinder for relevant information, documentation, and correct part numbers when replacing any of these components. -
Page 89: Door Gasket Removal And Replacement
Service Manual for the Thermador Pro Grand Next Generation 48-Inch Natural Gas and LP Gas Ranges, Models: PRG486JDG/01, PRL486JDG/01 5. At the base of the door assembly, gently lift the inner glass panel 6.9.11 Door Gasket Removal and Replacement upward slightly while removing the two lower retaining brackets that are positioned around the door hinges (see Figure 145). -
Page 90: Kick Panel Removal And Replacement
Service Manual for the Thermador Pro Grand Next Generation 48-Inch Natural Gas and LP Gas Ranges, Models: PRG486JDG/01, PRL486JDG/01 6.9.12 Kick Panel Removal and Replacement NOTE: The wiring diagram for the range is located on the back side of the kick panel (see Wiring Diagram, page 6). -
Page 91: Clean-Up
Service Manual for the Thermador Pro Grand Next Generation 48-Inch Natural Gas and LP Gas Ranges, Models: PRG486JDG/01, PRL486JDG/01 CLEAN-UP ADDITIONAL RESOURCES After you have finished servicing an appliance, clean up grease, fingerprints, and other residue that is present as the result of servicing 9.1 QuickFinder...
Need help?
Do you have a question about the PRG486JDG/01 and is the answer not in the manual?
Questions and answers