Table of Contents
Advertisement
Quick Links
Main power switch
1
Program selector
2
Heavy wash
3
Intensive wash
4
Eco wash
5
Quick wash
6
Rinse
7
Safety instructions ............................................
Before washing for the first time .......................
Loading the dishwasher ....................................
Using the dishwasher .......................................
Settings .............................................................
Care and cleaning ............................................
Troubleshooting ................................................
Installation ........................................................
Service ..............................................................
Information for test institute ..............................
Technical information ........................................
AU
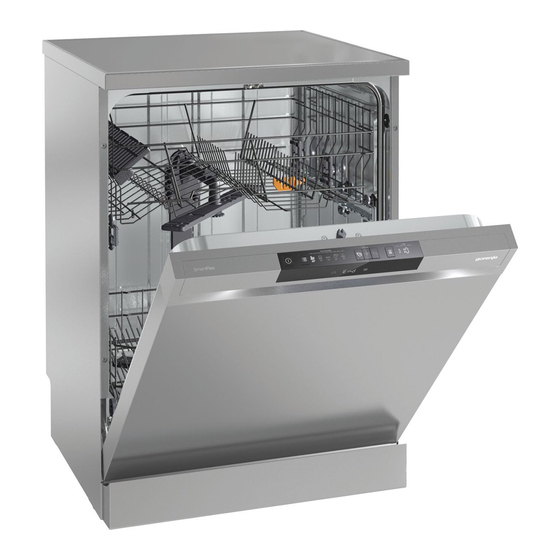
Operating Instructions
Dishwasher
GS63160AU
SpeedWash
8
Extra dry
9
Half load
10
Delayed start
11
Display
12
Rinse aid indicator
13
2
3
3
4
8
9
11
14
17
17
20
Advertisement
Table of Contents

Related Manuals for Gorenje GS63160AU


Summary of Contents for Gorenje GS63160AU
-
Page 1: Table Of Contents
Operating Instructions Dishwasher GS63160AU Main power switch SpeedWash Program selector Extra dry Heavy wash Half load Intensive wash Delayed start Eco wash Display Quick wash Rinse aid indicator Rinse Safety instructions ..........Before washing for the first time ....... Loading the dishwasher ........ -
Page 2: Safety Instructions
Safety instructions General WARNING! • Read the operating instructions and keep them in a safe place! Dishwasher detergents are strongly alkaline. They can be extremely dangerous if swallowed. Avoid contact with • Never use the dishwasher for any purpose other skin and eyes and keep children away from the dishwash- than that specified in these operating instructions. -
Page 3: Before Washing For The First Time
Before washing for the first time Loading the dishwasher Checking water hardness Economic dishwashing Contact the local water utility to check the water hardness Do not start the dishwasher until it is fully loaded in order • in your area. This is important with regard to how much de- to save energy. -
Page 4: Using The Dishwasher
Using the dishwasher Add detergent Turn the basket catch outwards at the end of both run- ners. Grip the upper basket with both hands, pull it out, and move the upper basket to its other position. Turn the basket catch on either side in to lock the basket in place. - Page 5 PROGRAMS - Choose program Delayed start Press the Program selector one or more times until the de- When you select Delayed start the dishwasher will start 1- sired program symbol is lit up. 24 hours after you close the door. Press the button once to activate Delayed start.
-
Page 6: Once The Program Has Finished
Activate the Extra dry option. • Open the door a little once the program has finished. • Allow the dishes to cool before unloading the dishwash- • Once the program has finished Once the program has finished, “End” appears on the dis- play. -
Page 8: Settings
Settings Open the Settings menu: First, open the door. Turn off the machine. Press and hold the main power switch until the display lights Within 10 seconds: - press the Program selector and the option button for SpeedWash. The display shows the Settings menu (current setting and its currently set value). (Exit the menu by browsing through the menu or pressing the main power switch.) Navigate the Settings menu: Press to save the set value and continue to the... -
Page 9: Care And Cleaning
Care and cleaning Coarse filter In order to inspect the drainage pump, remove the coloured stop on the right in the bottom drain. The coarse filter traps larger food particles, which cannot get past the drainage pump. Empty the coarse filter as By inserting your finger into the hole you can turn the necessary. - Page 10 Spray arms Unscrew the spray arm bearings counterclockwise to remove the spray arm from the upper basket. Holes and bearings can sometimes become blocked. Re- move any debris using a pin or something similar. The spray arms also have holes on their undersides. Door When cleaning the edge around the door, use only a To facilitate cleaning, you can remove the spray arms.
-
Page 11: Troubleshooting
Troubleshooting Type of fault on the display Action Overfilling Clear the drainage pump. See the chapter Care and cleaning. If the problem persists, call the service department. Water outlet fault See “Water remains in the dishwasher” in the table “Problem” below. If the problem persists, call the service department. - Page 12 Problem Possible causes Action The dishes are not clean. The spray arms do not rotate. Remove the arms and clean them. Check that the dishes are not blocking the spray arms. Old detergent. Detergent is a perishable Avoid large packages. product.
- Page 13 Problem Possible causes Action Water remains in the dishwasher. Blocked drainage hose. Loosen the drainage hose where it con- nects to the sink unit's water trap. Check that no debris has fastened. Is the cone- shaped part of the pipe cut to an inner diameter of at least 14 mm? Kink in drainage hose.
-
Page 14: Installation
Installation [mm] 1214 Safety instructions Transport protection for the door Connections to electricity, water and drainage must be Do not forget to remove the transport protection for the door • performed by a qualified professional. when unpacking the dishwasher. Always follow applicable regulations for water, drainage •... -
Page 15: Placing The Dishwasher
Placing the dishwasher The dishwasher is intended for freestanding installation, but can also be installed under a worktop. Adjust the height and slide the dishwasher into place Make any final adjustments to the front feet (the dish- 24 mm washer may not lean more than 5 mm). Once the feet are properly adjusted, adjust the anti-tip feet to sit firmly against the floor. -
Page 16: Connection To Water Supply
The hose must always discharge at least 350 mm above The electric wall socket must be placed outside of the instal- the bottom of the machine. lation area to be easily accessible after installing the dish- washer. Do not use an extension cord! Ensure that the drainage hose has no kinks. -
Page 17: Service
Service Information for test institute Request test institute information via e-mail Read the chapter Troubleshooting before contacting the dishwashers@appliance-development.com. service department. Provide the details on the compliance plate in all contact. Include the item number (1) and the se- The request should include the details on the product’s se- rial number (2). - Page 18 Your notes...
- Page 19 Your notes...
-
Page 20: Technical Information
Technical data Height: 848-898 mm Width: 600 mm Depth: 596 mm Capacity: 14 Place settings Water pressure: 0.03–1.0 MPa Electrical connection: See compliance plate Rated power: See compliance plate In accordance with standard, AS/NZS 2007. www.gorenje.com en (01-17)
Need help?
Do you have a question about the GS63160AU and is the answer not in the manual?
Questions and answers