Lennox XP15-024 Installation Instructions Manual
Xp15 series heat pump units
Hide thumbs
Also See for XP15-024:
- Brochure & specs (4 pages) ,
- Installation instructions manual (28 pages)
Table of Contents
Advertisement
E2009 Lennox Industries Inc.
Dallas, Texas, USA
RETAIN THESE INSTRUCTIONS
FOR FUTURE REFERENCE
WARNING
Improper
installation,
service or maintenance can cause property damage,
personal injury or loss of life. Installation and
service must be performed by a qualified installer or
service agency.
CAUTION
Physical contact with metal edges and corners
while applying excessive force or rapid motion can
result in personal injury. Be aware of, and use
caution when working near these areas during
installation or while servicing this equipment.
IMPORTANT
This unit must be matched with an indoor coil as
specified in Lennox' Engineering Handbook.
Coils previously charged with HCFC−22 must be
flushed.
IMPORTANT
The Clean Air Act of 1990 bans the intentional
venting of refrigerant (CFCs, HCFCs AND HFCs) as
of July 1, 1992. Approved methods of recovery,
recycling or reclaiming must be followed. Fines
and/or
incarceration
noncompliance.
06/09
*2P0609*
adjustment,
alteration,
may
be
levied
for
INSTALLATION
INSTRUCTIONS
Dave Lennox Signature
Collection XP15 Units
HEAT PUMP UNITS
505,328M
06/09
Supersedes 05/09
Table of Contents
. . . . . . . . . . . . . . . . . . . . . . . . . . . . . . .
. . . . . . . . . . . . . . . . . . . . . . . . . . . . . . .
. . . . . . . . . . . . . . . . . . . . . . . . . . . . . . . . . .
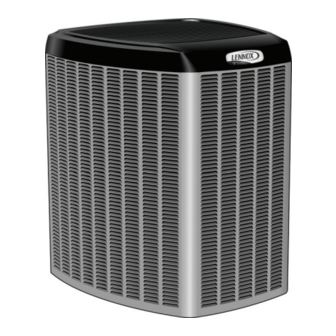
XP15 Outdoor Unit
The Lennox XP15 outdoor units use HFC−410A
refrigerant. This unit must be installed with a matching
indoor coil and line set as outlined in the Lennox
Engineering Handbook. XP15 series outdoor units are
designed for use in check expansion valve (CTXV)
systems only, and are not designed to be used with other
refrigerant flow control devices. The Lennox Engineering
Handbook lists compatible indoor CTXV kits which are
ordered separately.
Shipping and Packing List
1 − Assembled XP15 outdoor unit
1 − Bushing (for low voltage wiring)
2 − Grommets (for liquid and vapor lines)
Check equipment for shipping damage. If you find any
damage, immediately contact the last carrier.
Page 1
. . . . . . . . . . . . . . . . . . . . . . . . . . . .
. . . . . . . . . . . . . . . . . . . . . .
. . . . . . . . . . . . . . . . . . . . . . . . . . .
. . . . . . . . . . . . . . . . . .
. . . . . . . . . . . . . . . . . . . . . . . . . . . . . .
. . . . . . . . . . . . . . . . . . . . . . . . .
. . . . . . . . . . . . . . . . . . .
. . . . . . . . . . . . . . . . . . .
. . . . . . . . . . . . . . . . . . . . . . . . . . . . . .
. . . . . . . . . . . . . .
. . . . . . . . . . . . . . . . . . . . . . .
. . . . . . . . . . . . . . .
. . . . . . . . . . . . . . . . . . . . . . . . .
. . . . . . . . . . . . . . . . . . . . . . . . . . .
. . . . . . . . . . . . . . . . . . . . . . . . . . . .
. . . . . . . . . . . . . . . . . . . . . . . .
. . . . . . . . . . . . .
505,328M
*P505328M*
®
Litho U.S.A.
1
1
2
2
. . . . .
4
5
6
7
9
11
. . .
11
11
12
12
. . . . . . .
13
14
14
15
19
. . . . . . .
19
21
26
26
28
Advertisement
Table of Contents


Need help?
Do you have a question about the XP15-024 and is the answer not in the manual?
Questions and answers