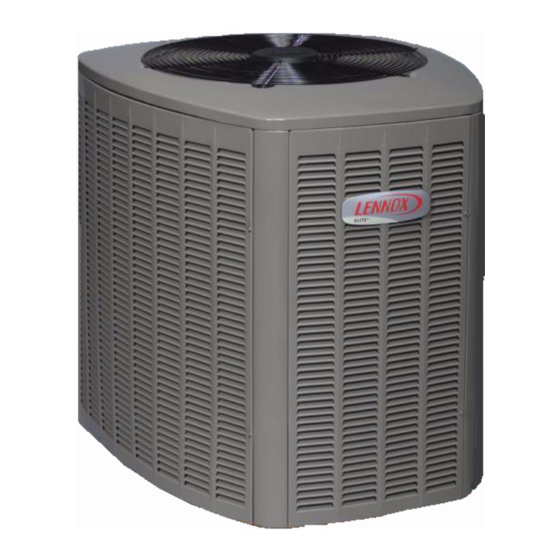
Lennox XP14 Elite Series Installation Instructions Manual
Xp14 elite series heat pump
Hide thumbs
Also See for XP14 Elite Series:
- Installation instructions manual (26 pages) ,
- Unit information (23 pages) ,
- Brochure & specs (4 pages)
Table of Contents
Advertisement
E2010 Lennox Industries Inc.
Dallas, Texas, USA
RETAIN THESE INSTRUCTIONS
FOR FUTURE REFERENCE
WARNING
Improper
installation,
service or maintenance can cause personal injury,
loss of life, or damage to property.
Installation and service must be performed by a
qualified installer or service agency.
CAUTION
Physical contact with metal edges and corners
while applying excessive force or rapid motion can
result in personal injury. Be aware of, and use
caution when working near these areas during
installation or while servicing this equipment.
IMPORTANT
The Clean Air Act of 1990 bans the intentional
venting of refrigerant (CFCs, HFCs, and HCFCs) as
of July 1, 1992. Approved methods of recovery,
recycling or reclaiming must be followed. Fines
and/or
incarceration
noncompliance.
IMPORTANT
This unit must be matched with an indoor coil as
specified in Lennox' Engineering Handbook.
Coils previously charged with HCFC−22 must be
flushed.
03/10
*2P0310*
adjustment,
alteration,
may
be
levied
for
INSTALLATION
INSTRUCTIONS
XP14 Elite
HEAT PUMP UNITS
505,244M
03/10
Supersedes 10/09
Table of Contents
. . . . . . . . . . . . . . . . . . . . . . . . . . . . . . .
. . . . . . . . . . . . . . . . . . . . . . . . . . . . . . . . . . . . .
. . . . . . . . . . . . . . . . . . . . . . . . . . . . . . . .
. . . . . . . . . . . . . . . . . . . . . . . . . . . . . . . . . .
. . . . . . . . . . . . . . . . . . . . . . . . . . . . . . . . . . .
. . . . . . . . . . . . . . . . . . . . . . . . . . . . . . . . . . . . . .
. . . . . . . . . . . . . . . . . . . . . . . . . . . . . . .
. . . . . . . . . . . . . . . . . . . . . . . . . . . . . . . . . .
XP14 Outdoor Unit
The XP14 outdoor unit uses HFC−410A HFC refrigerant.
This unit must be installed with a matching indoor blower
coil and line set as outlined in the Lennox Engineering
®
Handbook. Elite
for use in check expansion valve (CTXV) systems only and
are not to be used with other refrigerant flow control
devices. An expansion valve approved for use with
HFC−410A must be ordered separately and installed prior
to operating the unit.
Shipping and Packing List
1 − Assembled XP14 outdoor unit
Check the unit components for shipping damage. If you
find any damage, immediately contact the last carrier.
Page 1
®
Series Units
. . . . . . . . . . . . . . . . . . . . . . . . . . . .
. . . . . . . . . . . . . . . . . . . . . .
. . . . . . . . . . . . . . . . . . . . . . . . . . .
. . . . . . . . . . . . . . . . . . . . . . . . . . . . .
. . . . . . . . . . . . . . . . . . . . . . . . . . . . .
. . . . . . . . . . . . . . . . . . . .
. . . . . . . . . . . . . . . . . . . . . . . . . . .
. . . . . . . . . . . . . . . . . . . . . . . . . . . .
. . . . . . . . . . . .
. . . . . . . . . .
. . . . . . . . . . . . . . . . . . . . . . . . . . . . . .
. . . . . . . . . . . . . . . . . . . . . . . . . . . .
. . . . . . . . . . . . . . . . . . . . . . . . . . . . . .
. . . . . . . . . . . . . .
Series XP14 outdoor units are designed
505,244M
*P505244M*
Litho U.S.A.
1
1
. . . . . . . . .
2
3
3
5
6
8
. . . . . . . .
10
11
12
12
13
13
14
14
14
15
15
15
19
24
24
26
Advertisement
Table of Contents

Related Manuals for Lennox XP14 Elite Series


Summary of Contents for Lennox XP14 Elite Series
-
Page 1: Table Of Contents
The Clean Air Act of 1990 bans the intentional This unit must be installed with a matching indoor blower venting of refrigerant (CFCs, HFCs, and HCFCs) as coil and line set as outlined in the Lennox Engineering of July 1, 1992. Approved methods of recovery, ®... -
Page 2: Unit Dimensions And Parts Arrangement
Unit Dimensions − Inches (mm) and Parts Arrangement CAPACITOR DEFROST BOARD OUTDOOR FAN CONTACTOR COMPRESSOR REVERSING SUCTION LINE HIGH PRESSURE VALVE SWITCH CONNECTION FILTER DRIER/ VAPOR LINE LIQUID LINE CONNECTIONS LIQUID LINE CONNECTION VAPOR VALVE AND TOP VIEW GAUGE PORT/SUCTION LINE CONNECTIONS PARTS ARRANGEMENT DISCHARGE AIR... -
Page 3: General Information
Í Í Í Í Í Í Í Í Í Í Í Í Í Í supervisor. Í Í Í Í Í Í Í Í Í Í Í Í Í Í Lennox Industries Inc., PO Box 79011, Dallas, TX Í Í Í Í Í Í Í Í Í Í Í Í Í Í 75379−9011... - Page 4 ELEVATING THE UNIT (SMALL−BASE UNITS) NOTE − Keep the height of extenders short enough to ensure a sturdy installation. If it is necessary to extend If additional elevation is necessary, raise the unit by further, consider a different type of field−fabricated extending the length of the unit support feet.
-
Page 5: Removing Panels
With unit positioned at installation site, remove two side Removing Panels louvered panels to expose the unit base pan. Install the Remove the louvered panels as follows: brackets as illustrated in figure 6 using conventional 1. Remove two screws, allowing the panel to swing open practices;... -
Page 6: Electrical
4. Units are approved for use only with copper MAINTAIN MINIMUM PANEL ANGLE (AS CLOSE TO PARALLEL WITH THE UNIT conductors. (A complete unit wiring diagram is AS POSSIBLE) WHILE INSTALLING PANEL. located inside the unit control box cover.) HOLD DOOR FIRMLY TO THE HINGED ANGLE MAY BE TOO SIDE TO MAINTAIN EXTREME... - Page 7 Thermostat Indoor Unit Outdoor Unit Thermostat Indoor Unit Outdoor Unit 24V power 24V power 24V power 24V power common common common common EMERGENCY HEAT RELAY 1st-stage 1st-stage emergency heat OUTDOOR auxiliary heat auxiliary heat THERMOSTAT 1st-stage 1st-stage auxiliary heat auxiliary heat indoor blower indoor blower reversing valve...
-
Page 8: Refrigerant Piping
Figure 15 on page 9 shows how to install line sets on horizontal runs. NOTE − When installing refrigerant lines, refer to Lennox Figure 16 on page 9 shows how to install line sets Refrigerant Piping Guide (Corp. 9351−L9) or Lennox on vertical runs. - Page 9 TO HANG LINE SET FROM JOIST OR WIRE TIE RAFTER, USE EITHER METAL STRAPPING ANCHORED HEAVY (AROUND MATERIAL OR ANCHORED HEAVY NYLON NYLON WIRE TIE SUCTION LINE WIRE TIES. ONLY) 8 FEET STRAPPING MATERIAL (AROUND SUCTION LINE ONLY) FLOOR JOIST OR WALL ROOF RAFTER TAPE OR...
-
Page 10: Flushing Existing Line Set And Indoor Coil
Take care to empty all that the entire system is completely void of existing traps. refrigerant. Polyol ester (POE) oils are used in Lennox units Disconnect the liquid and vapor lines from the charged with HFC−410A refrigerant. Residual existing outdoor unit. -
Page 11: Refrigerant Metering Device
RECOVERY MACHINE (CTXV) systems only. See indoor coil installation Inverted HCFC−22 cylinder with clean refrigerant to the instructions and the Lennox engineering handbook for suction service valve. HCFC−22 gauge set (low side) to the liquid line valve. approved HFC−410A valve match−ups and application HCFC−22 gauge set center port to inlet on the recovery... -
Page 12: Manifold Gauge Set
DISTRIBUTOR OUTDOOR UNIT NOTE − ARROWS INDICATE DIRECTION OF REFRIGERANT FLOW REVERSING VALVE CHECK EXPANSION VALVE BIFLOW FILTER / DRIER OUTDOOR COIL HUGH PRESSURE PRESSURE INDOOR UNIT MUFFLER VAPOR GAUGE MANIFOLD SERVICE VAPOR VAPOR PORT SERVICE LINE PORT VALVE LIQUID HFC−410 LINE COMPRESSOR... -
Page 13: Leak Testing
2. With both manifold valves closed, connect the cylinder STEM of HFC−410A refrigerant. Open the valve on the OUTDOOR HFC−410A cylinder (vapor only). USE ADJUSTABLE WRENCH COIL TO OPEN: ROTATE STEM STEM 3. Open the high pressure side of the manifold to allow COUNTER-CLOCKWISE 90°. -
Page 14: Start−Up
NOTE − The term absolute pressure means the total 4. Replace stem caps and secure finger tight, then actual pressure within a given volume or system, tighten an additional (1/6) one-sixth of a turn. above the absolute zero of pressure. Absolute 5. -
Page 15: Setup For Checking And Adding Charge
Adding Charge for Indoor Match−Up Table 5 lists all 3. Weigh in the unit nameplate charge plus any charge the Lennox recommended indoor unit matches along with required for line set differences from 15 feet and any extra indoor unit match−up amount per table 5. (If the charge levels for the various sizes of outdoor units. - Page 16 Table 5. Adding Charge per Indoor Unit Match using Subcooling Method 1 Check the airflow as illustrated in figure 23 on page 15 to be sure the indoor airflow is as required. (Make any air flow adjustments before continuing with the following procedure.) cooling 2 Measure outdoor ambient temperature;...
- Page 17 Table 6. Air Handler/Coil Matchups and Target Subcooling Target Target Target *Add *Add *Add Subcooling Subcooling Subcooling INDOOR MATCHUPS INDOOR MATCHUPS INDOOR MATCHUPS charge charge charge Heating Cooling Heating Cooling Heating Cooling (+5ºF) (+1ºF) (+5ºF) (+1ºF) (+5ºF) (+1ºF) XP14−018 XP14−030 (Continued) XP14−042 (Continued) CBX27UH−018/024 CH33−42B...
- Page 18 Table 7. Normal Operating Pressures − Liquid +10 and Vapor +5 PSIG* (Cooling) XP14−018 XP14−024 XP14−030 XP14−036 XP14−042 XP14−048 XP14−060 Liquid / Vapor Liquid / Vapor Liquid / Vapor Liquid/ Vapor Liquid / Vapor Liquid / Vapor Liquid / Vapor 5F (5C)** Heating 60 (15)
-
Page 19: Defrost System
Defrost System Note − Component Locations Vary by Board Manufacture TEST PINS DEFROST SYSTEM DESCRIPTION DEFROST TERMINATION AMBIENT The demand defrost controller measures differential PIN SETTINGS THERMOSTAT PINS temperatures to detect when the system is performing SENSOR PLUG IN (COIL, AMBIENT, poorly because of ice build−up on the outdoor coil. - Page 20 Table 9. Defrost Control Board Description Low Ambient Thermostat Pins − P3 provides selection of the Y2 compressor lock−in temperature. The XP14 series Description heat pumps do not use a Y2 compressor and therefore O Out 24 VAC output connection for reversing valve these pins are not active.
- Page 21 TEST JUMPER Placing the jumper on the field test pins (E33) allows the technician to: Clear short cycle lockout Clear five−strike fault lockout Cycle the unit in and out of defrost mode Place the unit in defrost mode to clear the coil When Y1 is energized and 24V power is being applied to the Control, a test cycle can be initiated by placing a jumper on the Control’s TEST pins for 2 to 5 seconds.
- Page 22 DEFROST BOARD DEFROST SENSOR HARNESS AMBIENT SENSOR Figure 26. Sensor Locations Page 22 505244M 10/09...
- Page 23 DEFROST BOARD DIAGNOSTICS See table 10 to determine defrost board operational conditions and to diagnose cause and solution to problems. Table 10. Defrost Control Board Diagnostic LEDs Condition/Code Possible Cause(s) Solution Green Check control transformer power (24V). No power (24V) to board terminals R Power problem If power is available to board and LED(s) do not and C or board failure.
-
Page 24: Maintenance
30 minutes and the actual difference between the clear coil and frosted coil temperatures exceeds the 1. Air Filter Ask your Lennox dealer to show you where maximum difference allowed by the control, a defrost your indoor unit’s filter is located. It will be either at the cycle will be initiated. - Page 25 NOTE − If you are unsure about the filter required for HEAT PUMP OPERATION your system, call your Lennox dealer for assistance. Your new Lennox heat pump has several characteristics that you should be aware of:...
-
Page 26: Start-Up And Performance Checklist
The temperature indicator displays the actual room temperature. Loss of charge kit Programmable Thermostats High pressure switch kit Your Lennox system controlled Mild weather kit programmable thermostat. These thermostats provide the Compressor monitor added feature of programmable time-of-day setpoints for Compressor crankcase heater both heating and cooling.
Need help?
Do you have a question about the XP14 Elite Series and is the answer not in the manual?
Questions and answers