
Related Manuals for Citizen CL-S321 Series


Summary of Contents for Citizen CL-S321 Series
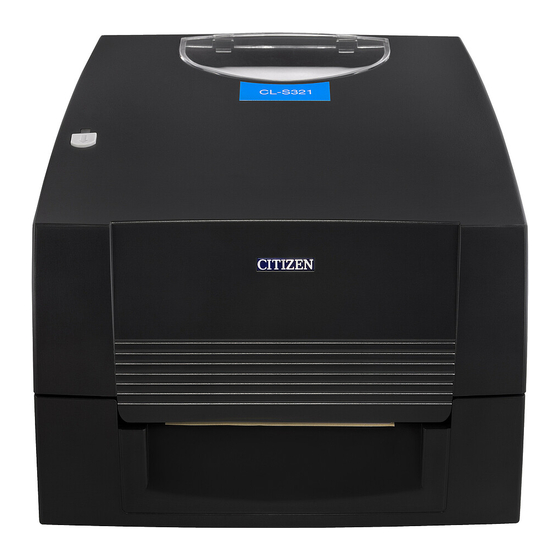
- Page 1 Service Manual Thermal Transfer Barcode & Label Printer CL-S321 Series Revision 1.00 2015.1.7...
- Page 3 CL-S321 Series Service Manual REVISIONS Rev No. Date Page Comment 1.00 2015/1/7 Newly issued CITIZEN is a registered trademark of CITIZEN HOLDINGS CO., LTD., Japan. CITIZEN es una marca registrada de Citizen Holdings Co., Japón. - i -...
-
Page 4: Table Of Contents
CL-S321 Series Service Manual CONTENTS INTRODUCTION .................... 1 SERVICE PARTS LIST ................1 1-1. Parts List ..........................1 1-2. Parts Diagrams ........................2 (1)“SA MAIN PCB 1 SP 321(PPS00173-00)”, (2)“SA MAIN PCB 2 SP 321(PPS00174-00)” ... 3 (3)“SA MOTOR SP 321(PPF80007-00)” ................3 (4)“SA PLATEN SP 321(PPK90017-00)”... -
Page 5: Introduction
CL-S321 Series Service Manual INTRODUCTION This manual describes the disassembly and reassembly procedures of CL-S321 Series. SERVICE PARTS LIST Remarks: When placing an order for service parts, refer to the Parts Price List published separately. If you need the Parts Price List, consult the local distributor from whom you purchased this product. -
Page 6: Parts Diagrams
CL-S321 Series Service Manual 1-2. Parts Diagrams (9)(10) (1)(2) - 2 -... -
Page 7: Sa Main Pcb 1 Sp 321(Pps00173-00)", (2)"Sa Main Pcb 2 Sp 321(Pps00174-00)
CL-S321 Series Service Manual (1)“SA MAIN PCB 1 SP 321(PPS00173-00)”, (2)“SA MAIN PCB 2 SP 321(PPS00174-00)” To disassembly procedure (3)“SA MOTOR SP 321(PPF80007-00)” To disassembly procedure - 3 -... -
Page 8: Sa Platen Sp 321(Ppk90017-00)
CL-S321 Series Service Manual (4)“SA PLATEN SP 321(PPK90017-00)” To disassembly procedure (5)“SA LABEL SENSOR SP 321(PPS00175-00)” To disassembly procedure - 4 -... -
Page 9: Sa Feed Swich Sp 321(Ppt00011-00)
CL-S321 Series Service Manual (6)“SA FEED SWICH SP 321(PPT00011-00)” To disassembly procedure (7)“SA RIBBON SENSOR SP 321(PPS00176-00)” To disassembly procedure - 5 -... -
Page 10: Sa Ribbon Holder Sp 321(Ppm40002-00)
CL-S321 Series Service Manual (8)“SA RIBBON HOLDER SP 321(PPM40002-00)” To disassembly procedure (9)“SA HEAD 1 SP 300(PPM80012-00)”, (10)“SA HEAD 1 SP 331(PPM80013-00)” To disassembly procedure - 6 -... -
Page 11: Disassembly And Reassembly
CL-S321 Series Service Manual DISASSEMBLY AND REASSEMBLY Note the following items when performing maintenance of the printer. Do not disassemble, reassemble, or adjust the printer unnecessarily when the printer operation is satisfactory. Do not loosen the screws that fasten the components unless it is absolutely necessary. -
Page 12: Disassembly Procedure
CL-S321 Series Service Manual 2-2. Disassembly Procedure (1)“SA MAIN PCB 1 SP 321(PPS00173-00)”, (2)“SA MAIN PCB 2 SP 321(PPS00174-00)” Lift up the bottom cover gently from the cut-out portion Unscrew and take out 3 screws on the bottom by using a flat-head screw driver. -
Page 13: Sa Motor Sp 321(Ppf80007-00)
CL-S321 Series Service Manual (3)“SA MOTOR SP 321(PPF80007-00)” Lift up the bottom cover gently from the cut-out portion Unscrew and take out 3 screws on the bottom by using a flat-head screw driver. cover. Hooks Pull up the main board. - Page 14 CL-S321 Series Service Manual Lift up the mechanism*. A flat-head screw driver may help to lever up. *The mechanism is held by two hooks on the other side. Press to release when lifting up the mechanism. Unscrew them and take out the motor.
-
Page 15: Sa Platen Sp 321(Ppk90017-00)
CL-S321 Series Service Manual (4)“SA PLATEN SP 321(PPK90017-00)” <Assembly Order> Lift up the bottom cover gently from the cut-out portion Unscrew and take out 3 screws on the bottom by using a flat-head screw driver. cover. Hooks Pull up the main board. - Page 16 CL-S321 Series Service Manual Unplug cables. Unscrew and take off the ESD cable. Lift up the mechanism*. A flat-head screw driver may help to lever up. *The mechanism is held by two hooks on the other side. Press to release when lifting up the mechanism.
- Page 17 CL-S321 Series Service Manual Take out another e-ring, a washer and a bracket. On the other side, unscrew and take out the ESD cable. Take out the bracket. Take out the e-ring and a washer. - 13 -...
-
Page 18: Sa Label Sensor Sp 321(Pps00175-00)
CL-S321 Series Service Manual (5)“SA LABEL SENSOR SP 321(PPS00175-00)” Lift up the bottom cover gently from the cut-out portion Unscrew and take out 3 screws on the bottom by using a flat-head screw driver. cover. The sensor is held by two hooks. -
Page 19: Sa Feed Swich Sp 321(Ppt00011-00)
CL-S321 Series Service Manual (6)“SA FEED SWICH SP 321(PPT00011-00)” Take out the screws and lift up. Open the top cover. The LED guide rod and the button are held by three screws. Lift up the bottom cover gently from the cut-out portion In order to reach the FEED switch module, open by using a flat-head screw driver. - Page 20 CL-S321 Series Service Manual Lift up the mechanism*. A flat-head screw driver may help to lever up. *The mechanism is held by two hooks on the other side. Press to release when lifting up the mechanism. The FEED switch module is held by two screws.
-
Page 21: Sa Ribbon Sensor Sp 321(Pps00176-00)
CL-S321 Series Service Manual (7)“SA RIBBON SENSOR SP 321(PPS00176-00)” Take out the screws and lift up. Open the top cover. The LED guide rod and the button are held by three screws. Lift up the bottom cover gently from the cut-out portion by Open the bottom cover. - Page 22 CL-S321 Series Service Manual Lift up the mechanism*. A flat-head screw driver may help to lever up. *The mechanism is held by two hooks on the other side. Press to release when lifting up the mechanism. The ribbon sensor is held by one screw.
-
Page 23: Sa Ribbon Holder Sp 321(Ppm40002-00)
CL-S321 Series Service Manual (8)“SA RIBBON HOLDER SP 321(PPM40002-00)” *Note that this part does NOT include sensors, the print head or the lower mechanism. Unscrew and take out the ESD cable. Open the top cover and unscrew to release the TPH. - Page 24 CL-S321 Series Service Manual Note that the connector joint is very soft and vulnerable. Hold the connector plastic when handling. Do not touch the head elements by bare fingers. Take out the E-ring to release the TPH holder. - 20 -...
- Page 25 CL-S321 Series Service Manual Lift up the bottom cover gently from the cut-out portion by Unscrew and take out 3 screws on the bottom using a flat-head screw driver. cover. Hooks Pull up the main board. The main board is held by two points with the body frame.
- Page 26 CL-S321 Series Service Manual Lift up the mechanism*. A flat-head screw driver may help to lever up. *The mechanism is held by two hooks on the other side. Press to release when lifting up the mechanism. Take out the e-rings on the both sides of hinge.
- Page 27 CL-S321 Series Service Manual Push the spindle from right. Left side has a bracket. To completely isolate the SA RIBBON HOLDER SP 321, cut the cable ties and remove all cables. - 23 -...
-
Page 28: Sa Head 1 Sp 300(Ppm80012-00)", (10)"Sa Head 1 Sp 331(Ppm80013-00)
CL-S321 Series Service Manual (9)“SA HEAD 1 SP 300(PPM80012-00)”, (10)“SA HEAD 1 SP 331(PPM80013-00)” Unscrew and take out the ESD cable. Open the top cover and unscrew to release the TPH. The TPH cover has two hooks on the both sides. - Page 29 CL-S321 Series Service Manual Note that the connector joint is very soft and vulnerable. Hold the connector plastic when handling. Do not touch the head elements by bare fingers. - 25 -...
-
Page 30: Assembly Procedure
CL-S321 Series Service Manual 2-3. Assembly Procedure When reassembling the parts, follow the procedure of “1-2 Disassembly Procedure” in reverse. - 26 -... -
Page 31: Troubleshooting
CL-S321 Series Service Manual TROUBLESHOOTING 3-1. Error Indication When an error occurs on the printer, the LED indicates the status by its color and the way of lighting. Orange Fast Flashing Slow Flashing Solid LED Indication Status Description Solution Set the paper properly and run the Unable to detect paper.
Need help?
Do you have a question about the CL-S321 Series and is the answer not in the manual?
Questions and answers