Table of Contents
Advertisement
Quick Links
Advertisement
Table of Contents

Subscribe to Our Youtube Channel
Related Manuals for Fluke 725Ex


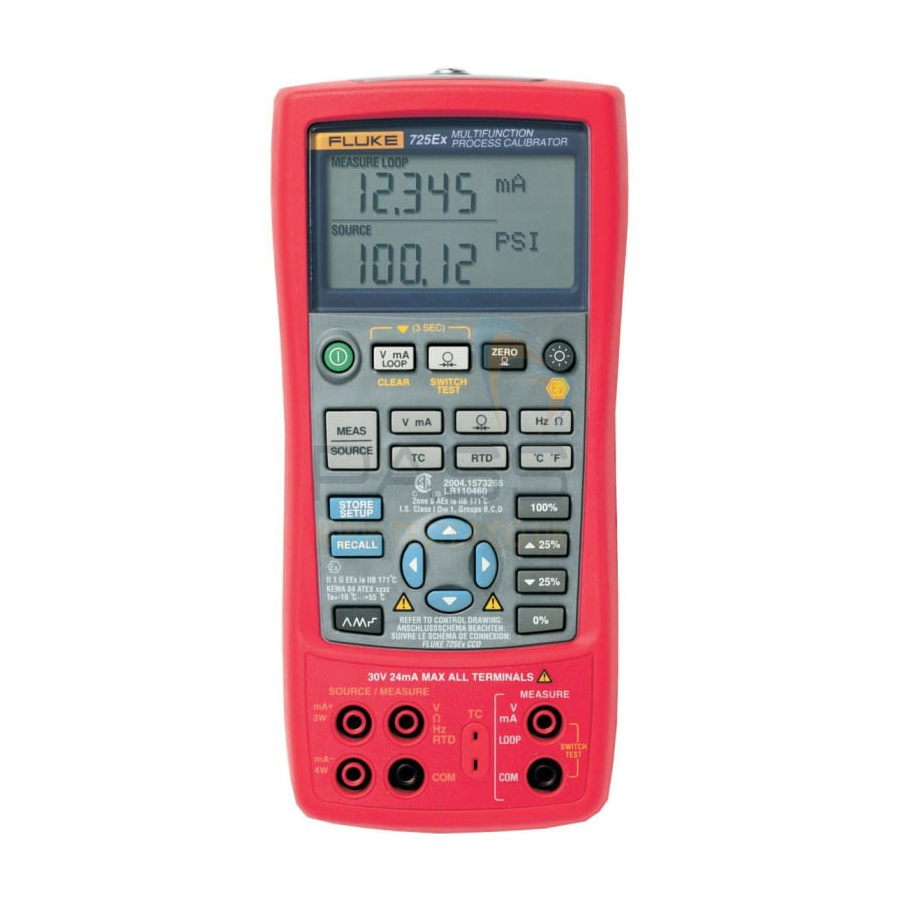
Summary of Contents for Fluke 725Ex
- Page 1 725Ex Multifunction Process Calibrator Calibration Manual PN 2406553 January 2005 Rev. 1, 5/09 © 2005, 2009 Fluke Corporation. All rights reserved. Printed in USA. Specifications are subject to change without notice. All product names are trademarks of their respective companies.
- Page 2 LIMITED WARRANTY AND LIMITATION OF LIABILITY Each Fluke product is warranted to be free from defects in material and workmanship under normal use and service. The warranty period is three years and begins on the date of shipment. Parts, product repairs, and services are warranted for 90 days.
-
Page 3: Table Of Contents
Table of Contents Title Page Introduction......................1 Read First – Safety Information................. 2 Symbols ......................3 Ex-Hazardous Areas ..................4 Specifications..................... 5 DC Voltage Measurement ................5 DC Voltage Source..................5 Millivolt Measurement and Source* ............. 5 DC mA Measurement and Source ..............5 Ohms Measurement.................. - Page 4 725Ex Calibration Manual Lower Display mV Source Tests..............26 Lower Display Voltage Source Tests ............26 Lower Display Ohms Source Tests ............... 27 Pressure Module Input................... 28 Calibration Adjustment Procedures ..............28 Setup ......................28 Initiating Communication................29 Cal Volts Input ....................30 Cal Volts Output....................
- Page 5 List of Tables Table Title Page Symbols........................3 Approved Batteries....................9 Required Equipment and Software ................ 11 Upper Display Voltage Readings................13 Lower Display mV Readings ................. 14 Lower Display Voltage Readings ................15 Upper Display mA Readings.................. 16 Lower Display mA Readings ................. 17 Lower Display Frequency Source Readings ............
- Page 6 725Ex Calibration Manual...
- Page 7 List of Figures Figure Title Page Replacing the Batteries................... 10 Upper Display Voltage Test Connections .............. 13 Lower Display mV and Voltage Test Connections..........14 Upper Display mA Test Connections..............16 Lower Display mA Test Connections ..............17 Lower Display Frequency Test Connections ............18 Lower Display Frequency Source Test Connections ..........
- Page 8 725Ex Calibration Manual...
-
Page 9: Introduction
Do not perform the verification tests or calibration procedures described in this manual unless qualified to do so. This Calibration Manual provides the following information for the Fluke 725Ex Multifunction Process Calibrator (also referred to as "the Calibrator" and/or “the UUT”): •... -
Page 10: Read First - Safety Information
To avoid electric shock, injury, damage to the Calibrator, or ignition of an explosive atmosphere, follow all equipment safety procedures. • Use the Calibrator only as described in this manual, the 725Ex Users Manual, and the Fluke 725Ex CCD (Concept Control Drawing), or the protection provided by the Calibrator may be impaired. -
Page 11: Symbols
Conforms to relevant European information. Refer to manual. Union directives. Battery Direct current Hazardous Voltage Pressure Conforms to relevant Australian Conforms to ATEX requirements standards Do not dispose of this product as unsorted municipal waste. Go to Fluke’s website for recycling information. -
Page 12: Ex-Hazardous Areas
The Calibrator will itself be a source of voltage and current. Each set of terminals has a Voc and an Isc rating as shown on Fluke 725Ex CCD. When connecting terminals to other equipment, the Vmax and Imax ratings on the other equipment must exceed the Voc and Isc ratings for the terminals connected to on the 725Ex Calibrator. -
Page 13: Specifications
Multifunction Process Calibrator Specifications Specifications All specifications apply from +18 °C to +28 °C unless stated otherwise. All specifications assume a five-minute warmup period. DC Voltage Measurement Accuracy, Range Resolution (% of Reading + Counts) 30 V (upper display) 0.001 V 0.02 % + 2 10 V (lower display) 0.001 V... -
Page 14: Ohms Measurement
725Ex Calibration Manual Ohms Measurement Accuracy ± Ω* Ohms Range 4-Wire 2- and 3-Wire 0 to 400 Ω 0.15 400 to 1.5 kΩ 1.5 to 3.2 kΩ Temperature coefficient -10 °C to 18 °C, +28 °C to 55 °C: ±0.005 % of range per °C Excitation Current: 0.2 mA... -
Page 15: Temperature, Thermocouples
Loop Power Supply Voltage: 12 V Maximum current: 24 mA Short circuit protected Entity Parameters For Entity Parameters, Refer to Fluke 725Ex CCD for use in Ex-hazardous areas. RTD Excitation (simulation) Allowable Excitation by RTD type Ni 120 0.15 to 3.0 mA Pt 100-385 0.15 to 3.0 mA... -
Page 16: Temperature, Rtd Ranges, And Accuracies
725Ex Calibration Manual Temperature, RTD Ranges, and Accuracies Accuracy Measure 4- Measure 2- Range °C Source °C Type Wire °C and 3-Wire* °C Ni120 -80 to 260 Pt100-385 -200 to 800 0.33 0.33 Pt100-3926 -200 to 630 Pt100-3916 -200 to 630... - Page 17 A Message From Fluke Corporation Some semiconductors and custom IC's can be damaged by electrostatic discharge during handling. This notice explains how you can minimize the chances of destroying such devices 1. Knowing that there is a problem.
- Page 18 8. WHEN REMOVING PLUG-IN ASSEMBLIES 5. USE STATIC SHIELDING CONTAINERS FOR HANDLE ONLY BY NON-CONDUCTIVE HANDLING AND TRANSPORT. EDGES AND NEVER TOUCH OPEN EDGE CONNECTOR EXCEPT AT STATIC-FREE WORK STATION. PLACING SHORTING STRIPS ON EDGE CONNECTOR HELPS PROTECT INSTALLED S.S. DEVICES. 6.
-
Page 19: Basic Maintenance
Multifunction Process Calibrator Basic Maintenance Basic Maintenance Cleaning the Calibrator Warning To avoid personal injury or damage to the Calibrator, use only the specified replacement parts and do not allow water into the case. Caution To avoid damaging the plastic lens and case, do not use solvents or abrasive cleansers. - Page 20 725Ex Calibration Manual Hex Key bah01f.eps Figure 1. Replacing the Batteries...
-
Page 21: Required Equipment
Temperature: Type J thermocouple 90 day accuracy: ±0.2 °C Resistance accuracy: ±0.006 % Frequency accuracy: ±0.01 % MET/CAL ® Metrology Version 6.0 or later Contact Fluke for the latest version. Software (see MET/CAL Installation and Upgrade Guide for minimum hardware requirements) Digital Multimeter DC voltage: 0 V to 24 V HP 3458A only−no substitute... -
Page 22: Performance Tests
Table 3. Unless otherwise indicated, all connection diagrams for the verification tests in this manual showing a calibrator or digital multimeter use a Fluke 5520A Calibrator or HP 3458A DMM. If using a different DMM, make the connections appropriate for that instrument. -
Page 23: Upper Display Voltage Measurement Tests
Multifunction Process Calibrator Performance Tests Upper Display Voltage Measurement Tests 1. Press RESET on the 5520A. 2. Press l on the UUT until V appears on the upper display. 3. Make the connections shown in Figure 2. 4. Set up the 5520A to output each of the voltages in Table 4 and verify that the UUT readings are within the limits shown. -
Page 24: Lower Display Mv Measurement Tests
725Ex Calibration Manual Lower Display mV Measurement Tests 1. Press RESET on the 5520A. 2. Press V on the UUT until MEASURE and mV appear on the lower display. 3. Make the connections shown in Figure 3. 4. Set up the 5520A to output each of the voltages in Table 5 and verify that the UUT readings are within the limits shown. -
Page 25: Lower Display Voltage Measurement Tests
Multifunction Process Calibrator Performance Tests Lower Display Voltage Measurement Tests 1. Press RESET on the 5520A. 2. Press V on the UUT until MEASURE and V appear on the lower display. 3. Make the connections shown in Figure 3. 4. Set up the 5520A to output each of the voltages in Table 6 and verify that the UUT readings are within the limits shown. -
Page 26: Upper Display Ma Measurement Tests
725Ex Calibration Manual Upper Display mA Measurement Tests 1. Press RESET on the 5520A. 2. Press l on the UUT until MEASURE and mA appear on the upper display. 3. Make the connections shown in Figure 4. 4. Set up the 5520A to output each of the voltages in Table 7 and verify that the UUT readings are within the limits shown. -
Page 27: Lower Display Ma Measurement Tests
Multifunction Process Calibrator Performance Tests Lower Display mA Measurement Tests 1. Press RESET on the 5520A. 2. Press l on the UUT until MEASURE and mA appear on the lower display. 3. Make the connections shown in Figure 5. 4. Set up the 5520A to output each of the voltages shown in Table 8 and verify that the UUT readings are within the limits shown. -
Page 28: Lower Display Frequency Measurement Test
725Ex Calibration Manual Lower Display Frequency Measurement Test 1. Set the 5520A to source a 40 Hz, 1 V peak-to-peak square wave (use the blue softkey under the wave type to change the wave shape). 2. Press F on the UUT until MEASURE and Hz appear on the lower display. -
Page 29: Lower Display Frequency Source Test
Multifunction Process Calibrator Performance Tests Lower Display Frequency Source Test 1. Press M on the UUT until SOURCE appears on the lower display. 2. Press F on the UUT until Hz appears on the lower display. 3. Configure the HP 3458A to measure frequency. 4. -
Page 30: Lower Display 4-Wire Resistance Measurement Tests
725Ex Calibration Manual Lower Display 4-Wire Resistance Measurement Tests 1. Press F on the UUT until Ω appears on the lower display. If necessary, use M to get to the measure mode, and use X to get to the 4W mode. (MEASURE should also appear on the lower display). -
Page 31: Lower Display 4-Wire Rtd Measurement
Multifunction Process Calibrator Performance Tests Lower Display 4-Wire RTD Measurement 1. Press R on the UUT until the lower display reads PT3916. If necessary, use D to select °C units and X to get to the 4W mode. (MEASURE should also appear on the lower display.) 2. -
Page 32: Lower Display 3-Wire Rtd Measurement
725Ex Calibration Manual Lower Display 3-Wire RTD Measurement 1. Press R on the UUT until the lower display reads PT3916. If necessary, use D to select °C units and the arrow keys to get to the 3W mode. (MEASURE should also appear on the lower display.) -
Page 33: Lower Display Thermocouple Measurement Tests
Multifunction Process Calibrator Performance Tests Lower Display Thermocouple Measurement Tests 1. Remove the test leads from the UUT terminals; then connect a type J thermocouple lead between the TC jack on the UUT and the TC jack on the 5520A as shown in Figure 10. -
Page 34: Lower Display Thermocouple Source Tests
725Ex Calibration Manual Lower Display Thermocouple Source Tests 1. Set the 5520A to measure type J thermocouple voltages. 2. Press M on the UUT until SOURCE appears on the lower display. If necessary, press T on the UUT until J appears on the lower display and press D so the temperature is displayed in °C. -
Page 35: Lower Display Ma Source Tests
Multifunction Process Calibrator Performance Tests Lower Display mA Source Tests 1. Press M on the UUT until SOURCE appears on the lower display; then press V until mA appears on the lower display. If necessary, press M until SOURCE appears on the lower display. 2. -
Page 36: Lower Display Mv Source Tests
725Ex Calibration Manual Lower Display mV Source Tests 1. Press M on the UUT until SOURCE appears on the lower display; then press V until mV appears on the lower display. 2. Set the HP 3458A to measure dc voltage in the 200 mV range. -
Page 37: Lower Display Ohms Source Tests
Multifunction Process Calibrator Performance Tests Lower Display Ohms Source Tests 1. Press F on the UUT until Ω appears on the lower display. If necessary, press M until SOURCE appears on the lower display. 2. Set the HP 3458A to measure 4-wire resistance. 3. -
Page 38: Pressure Module Input
Calibration Manual Pressure Module Input 1. Connect a Fluke 700 Series Pressure Module to the 5-pin LEMO connector at the top of the UUT; then press U. 2. Verify that the display first shows -----psi, then changes to a pressure value. -
Page 39: Initiating Communication
Starting with the UUT off, push and hold Q while turning the UUT on. Continue to hold Q until "Cal mode" is displayed. The calibration menus, as seen on the PC screen, are as follows: 725Ex Calibration Menu Calibrate Menu 1 - Cal Volts Input... -
Page 40: Cal Volts Input
From the Calibration Menu, type the cal step for Cal Volts Input. The PC displays: Enter 0 Volts - press space bar to continue Set the Fluke 5520A to output 0.0000 V, then press the space bar. After a short while, the following calibration constant and prompt are displayed on the PC: Offset = Enter 10.00 Volts... -
Page 41: Cal Volts Output
Multifunction Process Calibrator Calibration Adjustment Procedures Cal Volts Output Connect the UUT as shown in Figure 14. aal08f.eps Figure 14. Volts Output Calibration Connections From the Calibration Menu, type the number or letter for Cal Volts Output. The PC displays: Zero into DAC. -
Page 42: Cal Ma Input
Enter 0 ma - press space bar to continue Set the Fluke 5520A to output 0.000 mA, let the reading settle a few seconds, then press the space bar on the PC. After a short while, the PC displays the following calibration... -
Page 43: Cal Ma Output
Multifunction Process Calibrator Calibration Adjustment Procedures Cal mA Output Connect the UUT as shown in Figure 16. aal12f.eps Figure 16. mA Output Calibration Connections From the Calibration Menu, enter the cal step for Cal mA Output. The PC displays: Zero into DAC. Enter mA displayed : Set the HP 3458 to read DC current. -
Page 44: Cal Mv Input
Enter 0 mV - press space bar to continue Set the Fluke 5520A to output 0.000 mV, let the output settle then press the space bar on the PC. After a short while, the PC displays the following calibration constant and new... -
Page 45: Cal Mv Output
Multifunction Process Calibrator Calibration Adjustment Procedures Cal mV Output Connect the UUT as shown in Figure 18. aal08f.eps Figure 18. mV Output Calibration Connections From the Calibration Menu, enter the cal step for Cal mV Output. The PC displays: Zero into DAC. Enter mV displayed : Set the HP 3458 to read V DC. -
Page 46: Cal Thermocouples
Simulate 0.0 degrees C - press space bar to continue Set the Fluke 5520A to output 0.00 degrees C for a type-J thermocouple using the ITS-90 standard, then press the space bar on the PC. After a short while, the PC displays the following calibration constant and new prompt: CJC Temp Read = 27.359071... -
Page 47: Cal Ohms Hi Source
Multifunction Process Calibrator Calibration Adjustment Procedures Cal Ohms Hi Source Connect the UUT as shown in Figure 20. aal13f.eps Figure 20. Ohms Hi Source Calibration Connections From the Calibration Menu, enter the cal step for Cal Ohms Hi Source. The PC displays: 2500 into DAC. -
Page 48: Cal Ohms Low Source
725Ex Calibration Manual Cal Ohms Low Source The UUT connection is the same as cal Ohms Hi Source, it is shown in Figure 20. From the Calibration Menu, enter the cal step for Cal Ohms Low Source. The PC displays: 2500 into DAC. -
Page 49: Cal Rtd Low Range
Apply 350 ohms to 4 wire jacks press space bar to continue Set the Fluke 5520A to output 350.00 Ohms then press the space bar on the PC. After a short while, the Calibrator will return to the Calibration Menu. -
Page 50: Cal Rtd Hi Range
Apply 3200 ohms to 4 wire jacks press space bar to continue Set the Fluke 5520A to output 3200.0 Ohms, then press the space bar on the PC. After a short while, the Calibrator will return to the Calibration Menu. -
Page 51: Cal Iso Volts
Enter 0 Volts - press space bar to continue Set the Fluke 5520A to output 0.0000 V, then press the space bar on the PC. After a short while the PC displays the following a calibration constant and new prompt:... -
Page 52: Cal Iso Ma
Enter 24.00 ma - press space bar to continue Set the Fluke 5520A to output 24.0000 mA then press the space bar on the PC. After a short while, the PC displays the following calibration constants: diff = (Counts - Offset) -
Page 53: Replaceable Parts
AC72 alligator clip, red 1670641 AC72 alligator clip, black 1670652 Battery door 2097832 Battery Door Screws 2418054 Fluke 725Ex CD ROM, contains Fluke 725Ex 2406548 User Manual Fluke 725Ex Control Drawing 6800032 Fluke 725Ex Safety Information 2151996 Fluke 725Ex Calibration Manual... - Page 54 725Ex Calibration Manual...
Need help?
Do you have a question about the 725Ex and is the answer not in the manual?
Questions and answers