
Related Manuals for Precor SPINNER RALLY


Summary of Contents for Precor SPINNER RALLY
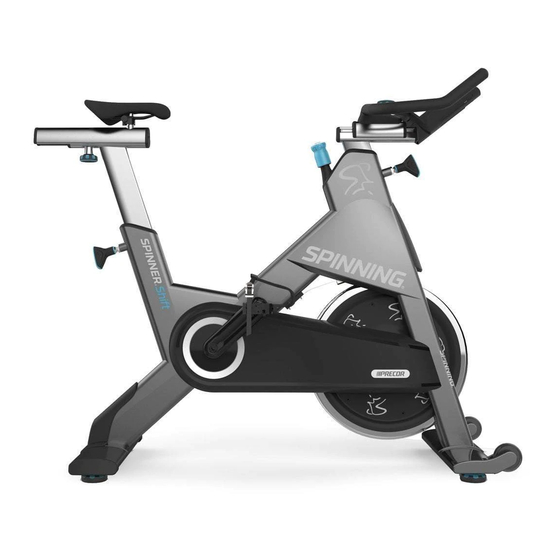
- Page 1 Service Manual SBK800-16 SPINNER ® BIKE LINE SPINNER RALLY SPINNER SHIFT SPINNER RIDE...
-
Page 2: Table Of Contents
Contents 1 Introduction General Information Orientation Convention Tools Specification Summary Parts Lubrication Cleaning Safety Guidelines 2 Operation Verification Operation Verification Checklist 3 Adjustment Procedures Available Adjustment Procedures Belt Drive Tension Adjustment About Procedure Chain Drive Tension Adjustment About Procedure Leveling Adjustment Procedure 4 Replacement Procedures Available Replacement Procedures Belt/Chain Guard Cover Replacement About... - Page 3 Procedure Brake Pad Replacement About Procedure Chain Drive and Flywheel Replacement About Specifications Procedure Handlebar Assembly Replacement About Procedure Handlebar Adjustment Knob Replacement About Procedure Pedal Replacement About Specifications Specialized Tools Procedure Crank Arm Replacement About Specifications Specialized Tools Procedure Resistance Knob Replacement About Procedure...
- Page 4 Procedure Stabilizer Replacement About Front Stabilizer Replacement Rear Stabilizer Replacement 5 Troubleshooting About Introduction To Troubleshooting Basic Steps Belt Drive Issues Applies To Issues Chain Drive Issues Applies To Issues Resistance Issues Applies To Issue Cause Solution 6 Spinning® Studio Console About Features Cadence (RPM) sensor installation Heart Rate Belt Bluetooth Pairing...
- Page 5 Maintenance Schedule 8 Parts Belt Drive Series Bikes Chain Drive Series Bikes Appendix A : Edition Information Edition Additional Documentation Copyright Appendix B : Notices and Safety Trademarks Intellectual Property Warranty Safety Instruction Safety Notices Page v...
-
Page 6: 1 Introduction
1 Introduction 1 Introduction If you are not a Precor certified servicer, you must not attempt to service any Precor Product. Call your dealer for service information. WARNING: This service documentation is for use by Precor certified servicer pro- viders only. Personal injury can result from electrical shock and/or mechanical moving parts. - Page 7 1 Introduction Page 2...
-
Page 8: General Information
1 Introduction General Information General Information The following information provides general equipment and service information that will help you to use this manual to properly repair and maintain the bike. Orientation Convention The equipment orientation (front, right, left, back) used in manual is referenced to a user sitting on the equipment facing the handlebars. -
Page 9: Parts
Parts IMPORTANT: Always purchase OEM replacement parts and hardware from Precor. If you use parts not approved by Precor, you could void the Precor Limited Warranty. Use of parts not approved by Precor may cause injury. Major Assembly and Parts Location... -
Page 10: Lubrication
1 Introduction General Information Precor Connect Partner Website Lubrication Common metal parts Use only synthetic lubricants such as Mobile 1 Synthetic grease or Super Lube with Teflon. Use of unapproved lubricants, cleaners, or solvents may void the bike warranty. Chain Lubricant: Use a high quality petroleum based chain lubricant such as Tri-Flow Super- ior Lubricant or equivalent. -
Page 11: Safety Guidelines
1 Introduction General Information Safety Guidelines Safety guideline you need to know and follow: Read and follow all Warning notices to protect yourself from personal injury. Read and follow all Caution notices to prevent damage to the equipment. Read the owner’s manual and follow all operating instructions. Operate the equipment on a solid, level surface. -
Page 12: 2 Operation Verification
2 Operation Verification 2 Operation Verification Use the Operation Verification Checklist to verify the bike operation. Verify the bike operation at the completion of any maintenance procedure and when it is necessary to ensure that the bike is operating properly. Operation Verification Checklist Do an overall visual inspection of the bike looking for any loose hardware and/or missing parts Repair and replace as needed. -
Page 13: 3 Adjustment Procedures
3 Adjustment Procedures 3 Adjustment Procedures Adjustment procedures provide you with the step-by-step adjustment instructions to bring sys- tems and components into specification. Perform the adjustment procedures whenever a trouble symptom points to a particular component and after a major component is removed/re- placed. -
Page 14: Belt Drive Tension Adjustment
Belt adjustment requires removing the front and rear belt guards and the use of a belt tension gauge. CAUTION: Improper belt adjustment will cause premature wear and may void the Precor Limited Warranty. Specifications System Component Specification... - Page 15 3 Adjustment Procedures Belt Drive Tension Adjustment 4. Adjust the belt tension between 140 - 150 lbs tension using the 13 mm belt tensioner adjustment nut . Replace the belt if it cannot be adjusted within the specified limits. 5. Slowly turn the crank and verify the belt is operating smoothly and with no other issues (noises, binding, etc.).
-
Page 16: Chain Drive Tension Adjustment
(noises, pedal skip, etc.) while operating the bike. CAUTION: Improper chain adjustment will cause premature wear and may void the Precor Limited Warranty. Specifications System Component Specification Chain Drive Tension 1/2 in (1.3 cm) up/dwn travel... - Page 17 3 Adjustment Procedures Chain Drive Tension Adjustment tight, continue procedure to adjust the chain tension. Chain adjustment instructions 1. Remove the front chain guard access panel by removing the one fastener using a 5 mm hex key. 2. Remove all brake pad flywheel resistance by turning the resistance knob counter clock- wise (-).
- Page 18 4. Chain adjustment requires proper chain tension and chain sprocket alignment. Equally tighten or loosen the left and right chain adjustment nuts (10 mm wrench) so that there is 1/2 in (1.3 cm) up/dwn travel. a. Slowly turn the crank arm and adjust the chain tension so the chain falls smoothly onto the front and rear sprockets.
- Page 19 3 Adjustment Procedures Chain Drive Tension Adjustment 5. Tighten the left and right axle nuts , torque to 29.5 ft-lbs (40 Nm). 6. Ride (pedal) the bike to verify there are no issues with the chain tension adjustment. 7. Replace the chain guard access panel. 8.
-
Page 20: Leveling Adjustment Procedure
Leveling Adjustment Procedure Use this procedure to level the bike. Make sure the bike is level and sits firmly on the floor before allowing anyone to use the bike. IMPORTANT: Place the unit on a flat surface. Rotating the adjustable feet does not compensate for extremely uneven surfaces. -
Page 21: 4 Replacement Procedures
4 Replacement Procedures 4 Replacement Procedures Replacement procedures provide you with the step-by-step instructions to remove and replace system components. Available Replacement Procedures "Belt/Chain Guard Cover Replacement" on page 18 "Belt and Flywheel Replacement" on page 21 "Brake Pad Replacement" on page 24 "Chain Drive and Flywheel Replacement" on page 27 "Front Stabilizer Replacement"... - Page 22 "Leveling Adjustment Procedure" on page 15...
-
Page 23: Belt/Chain Guard Cover Replacement
4 Replacement Procedures Belt/Chain Guard Cover Replacement Belt/Chain Guard Cover Replacement About This procedure provides instruction to remove and install the front and rear Belt/Chain Guard Covers. The front belt/chain guard includes an access panel used to access the tensioner nuts and right axle nut. - Page 24 2. Remove the front guard access panel by removing the one fastener using a 5 mm hex key. Retain fastener hardware for installation. Front Belt/Chain Panel guard cover removal instructions 3. Remove the front belt/chain guard cover by removing the fasteners (4x) using a 5 mm hex key.
- Page 25 4 Replacement Procedures Belt/Chain Guard Cover Replacement See Also "Replacement Procedures" on page 16...
-
Page 26: Belt And Flywheel Replacement
Belt and Flywheel Replacement About This procedure provides instruction to remove and install the Belt and flywheel. The Poly V drive belt is the latest generation of drive systems for spinner bikes. The flywheel axle and front pulley are mounted in a fixed position providing front-rear belt pulley alignment. Also, after the belt tension is set, the belt tensioner mechanism is designed to not require adjustment and will not allow belt slip. -
Page 27: Belt And Flywheel Replacement" On Page
4 Replacement Procedures Belt and Flywheel Replacement 1. Remove front and rear belt guard covers, see "Belt/Chain Guard Cover Replacement" page 18. 2. Remove all brake pad resistance by turning resistance knob counterclockwise (-). 3. Release belt tension by loosening the belt tension adjustment nut using a 13 mm wrench. - Page 28 Secure axle plate with mounting plate bolts and carefully return bike to the upright position. 11. Position the flywheel to align the left and right axle mounting plate holes to the frame mounting threads. Secure axle mounting plate with fasteners (2x each) using a 6 mm hex key.
-
Page 29: Brake Pad Replacement
4 Replacement Procedures Brake Pad Replacement Brake Pad Replacement About This procedure provides instruction to remove and install the Brake Pad. The leather pad is an extremely simple and reliable resistance system. The resistance adjust- ment knob is used to apply pressure and increased friction to the flywheel creating changing pedal resistance. - Page 30 3. Remove the brake pad by removing the one mounting bolt using a 3 mm hex key. Retain fastener hardware for installation. Installation Instructions 4. Reinstall the brake pad onto the assembly and secure with the mounting bolt. 5. Pull up the resistance knob and slide the brake pad assembly into position aligning the frame mounting bolt inserts.
- Page 31 4 Replacement Procedures Brake Pad Replacement 6. Verify that the brake pad is centered onto the flywheel. 7. Verify the bike operation per "Operation Verification Checklist" on page 7 and return to service. See Also "Replacement Procedures" on page 16...
-
Page 32: Chain Drive And Flywheel Replacement
Chain Drive and Flywheel Replacement (Chain drive bikes only). About This procedure provides instruction to remove and install the Chain Drive and Flywheel. Chain replacement requires removal of the flywheel so this procedure provides instructions for both chain and flywheel replacement. WARNING: Personal injury is possible while removing/installing the flywheel. -
Page 33: Chain Drive And Flywheel Replacement" On Page
4 Replacement Procedures Chain Drive and Flywheel Replacement 4. Loosen, but do not remove, the left and right axle nuts using a 19 mm wrench to allow axle movement. 5. Remove chain tension by alternately loosening the left and right chain adjustment nuts using a 10 mm wrench. - Page 34 14. Adjust the chain tension to specification, go to "Chain Drive Tension Adjustment" on page 11 15. Tighten the left and right axle nuts , torque to 29.5 ft-lbs (40 Nm). 16. Reinstall the rear chain sprocket finger guard , secure with two fasteners using a 5 mm hex key.
-
Page 35: Handlebar Assembly Replacement
4 Replacement Procedures Handlebar Assembly Replacement Handlebar Assembly Replacement About This procedure provides instruction to remove and install the Handlebar Assembly includeing: the Handlebar, Slider, Handlebar, and Handlebar Post. """Handlebar slider replacement Instructions" on page 1" above" above """Handlebar replacement Instructions" on page 1" above" above "Handlebar Post replacement Instructions"... - Page 36 4. Reinstall the replacement handlebar assembly in reverse order. 5. Verify the handlebar forward/reverse travel is smooth and that the handlebar slider is stopped from sliding off the post. 6. Verify the handlebar adjustment knob operation and that it holds the handlebar in pos- ition.
- Page 37 4 Replacement Procedures Handlebar Assembly Replacement Installation Instructions 4. Install the handlebar onto the slider in reverse order. 5. Reinstall the handlebar slider onto the handlebar post, see """Handlebar slider replace- ment Instructions" on page 1" above" on page 30. Handlebar Post replacement Instructions Removal Instructions 1.
- Page 38 installed. Installation Instructions 1. Clean and apply a thin film of the 3-IN-ONE SILICONE lubricant onto the handlebar assembly post. Do not apply lubricant to the handlebar forward/back slider. 2. Install the handlebar post into the frame. Pull the handlebar pop-pin and engage one of the post height holes.
-
Page 39: Handlebar Adjustment Knob Replacement
4 Replacement Procedures Handlebar Adjustment Knob Replacement Handlebar Adjustment Knob Replacement About This procedure provides instruction to remove and install the Handlebar Adjustment Knob. Procedure Review entire procedure before starting. Removal Instructions 1. Remove the handlebar assemble off the post slider, see "Handlebar Adjustment Knob Replacement"... - Page 40 3. To remove the adjustment knob, use a thin wall 5/16' deep socket to hold the locking nut from turning while loosening the adjustment knob. Keep light pressure on the adjust- ment knob while loosening. Installation instructions 1. Reinstall the handlebar adjustment knob in reverse order. 2.
-
Page 41: Pedal Replacement
4 Replacement Procedures Pedal Replacement Pedal Replacement About This procedure provides instruction to remove and install the Pedals. ® The pedals are dual-sided SPD compatible pedal attached to oversized crank arms utilizing the patented Morse taper connections. Available Movies (Internet Only) Pedal Replacement tutorial video. - Page 42 Removal Instructions 1. Position the crank arm and right pedal to the 12 o'clock position. 2. Remove the pedal mounting bolt using an 8 mm hex key. Retain fastener hardware for installation. 3. Use a crank puller (recommended PN X-Tools Crank Extractor or similar) to press the pedal out of the crank arm and remove.
- Page 43 4 Replacement Procedures Pedal Replacement 4. Repeat steps to remove the left pedal. Installation instructions: 5. Insert the right pedal into the right crank arm. Seat the pedal by using a rubber mallet to lightly tap the center of the pedal into the crank arm.
- Page 44 6. Secure pedal with the pedal mounting bolt using an 8 mm hex key, torque to 33 ft-lb (45 N•m).
- Page 45 4 Replacement Procedures Pedal Replacement 8. Repeat installation steps to install the left pedal. 9. Verify the bike operation per "Operation Verification Checklist" on page 7 and return to service See Also "Replacement Procedures" on page 16...
-
Page 46: Crank Arm Replacement
Crank Arm Replacement About This procedure provides instruction to remove and install the Crank Arm. The process is similar to removing the pedals. Specifications System Component Specification Crank arm fastener 33 ft-lb (45 N•m) Specialized Tools Tool Part Number Qty Crank Extractor X-Tools Crank Extractor) or sim-... - Page 47 4 Replacement Procedures Crank Arm Replacement 3. Use a crank puller (recommended Park Tool CCP-222 to pull the crank arm from the bottom bracket bearing axle and remove. 4. Remove the bottom bracket cover. Note: Early production bikes may not include the bottom bracket cover, see service bulletin SB.SBK.20160825 for information.
- Page 48 2. Install bottom bracket cover onto the bottom bracket axle over the axle nut. 3. Install the left crank arm onto the left side bottom bracket axle. Seat the crank arm by using a rubber mallet to lightly tap the crank arm onto the bottom bracket axle. 4.
-
Page 49: Resistance Knob Replacement
4 Replacement Procedures Resistance Knob Replacement Resistance Knob Replacement About This procedure provides instruction to remove and install the Resistance Knob assembly. The resistance knob is fixed to the steel resistance shaft capped with an acorn nut that applies pressure to the leather brake pad assembly. The brake pad assembly must be removed to access and remove the resistance shaft acorn nut. - Page 50 (2x) using a 5 mm hex key, Retain fastener hardware for installation. 3. Remove the resistance shaft acorn nut and lock nut . Use one 17 mm wrench to hold the acorn nut while using another 17 mm wrench to loosen the lock nut Then loosen and remove the acorn nut TIP: You may find it easier to tip the bike upright onto the handlebars to access and remove the resistance shaft acorn nut.
- Page 51 4 Replacement Procedures Resistance Knob Replacement spacer , adjustment bolt nut , spring , or adjustment knob cushion . Retain fastener hardware for installation. Installation Instructions 1. Reinstall the resistance shaft into the frame while carefully turning the knob in a clock- wise direction.
- Page 52 3. Reinstall any resistance shaft hardware that could have fallen off during the shaft removal including: the spacer , adjustment bolt nut , spring , and/or adjust- ment knob cushion . Make sure that the hardware is reinstalled in the proper order. 4.
- Page 53 4 Replacement Procedures Resistance Knob Replacement wrench to fully tighten the lock nut against the acorn nut. It's important to lock the acorn nut in place to keep it from loosening during bike workouts. 5. Pull up the resistance knob and slide the brake pad assembly into position aligning the frame mounting bolt inserts.
- Page 54 7. Verify the bike operation per "Operation Verification Checklist" on page 7 and return to service. See Also "Replacement Procedures" on page 16...
-
Page 55: Seat Assembly Replacement
4 Replacement Procedures Seat Assembly Replacement Seat Assembly Replacement About This procedure provides instruction to remove and install the Seat Assembly which includes: the Seat, Seat Slider Assembly, and Seat Post. "Seat replacement instructions" below "Seat slider assembly replacement instructions" below "Seat post replacement instructions"... - Page 56 3. Remove the slider travel limit set screw located on the underside of the seat slider using a 2.5 mm hex key. Retain fastener hardware for installation. 4. Remove seat slider assembly by moving it towards the front of the bike. 5.
-
Page 57: Stabilizer Replacement
4 Replacement Procedures Stabilizer Replacement Stabilizer Replacement About There is a front and rear stabilizer, select the procedure for your application. "Front Stabilizer Replacement" on the facing page "Rear Stabilizer Replacement" on page 55... -
Page 58: Front Stabilizer Replacement
Front Stabilizer Replacement About This procedure provides instruction to remove and install the Front Stabilizer. Specifications System Component Specification Stabilizer fastener Torque 15.6 ft-lbs (21 N•m) Procedure Review entire procedure before starting. Removal Instructions 1. Place a soft mat under the bike frame and stand the bike frame on its back resting on the rear stabilizer and seat rail. - Page 59 4 Replacement Procedures Stabilizer Replacement See Also "Rear Stabilizer Replacement" on the facing page "Leveling Adjustment Procedure" on page 15 "Replacement Procedures" on page 16...
-
Page 60: Rear Stabilizer Replacement
Rear Stabilizer Replacement About This procedure provides instruction to remove and install the Rear Stabilizer. Specifications System Component Specification Stabilizer fastener Torque 15.6 ft-lbs (21 N•m) Review entire procedure before starting. Removal Instructions 1. Place a soft mat under the bike frame and stand the bike frame on its front resting on the front stabilizer and handlebar 2. - Page 61 4 Replacement Procedures Stabilizer Replacement See Also "Front Stabilizer Replacement" on page 53 "Leveling Adjustment Procedure" on page 15 "Replacement Procedures" on page 16...
-
Page 62: 5 Troubleshooting
5 Troubleshooting About This section contains troubleshooting information to help you identify, isolate, and resolve com- ponent and system issues. Review the Introduction To Troubleshooting section below to learn about the troubleshooting process, troubleshooting best practices, and other pertinent information that will help you effi- ciently troubleshoot issues and return the equipment to service. - Page 63 4) Verify service bulletins Go to the Precor Connect website and browse the list of machine service bulletins and tech- tips. Incorporate any missing service bulletin repairs and in particular any bulletins that may fix the current failure.
-
Page 64: Belt Drive Issues
Belt Drive Issues Applies To All belt drive spinner series bikes. Issues Issues related to the belt drive bikes: ISSUE CAUSE SOLUTION Excessive belt Belt tension out- Verify and adjust belt tension, see "Belt Drive noise. of-spec. Tension Adjustment" on page 9. -
Page 65: Chain Drive Issues
5 Troubleshooting Chain Drive Issues Chain Drive Issues Applies To All chain drive spinner series bikes. Issues Issues related to the chain drive bikes: Issues ISSUE CAUSE SOLUTION Excessive Chain tension is either to Verify and adjust chain tension, see "Chain Drive chain noise. -
Page 66: Resistance Issues
Resistance Issues Applies To All Spinner Series Bikes Issue Increasing the resistance knob does not apply typical or no increased resistance to the fly- wheel. Cause Most likely the brake pad condition is worn, glazed, and/or dry. Less likely the resistance knob shaft mechanism has failed. Solution Remove the brake pad and visually inspect condition for wear, glazing, and/or dryness of leather (leather should be moist), replace as necessary, see... -
Page 67: 6 Spinning® Studio Console
Studio Console is used on the Spinner Climb™ indoor cycle. This console is ® ® ® also used on Precor Spinner Ride™, Spinner Shift™, and Spinner Rally™ model indoor cycles. Refer to the SPINNING STUDIO "Owner's Manual" for the latest console install- ation, use, and service information. -
Page 68: Cadence (Rpm) Sensor Installation
Cadence (RPM) sensor installation The Cadence sensor is battery operated and uses a CR2032 lithium coin cell battery. For instructions to install the cadence sensor, see the Cadence Sensor Installation chapter in the Operators Guide , see Operator's Guide. Heart Rate Belt Bluetooth Pairing For instructions to use and pair a bluetooth heart rate belt, see the Pairing with your Heart Rate Belt chapter in the Operators Guide , see Operator's... -
Page 69: 7 Preventive Maintenance
Precor recommended preventative maintenance schedule. Always pur- chase replacement parts and hardware from Precor. If you use parts not approved by Precor, you could void the Precor Limited Warranty. Use of parts not approved by Pre- cor may cause injury. -
Page 70: Maintenance Schedule
When the bike is not in use, always keep some resistance on the flywheel. Clean all surfaces of the frame and plastic components. Keep excess moisture away from electronic components and dry completely with a lint-free cloth to prevent electrical shock or damage. - Page 71 Tighten pedal toe straps and toe clips. Inspect and tighten resistance knob assembly. Check bike level. Adjust feet as needed to make bike level and stable. Clean and seal the bike Sweat can corrode the bike frame. Precor recommends that...
- Page 72 Monthly Task Instruction frame. you seal the bike frame at least once a month, see "Seal Bike Frame Procedure" below Clean and apply silicone lub- Remove the handlebar and seat posts from the frame. Clean ricant to the handlebar and and apply a thin film of the 3-IN-ONE SILICONE lubricant seat assembly posts.
-
Page 73: 8 Parts
IMPORTANT: Always purchase OEM replacement parts and hardware from Precor. If you use parts not approved by Precor, you could void the Precor Limited Warranty. Use of parts not approved by Precor may cause injury. Select Spinner Bike Model "Belt Drive Exploded View and Parts List"... -
Page 74: Belt Drive Series Bikes
Belt Drive Series Bikes Belt Drive Exploded View and Parts List... - Page 75 8 Parts Belt Drive Series Bikes...
-
Page 77: Chain Drive Series Bikes
8 Parts Chain Drive Series Bikes Chain Drive Series Bikes Chain Drive Exploded View and Parts List... - Page 79 8 Parts Chain Drive Series Bikes...
-
Page 80: Appendix A : Edition Information
No part of this manual may be reproduced in any form or by any means (including electronic storage and retrieval or translation into a foreign language) without prior agreement and writ- ten consent from Precor Incorporated as governed by United States and international copy- right laws. -
Page 81: Appendix B : Notices And Safety
Precor shall not be liable for errors or for incid- ental or consequential damages in connection with the furnishing, use, or performance of this document or of any information contained herein. -
Page 82: Safety Notices
B Appendix B: Notices and Safety Safety Notices Warning and Caution notices indicate an activity that could be dangerous and cause personal injury and/or equipment damage if not adhered to. Always follow Warning and Caution instruc- tions. Warning WARNING notice denotes a hazard. It calls attention to an operating procedure, practice, or the like that, if not correctly performed or adhered to, could result in per- sonal injury or death.
Need help?
Do you have a question about the SPINNER RALLY and is the answer not in the manual?
Questions and answers