Advertisement
Quick Links
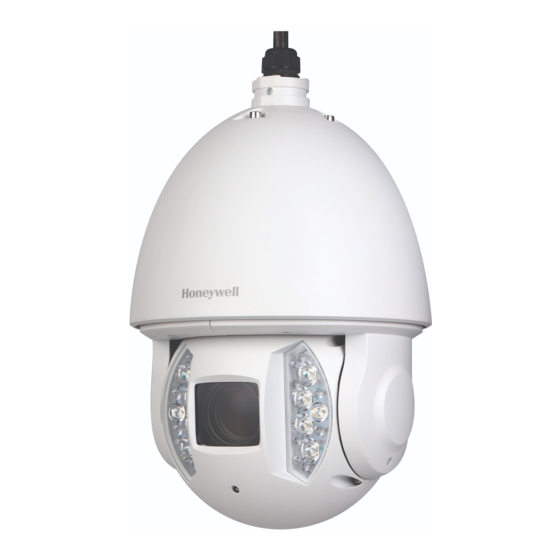
HDZ IR Series IP PTZ Dome
Quick Installation Guide
Cautions and Warnings
RISK OF ELECTRIC
SHOCK DO NOT O PE N
CAUTION: TO REDUCE THE RISK OF ELECTRIC SHOCK,
DO NOT REMOVE COVER (OR BACK).
NO USER SERVICEABLE PARTS INSIDE.
REFER SERVICING TO QUALIFIED SERVICE PERSONNEL.
WARNING Installation and servicing should be performed only by qualified and
experienced technicians to conform to all local codes and to maintain your warranty.
WARNING To ensure compliance with electrical safety standards, CSA Certified/UL Listed
Class 2 power adapters are required. Power over Ethernet (PoE+) shall be supplied by listed
Information Technology Equipment meeting the IEEE 802.3at-2009 PoE+ standard. The PoE
is not intended to be connected to exposed (outside plant) networks.
IMPORTANT NOTE
Regarding PoE operation of models HDZ302LIW/HDZ302LIK
A high power PoE injector capable of supplying at least 60 W is required for proper
operation of outdoor camera models HDZ302LIW/HDZ302LIK (NOTE – Using PoE
IEEE802.3af or IEEE802.3at will not support these models).
WARNING
IR emitted from this product. Do not view directly with optical instruments
(magnifiers). Do not stare directly into the lamp at a distance of less than 3.3 ft (1 m).
FCC Statement of Compliance
Information to the User: This equipment has been tested and found to comply with the
limits for a Class A digital device, pursuant to part 15 of the FCC Rules. These limits are
designed to provide reasonable protection against harmful interference when the equipment
is operated in a commercial environment. This equipment generates, uses, and can radiate
radio frequency energy and, if not installed and used in accordance with the instruction
manual, may cause harmful interference to radio communications. Operation of this
equipment in a residential area is likely to cause harmful interference in which case the user
will be required to correct the interference at his own expense.
Note
Changes or modifications not expressly approved by the party responsible for
compliance could void the user's authority to operate the equipment.
This Class A digital apparatus complies with Canadian ICES-003.
Cet appareil numérique de la Classe A est conforme à la norme NMB-003 du Canada.
Manufacturer's Declaration of Conformance
The manufacturer declares that the equipment supplied with this guide is compliant with the
European Parliament and Council Directive on the Restrictions of the use of certain
Hazardous Substances in electrical and electronic equipment (2011/65/EU), General
Product Safety Directive (2001/95/EC) and the essential requirements of the EMC Directive
(2004/108/EC), conforming to the requirements of standards EN 55022 for emissions, EN
50130-4 for immunity, and EN 60950-1 for electrical equipment safety.
CAUTION This is a Class A product. In a domestic environment this product may cause
radio interference in which case the user may be required to take adequate measures.
WARNING To comply with EN50130-4 requirements, a UPS should be employed when
powering the camera from 24 V AC.
Waste Electrical and Electronic Equipment (WEEE)
Correct Disposal of this Product (applicable in the European Union
and other European countries with separate collection systems).
This product should be disposed of, at the end of its useful life, as per
applicable local laws, regulations, and procedures.
Safety Instructions
Before installing or operating the unit, read and follow all instructions. After
installation, retain the safety and operating instructions for future reference.
1.
HEED WARNINGS - Adhere to all warnings on the unit and in the operating
instructions.
2.
INSTALLATION
•
Install in accordance with the manufacturer's instructions.
•
Installation and servicing should be performed only by qualified and
experienced technicians to conform to all local codes and to maintain your
warranty.
•
Do not install indoor rated models in outdoor locations.
•
Any wall or ceiling mounting of the product should follow the manufacturer's
instructions and use a mounting kit approved or recommended by the
manufacturer.
3.
POWER SOURCES - This product should be operated only from the type of power
source indicated on the marking label.
4.
HEAT - Situate away from items that produce heat or are heat sources such as
radiators, heat registers, stoves, or other products (including amplifiers).
5.
MOUNTING SYSTEM - Use only with a mounting system recommended by the
manufacturer, or sold with the product.
6.
ATTACHMENTS - Do not use attachments not recommended by the product
manufacturer as they may result in the risk of fire, electric shock, or injury to persons.
7.
ACCESSORIES - Only use accessories specified by the manufacturer.
8.
CLEANING - Do not use liquid cleaners or aerosol cleaners. Use a damp cloth for
cleaning.
9.
SERVICING - Do not attempt to service this unit yourself as opening or removing
covers may expose you to dangerous voltage or other hazards. Refer all servicing to
qualified service personnel.
10. REPLACEMENT PARTS - When replacement parts are required, be sure the service
technician has used replacement parts specified by the manufacturer or have the same
characteristics as the original part. Unauthorized substitutions may result in fire, electric
shock or other hazards. Using replacement parts or accessories other than the original
manufacturers may invalidate the warranty.
CAUTION
Risk of explosion if Battery is replaced by an incorrect type. Dispose of
used batteries in accordance with local laws.
Before You Begin
Open the box and check:
Module
Pendent
Adaptor
HDZ302LIW
Security
HDZ302LIK
Chain
Note: Rotate and remove the protective cover bag and tape from the camera body before
the installation.
Inserting the SD Card
Please open the camera cover and insert SD card into the camera before installation if
an SD card is required.
It is recommend that you use a high quality micro SD card (up to 128 GB) that has a
minimum write speed of class 10. Insert the card before finishing camera installation. The
card must be formatted using the Honeywell Web GUI before it can be used for recording
(go to Setup Storage Setup Destination Local Format).
1
Accessories
Installation
Wrench
Water-proof
Joint
Waterproof
CD
Tape
Micro-SD Card Inserting
Position
Quick
Guide
Advertisement

Related Manuals for Honeywell HDZ302LIW


Summary of Contents for Honeywell HDZ302LIW
-
Page 1: Quick Installation Guide
10. Insert the card before finishing camera installation. The warranty. card must be formatted using the Honeywell Web GUI before it can be used for recording • Do not install indoor rated models in outdoor locations. -
Page 2: Mounting The Camera
You can install the camera to a ceiling, wall, pole, parapet, or roof using the following Important Notes: Honeywell products: • Ensure that the mounting surface can support the combined weight of the camera Model No. -
Page 3: Cable Connections
Regarding PoE Operation of models HDZ302LIW/HDZ302LIK A high power PoE injector capable of supplying at least 60 W is required for proper operation of outdoor camera models HDZ302LIW / HDZ302LIK (NOTE – Using PoE to IEEE802.3af or IEEE802.3at will not support these models). - Page 4 Document 800-21696 – Rev. B – 03/2016 © 2016 Honeywell International Inc. All rights reserved. No part of this publication may be reproduced by any means without written permission from Honeywell. The information in this publication is believed to be accurate in all respects. However, Honeywell cannot assume responsibility for any consequences resulting from the use thereof.
Need help?
Do you have a question about the HDZ302LIW and is the answer not in the manual?
Questions and answers