Table of Contents
Advertisement
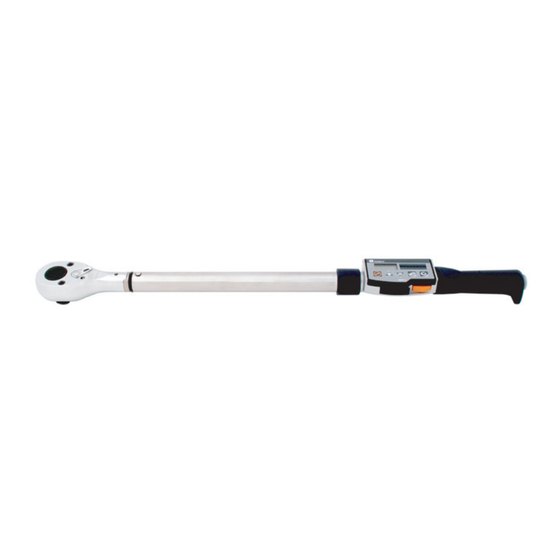
TOHNICHI DIGITAL TORQUE WRENCH FOR TIGHTENING
MODEL CPT-G
OPERATING INSTRUCTION
CPT20X10D-G
CPT100X15D-G
CPT280X22D-G
To use this product correctly and safely, please read this manual carefully before use.
If you have any questions about the product, contact your nearest distributor or TOHNICHI MFG. CO., LTD.
Advertisement
Table of Contents

Subscribe to Our Youtube Channel
Related Manuals for Tohnichi ProTork CPT20X10D-G


Summary of Contents for Tohnichi ProTork CPT20X10D-G
- Page 1 TOHNICHI DIGITAL TORQUE WRENCH FOR TIGHTENING MODEL CPT-G OPERATING INSTRUCTION CPT20X10D-G CPT100X15D-G CPT280X22D-G To use this product correctly and safely, please read this manual carefully before use. If you have any questions about the product, contact your nearest distributor or TOHNICHI MFG. CO., LTD.
- Page 2 To the user In order to use the torque wrench properly and safely, please read this instructions before operation. If any question, please contact a Tohnichi official distributor or Tohnichi office. Keep this operating instruction for future use. The safety alert symbol This symbol means Attention! Your safety is involved.
- Page 3 (10) For accurate tightening or measuring, make sure to grip on the effective length line firmly and apply force at a right angle. If the product should catch fire or emit unusual smell, stop using the product immediately, and put it in a safe place. Contact TOHNICHI MFG. CO., LTD. for further instructions.
-
Page 4: Table Of Contents
Contents 1. Outline ・ ・ ・ ・ ・ ・ ・ ・ ・ ・ ・ ・ ・ ・ ・ ・ ・ ・ ・ ・ ・ ・ ・ ・ ・ ・ ・ ・ ・ ・ ・ ・ ・ ・ ・ ・ ・ ・ ・ ・ ・ ・ ・ 5 2.... -
Page 5: 1. Outline
Use it only with a CPT torque wrench, otherwise the product may not maintain the original durability. In case of breakage, Tohnichi will be able to replace it with a new one (at your cost). Repairing may not be acceptable. -
Page 6: 4. Name And Explanation Of Each Part
① ② ⑨ ⑩ ③ ④ ⑤ ⑥ ⑦ ⑧ ① LCD display Torque value, memory counter, tightening mode, torque unit, residual battery level will be indicated. ② Indicator display Applied torque will be indicated by red and blue LED lamp positioning. ③... -
Page 7: 5. Explanation Of Functions
5. Explanation of Functions ① Auto Zero function In RUN mode, push Clear key to activate Auto Zero function. Displayed torque value will be cleared to zero (Auto Zero function will activate only when the displayed torque is within 7.5% of the maximum torque value). If the value is 7.5% of the maximum torque or more, it may show "Err9". -
Page 8: 6. Explanation Of Each Mode
6. Explanation of Each Mode ① Continuous display (RUN mode) Set the memory counter to "00". The applied torque will be directly displayed without peak holding, and torque value will be returned to zero as you release loading. Indicator display will not be used. ②... - Page 9 Tightening operation ○ Example) Target torque: 100N ・ m Target range : 5% Blue LED turns on to indicate the target torque. Blue N・m Start tightening Blue When it reaches 20% of the target torque, red LED N・m turns on. (Red LED may turn on at 7.5% of the max 20.0 capacity torque in case 20% of the target torque is higher than this value.)
-
Page 10: ② Judgement Tightening Mode
② Judgement tightening mode "JUDGE" This mode is for tightening with a judgement function. Set the tightening mode to "JUDGE". Set the target torque range (lower limit value and the upper limit value) and tightening direction. A judgement will be given as you press MEM key after tightening (In Auto memory/reset mode, the judgement will be given automatically). -
Page 11: ③ Saving Measured Data
Press MEM key to judge if the tightened torque value Blue J 02 N・m is within the target range (In Auto Memory/Reset mode, judgement will be given automatically). ・ OK: Measured data will be saved and proceed to the next counter. Proceed to the next counter ・... -
Page 12: ⑤ Output Of The Measured Data
Output of the measured data ⑤ ● Outputting one data To output the measured data to PC, connect CPT to PC with the communication cable (No 585). Use ▲ ▼ key to select the data and press MEM key. ● Outputting selected range of data To output a selected range of data at one time, connect CPT to PC with the communication cable (No 585). -
Page 13: ⑦ Inspection Use By Re-Tightening Torque Method/Loosening Torque Method
Use ▲▼ key to select the lowest end of the data range to delete, and press MD key. It shows the number of data to delete (Press C key to cancel). n N・m n N・m 10 10 Number of data to delete Keep MD key pressed, and press C key, then the selected range of data will be deleted at one time. -
Page 14: 8. Various Settings
8. Various Settings CPT has various kinds of modes and settings according to customer's usage. Please refer to the table below for available modes and detailed functions of CPT. ① Settings Common Settings Subject Display Delivery Condition Select Selecting Subject to Set MODE-S PARA_S Measurment Mode... -
Page 15: ③ Setting On Preset Tightening Mode
③ Setting on Preset tightening mode Use ▲▼ key to set the counter to 00 (RUN mode). N・m Keep MD key pressed for 2 seconds or more seconds, then it proceeds to the setting subject selection. ● Selecting setting subject Select MODE_S (setting on tightening mode and torque setting)... -
Page 16: ④ Setting On Judgement Tightening Mode
● Target range setting (Default setting: 0%) Set the target torque range to be indicated by blue LED. Select target range by percentage (%) based on the target torque (select in 0-10% range). Example: When target torque is 100N ・ m and Target range 5%, the actual range will be 100N ・ m-105N ・ m (The target range will be lit by blue LED). - Page 17 ● Data Clearance Confirmation Press MEM key to save the tightening mode and S E L proceeds to the next. CLR_OK (Press C key to return to Tightening mode setting.) Data clearance confirmation (below) will be skipped if the tightening mode is not changed. Go to next Step.(Lower limit setting) S E L ※...
-
Page 18: ⑤ Other Settings
⑤ Other settings Use ▲▼ key to set the memory counter to 00 (RUN N・m measuring mode). Keep MD key pressed for more than 2 seconds till it the display changes. ● Selecting setting subject Select MODE_S (setting on tightening mode and torque setting), or PARA_S (other parameter settings). - Page 19 ● Sound option (Default setting: ON) Choose whether or not to activate sound on any tightening operations. Use ▲▼ key and press MEM key to save and proceed to the next. (Press MD key to proceed without saving. ON OFF Press C key to return to RUN measuring mode).
-
Page 20: 9. External Output
9. External Output ① Communication settings for external output Synchro system : asynchronous communication method Baud rate : 2400/4800/9600/19200bps Data length : 7bit/8bit Stop bit : 1 bit Parity : NONE / EVEN / ODD ② PC output Connect CPT to PC with the dedicated communication cable (No.585). Set the PC’s baud rate in line with CPT setting. ※... -
Page 21: 11. Error Message
◎ Turn off the power once and turn it on without touching any other keys. ・ If Err disappears, it should work properly. ・ If Error does not disappear, it needs to be repaired. Please contact TOHNICHI MFG.CO.,LTD. or your nearest distributor. -
Page 22: 12. Specifications
12. Specifications Common Specifications Overall Length with TQH Head L'2 Overall Length with TQH Head L'1 Effective Length L 131.5 TQH comes with "-SET" model version only □ a Accuracy ± 3% Torque Range Model [N.m] [kgf.cm] [kgf.m] [lbf.in] [lbf.ft] Min.-Max. - Page 24 Designs and specifications are subject to change without notice. TEL: +1-(0)678-423-5777 FAX: +1-(0)678-423-1333 4046 Hwy. 154 Suite 103 Newnan, GA 30265 Website:http://www.tohnichi-sh.com 13.05.YK...
Need help?
Do you have a question about the ProTork CPT20X10D-G and is the answer not in the manual?
Questions and answers