TSC ME240 series Quick Installation Manual
Hide thumbs
Also See for ME240 series:
- User manual (85 pages) ,
- Service manual (49 pages) ,
- Programming manual (434 pages)
Advertisement
Quick Links
Quick Installation Guide
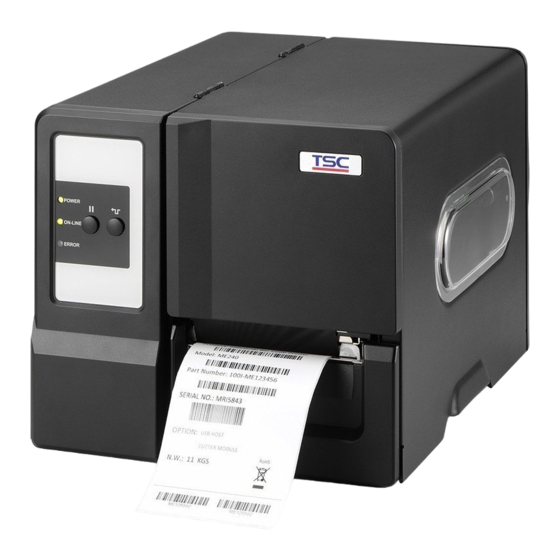
Printer Overview
Fan-fold Paper
Entrance Chute
LED Indicator
& Keys
Media View
Paper Exit
Window
Chute
Note:
The interface picture here is for reference only. Please refer to the product specification for the interfaces
availability.
Printer Cover
Ribbon Rewind
Spindle
Ribbon Supply
Spindle
Print Head Pressure
Adjustment Knobs
SD Card Socket
Ethernet Interface
(Option)
RS-232C
Interface
USB Interface
Print Head
Platen Roller
Media Sensor
Label Roll Guard
Label Supply
Spindle
3" Core
Media
Adapter
Label Guide
Guide Bar
Loading the Ribbon
Centronics
Interface
(Option)
USB Host
Interface
(Option)
(1) Open the printer right side cover.
Install the ribbon and paper core
onto ribbon supply spindle and
Power Switch
ribbon rewind spindle.
Power Jack
Socket
(4) Stick ribbon onto ribbon rewind
paper core, keeping the ribbon flat
and wrinkle-free.
* Loading path for ribbon
Print Head
Release Lever
Ribbon Sensor
Ribbon
Guide Bar
Page 1 of 2
(2) Push print head release lever to
(3) Thread ribbon under the ribbon
open print head mechanism.
guide bar and through ribbon
sensor slot. (Please refer to
"Loading path for ribbon" as
following fig.)
(5) Wind the ribbon rewind spindle
(6) Close the print head mechanism
clockwise roughly 3~5 circles until
by pushing the both sides of print
ribbon is smooth, properly stretched
head mechanism. Make sure the
and wrinkle-free.
latches are engaged properly.
Advertisement

Related Manuals for TSC ME240 series


Summary of Contents for TSC ME240 series
- Page 1 Quick Installation Guide Printer Overview Loading the Ribbon SD Card Socket Fan-fold Paper Entrance Chute Centronics LED Indicator Interface Ethernet Interface & Keys (Option) (Option) USB Host Interface (Option) (1) Open the printer right side cover. (2) Push print head release lever to (3) Thread ribbon under the ribbon RS-232C Install the ribbon and paper core...
- Page 2 (When insert the 3 inch TSC’s Diagnostic Utility is an integrated tool incorporating features that enable you to explore a printer’s settings/status; down the label roll guard. (If your core adapter to the spindle, please change a printer’s settings;...
Need help?
Do you have a question about the ME240 series and is the answer not in the manual?
Questions and answers