Mr. Heater MH40NG Operating Instructions And Owner's Manual
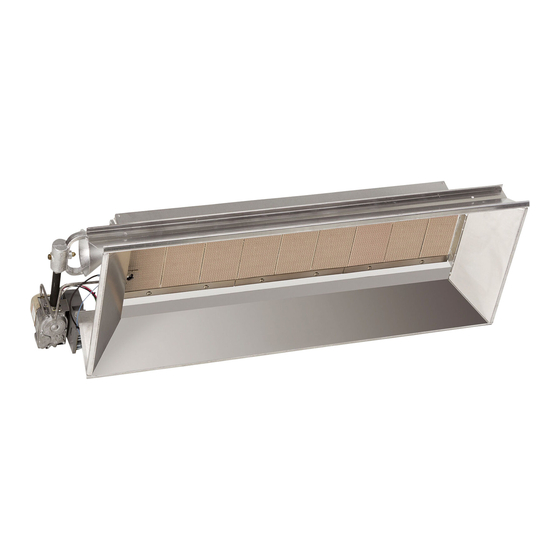
Gas fired infra-red workshop heater
Hide thumbs
Also See for MH40NG:
- Operating instructions and owner's manual (24 pages) ,
- Installation and operating instructions manual (13 pages) ,
- Installation and operation instructions manual (13 pages)
Table of Contents
Advertisement
Available languages
Available languages
Installer: Leave this manual with the appliance. Consumer: Retain this manual for future reference.
OPERATING INSTRUCTIONS AND OWNER'S MANUAL
READ INSTRUCTIONS CAREFULLY: Read and follow all instructions. Place
instructions in a safe place for future reference. Do not allow anyone who
has not read these instructions to assemble, light, adjust or operate the
heater.
GAS FIRED INFRA-RED WORKSHOP HEATER
WARNING:
— Do not store or use gasoline or other flammable vapors and liquids in the vicinity of this or any
other appliance.
— WHAT To Do IF YoU SMeLL GAS
•
Shut off gas supply
•
Do not try to light appliance
•
Do not touch an electrical switch; do not use any phone in your building
•
Immediately call your gas supplier from a neighbor's phone.
Follow the gas supplier's instructions
•
If you cannot reach your gas supplier, call the fire department
— Installation and service must be performed by a qualified installer, service agency or the gas
supplier.
This is an unvented gas-fired portable heater. It uses air (oxygen) from the area in which it is used.
Adequate combustion and ventilation air must be provided. Refer to page 5.
If the information in this manual is not followed exactly, a fire or explosion
may result causing property damage, personal injury or loss of life.
eNeRCo GRoUP INC., 4560 W. 160TH ST., CLeVeLAND, oHIo 44135 • 800-251-0001
MR. HEATER
MH40NG
MH40LP
LANGUAGES
ENGLISH
Pages E1 — E8
SPANISH
Pages S1 — S8
FRENCH
Pages F1 — F8
18682 - 2016 - CB
Advertisement
Chapters
Table of Contents

Related Manuals for Mr. Heater MH40NG


Summary of Contents for Mr. Heater MH40NG
- Page 1 OPERATING INSTRUCTIONS AND OWNER’S MANUAL READ INSTRUCTIONS CAREFULLY: Read and follow all instructions. Place MR. HEATER instructions in a safe place for future reference. Do not allow anyone who has not read these instructions to assemble, light, adjust or operate the MH40NG heater.
-
Page 2: Table Of Contents
13. RePLACING THe GAS VALVe UNIT ......... 7 6. GAS PReSSURe ............... 4 14. FReQUeNCY oF oPeRAToR CHeCKS ........7 7. eLeCTRICAL ................4 MH40 RePLACeMeNT PARTS LIST ..........7 8. THeRMoSTAT & LoCATIoN ............. 4 Model # MH40NG/LP Installation Instructions and owner’s Manual... -
Page 3: General Information
1. GENERAL INFORMATION *The following extra NFPA manuals are helpful when installing MR. HEATER in a location not anticipated in this manual: a. Your heater comes fully assembled and is tested at the factory Number Related Subject for proper gas and input as stated on the name plate. -
Page 4: Suspension
½” MAXIMUM DePTH oF INSeRTS location, drill appropriate size anchor holes, install the anchors and requirements INTo GAS VALVe securely attach the thermostat using the mounting screws. Model # MH40NG/LP Installation Instructions and owner’s Manual... -
Page 5: Ventilation
NOTE: for not less than 400 CFM for every 100,000 BTU input except During the initial startup of MR. HeATeR an odor and, perhaps, that the infiltration area may be included in the intake area. some vapor will come from the heater. This is the gasket binding b. -
Page 6: Replacing The Gas Valve Unit
Clean orifice or replace Failure to ignite Main gas off open manual valves Air in gas line Bleed gas line Loose wire connections Tighten wire connections Dirty wire connections Clean terminals and secure terminals Model # MH40NG/LP Installation Instructions and owner’s Manual... -
Page 7: Mh40 Replacement Parts List
14 ....1 1405 ....PILoT BURNeR L/P 7 ...... 05450 ....oRIFICe BURNeR-PRoPANe GAS OPTIONAL CONVERSION KITS: 00286A ....LP to NG Conversion 8 ...... 05437 ....oRIFICe – BURNeR NAT. GAS 00285A ....NG to LP Conversion Model # MH40NG/LP Installation Instructions and owner’s Manual... -
Page 8: Parts Ordering Information
DIReCT FRoM THe FACToRY AND MUST Be INSTALLeD BY A QUALIFIeD SeRVICe AGeNCY. PARTS ORDERING INFORMATION: PURCHASING: Accessories may be purchased at any Mr. Heater local dealer or direct from the factory FOR INFORMATION REGARDING SERVICE Please call Toll-Free 800-251-0001 www.mrheater.com... - Page 9 Instalador: deje este manual junto con el artefacto. Consumidor: conserve este manual para referencia futura. INSTRUCCIONES DE USO Y MANUAL DEL USUARIO LEA CUIDADOSAMENTE LAS INSTRUCCIONES: lea y siga todas las MR. HEATER instrucciones. Conserve estas instrucciones en un lugar seguro para futura referencia. No permita que nadie que no haya leído estas instrucciones MH40NG arme, encienda, ajuste o use el calentador.
- Page 10 4. SUMINISTRO DE GAS ............S4 12. INSTRUCCIONES DE MANTENIMIENTO PARA EL OPERADOR ............S5 5. REQUISITOS DE LAS TUBERÍAS ..........S4 13. REEMPLAZO DE LA UNIDAD DE LA VÁLVULA DE GAS ..S7 6. PRESIÓN DE GAS ..............S4 14. FRECUENCIA DE LAS VERIFICACIONES DEL OPERADOR ..S7 7. ELECTRICIDAD ............... S4 LISTA DE REPUESTOS MH40 ............. S7 8. TERMOSTATO Y UBICACIÓN ..........S4 Modelo N.° MH40NG/LP Instrucciones de uso y manual del usuario...
-
Page 11: Información General
*Los siguientes manuales adicionales de la NFPA son útiles cuando b. Antes de seguir con la instalación, verifique que la unidad no se debe instalar un MR. HEATER en un lugar no previsto en este esté dañada. Debe notificar a la compañía de transporte acerca manual: de cualquier daño y solicitar que inspeccionen la unidad. -
Page 12: Suspensión
Figura 2. montaje del termostato. Utilice la placa posterior del termostato Requisitos de la CUERPO DE LA VÁLVULA DE GAS como plantilla para marcar la ubicación del orificio, perfore los conexión de la PROFUNDIDAD MÁXIMA DE LOS orificios de anclaje del tamaño adecuado, instale los anclajes y válvula de gas ACCESORIOS EN LA VÁLVULA sujete firmemente el termostato con los tornillos de montaje. DE GAS DE 1,27 CM (½") Modelo N.° MH40NG/LP Instrucciones de uso y manual del usuario... -
Page 13: Ventilación
Para ajustar la llama después de la instalación). del piloto, consulte la Figura 7. Gire la perilla manual de control de gas hasta la posición PILOTO. AJUSTE ADECUADO 10 A 13 MILÍMETROS Presione la perilla manual de control de gas. Con un fósforo, DE LA LLAMA (3/8 A ½ PULGADAS) encienda el piloto. Vea la figura 6. Mantenga la perilla presionada durante aproximadamente 30 segundos para permitir que el aire que se encuentra en las tuberías de gas pase por el piloto y, una TERMOCUPLA vez que el piloto esté encendido, permita que la termocupla se caliente lo suficiente como para activar la válvula de seguridad en Figura 7. Ajuste adecuado de la llama una posición abierta. Modelo N.° MH40NG/LP Instrucciones de uso y manual del usuario... -
Page 14: Reemplazo De La Unidad De La Válvula De Gas
El piloto queda encendido pero el Cable flojo o mal conectado Ajustar las conexiones, verificar el diagrama quemador principal no enciende Control defectuoso Reemplazar Orificio del quemador bloqueado Limpiar el orificio o reemplazar No enciende El suministro de gas principal está apagado Abrir las válvulas manuales Aire en la tubería de gas Purgar la tubería de gas Conexiones eléctricas flojas Ajustar las conexiones eléctricas Conexiones eléctricas sucias Limpiar y sujetar los terminales Modelo N.° MH40NG/LP Instrucciones de uso y manual del usuario... -
Page 15: Lista De Repuestos Mh40
13 ....F114581 ....JUEGO DE GANCHOS PARA 6 ....05573 .... O RIFICIO – PILOTO GAS PROPANO COLGAR EL CALENTADOR 7 ....05450 .... O RIFICIO – QUEMADOR 14 ....1 1405 ....QUEMADOR DEL PILOTO GAS L/P GAS PROPANO JUEGOS DE CONVERSIÓN OPCIONALES: 8 ..... 05437 ....ORIFICIO – QUEMADOR GAS NAT. 00286A....Conversión de LP a gas natural 00285A ....Conversión de gas natural a LP Modelo N.° MH40NG/LP Instrucciones de uso y manual del usuario... - Page 16 Nuestro horario de trabajo es de 8:00 a. m. a 5:00 p. m., hora del este, de lunes a viernes. Incluya el número de modelo, la fecha de compra y la descripción del problema en todas sus comunicaciones. GARANTÍA LIMITADA Enerco Group, Inc. garantiza la calidad material y de fabricación de sus calentadores y accesorios por un período de 1 año a partir de la fecha de compra. Enerco Group, Inc. reparará o reemplazará este producto sin cargo si presentara desperfectos dentro del primer año tras realizada la compra, siempre y cuando el cliente cubra los gastos de la devolución y presente el comprobante de compra a Enerco Group, Inc. dentro del período de garantía. Enerco Group, Inc. se reserva el derecho de hacer cambios en cualquier momento, sin previo aviso, en los colores, especificaciones, accesorios, materiales y modelos. REGISTRO DEL PRODUCTO: Gracias por su compra. Inicie sesión en http://www.egiregistration.com para registrar su producto. ENERCO GROUP, INC., 4560 W. 160TH ST., CLEVELAND, OHIO 44135 • 800-251-0001 Mr. Heater y Portable Buddy son marcas comerciales registradas de Enerco Group, Inc. © 2015, Enerco/Mr. Heater. Todos los derechos reservados. ANSI Z83.19a-2011/CSA 2.35a-2011 Modelo N.° MH40NG/LP Instrucciones de uso y manual del usuario...
- Page 17 À l’installateur : rangez ce manuel avec l’appareil. Au consommateur : conservez ce manuel pour vous y référer ultérieurement. GUIDE D’UTILISATION ET INSTRUCTIONS DE FONCTIONNEMENT LISEZ SOIGNEUSEMENT LES INSTRUCTIONS :Lisezetobservez MR. HEATER touteslesinstructions.Conservezlesinstructionsensécuritépourvousy référerultérieurement.Interdisezàquiconquen’ayantpaslulesprésentes MH40NG instructionsd’assembler,d’allumer,derégleroudefairefonctionnercet MH40LP appareildechauffage. RADIATEUR AUTONOME À GAZ OU À INFRAROUGE...
- Page 18 DEPRESSIOND'ADMISSIONAUSYSTÈME. L'utilisationdecetappareilcréedessous-produitsdecombustion contenantdumonoxydedecarbone,unproduitchimiquereconnu DANGER : parl'ÉtatdelaCaliforniecommecausedecanceretd'anomalies congénitales(ouautresrisquespourlareproduction). L'EMPOISONNEMENTAUMONOXYDEDECARBONEPEUTCAUSER LAMORT TABLE DES MATIÈRES 1.RENSEIGNEMENTSGÉNÉRAUX ..........F3 9.VENTILATION .................F5 2.DÉGAGEMENT...............F3 10.PROCÉDUREDEDÉMARRAGE..........F5 3.SUSPENSION.................F4 1 1.FERMETUREDEL'APPAREILDECHAUFFAGE......F5 4.ALIMENTATIONENGAZ ............F4 12.GUIDED'INSTRUCTIONSD'ENTRETIENDEL'UTILISATEUR..F5 5.EXIGENCESRELATIVESAUXCONDUITES.......F4 13.REMPLACEMENTDEL'ENSEMBLEDESOUPAPEDEGAZ..F7 6.PRESSIONDUGAZ..............F4 14.FRÉQUENCEDESVÉRIFICATIONSPARL'UTILISATEUR ....F7 7.CIRCUITÉLECTRIQUE ..............F4 LISTEDEPIÈCESDERECHANGEPOURLEMH40......F7 8.THERMOSTATETEMPLACEMENTD'INSTALLATION....F4 Modèlen°MH40NG/LP Guided’installationetd’utilisation...
-
Page 19: Renseignements Généraux
1. RENSEIGNEMENTS GÉNÉRAUX *Les manuels NFPA supplémentaires suivants sont utiles lors de l'installation de l'appareil MR. HEATER dans un endroit non prévu a. Votre appareil de chauffage est livré entièrement assemblé et a dans ce manuel : été préalablement inspecté en usine pour approuver le type de gaz utilisé... -
Page 20: Suspension
Desfiletspluslongsqueceuxapparaissantdanslafigurepeuvent répondàtouteslesexigencesmentionnéesprécédemment. provoquerunedistorsionouunedéfaillancedelasoupapeàgaz. Reportez-vousauxinstructionsfourniesaveclethermostatpour • Unetrappeàsédimentsrépondantauxexigences obtenirlesrenseignementsgénérauxetlesdirectivesdemontage. caractéristiquesdelafigure3doitêtreinstalléedansla conduiteverslasoupapeàgaz. Silemurestfaitdemontantsetdeplacoplâtre,alorsutilisezles visàmétaln°6deunpouceinclusesaveclethermostatetfixez-le 1,90CM(¾ po) LONGUEUR àl'emplacementchoisi. MAXIMALEDUFILETAGE S'ils'agitd'unmurenbriqueouenmaçonnerie,utilisezles TUYAUNOIR1,27CM(½ po) ancragesappropriéspourfixerlesvisdemontageduthermostat. Utilisezlaplaquearrièrecommegabaritpourmarquer l'emplacementdutrou,puispercezdestrousdedimension Figure 2. appropriéepouraccueillirlesancragesetfixezsolidementle Exigences de thermostatàl'aidedesvisdemontage. CORPSDELASOUPAPEÀGAZ connexion de la 1,27CM(½ po)-PROFONDEURMAXIMALE soupape à gaz DESINSERTSDANSLASOUPAPEÀGAZ Modèlen°MH40NG/LP Guided’installationetd’utilisation... -
Page 21: Ventilation
OFF,enfoncezpartiellementleboutonetfaitestournerjusqu'àla détaillantMr.Heater,ouleserviceàlaclientèledufabricantau positionOFF.VoirlaFigure6. 1-800-251-0001. Attendez5minutespourpermettreaugazquis'estaccumulé 2. RÉGLAGE DE LA FLAMME DE LA VEILLEUSE (PILOTE) danslebrûleurprincipaldes'échapper(particulièrementimportant Laflammedelaveilleuse(pilote)doitfaireenviron10à13mm aprèsl'installation). (3/8ou½po.)del'emboutduthermocoupleoudugénérateur. Pourréglerlaflammedelaveilleuse,consultezlaFigure7. Tournezleboutondecommandemanuelledugazenposition RÉGLAGEADÉQUATDELAFLAMME PILOT. 3/8À½POUCE Appuyezsurleboutondecommandemanuelledugaz.Àl'aide (10À13MILLIMÈTRES) d'uneallumette,allumezlaveilleuse.VoirlaFigure6.Tenezle boutonenfoncépendantenviron30secondespourpermettreà THERMOCOUPLE l'airdanslesconduitesdepasserparlepilotequi,unefoisallumé, permetauthermocoupledechauffersuffisammentpouractiverla soupapedesûretéenpositionouverte. Figure 7. Réglage adéquat de la flamme Modèlen°MH40NG/LP Guided’installationetd’utilisation... -
Page 22: Remplacement De L'ensemble De Soupape De Gaz
(àl’étatneufouaprèslenettoyage) Sil’orificedubrûleurestintactvérifieralors silecollecteurestendommagé Lepilotenepeutpass’allumer Orificedupilotebloqué Remplacer Robinetdegazhorsposition Leboutondurobinetdegazdoitêtre tournéverslepilote etdoitêtremaintenu enfoncé Ouvriretrégler(voirlaFigure8) Lavisderéglagedufluxdegazestpeut- êtrefermée Lepilotes’allumemaiss’éteintaussitôt Thermocoupledéfectueux Remplacer refusedes’allumer Commandedéfectueuse Remplacer Lepiloteresteallumémaislebrûleur Fildesserréouincorrectementbranché Serrerlesconnexions,vérifierlecâblage principal Schéma Commandedéfectueuse Remplacer Orificedebrûleurbloqué Nettoyerl’orificeouleremplacer Échecdel’allumage Alimentationprincipaledugazfermée Ouvrirsoupapesmanuelles Purgerconduitedegaz Airdanslaconduitedegaz Serrerlesconnexionsdefils Connexionsdefilsdesserrées Nettoyerlesbornesetlesfixer Connexionsdefilsencrassées Modèlen°MH40NG/LP Guided’installationetd’utilisation... -
Page 23: Liste De Pièces De Rechange Pour Le Mh40
5 ....05574 ....ORIFICE–PILOTEGAZNATURELGAZ 13....F114581..ENSEMBLEDESUPPORTPOUR APPAREILDECHAUFFAGE 6 ....05573....ORIFICE–PILOTEGAZPROPANE 14....1 1405..BRÛLEURDUPILOTEL/P 7 ....05450 ....ORIFICE–BRÛLEUR-GAZPROPANE TROUSSES DE CONVERSION FACULTATIVES : 8 ....05437 ....ORIFICE–BRÛLEURGAZNAT.GAZ 00286A ....ConversionLPàNG 00285A....ConversiondeNGàLP Modèlen°MH40NG/LP Guided’installationetd’utilisation... - Page 24 MR. HEATER INSTRUCTIONS DE FONCTIONNEMENT ET GUIDE D'UTILISATION MH40NG MH40LP AVERTISSEMENT : N'UTILISEZQUELESPIÈCESDEREMPLACEMENTDUFABRICANT.L'UTILISATION D'AUTRESPIÈCESRISQUEDECAUSERDESBLESSURESETLAMORT.LESPIÈCESDE REMPLACEMENTNESONTOFFERTESQUEPARLEFABRICANTETDOIVENTÊTRE INSTALLÉESPARUNEENTREPRISESPÉCIALISÉE. INFORMATIONS SUR LA COMMANDE DE PIÈCES : ACHAT : Onpeutseprocurerlesaccessoiresparl'entremisedetouslesdétaillants locauxMr.Heateroudirectementdufabricant. POUR OBTENIR DES INFORMATIONS SUR LE SERVICE Appelezsansfraisau800-251-0001 www.mrheater.com Nosheuresd'ouverturesontde8h00à17hHE,dulundiauvendredi. Veuillezindiquerlenumérodumodèle,ladated'achatetladescriptionduproblème danstoutesvoscommunicationsavecnous. GARANTIE LIMITÉE EnercoGroupInc.garantitsesappareilsdechauffageetsesaccessoirescontre...
Need help?
Do you have a question about the MH40NG and is the answer not in the manual?
Questions and answers