Tenda F3 User Manual
Hide thumbs
Also See for F3:
- User manual (93 pages) ,
- Quick installation manual (67 pages) ,
- Installation manual
Table of Contents
Advertisement
Quick Links
Advertisement
Table of Contents

Related Manuals for Tenda F3


Summary of Contents for Tenda F3
- Page 1 Wireless Router Model: F3 User Guide...
-
Page 2: Copyright Statement
Tenda reserves the right to make changes to the products without obligation to notify any person or organization of such revisions or changes. Tenda does not assume any liability that may occur due to the use or application of the product described herein. Every effort has... -
Page 3: Acronyms And Abbreviations
Preface Thank you for choosing Tenda! Please read this user guide before you start with AC18. Conventions The typographical elements that may be found in this document are defined as follows. Item Presentation Example Cascading menus > System > Live Users... -
Page 4: Additional Information
If you need more help, contact us by any of the following means. We will be glad to assist you as soon as possible. Global: (86) 755-27657180 United States: Hotline 1-800-570-5892 Email Canada: 1-888-998-8966 support@tenda.com.cn Hong Kong: 00852-81931998 Australia: 1300787922 New Zealand: 800787922 http://www.tendacn.com tendasz Website Skype... -
Page 5: Table Of Contents
Contents 1 Get to Know Your Router ........................1 1.1 Overview ............................1 1.2 Packing List ..........................1 1.3 Appearance..........................2 1.3.1 LED Indicators ........................2 1.3.2 Button & Ports ........................3 1.3.3 Label on the Bottom ......................4 2 Quick Setup ............................5 2.1 Connecting to Your Router ...................... - Page 6 3.3 Wireless Settings ........................21 3.3.1 WiFi ON/OFF Button ......................22 3.3.2 WiFi Name and Password ....................22 3.3.3 WiFi Schedule ........................24 3.3.4 WPS ..........................25 3.3.5 Wireless Parameters ......................26 3.4 Bandwidth Control ........................27 3.5 Wireless Repeating ........................30 3.5.1 Enabling the WISP Mode ....................
- Page 7 A.2.1 Windows 8 ........................61 A.2.2 Windows 7 ........................63 A.2.3 Windows XP ........................65 A.3 FAQ ............................66 A.4 Safety and Emission Statement ....................69...
-
Page 8: Get To Know Your Router
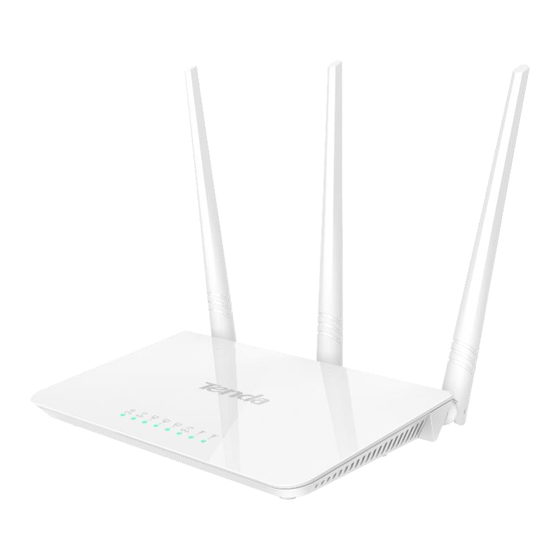
Get to Know Your Router 1.1 Overview F3 is a smart router that helps you quickly set up wired and wireless internet connections at home. It boasts three external antennas to provide strong wireless signals throughout your apartment for ultimate internet surfing experience. User-friendly web UI allows you to easily configure the router. -
Page 9: Appearance
1.3 Appearance 1.3.1 LED Indicators States of LED indicators of the router that is powered on State State Description Indicator Blinking The system is working properly. Solid on The WiFi function is enabled. The router is transmitting or receiving data over the WiFi WiFi Blinking network. -
Page 10: Button & Ports
State State Description Indicator Solid on for 5 mins->Off WPS negotiation is successful. The router is preparing for or performing WPS negotiation Blinking with a wireless client. The WPS function is disabled. WPS negotiation is failed. Reserved 1.3.2 Button & Ports Description of buttons and ports Button/Port Description... -
Page 11: Label On The Bottom
1.3.3 Label on the Bottom (1) Default IP address of the router. You can use the IP address to access the router web UI. (2) MAC address of the router. Each router has a unique MAC address and the default WiFi name (Tenda_XXXXXX) consists of “Tenda_”... -
Page 12: Quick Setup
Quick Setup 2.1 Connecting to Your Router 2.1.1 Connecting to Your Router Through WiFi Perform the following procedure: Step 1 Connect the WAN port using any of the methods shown in the following figure depending on your internet connection means. Step 2 Use the power adapter to connect the router to a power supply. -
Page 13: Connecting To Your Router Using An Ethernet Cable
---End 2.1.2 Connecting to Your Router Using an Ethernet Cable Perform the following procedure: Step 1 Connect the internet port using any of the methods shown in the following figure depending on your internet connection means. Step 2 Use the power adapter to connect the router to a power supply. Step 3 Connect your computer to port 1, 2 or 3 of the router using an Ethernet cable. -
Page 14: Setting Up An Internet Connection
---End 2.2 Setting up an Internet Connection Step 1 Start a web browser, type tendawifi.com or 192.168.0.1 in the address bar, and press Enter. Step 2 The router detects your connection type. Step 3 According to the detection result, configure related settings. For details about the connection-type-specific configuration procedures, refer to Setting up an Internet Connection with... -
Page 15: Setting Up An Internet Connection With Pppoe
---End 2.2.1 Setting up an Internet Connection with PPPoE Step 1 Select PPPoE, and enter your PPPoE user name and password provided by your internet service provider. Step 2 Set a WiFi name and password, and click OK. -
Page 16: Setting Up An Internet Connection With A Dynamic Ip Address
---End The WiFi password indicates the password for connecting to the WiFi network of the router. Ensure that your password meets the complexity requirement. After the preceding procedure, the Status page appears. If "You can surf the Internet" is displayed at Connection Status, the internet is accessible. - Page 17 ----End The WiFi password indicates the password for connecting to the WiFi network of the router. Ensure that your password meets the complexity requirement. After the preceding procedure, the Status page appears. If "You can surf the Internet" is displayed at Connection Status, the internet is accessible.
-
Page 18: Setting Up An Internet Connection With A Static Ip Address
If you connect to your router through WiFi, you need to connect to your router again after setting up the WiFi name or password. 2.2.3 Setting up an Internet Connection with a Static IP Address Step 1 Select Static IP, enter your static IP address, subnet mask, default gateway, preferred DNS, and alternative DNS provided by your internet service provider. - Page 19 If you connect to your router through WiFi, you need to connect to your router again after setting up the WiFi name or password. To enable the router to provide more stable WiFi signals and cover a wider area, position your router as follows: ...
-
Page 20: Functions
Functions 3.1 Status Log in to the router web UI and access the Status page. On this page, you can view the network status of the router, attached devices, add blacklisted devices, and so on. 3.1.1 Internet Connection Status This part displays connection status. If “You can surf the Internet” is displayed, you can access the internet through the router. -
Page 21: Attached Devices And Real-Time Statistics
3.1.2 Attached Devices and Real-time Statistics This part displays the number of devices connected to your router, and the total download speed and upload speed. You can click this field to go to the bandwidth control page. For the detailed configuration procedure, refer to Bandwidth Control. - Page 22 information to determine whether settings have taken effect.
-
Page 23: Internet Settings
3.2 Internet Settings This module enables you to configure internet settings and view internet connection status. When you use the router for the first time or after you reset the router, the router automatically detects your internet connection type. You are recommended to select the detected type and follow the instructions of the quick setup wizard to configure internet settings. - Page 24 The WiFi password indicates the password for connecting to the WiFi network of the router. Ensure that your password meets the complexity requirement. After finishing the configuration above, the Status page appears. If "You can surf the Internet" is displayed at Connection Status, the internet is accessible.
-
Page 25: Set Up An Internet Connection With Dynamic Ip
If you connect to your router through WiFi, you need to connect to your router again after setting up the WiFi name or password. ----End 3.2.2 Set up an Internet Connection with Dynamic IP Step 1 Select Dynamic IP. Step 2 Set a WiFi name and password, and click OK. -
Page 26: Set Up An Internet Connection With A Static Ip Address
If you connect to your router through WiFi, you need to connect to your router again after setting up the WiFi name or password. ----End 3.2.3 Set up an Internet Connection with a Static IP Address Step 1 Select Static IP, enter your static IP address, subnet mask, default gateway, preferred DNS, and alternative DNS provided by your internet service provider. - Page 27 The WiFi password indicates the password for connecting to the WiFi network of the router. Ensure that your password meets the complexity requirement. After finishing the configuration above, the Status page appears. If "You can surf the Internet" is displayed at Connection Status, the internet is accessible.
-
Page 28: Wireless Settings
If you connect to your router through WiFi, you need to connect to your router again after setting up the WiFi name or password. ----End 3.3 Wireless Settings This module enables you to configure the WiFi function of the router. -
Page 29: Wifi On/Off Button
3.3.1 WiFi ON/OFF Button This button specifies whether to enable the WiFi function. By default, the WiFi function is enabled. You can click this button to change it to the state , and click OK button on the bottom of the page to disable the WiFi function. - Page 30 Parameter Description It specifies whether to prevent a WiFi name from being detected by wireless devices. If this function is enabled, the WiFi name is not broadcast. Therefore, the WiFi name Hide WiFi is not displayed on the available WiFi networks list of a wireless device. To connect a wireless device such as a smart phone to the WiFi network, you need to manually enter the WiFi name and password of the network on the device.
-
Page 31: Wifi Schedule
3.3.3 WiFi Schedule It specifies whether to enable the WiFi function schedule, which allows you to specify the downtime of the function. By default, the schedule is disabled. For the configuration procedure, refer to the following example. Application Scenario You want to disable the WiFi function during 23:00 to 7:00 every day for a healthier sleep environment. WiFi function downtime: 23:00~07:00 every day In this period, the WiFi function... -
Page 32: Wps
Step 3 Set Turn off WiFi during to the downtime. In this example, the downtime is 23:00~07:00. Step 4 Set Repeat to the days to which the downtime is applied. In this example, select Everyday. Step 5 Click OK to save and activate your settings. ---End Verification Verify that the WiFi network is inaccessible during 23:00 to 07:00 every day but accessible during the... -
Page 33: Wireless Parameters
Enabling WPS function via WPS button Hold on the WPS/RST button on the rear panel of the router for about 1 second and then release it to enable the WPS function. 3.3.5 Wireless Parameters It is recommended that you retain the default wireless parameters settings. Change the settings only when it is necessary. -
Page 34: Bandwidth Control
3.4 Bandwidth Control If multiple devices access the internet through the router, bandwidth control is recommended, so that high-speed file download by a device does not reduce the internet access speed of the other devices. To implement bandwidth control, and choose Bandwidth Control. The following table describes the parameters. - Page 35 download speed of every device to 2 Mbps (256KB/s). The following figure shows the application scenario. Procedure Step 1 Choose Bandwidth Control. Step 2 Select 256KB/s (SD Videos) from the Download Limit drop-down list box corresponding to each device. Step 3 Click OK.
- Page 36 ---End Verification Verify that the download speed of each device does not exceed 2 Mbps (256KB/s). Application Scenario 2 You check the device name list and find that there is an unknown device. You do not want to share your bandwidth with it.
-
Page 37: Wireless Repeating
Step 2 Click OK. ---End Verification Verify that the unknown device is added to Blocked Devices list. The device in Blocked Devices list cannot be connected to the router. To remove the device from the Blocked Devices list, click the Remove button and click OK. 3.5 Wireless Repeating The wireless repeating function enables a wireless router to function as a wireless repeater or an AP to extend wireless network coverage. -
Page 38: Enabling The Wisp Mode
Solution To improve internet connectivity, the user can add a Tenda F3 router and configure the wireless repeating function of the router to extend the WiFi network coverage. That will eliminate blind areas in the apartment, enabling the user to access the internet anywhere in the apartment. - Page 39 Procedure Step 1 Select the WISP mode. Step 2 Select the WiFi name of the original router from the WiFi Name list. In this example, select Tenda_2. Step 3 (If the password is not set on the original router, go to step 4 directly.) Enter the WiFi password of the original router in the WiFi Password text box.
-
Page 40: Enabling The Universal Repeater Mode
The router restarts automatically, and the settings take effect after the router restarts. ---End Verification After the "Connected! You can surf the Internet." message appears on the Status page, you can access the internet through the WiFi network of the new router. ... - Page 41 Procedure Step 1 Select the Universal Repeater mode. Step 2 Select the WiFi name of the original router from the WiFi Name list. In this example, select Tenda_2. Step 3 (If the password is not set on the original router, go to step 4 directly.) Enter the WiFi password of the original router in the WiFi Password text box.
-
Page 42: Enabling The Ap Mode
3.5.3 Enabling the AP Mode Log in to the web UI of the new router, and choose Wireless Repeating. Assume that the router connections shown in the following figure are set up. Procedure Step 1 Select the AP Mode mode. Step 2 Click OK. -
Page 43: Parental Control
Verify that one of the new routers’ ports (any port) is connected to a LAN port of the original router which can access the internet. 3.6 Parental Control This function enables you to control internet connectivity availability and content accessibility for devices connected to the router, ensuring healthy internet usage. - Page 44 Parameter Description Online Duration It specifies the duration that a device has been connected to the router. Manage It allows you to enable/disable parental control for a device. Disable It specifies that the website restriction function is disabled. It specifies that only the websites listed below the Websites Specified text box can Only Permit be visited during the specified time.
-
Page 45: Advanced Functions
---End 3.7 Advanced Functions The router provides advanced functions to address tailored requirements. 3.7.1 DHCP Reservation Generally, IP addresses assigned by the router to devices are changeable. Some functions, such as the DMZ host and virtual server functions, require static device IP addresses. In this case, you can use the DHCP reservation function to bind fixed IP addresses with the devices involved in the functions. -
Page 46: Port Forwarding
TCP/UDP is recommended. Action It allows you to manually add LAN servers and rules. Application Scenario An F3 is used to set up a LAN and a web server on the LAN must be accessible to internet users. This... - Page 47 requirement can be addressed using the port forwarding function. The following figure shows the application scenario. WAN IP address of the router: 102.33.66.88 IP address of the web server: 192.168.1.100 Prerequisites The WAN port of the router is assigned a public IP address. ...
-
Page 48: Ddns
---End Remote Access Enter Protocol name://WAN port IP address:External port in the address bar of a web browser on a computer over the internet to access the resources on the LAN server. In this example, enter http://102.33.66.88:80. If you are uncertain about the WAN IP address of the router, you can use the DDNS function to map the WAN IP address to a domain name, and then you can access the LAN server with the domain name instead of the WAN IP address. - Page 49 Status Application Scenario An F3 is used to set up a LAN and a web server on the LAN must be accessible to internet users. This requirement can be addressed using the DDNS and port forwarding functions. Assume that the registered domain name is tenda.dyndns.com, the username is Tenda, and the password is 1234578.
-
Page 50: Dmz Host
Click OK. Refer to port forwarding to configure the port forwarding function. Remote Access Enter http://tenda.dyndns.com:8080 in the address bar of a web browser on a computer that needs to access the resources on the LAN server over the internet. ---End 3.7.4 DMZ Host... -
Page 51: Upnp
Security software, antivirus software, and the built-in OS firewall of the computer may cause DMZ function failures. Disable them when using the DMZ function. If the DMZ function is not required, it is recommended that you disable it and enable your firewall, security, and antivirus software. Procedure Log in to the web UI of the router, choose Advanced >... -
Page 52: Wan Parameters
Step 2 Set New Password to a new password (5-32characters), and Repeat New Password to the new password. Step 3 Click OK. ---End Verification Verify that you can log in to the router web UI only after entering the new password on the login page. 3.8.2 WAN Parameters To change WAN parameters, choose Administration >... -
Page 53: Clone Mac
MTU specifies the maximum size of a packet that the router can transmit. MTU varies across connection types. The default setting is recommended. You can try changing the MTU when: You cannot access some websites or encrypted websites (such as online banking or Paypal websites). -
Page 54: Lan Parameters
Step 2 Log in to the router web UI. Step 3 Choose Administration > WAN Parameters. Step 4 Set MAC Address to Manual. Step 5 Enter the MAC address of the computer that can access the internet in the format of xx:xx:xx:xx:xx:xx. - Page 55 Modifying the LAN IP Address If you use multiple routers or other network devices (such as switches and APs) at the same time, IP address conflicts may occur. If the router is involved in an IP address conflict, change the LAN IP address of the router.
- Page 56 Enabling or Disabling the DHCP Server The default setting is recommended. If you need to change the settings, refer to the parameter description in the following table. By default, the DHCP server of the router is enabled. It is recommended that you retain the default settings.
-
Page 57: Remote Web Management
Parameter Description If the Enable is selected, the server assigns one IP address within a specified IP address range to each device connected to the router. If the Enable is deselected, no IP address is assigned to the devices DHCP Server connected to the router (such as laptops and mobile phones). - Page 58 Application Scenario An F3 is used to set up a LAN at an apartment and the router must be logged in and managed over the internet. Assume the public IP address of the router is 102.33.66.88 and the public IP address of the computer for remote login is 218.88.93.33.
-
Page 59: Date & Time
Step 4 Set Port to the port number of the web service, which is generally 8080. You can also select a port number from 1024~65535, but the port number must not be the same as that for port forwarding. Step 5 Click OK. -
Page 60: Device Management
--End 3.8.6 Device Management This section helps you maintain your router to improve the performance of your router and extend the durability of your router. Reboot Router If a setting fails to take effect or the router fails to work properly, you can try rebooting the router. To reboot the router, choose Administration >... - Page 61 It is recommended that you reset the router only when you forget your login password or Tenda technical support asks you to do so. Ensure that the power supply of the router is normal when the router is reset.
- Page 62 To back up the current configuration, click Backup. To restore a configuration: Step 1 Click Restore and select the file of the configuration to the restored. Step 2 Click Open. Step 3 Click OK on the dialog box that appears. ---End Export Syslog This function logs all key events that occur after the router is started.
-
Page 63: Firmware Upgrade
Firmware Upgrade latest firmware version router available Tenda's official website (http://www.tendacn.com/). You can download the latest version to upgrade your router. To upgrade your router, choose Administration > Device Management and perform the following procedure. It is recommended that you connect your computer to the router using an Ethernet cable for upgrading the router. -
Page 65: Appendixes
Appendixes A.1 Join Your WiFi A computer can connect to the WiFi network of the router only if it has a wireless network adapter. This part instructs you how to connect to your wireless network via your notebook or other wireless devices. We take Windows Windows... -
Page 66: Windows Xp
Step 2 Select the WiFi network of the router from the network list that appears. Step 3 Enter the WiFi password (network security key) of the WiFi network. Step 4 Click OK. ---End If you cannot find the icon, choose Start > Control Panel > Network and Internet > Network and Sharing Center, click Change adapter settings, right-click Wireless Network Connection, and choose Disable. - Page 67 ---End If the computer is connected to the network, Connected appears.
-
Page 68: Configure Your Computer
A.2 Configure Your Computer Perform the configuration procedure corresponding to Windows Windows 7, or Windows depending on your OS. A computer installed with a wired network adapter is used as an example to describe the procedures. The procedures for configuring computers installed with a wireless network adapter are similar to these procedures. - Page 69 Step 4 Select Obtain an IP address automatically and Obtain DNS server address automatically, and click OK. Step 5 Click OK in the Ethernet Properties window. ---End...
-
Page 70: Windows 7
A.2.2 Windows 7 Step 1 Click in the lower-right corner of the desktop and choose Open Network and Sharing Center. Step 2 Click Local Area Connection and then Properties. Step 3 Double-click Internet Protocol Version 4 (TCP/IPv4). - Page 71 Step 4 Select Obtain an IP address automatically and Obtain DNS server address automatically, and click OK. Step 5 Click OK in the Local Area Connection Properties window. ---End...
-
Page 72: Windows Xp
A.2.3 Windows XP Step 1 Right-click My Network Places on the desktop and choose Properties. Step 2 Right-click Local Area Connection and choose Properties. Step 3 Double-click Internet Protocol (TCP/IP). -
Page 73: Faq
Step 4 Select Obtain an IP address automatically and Obtain DNS server address automatically, and click OK. Step 5 Click OK in the Local Area Connection Properties window. ---End A.3 FAQ Read the following Frequently Asked Questions if you are running into problems. Q1: Where should I place my wireless router for wider WiFi coverage? A1: To enable the router to provide more stable WiFi signals and cover a wider area, position your router as follows:... - Page 74 Q2: What should I do if I cannot access the router login page at tendawifi.com? A2: Use the following method to troubleshoot the fault and then try accessing the page again. Ensure that the connection between the router and your computer is correct. If you connect to the router wirelessly, ensure that the connected WiFi network belongs to the router.
- Page 75 Q4: What should I do if I cannot access the internet after configuring internet settings? A4: Try the following methods: Verify that the router is connected properly. If you use a mobile phone to access the internet through the router, verify that your mobile phone is connected to the WiFi network properly.
-
Page 76: Safety And Emission Statement
RJ45 cable. Declaration of Conformity Hereby, SHENZHEN TENDA TECHNOLOGY CO. LTD. declares that the radio equipment type F3 is in compliance with Directive 2014/53/EU. The full text of the EU declaration of conformity is available at the following internet address: http://www.tendacn.com/en/service/page/ce.html... - Page 77 EIRP Power (Max.): 19dBm Caution: Adapter Model: BN049-A05009E, BN049-A05009B Manufacture: SHENZHEN HEWEISHUN NETWORK TECHNOLOGY CO., LTD. Input: 100-240V~ 50/60Hz 0.3A Output: 9V 0.6A : DC Voltage RECYCLING This product bears the selective sorting symbol for Waste electrical and electronic equipment (WEEE). This means that this product must be handled pursuant to European directive 2012/19/EU in order to be recycled or dismantled to minimize its impact on the environment.
- Page 78 This equipment should be installed and operated with minimum distance 20cm between the radiator & your body. Caution: Any changes or modifications not expressly approved by the party responsible for compliance could void the user's authority to operate this equipment. This transmitter must not be co-located or operating in conjunction with any other antenna or transmitter.
Need help?
Do you have a question about the F3 and is the answer not in the manual?
Questions and answers