Table of Contents
Advertisement
Advertisement
Table of Contents

Related Manuals for Sound Devices MixPre-10M


Summary of Contents for Sound Devices MixPre-10M
- Page 1 ® MixPre-10M Multitrack Recorder | Mixer | USB Audio Interface User Guide...
- Page 2 Trademarks The “wave” logo is a registered trademark and Kashmir is a trademark of Sound Devices, LLC. iPad, iPhone, Mac and OS X are trademarks of Apple Inc., registered in the U.S. and other countries. Windows is a registered trademark of Microsoft Corporation in the U.S.
-
Page 3: Table Of Contents
Table of Contents Quick Start Multitrack Recording Step-by-Step ..5 Intro Powering Flexible Powering Options ... . .11 Panels Front Panel ..... . .13 Right Side Panel . - Page 4 User Guide Recording and Playback Formatting SD Cards & USB Thumbdrives. .39 Clearing & Deleting Q-Points ..45 Transport Controls ....40 Locating to Q-Points .
-
Page 5: Quick Start
Multitrack Recording Step-by-Step This Quick Start chapter is meant as a “step-by-step, how-to” reference for setting up the recorder and making music with the MixPre-10M right out of the box. For more information on features and steps mentioned in this procedure, refer to later chapters in this User Guide. - Page 6 (B) Tap Project > New. (C) Tap Name to customize the name of the new project. If no custom name is provided, the MixPre-10M creates new projects with unique names, such as Song 1, Song 2, etc. by default. (D) Tap Sample Rate to select from available rates.
- Page 7 QUICK START (F) To hear the input as you adjust gain, first turn the Channel knob until fader setting is 0dB. Then, tap Gain (on Channel screen) and turn the HP encoder to adjust input sensitivity for the source. If possible, adjust with signal coming in at the intended level and observe the LED ring around the Channel knob.
- Page 8 User Guide During playback, you can change the track Level, Reverb, Air, Pan, Solo, and Mute settings. You can only use Air on one track at a time. 13. (Optional) Should you want to scrap the recording and try again, tap and then tap History.
-
Page 9: Intro
The MixPre-10M lets you record up to eight tracks at once from any of the 8 XLR inputs, Aux 3.5mm, or USB inputs. The built-in metronome helps you to keep your performance in time, while the reverb and vocal air effects add character to your recording and can aid in inspiring a great performance. - Page 10 We sincerely hope that you enjoy working with the MixPre-10M as much as we’ve enjoyed creating it! Please drop us an email at support@sounddevices. and share your experiences as we’d love to see how the MixPre-10M is fur- thering your passion.
-
Page 11: Powering
Powering Flexible Powering Options In designing the MixPre-10M, we felt that it was important for it to be able to operate in a wide array of applications and environments. To support that goal, power can be supplied from several possible sources: •... - Page 12 User Guide Do either or both of the following: Tap Battery Sled and select the type of batteries being used in the sled. Options include: NiMH, Alkaline, L-Mount Tap Ext Power and select the type of external power being used. Options include: 12V Ext DC, NiMH, Exp.
-
Page 13: Panels
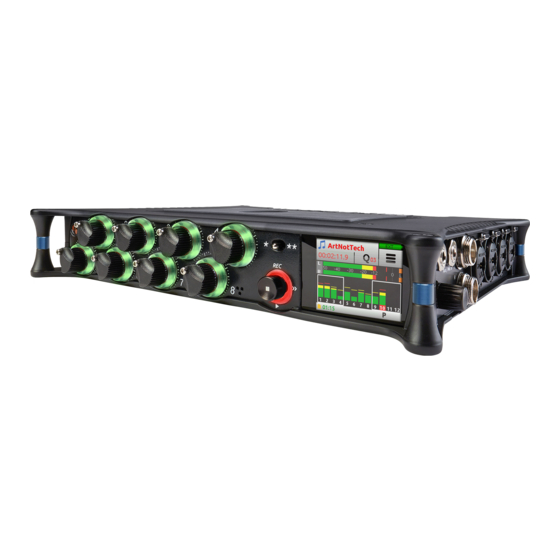
Panels Front Panel Power light, transport joystick, toggle switch for Star (*/**) shortcuts, Channel knobs, Channel knob ring LEDs, internal microphone and touch screen Star Shortcuts Power Light Channel Knobs 1-4 Channel Knobs 5-8 Touch Screen Internal Mic Transport Joystick Channel Knob Ring LEDs The Channel knobs on the front panel have two purposes: •... -
Page 14: Right Side Panel
User Guide Right Side Panel 3.5mm headphone output, 3.5mm Aux/Mic input, main L/R balanced TA3 outputs, XLR/¼-inch TRS inputs 5-8, headphone encoder XLR/ ¼-inch TRS Inputs 3.5 mm Aux/Mic Input 3.5 mm Headphone Output 3.5 mm Headphone Output L/R TA3 Outputs HP Encoder Back Panel Battery mounts, 4-pin locking power connection, SD memory card slot, Allen... -
Page 15: Screens & Navigation
Screens & Navigation The MixPre-10M has a sunlight-viewable, high-resolution, touch-screen-based user interface. The touch screen interface displays the Home screen, Main Menu screen, Channel screens and various other views. For information on Channel screens, see Accessing Channel Screen Settings Input Channels chapter. - Page 16 User Guide You will find on the Home screen numerous items, such as: Name Icon Description Music (notes) icon Access the Music Control menu by touching this region of the Home screen. Current name Displays name of current Music project. Time counter Indicates the current song position in hh:mm:ss:tenths.
-
Page 17: Main Menu Screen
SCREENS & NAVIGATION Main Menu Screen The Menu screen is where most of the features and functions are selected and set up. To enter the Menu screen: on the Home screen. There are three Menu pages. These pages are indicated by the Dots icon . -
Page 18: Music Control Menu
User Guide To return to the main Menu from a submenu at any time: To return directly to the Home screen from the main Menu: Music Control Menu The Music Control Menu provides fast access to the the Q-List, the Solo/Mute screen, metronome on/off, project render, and access to project history. -
Page 19: Using Star Shortcuts (*/**)
SCREENS & NAVIGATION Using Star Shortcuts (*/**) For your convenience, we have included a front panel user-programmable toggle switch with two positions, * and **. This lets you dedicate a hardware shortcut to frequently used functions without having to navigate the menus. To program functions to the Star toggle switch: 1. - Page 20 User Guide...
-
Page 21: Input Channels
An input channel is the path an audio source travels before it can be mixed and recorded along with other channels. In the MixPre-10M, think of an input channel as the same as a ‘track’ in a DAW. An input channel can be fed by any of the eight XLR or TRS mic/line sources, a 3.5mm Aux line/mic source (with or... -
Page 22: Track Names
Any input can be routed to any channel. This reduces the need to re-plug inputs when you want to record an input to a different track. You can also select the MixPre-10M’s mixer outputs (see Bouncing), a metronome click (see Metronome) or turn on Phantom power. -
Page 23: Enabling Monitoring
INPUT CHANNELS into a DAW to develop the song further. The recorded metronome will allow you to set the DAW’s tempo and internal metronome so that it is perfectly aligned with the MixPre recording. For more information, see Metronome. Tip: If you do not have a mic handy and want to quickly record a rough scratch track of a song idea and are not too concerned about the audio quality, you can use the built-in mic. -
Page 24: Using Solo/Mute
User Guide Using Solo/Mute The MixPre-10M offers a few different ways to mute or solo tracks. • From each track’s Channel screen, tap Mute to mute the selected track. This removes the signal from recorded tracks, mix and all outputs. When muted, its LED ring will glow red. -
Page 25: Understanding Pan
INPUT CHANNELS Understanding Pan Pan sets the position of the track in the LR stereo mix. Pan range has 33 positions from L16 (fully left) to C (Center) to R16 (fully right). Using Reverb Reverb sets how much reverb is added to a track in the LR mix. Only the mix is affected, not the individual recorded tracks. -
Page 26: Setting The Low Cut Filter
User Guide Setting the Low Cut Filter Use Low Cut to attenuate undesirable low frequencies such as mic handling noise and wind noise. The Low Cut setting activates and sets the Low Cut filter. Range is Off, 40-160 Hz in 40 Hz steps. Toggling Phase Inversion Phase inversion, also known as polarity reversal, can be used to prevent signal cancellation when a source is dual-mic’d from opposite directions (e.g. -
Page 27: Track Bank Selector
◦ Mic: Select this option when the Aux/Mic In is to be used with a mic. The MixPre-10M provides bias voltage for PiP (plug-in-power) mics. ◦ Line: Select this option when the Aux/Mic In is to be used with an unbalanced 2ch line source, such as smartphone headphone output, stereo line source, etc. - Page 28 User Guide Upon switching track banks, if the knob’s rotational position is not aligned with its fader value, the LEDs for that knob will illuminate with a pulsing orange light. This will stop once position and value are re-aligned. When adjusting the Channel knob, its fader value along with the previously stored value is shown in orange text at the top of the Home screen and Channel screens until it reaches its previously stored value, at which point it changes to black text.
-
Page 29: Adjusting Output Level
Outputs The MixPre-10M includes two pairs of outputs, L/R and X1/X2. The L/R TA3 outputs are balanced (ideal for long cable runs), while the X1/X2 3.5mm are unbalanced. To route the L/R and X1/X2 stereo outputs: 1. Tap Tap Outputs. -
Page 30: Headphone Output And Presets
User Guide Headphone Output and Presets The MixPre-10M’s audiophile-grade headphone amplifier provides high power and very low noise performance so that you can accurately hear the audio being handled, regardless of headphones or environment. Connect headphones via 3.5mm jack to the headphone jack (located on the right side panel). The volume of the headphones can be set with the encoder directly adjacent to the headphone jack. -
Page 31: Leds And Metering
Metering LEDs and Metering There are several basic methods for observing input and output levels on the MixPre-10M: Channel knob ring LEDs, Channel screen meter, and Home screen’s meter view. Channel Knob Ring LEDs Channel knob ring LEDs - Each LED ring is capable of displaying green, orange and red colors. -
Page 32: Meter View
User Guide Meter View The Home screen’s meter view displays vertical metering for the 12 tracks and horizontal stereo L/R mix. The meter view also provides the Track Bank selector, which is a white-outlined box (or boxes) surrounding a group of neighboring meters in the meter view. -
Page 33: Projects
Projects Each song or composition in the MixPre-10M is known as a Project. A Project is essentially a folder on the SD card that stores all your song’s audio files and settings. This makes it easy to organize, share, and copy your musical creations. -
Page 34: Creating Projects
User Guide Creating Projects MixPre-10M will automatically create a project if record is pressed without first creating a new project. To create a new Music project: 1. Tap Tap Project > New. When the new Music Project screen appears, you can do any of the following: Name the project. -
Page 35: Copying Projects
Formatting SD Cards & USB Thumbdrives for more information. ⚠ The formatting process erases all data. No need to do anything else. The MixPre-10M will automatically replicate the active project from SD card to USB thumbdrive. See Copying to a USB Drive for more information. -
Page 36: Project History
To free up space on the SD card, you can permanently delete projects in the SD card’s TRASH folder from the MixPre-10M’s SD Card > Empty Trash sub-menu. Project History Each recording is logged as an item (revision) in the History list. This makes it easy to “undo”... -
Page 37: Project Folder Structure
SD card or USB thumbdrive. There are multiple ways to share a project: • Copy Project Folder - ideal for collaborating with other MixPre-10M users. They can load the whole project from an SD card and continue working from where you left off. - Page 38 User Guide uncompressed 2ch stereo wav file. All track level, pan, mute, reverb and air adjustments made during rendering are reflected in the resulting stereo wav file. ◦ AAC Stereo - performs a real-time render of the LR mix to a compressed 2ch stereo AAC file.
-
Page 39: Recording And Playback
USB thumbdrive connected to the USB-A port. This is ideal for backup purposes or as a quickly available handover copy for sharing with others. You can record to the SD card even when using the MixPre-10M as a USB audio interface. This opens up cool opportunities for recording the computer’s USB audio output and mixing it with other mic and line sources plugged into the MixPre. -
Page 40: Transport Controls
Transport Controls On the MixPre-10M, the joystick transport control works in a similar fashion to how transport controls work in a typical DAW, i.e. they control a playback cursor (typically indicated by a moving vertical line in most DAWs) that moves horizontally across a timeline indicating the current position in the song. -
Page 41: Record Arming
RECORDING AND PLAYBACK Function Control Action While playing or paused, press the headphone encoder to enter Scrub mode. Then rotate clockwise for fast forward or counter-clockwise for rewind at speeds of 0x, 1/8x, 1/4x, Scrub 1/2x, 1x, 2x, 4x, 8x and 16x. The audio may be heard in Scrub mode up to 2x speed. -
Page 42: Working With Q-Points
User Guide Working with Q-Points The MixPre-10M uses Q-Points to make it easy to locate quickly to points of interest and set up automatic punch in/out regions. There are different types of Q-Point. Icon Type Description Play In Defines when playback begins. Typically used as pre-roll before punch in (Record In). - Page 43 RECORDING AND PLAYBACK It is not possible to place an In point after an Out point. It is also not possible to have more than one In or Out point of each type (Play or Record). Alternatively, you can create cue marks and set them as Play In, Record In/Out, or Stop points from the Q-List.
-
Page 44: Moving Q-Points
User Guide To set a cue as a Play In, Record In/Out, or Stop point: 1. From the Q-List, select a cue. Tap Set As. Tap Play In, Record In, Record Out, or Stop to set the selected cue as an In/Out point for recording or playback. -
Page 45: Clearing & Deleting Q-Points
RECORDING AND PLAYBACK Clearing & Deleting Q-Points You can delete cue marks and clear Play In, Record In/Out, or Stop points via the Q-Points menu or Q-List screen. To clear all In and Out stored values: Tap Clr In/Out. To clear an individual Play In, Record In/Out, or Stop point: Select one from the Q-List and tap Disable. -
Page 46: Bouncing
In, Record In/Out, and Stop points. Bouncing The MixPre-10M offers up to 12 tracks which is enough for many situations. For example, four for drums, one for bass, two for vocals, two for guitars, two for keyboards plus a spare! However, sometimes you may want to add more layers. - Page 47 RECORDING AND PLAYBACK feedback. You can adjust the level of the recorded bounce using the LR gain control - tap the L(left) mix meter in the home screen to quickly access LR gain. Decide which track or tracks you want to bounce from. Let’s call these the source tracks.
-
Page 48: Metronome
User Guide Metronome The metronome is an audible click that may be used to help you perform in time while recording and also provide a count-in so that you know when to start playing. The first beat of the bar is represented by a higher pitched click than the other beats of the bar. -
Page 49: Record Settings
RECORDING AND PLAYBACK The Metronome button will be disabled (appearing grayed out but with an orange icon) whenever Click is assigned as a track’s input source. Record Settings The Record submenu provides access to the settings detailed in the following table: Sub-menu Description... - Page 50 User Guide...
-
Page 51: Usb
To work with the USB audio from a host computer, it is necessary to route the USB 1 - 4 sources appropriately. Should you want to mix the USB audio from the host computer with live audio from the MixPre-10M’s inputs to the LR bus, use the channel screen and select input source. -
Page 52: Low-Latency Monitoring
1 to taste. USB File Transfer The MixPre-10M supports USB file transfer between its SD card and a computer by connecting the MixPre-s USB-C port to a host computer’s USB port. To use this feature, connect the recorder to a computer and then put the MixPre-10M into File Transfer mode. -
Page 53: Usb Keyboard
Additionally, some keyboards must be connected only after the recorder is turned on. A connected USB keyboard may also be used as a wired remote control for certain functions of the MixPre-10M. See the table below for available USB keyboard shortcuts. USB Keyboard Shortcuts When a USB keyboard is attached, the following key-combinations or shortcuts are available. -
Page 54: Copying To A Usb Drive
User Guide Copying to a USB Drive The MixPre-10M supports automatic copying of active projects from its SD card to a formatted USB thumbdrive inserted into its USB-A port. This handy feature is great for fast hand-off copies to a music producer as well as for backup purposes. -
Page 55: User Presets And System Settings
User Presets and System Settings Saving and Recalling Presets Flexibility is the MixPre-10M’s M.O. To make it easy for you to use the recorder in a wide variety of situations, we created a slick feature where you can store and recall snapshots of all of the MixPre-10M’s settings. There are four internal Preset slots available. -
Page 56: System Settings
LEDs. Date/Time Provides access to set the date, time, and formats for both. Regulatory Provides, specific to MixPre-10M, full Federal Communications Commission (FCC) compliance information and ISED regulatory information. (FCC ID: 2AKLX-739M10T and IC: 22225-739M10T) Version Provides the current firmware version and serial number. -
Page 57: Specifications
Specifications Specifications are subject to change without prior notice. For the latest information available on all Sound Devices products, visit our website at: www.sounddevices.com. Audio Inputs Name Description Frequency Response 10 Hz to 40 kHz +/- 0.5dB re 1 kHz @ 96 kHz sample rate Total Harmonic Distortion 0.005% max (@1 kHz, 22-22 kHz BW, gain=20 dB, -10 dBu in) -
Page 58: Audio Outputs
• Vocal Air Name Description Audio Interface (USB-C) 12-in/4-out; 44.1 to 96 kHz; 16/24 bit; Class compliant USB 2.0 high speed or ASIO driver (supplied via download from Sound Devices’ website) Mass Storage (USB-C) USB 2.0 high speed Keyboard (USB-A) -
Page 59: Touch Screen
SPECIFICATIONS Touch Screen Name Description Display 1.6-inch, color, sunlight-viewable IPS LCD Resolution 320 x 256 Remote Control Name Description Keyboard (USB-A) Text entry and control Power Name Description AA Batteries 8x AA sled (NiMH or Lithium recommended) L-Mount Batteries MX-LMount: 2x L-mount sled for hot-swappable Li-Ion batteries AC Adapter XL-WPH3: Universal, 45 W in-line AC-to-DC power supply Hirose 4-pin DC plug, with detachable IEC power cord. - Page 60 User Guide...
- Page 61 SOFTWARE PRODUCT remains with you. No liability for damages. In no event shall Sound Devices, LLC or its suppliers be liable for any damages whatsoever (including, without limitation, damages for loss of business profits, business interruption, loss...
- Page 62 User Guide Devices, LLC product, even if Sound Devices, LLC has been advised of the possibility of such damages. In any case, Sound Devices, LLC’s entire liability under any provision of this evaluation license shall be limited to the greater of the amount actually paid by you for the SOFTWARE PRODUCT or U.S. $5.00. Because some states/jurisdictions do not allow the exclusion or limitation of liability for consequential or incidental damag- es, the above limitation may not apply to you.
- Page 63 ® Sound Devices, LLC Customer Support Product Information E7556 Road 23 and 33 For more information about products Reedsburg, Wisconsin 53959 Toll Free: (800) 505-0625 and accessories, visit us on the web at www.sounddevices.com. Email: support@sounddevices.com Phone: +1 (608) 524-0625 http://www.sounddevices.com/support...
Need help?
Do you have a question about the MixPre-10M and is the answer not in the manual?
Questions and answers