Table of Contents
Advertisement
Quick Links
Advertisement
Table of Contents

Related Manuals for Sound Devices MixPre-10T


Summary of Contents for Sound Devices MixPre-10T
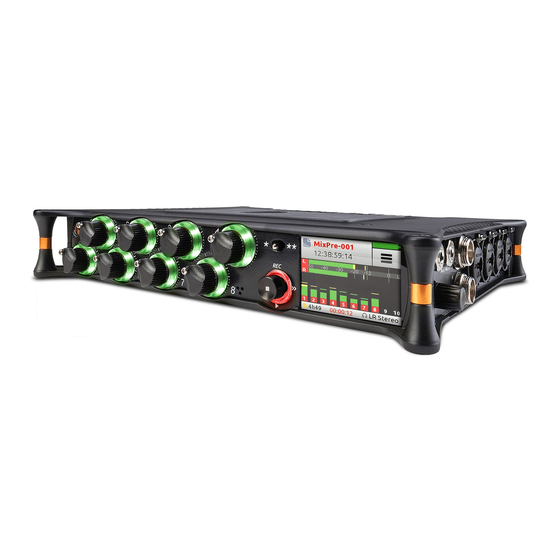
- Page 1 ® MixPre-10T Multichannel Recorder | Mixer | USB Audio Interface User Guide...
- Page 2 Trademarks The “wave” logo is a registered trademark and Kashmir is a trademark of Sound Devices, LLC. iPad, iPhone, Mac and OS X are trademarks of Apple Inc., registered in the U.S. and other countries. Windows is a registered trademark of Microsoft Corporation in the U.S.
-
Page 3: Table Of Contents
Table of Contents Intro Powering Flexible Powering Options ....7 Panels Front Panel ......9 Right Side Panel . - Page 4 User Guide Timecode Timecode/Sync ....41 Timecode Display ....42 Timecode Modes .
-
Page 5: Intro
With that in mind, the MixPre-10T ships from the factory in Basic mode - this is ideal for less ex- perienced users and will satisfy many audio applications. If you want to dive straight into the full array of professional features, we recommend setting to Advanced mode. - Page 6 User Guide...
-
Page 7: Powering
Powering Flexible Powering Options In designing the MixPre-10T, we felt that it was important for it to be able to operate in a wide array of applications and environments. To support that goal, power can be supplied from several possible sources: •... - Page 8 User Guide...
-
Page 9: Panels
Panels Front Panel Power light, transport joystick, toggle switch for Star (*/**) shortcuts, Channel knobs, Channel knob ring LEDs, and touch screen Star Shortcuts Power Light Channel Knobs 1-4 Channel Knobs 5-8 Transport Joystick Touch Screen Channel Knob Ring LEDs Left Side Panel BNC output for LTC/Word Clock, BNC input for LTC/Word Clock, USB connections, XLR/¼-inch TRS inputs 1-4, X1/X2 unbalanced, 2-channel 3.5 mm... -
Page 10: Right Side Panel
User Guide Right Side Panel 3.5mm headphone output, 3.5mm Aux/Mic input, main L/R balanced TA3 outputs, XLR/¼-inch TRS inputs 5-8, headphone encoder, HDMI TC input XLR/ ¼-inch TRS Inputs 3.5 mm Aux/Mic Input 3.5 mm Headphone Output 3.5 mm Headphone Output L/R TA3 Outputs HP Encoder HDMI TC Input... -
Page 11: Touch Screen
Touch Screen The MixPre-10T has a sunlight-viewable, high-resolution, touch-screen-based user interface. The touch-screen interface consists of the Home screen, Main Menu screen, Channel screen and File List views. As you will notice, there are several touch zones on the touch screen for controls. As you become familiar with the user interface, changing settings for inputs, outputs, recording and metering will become fast and intuitive. -
Page 12: Main Menu Screen
User Guide • Status bar (cycle status info. by touching) ◦ SD card status: card/drive activity, available recording time, file duration, elapsed time, and headphone preset ◦ USB drive status: remaining space on drive and when it is actively copying ◦... -
Page 13: Channel Screen
TOUCH SCREEN Page Sub-menu Description Presets Lets you save and load user presets to and from SD card and internal memory. Also allows resetting all settings to factory default. Project Lets you create new projects, open or trash existing projects, create sound reports, or enter metadata information for sound reports. -
Page 14: Using Star Shortcuts (*/**)
User Guide Page Sub-menu Description Solo Lets you solo the selected channel in the headphone output. Soloing by default is Individual (exclusive) in that only one input at a time will be soloed. When a channel is soloed, its light ring will flash orange. - Page 15 TOUCH SCREEN Any of the following functions may be programmed as Star shortcuts: • Ch 9/10 • Solo/Mute screen • Project screen • SD Card screen • Undo • Slate Mic • Tone To activate the * or ** shortcut(s): Toggle the switch to the * or ** position.
- Page 16 User Guide...
-
Page 17: Modes And Presets
Modes and Presets Setting the Mode We’ve designed the MixPre-10T to be easy to use for the novice without taking away truly professional-level features for the seasoned pro user. We want both the newcomer and the career professional to enjoy a quick, easy setup and foolproof results. -
Page 18: Advanced Mode
User Guide Screen Sub-menu Description Menu System Provides settings for Basic/Advanced/Custom mode, Custom mode setup, limiters, Date/Time, File Transfer, Bluetooth ® Wingman App password, adjusting LCD/LED brightness, updating firmware, and viewing version and regulatory information. Menu Power Select the type of batteries being used (Alkaline, NiMH, L-Mount) to ensure that the Power Status icon on the Home screen accurately displays remaining battery level. -
Page 19: Custom Mode
MODES AND PRESETS Screen Sub-menu Description Channel Lets you position the audio of the channel anywhere between Left and Right in the stereo image of the LR mix and Stereo Out. Channel Linking Lets you link channels 1 and 2, 3 and 4, 5 and 6, and 7 and 8 either as a stereo pair, mid side pair, or turn linking off. -
Page 20: User Presets
User Guide User Presets Flexibility is the MixPre-10T’s M.O. To make it easy for you to use the recorder in a wide variety of situations, we created a slick feature where you can store and recall snapshots of all of the MixPre-10T’s settings. There are four internal Preset slots available. -
Page 21: Inputs
The MixPre-10T’s flexibility is enhanced by its ability to select various input types to its mixer channels. Each of the MixPre-10T’s channels can be sourced from an XLR or TRS mic/line input, 3.5mm Aux line or mic input (with or without plug-in-power) or from USB channels 1-4 from a computer. -
Page 22: Linking Channels
Are you working with a stereo source—a keyboard or stereo mic perhaps? To make it easy to adjust these types of sources, the MixPre-10T offers linking of channel pairs 1-2, 3-4, 5-6, 7-8 either as a stereo pair or mid-side (MS) pair. -
Page 23: Gain Staging With Linking
INPUTS Gain Staging with Linking You can use linking with single gain stage or two-gain stage (trim/fader) operation. For instance, users wanting to link inputs 1-2 or 1-4, but control all levels from the front-panel Channel 1 knob should set System > Mode to Custom and then in Custom Setup, set Gain to Basic and Channel to Advanced. -
Page 24: Inputs Menu
MixPre-10T’s headphones and camera return (C1/C2) meters located on meter view 3. This is particularly useful when you want to use the MixPre-10T to drastically improve the sound quality recorded on the camera. It is common knowledge that camera mic inputs are not of high quality so by connecting your mics to the MixPre-10T instead, then connecting the MixPre-10T’s L/R... - Page 25 INPUTS audio level. You also get additional camera monitoring options in the HP Presets menu. When Aux In Mode is set to Camera, you cannot route Aux In to a channel and thus you cannot record it. • Timecode: Select this option is using an external timecode source connected to the Aux/Mic In port.
- Page 26 User Guide...
-
Page 27: Outputs
Routing L/R and X1/X2 Outputs The MixPre-10T includes 2 pairs of outputs, L/R and X1/X2, for a total of 4 output buses. The L/R TA3 outputs are balanced, while the X1/X2 3.5mm are unbalanced. -
Page 28: Adjusting Output Level And Delay
Select Delay. You can set delay from 0 to 400 ms in 1 ms steps. Headphone Out The MixPre-10T’s audiophile-grade headphone amplifier provides high power and very low noise performance so that you can accurately hear the audio being handled, regardless of headphones or environment. Connect headphones via 3.5mm jack to the headphone jack (located on the right side panel). -
Page 29: Creating A Custom Hp Preset
OUTPUTS Creating a Custom HP Preset To create a custom HP Preset: 1. In the HP Preset menu, select Edit HP Preset (Advanced Mode Only) to edit and name any of the User HP Presets. Additionally, set HP Solo mode to Individual (exclusive solo) or Multiple (non-exclusive solo) for single or multi-channel solo monitoring. - Page 30 User Guide...
-
Page 31: Recording And Playback
Additionally, you can manually copy any project, the active one or previous ones to the thumbdrive. You can mix and record to the SD card even when using the MixPre-10T as a USB audio interface. This opens up cool opportunities for recording the computer’s USB audio output and mixing it with other mic and line sources... -
Page 32: Formatting Sd Cards & Usb Thumbdrives
SD cards must be formatted by the MixPre-10T for reliable recording and playback. If a USB thumbdrive is inserted into the USB A port, the MixPre-10T automatically copies the current project’s recorded files to it. The thumbdrive must also be formatted before use. For more information about this Auto Copy... -
Page 33: Transport Controls
RECORDING AND PLAYBACK Transport Controls A joystick (with its illuminated LED ring) on the front panel is used to perform various transport control functions. Function Control Action Push up the Transport control to begin recording a new file. The LED ring illuminates red while recording is underway. Record Press in the Transport control to stop recording or playback. -
Page 34: Record Menu
In Basic mode, the Rec Trigger function can be used to automatically start and stop recording from a compatible HDMI or timecode source. This cool feature lets you simultaneously start recording on a camera and the MixPre-10T just by pressing the Record button on the camera, thus eliminating the possibility of forgetting to record audio on the MixPre-10T. -
Page 35: Metering
Metering LEDs and Meter Views There are five basic methods for observing input and output levels on the MixPre-10T. • Channel knob ring LEDs - Each LED ring is capable of displaying green, orange and red colors. The brightness of the light ring tracks the level of the input. - Page 36 User Guide • LR, 1-10 multi-track meter view • LR, Camera Returns (via Aux In) and USB 1,2 meter view Switching between the three main meter views is easy—just touch the meters and cycle through the different views. The meters will show not only signal levels, but also the current arm status of each track for the recorder and limiting activity for L,R and each channel.
-
Page 37: Usb
The MixPre-10T has an integrated 12-in, 4-out core audio-compatible interface for use with a Mac or PC computer. For PC users, the MixPre-10T will appear as a 2x2 audio interface unless a specific ASIO driver is installed. The latest ASIO driver can be downloaded at www.sounddevices.com/support/downloads. -
Page 38: Usb File Transfer
The MixPre-10T can support USB file transfer between its SD card and a computer by connecting the MixPre’s USB-C port to a host computer’s USB port. To use this feature, put the MixPre-10T into File Transfer mode. (USB audio will be suspended.) To enter File Transfer mode: 1. -
Page 39: Copying To A Usb Drive
All you need to do is insert a USB thumbdrive, and MixPre-10T will handle the rest. When the USB thumbdrive is inserted, it will automatically mirror the current project being recorded to the SD card. - Page 40 User Guide To copy previously recorded project folders: 1. Tap Tap Project > Copy. Select the project you want to copy from the list. Copy progress is displayed as the project is copied.
-
Page 41: Timecode/Sync
Timecode Modes The MixPre-10T has six timecode modes: Free Run, Time of Day, Rec Run, BNC In, AuxTC In, and HDMI TC In. Timecode may also be turned off. -
Page 42: Bnc In, Aux Tc In (External Ltc)
A few examples of cameras that do this are the Sony a7s and Panasonic GH4/ GH5. Connect their HDMI output to the HDMI TC In port on the MixPre-10T’s right hand panel and set Menu>Timecode>TC Mode to HDMI TC In. Refer to the camera’s user guide to determine how to output HDMI timecode from the... -
Page 43: Setting The Frame Rate
Setting the Frame Rate When using external TC modes (BNC In, Aux TC In, HDMI TC In), it is not necessary to set the frame rate because the MixPre-10T auto-detects the frame rate of the incoming timecode and sets frame rate accordingly. -
Page 44: Jamming Timecode
In normal circumstances, set the internal generator’s frame rate to the same as the incoming timecode frame rate. However, it is possible to crossjam, that is have the MixPre-10T jam its internal generator to a different but compatible frame rate with the incoming rate. -
Page 45: Bnc Out - Timecode Or Word Clock
BNC Out - Timecode or Word Clock By default, the TC Out BNC outputs timecode; however, it may be configured to output word clock for when you want to use the MixPre-10T as an accurate master clock. To configure the TC Out BNC: Set Menu>Timecode>BNC Out to either Timecode or Word Clock. - Page 46 User Guide...
-
Page 47: Projects And Files
Projects and Files Each time record is pressed, the MixPre-10T creates a Broadcast WAV audio file which can subsequently be played back on the MixPre-10T or in almost any computer audio application. The MixPre-10T is able to record up to 12 tracks (the stereo mix LR tracks plus 10 isolated tracks) into a single polyphonic WAV file. -
Page 48: Managing Projects
User Guide Managing Projects The File List is a chronological list of all files that have been recorded in the active project. To access the File List: Tap the filename region at the top of the Home screen. The very top item in the list is the NEXT file to be recorded. Directly below that is the last recorded file or file currently being recorded, followed by all previously recorded files. -
Page 49: File Name Format
MixPre-10T’s Drive sub-menu. File Name Format The MixPre-10T makes it easy to identify recordings (WAV files) by providing the ability to name them before, during, or after recording. Each recording’s file name is comprised of a Name (maximum 9 characters), followed by a dash (-), and then followed by a Number (3 digits). -
Page 50: Naming A Recording
User Guide Naming a Recording To name a recording: 1. Go to the File List by tapping the top left region of the Home screen. Select a file from the list by using the headphone encoder on the right panel. Rotate to highlight a file then press the encoder (or touch Edit) to select it for naming or press the Play button to play it. -
Page 51: Undo, Trash File
TRASH folder from the MixPre-10T’s SD Card menu. Sound Reports The MixPre-10T includes the ability to create a .csv sound report file for the active project. It contains useful descriptive information about the project settings and all its recorded files. This can be used as a log of your recording session or as an electronic report that you can send along with your audio files to post-production or a client. - Page 52 User Guide If you choose, you can leave all these items blank. They simply won’t appear in the .csv report. To create the sound report: 1. Tap Tap Project > Create Report. The .csv sound report file is stored in the active project’s folder alongside it’s audio files and is named as follows: ActiveProjectName_Report.csv To open and view the .csv file: 1.
-
Page 53: Remote Control
Remote Control Wingman Application Sound Devices Wingman is a free app that allows wireless remote control of the Bluetooth Smart-enabled MixPre Series from iOS or Android devices. To enable Bluetooth on the MixPre recorder: 1. Tap Tap System > Bluetooth. This toggles Bluetooth On and Off. -
Page 54: Connecting To A Mixpre Recorder
User Guide Wingman’s touch-screen user interface offers easy navigation and monitoring with three main areas of interest: • Status - Shows device-specific status information. • Viewing area - Displays different screen views, such as the Transport view with its transport control buttons, metadata fields, and meters. Swiping vertically in this area can toggle to other meters. -
Page 55: Hdmi Record Trigger
Connected and authenticated HDMI Record Trigger The MixPre-10T may be configured to begin recording when it is triggered to do so from an HDMI record flag from compatible cameras with HDMI output. By default, record triggering is turned off. Setting the Record Trigger to HDMI flag will initiate record when a compatible device issues the record flag via the HDMI input. -
Page 56: Keyboard
User Guide Keyboard A connected USB keyboard may be used as a wired remote control for certain functions of the MixPre-10T. See the table below for available USB keyboard shortcuts. USB Keyboard Shortcuts When a USB keyboard is attached, the following key-combinations or shortcuts are available. -
Page 57: Basic/Advanced Mode Differences
Appendix A Basic/Advanced Mode Differences Screen Sub-Menu Basic Mode Advanced Mode Channel Solo Channel Channel Gain Channel L, C, R Continuously Variable Channel Input Channel Phantom Channel Low Cut Fixed 80 Hz 40, 80, 120, 160 Hz Channel Phase Normal/Invert... -
Page 58: System Settings
Lets you update the MixPre firmware from a file on the SD card. The latest MixPre firmware can be downloaded from the Sound Devices website: www.sounddevices.com/support/downloads Tune Crystal Lets you fine tune the MixPre-10T’s internal crystal frequency to an external word clock or LTC signal via the BNC In port. -
Page 59: Specifications
Specifications Specifications are subject to change without prior notice. For the latest information available on all Sound Devices products, visit our website at: www.sounddevices.com. Audio Inputs Name Description Frequency Response 10 Hz to 80 kHz +/- 0.5dB re 1 kHz @ 192 kHz sample rate Total Harmonic Distortion 0.005% max (@1 kHz, 22-22 kHz BW, gain=20 dB, -10 dBu in) -
Page 60: Audio Outputs
• WAV (Broadcast Wave File format), with embedded timecode stamp and metadata Name Description Audio Interface (USB-C) 12-in/4-out; 44.1 to 96 kHz; 16/24 bit; Class compliant USB 2.0 high speed or ASIO driver (supplied via download from Sound Devices’ website) Mass Storage (USB-C) USB 2.0 high speed Keyboard (USB-A) -
Page 61: Timecode
SPECIFICATIONS Timecode Name Description Modes • Free Run • Time of Day (file stamped w/current ToD) • Rec Run • Ext LTC (file stamped w/incoming LTC on BNC or Aux 3.5mm) • HDMI TC (file stamped w/incoming TC from cameras that output TC over HDMI) Accuracy 0.1 ppm (0.25 frame in 24 hr) Frame Rates... -
Page 62: Environmental
User Guide Environmental Name Description Operation and Storage • Operating: -20° C to 60° C • Storage: -40° C to 85° C • 0 to 90% relative humidity (non-condensing) Dimensions and Weight Name Description Size (H x W x D) •... - Page 63 SOFTWARE PRODUCT remains with you. No liability for damages. In no event shall Sound Devices, LLC or its suppliers be liable for any damages whatsoever (including, without limitation, damages for loss of business profits, business interruption, loss...
- Page 64 User Guide Devices, LLC product, even if Sound Devices, LLC has been advised of the possibility of such damages. In any case, Sound Devices, LLC’s entire liability under any provision of this evaluation license shall be limited to the greater of the amount actually paid by you for the SOFTWARE PRODUCT or U.S. $5.00. Because some states/jurisdictions do not allow the exclusion or limitation of liability for consequential or incidental damag- es, the above limitation may not apply to you.
- Page 65 ® Sound Devices, LLC Customer Support Product Information E7556 Road 23 and 33 For more information about products Reedsburg, Wisconsin 53959 Toll Free: (800) 505-0625 and accessories, visit us on the web at www.sounddevices.com. Email: support@sounddevices.com Phone: +1 (608) 524-0625 http://www.sounddevices.com/support...
Need help?
Do you have a question about the MixPre-10T and is the answer not in the manual?
Questions and answers