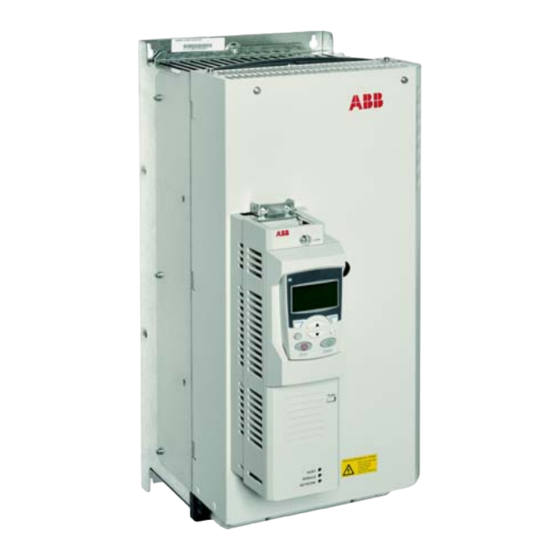
ABB ACS850 Quick Installation Manual
Drive modules, 55...160 kw, 75...200 hp
Hide thumbs
Also See for ACS850:
- Manual (370 pages) ,
- Firmware manual (260 pages) ,
- Quick start up manual (196 pages)
Table of Contents
Advertisement
Quick Links
Advertisement
Table of Contents

Related Manuals for ABB ACS850


Summary of Contents for ABB ACS850
- Page 1 ACS850 Quick Installation Guide ACS850-04 Drive Modules (55…160 kW, 75…200 hp) English..... 3 中文 ..... . . 9...
-
Page 3: Installing The Power Cables
This guide contains the very basic information about the mechanical and electrical installation ACS850-04 INPUT OUTPUT of the ACS850-04 drive module (55 to 160 kW). UDC+ V1 W1 V2 W2 For complete documentation see ACS850-04 Drive Modules (55…160 kW, 75…200 hp) Hardware Manual (code: 3AUA0000045487 [English]). - Page 4 To ensure safety, pay special attention to connection of the grounding conductors. Input power cable Motor cable Cabling examples Frame size E0: Screw terminal installation UDC+ U2 V2 W2 PE Input power cable Motor cable Quick installation guide – ACS850-04...
-
Page 5: Wire Sizes Accepted By Power Terminals
Tightening torques Power terminals Drive type ACS850-04… N·m (lbf·ft) N·m (lbf·ft) -103A-5, -144A-5 15 (11) 15 (11) Cable lug installation 8 (5.9) 30…44 (22…32) Allen screw -166A-5…-290A-5 20…40 (15…30) 8 (5.9) Screw terminal installation 30…44 (22…32) Quick installation guide – ACS850-04... -
Page 6: Installing The Control Cables
Installing the control cables Default I/O connection diagram Notes: XPOW [Default setting with ACS850 standard +24VI External power input control program (Factory macro). 24 V DC, 1.6 A *Total maximum current: 200 mA XRO1, XRO2, XRO3 The wiring shown is for demonstrative Relay output RO1 [Ready] purposes only. -
Page 7: Mounting The Clamp Plate
Continue with drive start-up according to the instructions in the appropriate Quick Start-up Guide. Mounting the clamp plate The clamp plate can be fastened at the top or the bottom of the JCU Control Unit. Quick installation guide – ACS850-04... -
Page 8: Technical Data
Technical data UL checklist • The ACS850-04 is an IP20 (UL open type) drive to be used in a heated, indoor controlled environment. The drive must be installed in clean air according to enclosure classification. Cooling air must be clean, free from corrosive materials and electrically conductive dust. - Page 9 快速安装指南 – ACS850-04 安装功率电缆 接线图 关于本指南 本指南包含了 ACS850-04 传动模块 (55 至 ACS850-04 160 kW) 机械和电气安装需遵循的基本步骤。 完 输入 输出 UDC+ 传动模块 整手册请参阅 ACS850-04 V1 W1 V2 W2 硬件手册 ( 编号: (55…160 kW, 75…200 hp) 3ABD00030508 [ 中文 ])。 (PE) (PE) 安全须知...
- Page 10 W2 端子上。 尺寸 E0 推荐剥线长度为16 mm (0.63”) ,尺寸 E 推荐剥线长度为 28 mm (1.1”)。 • 对传动模块的外部电缆进行机械保护。 • 在透明塑料盖板剪洞安装电缆,以适应功率 电缆。压紧端子上的盖板。 • 连接功率电缆的另一端。为确保安全,要特 别注意接地导体的连接。 8 N·m (5.9 lbf·ft) 布线示例 外形尺寸 :螺丝端安装 输入功率电缆 电机电缆 UDC+ U2 V2 W2 PE 输入功率电缆 电机电缆 快速安装指南 – ACS850-04...
- Page 11 (22…32 lbf·ft)。 注意 ! 如果电线尺寸少于 95 mm (3/0 AWG), 那么必须使用紧耳盖,如果连 接到该端子的电线尺寸少于 5 mm (3/0 AWG),那么会发生松动或导致变频器 8 N·m (5.9 lbf·ft) 损坏。 功率端子接受的电线尺寸: 传动型号 ACS850-04… 电线尺寸 -103A-5, -144A-5 6 … 70 mm -166A-5…-290A-5 95 … 240 mm 电机电缆 输入功率电缆 紧固力矩 功率端子 传动型号...
- Page 12 安装控制电缆 缺省 I/O 连接图 注意 : XPOW [ACS850 标准控制程序的缺省设置 ( 工厂宏 外部电源输入 +24VI )。 24 V DC, 1.6 A * 总最大电流: 200 mA XRO1, XRO2, XRO3 接线图仅供演示说明。 继电器输出 RO1 [ 准备 ] 关于跳线设置,请参见: 250 V AC / 30 V DC 电线尺寸和紧固力矩:...
- Page 13 AI1 – 用来选择模拟输入 AI1 的输入信号是电流 信号还是电压信号。 电流 电压 控制电缆布线 AI2 – 用来选择模拟输入 AI2 的输入信号是电流 使用热缩管或胶带包住 屏蔽层 信号还是电压信号。 电流 电压 剥开电缆固定夹处的电缆外 皮,将屏蔽层裸露出来。 1.5 N·m (13 lbf·in) T – 传动对传动连接的链路终端。当传动是最后 一个单元时,必须设置到 ON 位置。 关于传动的启动请参考快速启动指南中的相关 介绍。 安装电缆固定夹 电缆固定夹可以安装在 JCU 控制单元的顶部或 底部。 快速安装指南 – ACS850-04...
- Page 14 技术数据 UL 清单 • ACS850-04是IP20 (UL开路类型)防护等级的 传动,用于室内温度可控的环境中。 传动必 须安装在符合要求的清洁环境中。冷却空气 必须干净,并且没有腐蚀性气体和导电灰尘。 硬件手册。 详细说明请参见 • 在额定电流下,最高环境空气温度为 40 °C (104 °F)。 在 40 至 55 °C (104 至 131 °F) 温度 下,电流需要降容。 • 传动单元适用于电流有效值不超过 100,000 A,最大电压 500 V 的电路容量。 • 遵照 UL 认证的安全要求,位于电机内部的电...
- Page 16 北京 ABB 电气传动系统有限公司 中国,北京, 100015 北京市朝阳区酒仙桥北路甲 10 号 D 区 1 号 电话:010-58217788 传真:010-58217518/58217618 服务热线:(+86) 400 810 8885 网址:http://www.abb.com/drives...
Need help?
Do you have a question about the ACS850 and is the answer not in the manual?
Questions and answers