Advertisement
Available languages
Available languages
Quick Links
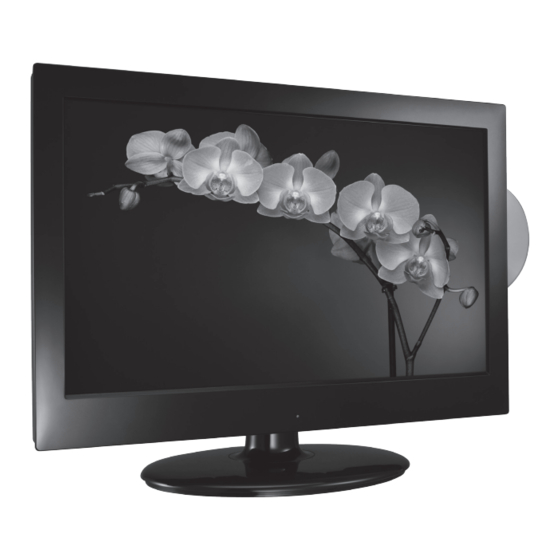
19" HD Ready Digital LED TV with DVD Player
Quick Start Guide
L19LDVB11E
Thank you
for purchasing your new Logik TV.
Your new TV incorporates the latest technology to enhance your
viewing experience. We would suggest that you allow about 20 mins
for initial setup.
Please follow this guide for a successful rst time installation.
GB
1
1
Unpacking
Remove all packaging from the TV. Retain the packaging. If you dispose of it
please do so according to any local regulations.
LCD TV
Mains Adapter
Base Stand
SCART Adapter Cable
Remote Control /
Instruction Manual
AAA Batteries x 2
Quick Start Guide
Screw A
2
2
Operating Your Remote Control
1. Press and lift the back
cover up to open the
battery compartment of
the remote control.
2. Insert two AAA size
batteries. Close the
battery compartment
cover.
Install the batteries correctly by following the polarity (+ and -)
indications in the battery compartment.
3
3
Installing the Base Stand
screw
or
screw
Screw A x 1
(P.N.: 20912223101 )
1. Lay the TV down on a at surface with the back side facing up. Please
make sure to place a soft cushioned material (such as a pillow or thick
piece of foam) beneath the screen.
2. To install the base stand, align the screw hole and then secure the base
stand with the provided 1 screw.
4
4
Connecting the Aerial
OR
RF Coxial Cable
(not included)
USB
HDMI1
PC AUDIO
SCART
VGA
RF
Connect one end of the RF coaxial cable to the aerial socket on the wall and
the other end of the cable to the RF IN (75 ) socket at the rear right side of
your TV.
Do not connect the TV to the mains supply until you have
completed all the connections.
6
6
Turning the TV On for the First Time
The rst time you turn the TV on, it will go straight into First Time Installation.
1. Press the OK button to start First Time
First Time Installation
Installation.
Please ensure aerial is plugged in!
Then press OK button.
2. Press
the buttons to
OSD Language
select your desired language to
be displayed on the menu. The
Cesky
English
Fran ais
Magyar
default on-screen menu
~
Dansk
Espanol
Hrvatski
Nederlands
language is set as English. Press
Deutsch
E
k
Italiano
Norsk
the OK button to con rm.
OK
3. Press the
buttons to select DVB-T /
DVB-C and then press the OK button to
DVB SELECT TYPE
con rm.
DVB-T
DVB-C
Well done,
your new TV is now ready to use. You will nd that there are many exciting features available. To get to know all these features, please
take some time to read the instruction manual provided with your TV.
5
5
Connecting to the Mains Socket
To mains socket
VIDEO
L
R
Y
Pb
Pr
HDMI2
1. Connect the mains adapter to the mains adapter socket located at the
rear right bottom side of your TV and then connect to the mains socket
after you have completed all the connections.
2. At this stage, the TV switches to standby mode. The red LED indicator
will illuminate on the front panel of the TV.
3. In standby mode, press the
button on the right side panel of the TV
or on the remote control to turn the TV on. The red LED indicator will
turn blue.
3a. If you select DVB-T, press the
Tune Type
buttons to select the desired country
and then press the OK button to start
UK
tuning.
Australia
Austria
3b. If you select DVB-C, the next step is to
con gure the DVB-C system (Scan type /
Frequency / Network ID / Symbol(KS/S).
Press the OK button to go to the tune
type add country select menu this step is
Scan type
Polski
the same as DVB-T, select the tune type
Frequency
(DTV/ATV). Press the
buttons to
Portugues
Network ID
select the desired country and then press
Pycck
Symbol(KS/S)
the OK button to start tuning.
OK
4. Channel tuning will commence. This operation
may take up to 6 minutes. The display will show
the progress of the tuning and the number of
channels found.
Mains Adapter
(included)
DTV+ATV
Belgium
Czech
Bulgaria
Denmark
Croatia
Finland
MENU
DVB-C Scan Menu
Full
610000
Auto
Auto
MENU
Channel Tuning
TV
: 3 Channel(s)
DTV
: 0 Channel(s)
Radio : 0 Channel(s)
Data
: 0 Channel(s)
36%...
668.75MHz
(TV)
Please press MENU to skip.
(P.N.: 4033C193616)
Advertisement

Related Manuals for Logik L19LDVB11E


Summary of Contents for Logik L19LDVB11E
- Page 1 HDMI1 PC AUDIO SCART Thank you for purchasing your new Logik TV. Your new TV incorporates the latest technology to enhance your viewing experience. We would suggest that you allow about 20 mins for initial setup. Connect one end of the RF coaxial cable to the aerial socket on the wall and 1.
- Page 2 HDMI1 PC AUDIO SCART Takk for at du kjøpte Logik TV. Dette nye TV-apparatet har innebygd den nyeste teknologien for å gi deg den beste seeropplevelsen. Vi anbefaler at du bruker omtrent 20 minutter på det første oppsettet. Sett den ene enden av RF-koaksialkabelen inn i antennekontakten på...
- Page 3 HDMI1 PC AUDIO SCART Tack för att du köpt din nya Logik TV. Din nya TV innehåller den senaste tekniken för att förbättra din tittarupp- levelse. Vi föreslår att du avsätter minst 20 minuter för att göra initialinställ- ningarna. Anslut en av RF-koaxialkablarna till antennuttaget i väggen och den andra 1.
-
Page 4: Onneksi Olkoon
HDMI1 PC AUDIO SCART Kiitos, kun ostit uuden Logik TV-vastaanottimen. Uusi TV:si sisältää uusinta teknologiaa katsomiskokemuksesi parantamiseksi. Suosittelemme, että käyttäisit vähintään 20 minuuttia ensimmäiseen asennukseen. Liitä RF-koaksiaalikaapelin toinen pää antenniseinäpistorasiaan ja toinen 1. Liitä verkkolaite verkkolaiteliitäntään, joka sijaitsee TV-vastaanottimen pää... - Page 5 HDMI1 PC AUDIO SCART for købet af dit nye Logik tv. Dit nye tv bruger den seneste teknologi til at forbedre gengivelsen. Vi foreslår, at du bruger cirka 20 minutter til den indledende installation. Tilslut en ende af RF-koaksialkablet til antennestikket på væggen, og den 1.