Table of Contents
Advertisement
Advertisement
Table of Contents

Subscribe to Our Youtube Channel
Related Manuals for Laguna Tools PL1220


Summary of Contents for Laguna Tools PL1220
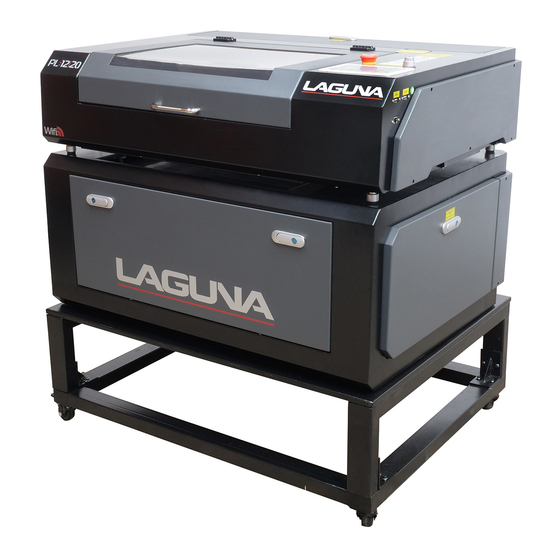
- Page 1 Laser Machine Owner’s Manual MLC122040...
-
Page 2: Specifications
Pl1220 Laser Machine SPECIFICATIONS MLC122040 © 03/2018, Laguna Tools, Inc. Laser Type Water cooled CO2 sealed laser, 10.6µm wavelength Laser Power 40 Watt Work Envelope 12″L x 20″W (cm: 30.5, 50.8) Max Material Thickness 3/4" (1.9 cm) Max Material Thickness Bottomless... -
Page 3: Table Of Contents
We work hard to offer a large library of videos for each and every product that we sell. This list is on-going and subject to change without notice. To access these videos, please navigate to the product page, the video library, or the Laguna Tools YouTube Channels with the following QR codes or web links. -
Page 4: Warranty & Registration
We understand that you have a choice of where to purchase your machines cleaning, damage caused by accident, neglect, or lack-of inadequate dust and appreciate the confidence you have in the Laguna Tools® brand. collection. The warranty may be voided against proof of misuse/abuse, damage caused where repair or alterations have been made or attempted Through hands-on experience, Laguna Tools®... -
Page 5: About This Manual
There are organizations with published 1.1 Intended Use safe practices, techniques, and proper operation of this product. The PL1220 Laser Marking Machine has been design solely for Power Tool Institute engraving, marking, cutting, and sintering materials that are safe and www.powertoolinstitute.com... -
Page 6: Prohibited Materials
DANGEROUS ENVIRONMENTS. Never operate the tool under wet or damp USE ONLY LAGUNA TOOLS OR COMPATIBLE AND MARKED conditions; there is a serious risk of electrical shock. Do not use the tool in the REPLACEMENT PARTS. All others may cause damage or harm. -
Page 7: Regulation Rulings
14 ga. 14 ga. 12 ga. 10 ga. standards of safe tool use. Laguna Tools is in no way responsible for injury or death 12-16 14 ga. 12 ga. that occurs while using this product. YOUR PERSONAL SAFTEY IS 100% YOUR... -
Page 8: Machine Maps
PL1220 Laser, MLC122040 Machine Maps 2. Machine Maps 2.1 Location of Safety Stickers A. Machine Plate B. Rules/Safety Sticker C. Laser Classification 3A D. Open Lid Laser Classification 4 © 03/2018, Laguna Tools, Inc. -
Page 9: External Map
Q. Standby Alarm Input – This is an optional plug that is not A PC can also be connected to the machine to transfer machine used with the PL1220 Machine. data to the RDWorks Software on the PC. R. Chiller Alarm Input – To be used to connect the chiller alarm USB Flash Drive Input –... -
Page 10: Internal Map
14. Laser Power Supply – Converts 110V/220V (50/60Hz) AC power to run the electrical components of the laser. The beam has a separate power supply (N). input power to 20,000V DC power to produce a laser beam. © 03/2018, Laguna Tools, Inc. -
Page 11: Controls Map
Running Progress Bar: To display the progress bar of the current running file. Running Status: To display the current status of the machine, such as Idle, Run, Pause, Finish, etc. © 03/2018, Laguna Tools, Inc. -
Page 12: Connections Map
PL1220 Laser, MLC122040 Machine Maps 2.5 Connections Map © 03/2018, Laguna Tools, Inc. - Page 13 PL1220 Laser, MLC122040 © 03/2018, Laguna Tools, Inc.
-
Page 14: Set-Up Procedures
DESCRIPTION The PL1220 can be used to engrave, mark, and cut a variety of materials. It is sold as a turnkey package, with everything included to run the machine, straight out of the box. All that is needed is a PC to run the included RDWorks software package. -
Page 15: Ventilation (Exhaust/Fume Extraction) Set-Up
DO NOT USE ANY TYPE OF CHEMICAL engraving. COOLANT. © 03/2018, Laguna Tools, Inc. -
Page 16: Air Pump Set-Up
USE CAUTION: Be careful not to cut or nick the belts when machine (systems) on and off easily. removing zip ties. © 03/2018, Laguna Tools, Inc. -
Page 17: Connections
Do not give power to the laser WARNING: Make sure that the power supply matches the machine’s machine during this check. requirements as stated on the plate. The PL1220 is prewired for 110V but can be converted to 220V. Please call Customer Support for instructions. -
Page 18: Confirmation Of Proper Set-Up Test
Confirm the correct focal spacing is set. Unplug all systems and remove the protective panels. Confirm that nothing is blocking the laser beam path. See section 7.4-7.8. Re-align mirrors, starting with the laser tube. © 03/2018, Laguna Tools, Inc. -
Page 19: Software Installation
Ethernet port on the router. With Ethernet connected, turn the router off, wait 20 seconds, and then turn the NOTICE: Design programs may not be compatible with the newest router back on. versions of RDWorks and vice versa. © 03/2018, Laguna Tools, Inc. -
Page 20: Install Rdworks As A Stand-Alone Program
To do this, right click rdworkssetup.exe and select “Run as Administrator” The Program will not install: Make sure that the “Type” is https://lagunatools.com/design-software- Figure 4-2: Laserwork. Make sure that “Install” rather than “install USB driver” is resources/machine-software-posts/ selected. © 03/2018, Laguna Tools, Inc. - Page 21 Use a hardwired USB to USB machine is powered on and functional. Use a hardwired USB to USB connection if the Ethernet method is problematic. connection if the Ethernet method is problematic. © 03/2018, Laguna Tools, Inc.
-
Page 22: Install Rdworks As A Plug-In Print Driver (Advanced)
Depending on the Program, you will now need to enable the macro or plugin according to the method described by the program. TROUBLESHOOTING: Cannot find ad-in on design program: Consult design program Figure 4-2: https://lagunatools.com/design-software-resources/machine- user manual for ad-on or macro locations. software-posts/ © 03/2018, Laguna Tools, Inc. -
Page 23: Adjustments & Maintenance Work
NOTICE: The focal length is different than focal spacing and depends on the focal lens used. The stock lens installed in the PL1220 is NOTICE: The maximum cut depth depends on the material. Always 20mm in diameter, and 50.8mm in focal length. -
Page 24: Changing Or Cleaning The Focal Lens
USE CAUTION not to scratch the focal lens. NOTICE: See Sections 5.4-5.8 for the entire mirror alignment procedure. NOTICE: The PL1220 is designed to be used with a 20mm diameter 50.8mm focal length lens. TECH TIP: A video is available on the alignment procedure. -
Page 25: Checking For Mirror Alignment
TECH TIP: A video is available on the alignment procedure. Mirror 1 Work Area Mirror 2 Mirror 3 Figure 5-6: PL1220 Mirror 1 Aligned If the mirrors are not aligned, something like the following will be observed: Mirror 1 Work Area Mirror 3... -
Page 26: Mirror Alignment Procedure
PL1220. NOTICE: You Pulse the laser machine to leave a position mark. may need to lift the front of the PL1220 to remove the focal lens tube (see figure 6-2) of the laser head assemble. -
Page 27: Laser Tube Installation
USE CAUTION: Be very careful with the laser tube as it is fragile and excessive pressure can lead to fracture. USE CAUTION: Avoid electrical shock: unless otherwise specified, do not perform any maintenance work with the machine connected to a power source. © 03/2018, Laguna Tools, Inc. -
Page 28: Leveling The Machine
Leveling Feet Leveling Procedure With the Laser machine on the table, use a level to measure if the pl1220 is not level. Adjust one of the four leveling casters located at the bottom of the machine, as needed, to level it. -
Page 29: Appendix 1: Maintenance Schedule
PL1220 Laser, MLC122040 Appendix 1: Maintenance Schedule Appendix 1: Maintenance Schedule To keep this Laguna Tools machine in top performance for many years, please follow this maintenance schedule and refer to any instructions. Notes As needed: Clean Engraving Table (work surface) •... -
Page 30: Appendix 2: Troubleshooting
A: All focal lenses must be 20mm in diameter to fit the laser tube assembly. The shortest focal length that can be used is the 50.8mm, constraint by the laser assembly mounting tube. A longer focal length can be used by removing the removable bottom of the PL1220 and resting the machine on riser blocks to accommodate the larger focal spacing needed. -
Page 31: Appendix 3: Pl1220 Specifications Sheet
PL1220 Laser, MLC122040 Appendix 3: PL1220 Specifications Sheet Appendix 3: PL1220 Specifications Sheet Box Dimensions (L x W x H) 1 of 2: 35"L x 42"W x 16"H 2 of 2: 16"L x 42"W x 19"H Net Weight (No Accessories) 150 Lbs. - Page 32 PL1220 Laser, MLC122040 Appendix 3: PL1220 Specifications Sheet ACCESSORIES Fume Extractors: Coming early 2018 – check lagunatools.com Laser Machine Table: Coming early 2018 – check lagunatools.com Rotary Adapter: Check lagunatools.com SOFTWARE AND COMPATIBILITY Included Software RDWorks ® Compatible Operating Systems...
-
Page 33: Appendix 4: Co2 Laser Machine Settings For Rdworks
Specific Materials Process Speed (mm/s) – Min Power% – Max Power% Place the workpiece inside the PL1220 Laser Machine, close the door and give power to all systems. PLOLYMERS 40 WATT... -
Page 34: Appendix 5: Wiring Diagram
PL1220 Laser, MLC122040 Appendix 5: Wiring Diagram Appendix 5: Wiring Diagram NOTICE: Please contact Laguna Tools customer service for 220V conversion instructions. © 03/2018, Laguna Tools, Inc. -
Page 35: Appendix 6: Exploded Parts
Back Panel PLC122040-20 Electrical Bracket PLC122040-8 Left Panel PLC122040-21 Interlock Door Sensor PLC122040-9 Right Panel PLC122040-22 Exhaust Blower PLC122040-10 Emergency Stop Switch PLC122040-23 Water Chiller PLC122040-11 On/Off Switch PLC122040-24 Air Pump PLC122040-12 RDC6442S-B (EC) Control System © 03/2018, Laguna Tools, Inc. - Page 36 USB CABLE PLC122040-40 Belt Clasp A PLC122040-61 Ducting PLC122040-41 Belt Clasp B PLC122040-62 USB Thumb Drive & Software PLC122040-42 Transfer Rod PLC122040-63 Hardware Kit (with install tools) PLC122040-43 Coupler PLC122040-64 Manual PLC122040-44 Laser Head Mounting Assembly © 03/2018, Laguna Tools, Inc.
- Page 37 PL1220 Laser, MLC122040 © 03/2018, Laguna Tools, Inc.
- Page 38 How was your unboxing and set-up experience? Any suggestions, feedback, or comments regarding this manual and the tools we sell are highly appreciated. Please email us at manuals@lagunatools.com and thank you again for choosing the Laguna Tools® brand. https://lightburnsoftware.com/ © 03/2018, Laguna Tools, Inc.
- Page 39 Pl1220 Laser Machine Dimensions MLC122040 © 03/2018, Laguna Tools, Inc. Foot Print (LxW) 30"L x 40"W (cm: 76.2, 101.6) Overall Dimensions (LxWxH) 30"L x 40"W x 9"H* (cm: 76.2, 101.6, 22.9) Shipping Dimensions (LxWxH) 1 of 2: 35”L x 42”W x 16”H. 2 of 2: 16”L x 42”W x 19”H.
- Page 40 Laguna Tools is not responsible for errors or omissions. Specifications subject to change. Machines may be shown with optional accessories. © 2018, Laguna Tools, Inc. LAGUNA® and the LAGUNA Logo® are the registered trademarks of Laguna Tools, Inc. All rights reserved.
Need help?
Do you have a question about the PL1220 and is the answer not in the manual?
Questions and answers