Table of Contents
Advertisement
Quick Links
Advertisement
Table of Contents

Related Manuals for Rentokil Luminos 3 Plus


Summary of Contents for Rentokil Luminos 3 Plus
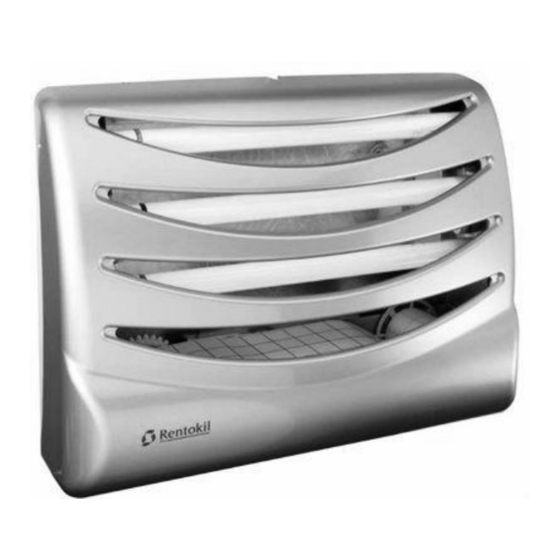
- Page 1 MODEL – Luminos 3 Plus Wall Mounted Model INSTRUCTION MANUAL...
-
Page 2: Important Safety Instructions
INSTRUCTIONS PERTAINING TO A RISK OF FIRE, ELECTRIC SHOCK, OR INJURY TO PERSONS. We hereby declare that Models Luminos 3 Plus and Luminos 3 to conforms covering the appliance provisions of applicable US Federal requirements, including 21 CFR, Chapter 1, Subchapter J, Radiological Health. - Page 3 CAUTION The unit must not be installed where dangerous concentrations of inflammable or explosive substances are likely to be present in the air. The product is intended for commercial indoor use only but is not suitable for use in barns, stables and similar locations. The device is not constructed for use outdoors or in wet locations.
- Page 4 GROUNDING INSTRUCTIONS This product is equipped with an appropriate 3-core cable and 3 pin earthing type plug to fit the proper earthing type socket. To reduce the risk of electric shock, the plug must be plugged into an appropriate outlet that is properly installed and EARTHED. Consult a suitably qualified person if the earthing instructions are not completely understood, or if in doubt as to whether proper earthing exists.
- Page 5 ASSEMBLY & INSTALLATION check the unit for any transit damage. Luminos 3 Plus is a wall-mounted unit. To fix to the wall first unclip the cover LOCATIONS from the backplate and lift off the catch The attraction of the unit to flying insects tray.
- Page 6 CONNECTION TO THE POWER SETTING UP AND OPERATION SOURCE Remove the cover of the unit. (Fig 1.) Installation of this unit should only be carried out by a qualified electrician. The unit is supplied with power cable, which must be connected to a suitable outlet. The cable should be plugged into a standard power socket or fused spur.
- Page 7 In high infestations Luminos 3 Plus, Note: The glueboard should only be offers the option to use a glueboard. used if there is a heavy infestation of Remove paper from the glue board and flies. slide up the chassis behind the bulbs.
- Page 8 If required, release the glue board from the central tab and slide out and discard Refit the cover securely to the unit. (Fig. (or retain for counting). (Fig. 8) Figure 8 Figure 7 If required, refit a new glue board by sliding it up the chassis side channels THE TIMER FUNCTION behind the lamps onto the central tab.
- Page 9 Catch Tray. Fit two end caps into the remove the loose lamp holder covers. glue roll and fit into the right hand side of (Fig. 10) the Catch. Pull sufficient paper from the reel to reach the drive reel and wind the paper on until the film is securely fitted and tensioned.
- Page 10 (situated bottom left) from the unit by FAULT FINDING unscrewing the 5 self tapping screws, 2 on the front, 2 on the back and 1 on the If the motor does not operate at the set base. Carefully lift the motor cover plate time period and the UV lamps are on, the off, taking care not to damage internal probable cause will be that the fuse...
- Page 11 SPECIFICATION Power Supply: 120V / 60 Hz ~ Power Consumption: 91mA @ 120V 60Hz Internal Fuse: 20mm 1 Amp Quick Blow. Size Inch (mm): W 20 (510) x H 15 (380) x D 6,1 (154) Weight lb (kg) Boxed: 16,8 (7.6) / Unit: 10,1 (4,6) Conforms to the relevant sections of: E345204 UL 73...
- Page 12 Exploded View - Parts Identification.
- Page 13 PARTS LIST No. Description 23.ψ4.2 INT. Tooth Washer 1.Cover Assy 24.Wiring Harness 2.Lamp Holder 25.M4x8 Screw 3.Lamp Holder Cover-Back 26.Module RH 4.Lamp Holder & Base Cover-Back 27.Lamp 5.Lamp Holder Cover-Front 28.End Spool 6.Lamp Holder & Base 29.Terminal Block 7.Lamp Holder & Base Cover-Front 30.M3x12 Screw 8.
- Page 14 Manufactured for Rentokil made in Vietnam Number:363204 Revision 1.0 30-01-2012...
Need help?
Do you have a question about the Luminos 3 Plus and is the answer not in the manual?
Questions and answers