Table of Contents
Advertisement
Quick Links
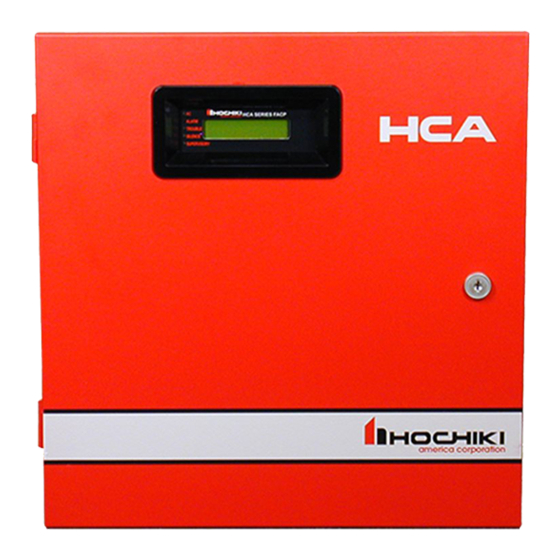
HCA Series
Conventional Fire Alarm System
(HCA-2, HCA-2D, HCA-4, HCA-4D, HCA-8, HCA-8D)
Installation and Operation Manual
Hochiki America Corporation
7051 Village Drive, Suite 100
Version 2.15
Buena Park, CA90621-2268
Created: 07/22/2013
714.522.2246 Corporate Headquarters
Updated: 06/30/2017
800.845.6692 Technical Support
HA-06-266
http://www.hochiki.com
Advertisement
Table of Contents

Related Manuals for Hochiki HCA-2


Summary of Contents for Hochiki HCA-2
- Page 1 HCA Series Conventional Fire Alarm System (HCA-2, HCA-2D, HCA-4, HCA-4D, HCA-8, HCA-8D) Installation and Operation Manual Hochiki America Corporation 7051 Village Drive, Suite 100 Version 2.15 Buena Park, CA90621-2268 Created: 07/22/2013 714.522.2246 Corporate Headquarters Updated: 06/30/2017 800.845.6692 Technical Support HA-06-266...
-
Page 2: Table Of Contents
Table of Contents 1. Introduction ........................4 Product Features ......................... 4 Electrical Specifications......................5 Fire Alarm System Limitations ....................6 Installation Precautions ....................... 7 2. Controls and Indicators ....................9 Front Panel User Control Buttons ..................9 LED Indicators: ........................9 Local Piezoelectric (PZT) Sounder: .................. - Page 3 4.10.1 Disabling or Enabling Zones ..................... 32 4.10.2 Disabling or Enabling Outputs ..................33 4.11 Manual DACT Test ......................33 4.12 Operating the Remote Annunciator ..................33 5. Programming ........................34 Editing User and Installer Access Codes................34 Zone Programming Options ....................34 5.2.1 Zone Edit ..........................
-
Page 4: Introduction
1.1 Product Features The HCA panels have the following key features: 2, 4, or 8 conventional input zones (Models HCA-2, HCA2-D, HCA-4, HCA-4D, HCA-8, HCA-8D). Built-in Digital Alarm Communicator Transmitter (DACT) included with models HCA-2D, HCA-4D, HCA-8D. -
Page 5: Electrical Specifications
Maximum Battery Charging Current 0.98 Amps @ 22VDC Maximum Battery Charger Capacity 18 Ah battery (Two 7 Ah batteries fit inside cabinet) Initiating Device Circuits HCA-2 Alarm Zone 1 & 2 Initiating Device Circuits HCA-4 Alarm Zone 1, 2, 3, & 4 Initiating Device Circuits HCA-8 Alarm Zone 1, 2, 3, 4, 5, 6, 7, &... -
Page 6: Fire Alarm System Limitations
1.3 Fire Alarm System Limitations An automatic fire alarm system – in general is made up of smoke detectors, heat detectors, manual pull stations, call points, audible warning devices, and fire alarm control panels with remote notification capability, which can supply early warning of a developing fire. Such a system, on the other hand, is unable to assure protection against property damage or loss of life resulting from a fire. -
Page 7: Installation Precautions
Audible warning devices such as bells may not alert people if these devices are located on the other side of closed or partly open doors or are located on another floor of a building. Any warning device may fail to alert people with a disability or those who have recently consumed drugs, alcohol or medication. - Page 8 Verify that wire sizes are adequate for all initiating and indicating device loops. Refer to the manual specifications section for maximum allowable I.R. drop from the specified device voltage. Like all solid state electronic devices, this system may operate erratically or can be damaged when subjected to lightning-induced transients.
-
Page 9: Controls And Indicators
2. Controls and Indicators 2.1 Front Panel User Control Buttons Acknowledge This function, abbreviated "Ack" on the keypad, is used to acknowledge an off normal condition such as an alarm or trouble condition. The acknowledge function tells the panel that building personnel or emergency responders are aware of the alarm, trouble, or supervisory condition. -
Page 10: Local Piezoelectric (Pzt) Sounder
Supervisory Yellow LED The supervisory signal indicates that a portion of the building's fire protection system has been disabled (such as a fire sprinkler control valve being closed and, consequentially, a sprinkler tamper switch being activated), or, less frequently, that a lower priority initiating device has been triggered (such as a duct smoke detector). -
Page 11: Control Panel Installation
If there is application or installation information that is not clear or not covered in this manual, please contact Hochiki America Corp. - Page 12 If trouble is experienced with this equipment please contact Hochiki America Corporation in the U.S.A. at (714) 522-2246 for repair or warranty information. If the equipment is causing harm to the telephone network, the telephone company may request that you disconnect the equipment until the problem is resolved.
-
Page 13: Calculating Current Draw And Battery Size
3.4 Calculating Current Draw and Battery Size Use this section to determine the current draw and standby battery needs for your installation. 3.4.1 Maximum Battery Standby Load The nominal battery capacity versus system standby current is shown in table 3.3.1 for typical battery sizes. Make sure that the standby battery calculation of table 3.3.2 is less than the number of table 3.3.1 for the battery chosen and the standby hours needed. - Page 14 Table 3.3.2 Worst Case Battery Current Calculations Devices Number of Devices Current per device Standby Alarm Current Current Multiply This Column By This Column To Get Standby/Alarm Currents Main Panel HCA Panel Standby: 0.160A 0.160A Alarm: 0.290A 0.290A Panel Relays Alarm relay Standby: 0.0A...
-
Page 15: Mounting The Enclosure
3.5 Mounting the Enclosure Install the enclosure as follows: 1. Carefully unpack the system components and inspect for any damage due to shipping. 2. Mount the enclosure in a clean, dry, vibration-free area where extreme temperatures are not encountered. The location should be readily accessible with sufficient room for easy installation and maintenance. -
Page 16: Battery Installation
3.7 Battery Installation The batteries are placed at the bottom of the enclosure. The HCA panel is fully protected if the batteries are connected in the wrong polarity. The Amber battery fault LED on the main circuit board will show steady in such a condition. -
Page 17: Nac Output Circuit Installation
3.8 Notification Appliance Circuit (NAC) Wiring The HCA series control panel has 4 built-in NACs which can be individually configured as either class B (style Y) supervised notification appliance circuits (NACs), auxiliary power 24VDC circuits, auxiliary power 24V resettable circuits or auxiliary power 24V door holder circuits. Figure 3.7 shows NAC 1 wired as a class B NAC. -
Page 18: Zone Installation
3.9 Zone Installation The HCA series panel has either 2, 4 or 8 class B (style B or C) conventional input zones depending on the HCA model chosen. The mode programming option determines if the zone logic interprets short circuits as an alarm (style B) or a trouble condition (style C). -
Page 19: Inner Door Label (Wiring Diagram)
Alarm NAC HA-06-266 section 6.1 Release Alarm General Alarm Compatibility identifier number: 0409007 Software release: Version 2.XX HOCHIKI AMERICA Indoor use only (dry) CORPORATION Commercial – protected-premises control unit This Product shall be installed in accordance with HCA Series NAC1... -
Page 20: Relay Outputs
3.11 Relay Outputs Each HCA series panel has 5, form C relays. 2 of the relays are dedicated to common alarm and common trouble functions. The other 3 relays can be configured as Alarm or Supervisory functions. All 5 relay outputs (Alarm, Trouble, and the programmable relays) carry the same voltage and current ratings. -
Page 21: Dact Phone Lines
3.12 DACT Phone Lines Models HCA-2D, HCA-4D and HCA-8D have a built-in Digital Alarm Communicator Transmitter (DACT). These models have 2, RJ-45 phone line connectors used to wire the incoming telephone lines and pass through any local premises phone connections that are shared with the DACT. See figure 3.11 for wiring details. -
Page 22: Remote Annunciator (Model Hca-Ra)
3.13 Remote Annunciator (Model HCA-RA) 3.13.1 HCA-RA Installation HCA-RA Remote Annunciator – – GND GND GND GND 485+ 485+ RS485 24VDC HCA Control Panel Wire Runs Up to 3300 Feet From FACP RS485 HCA FACP Figure 3.12 HCA-RA connections to the HCA panel. HCA Series Installation Manual Page 22 of 58 V2.15... -
Page 23: Hca-Ra Specifications
It is necessary to enable the remote annunciator in the panel programming in order for the annunciator to function as intended. See programming section 5.5 of this manual for instructions on adding a remote annunciator to the HCA panel. 3.13.2 HCA-RA Specifications Electrical Specifications Operating Voltage: 16-26 VDC Standby Current: 12 mA max... -
Page 24: Diagnostic Leds
This LED flickers when the panel is working normally. When this LED is lit, it indicates trouble with the panel’s internal operation. D116 Amber Contact Hochiki Technical Support for assistance. Green This LED is lit when the standby batteries are properly connected. Amber This LED is lit if the standby battery polarity is reversed. -
Page 25: Control Panel Operations
These LEDs are lit when the corresponding programmable relays are D51, D53, D57 Amber activated. 4. Control Panel Operations All non-programming operations and system behaviors are described in this section. See section 5 for initial setup and control panel programming. The HCA series control panel has 15 keys as shown in the diagram below that are used to operate and program the panel. -
Page 26: System Normal Status Screen
4.1.2 System Normal Status Screen When the control panel condition is normal standby (no active alarms, troubles, etc.), it displays one of two system normal screens: 16/03 13:17:03 European time and date format SYSTEM NORMAL 03/16 01:17:03pm American time and date format SYSTEM NORMAL 4.1.3 Off Normal System Status Screens and Sounds During off normal alarm, trouble, or supervisory conditions, the piezoelectric sounder provides separate... -
Page 27: Nac Output Trouble Screens
CHARGER FAULT This screen is displayed when the battery charger is not operating properly. AC FAULT This screen is displayed when there is no AC power or the AC power is low. GROUND FAULT This screen is displayed when there is an earth ground fault between at least one control panel circuit and earth ground. -
Page 28: Operation Keys
4.2 Operation Keys 4.2.1 System Reset When there are active alarms and /or supervisories in the system, pressing the reset key will first silence all outputs and the panel’s PZT while the zone input circuits are being reset. At the end of the reset period if there are no active alarms or supervisories the panel status will return to normal. -
Page 29: Installer Top Level Menu Options
USER MENU Pressing 3 will select the walk test function. The walk test function is the same for both the user and installer menus. Pressing the Next key will 3-Walk Test, Nxt display the next user menu option. USER MENU Pressing 4 will select event history display. -
Page 30: Fire Drill
4.6 Fire Drill The fire drill function is accessible from both the user and installer menus. Select option 1 from either the user or installer menu. Once the Drill option is selected you will see the screen below: Fire Drill Press Enter to start the fire drill. -
Page 31: Walk Test
4.8 Walk Test The walk test is designed to be used for on-site testing only and is available from option 3 of either the user or installer menus. Select which circuit to test from the first walk test screen displayed below: WALK TEST A walk test is performed one zone at a time. -
Page 32: Clearing Event History
Enter an installer access code to access the main installer menu. Select option 5to disable or enable a zone. Enter the zone number you wish to disable or enable at the screen below. ZONE SETUP Select the zone numbers 1-2 for the HCA-2, 1-4 for the HCA-4 and 1-8 for the HCA-8 model. SELECT ZONE #: Once you select the zone number, the following screen will display. -
Page 33: Disabling Or Enabling Outputs
Press the ESC key several times to back out of the installer menu and return to the idle display. To enable a zone, return to the installer menu and traverse the menus down to the same zone enable screen used to disable the zone. At the enable screen select the Yes key to enable the zone. The supervisory condition associated with the zone being disabled will restore. -
Page 34: Programming
1-Edit Zone, Nxt After selecting option 1 for editing a specific zone, the screen below will display. ZONE SETUP Select the zone numbers 1-2 for the HCA-2, 1-4 for the HCA-4 and 1-8 for the HCA-8 model. SELECT ZONE #:... -
Page 35: Zone Type
5.2.1.1 Zone Type Each of the zones can be configured as FIRE, ALARM VERIFICATION, SUPERVISORY LATCHING or SUPERVISORY NON-LATCHING type. FIRE type zones initiate a fire alarm after the zone response debounce if the circuit is activated. ALARM VERIFICATION type zones will initiate a fire alarm only after the zone is initially activated and then reset by the panel and then verified to still be in alarm during the alarm verification period. -
Page 36: Shorted Zone Mode
ZONE 1 RELAYS In this example, the screen shows that the zone 1 will activate relays 1 and 2, but not relay 3. A dash indicates that the relay will not activate. Select keys 1 through 3 to toggle the activation for each programmable relay. 5.2.2 Shorted Zone Mode The HCA panel provides a programming option which determines the behavior of shorted zones. - Page 37 5.3.2.1 Strobe Synchronization Silencing Option When a NAC cadence pattern is configured as Gentex built-in synchronization, the panel behavior during system silence can be configured to leave the strobes on while silencing the horns or the panel can silence both the horns and strobes. The first programming screen for the NACs sets up the strobe silencing characteristics for circuits programmed with the Gentex cadence pattern.
-
Page 38: Relay Silencing Programming
when complete. Circuits programmed as door holder power will have continuous 24V power present unless the AC power is gone and the panel is running on battery standby. If the AC power fails the door holder power is shut down to conserve the battery backup and the door holder current load is not included in the battery backup calculations. -
Page 39: Releasing Programming Options
5.4 Releasing Programming Options The HCA panel provides water releasing and two agent releasing programming options. You must use either the HCA-4 or HCA-8 if you are using releasing features as all releasing programming options require the use of zones 1 through 4. Note that if you want to use a disconnect switch for the releasing circuit, you must use the HCA-8! Both the water and agent releasing configurations use zones 2 and 3 for cross alarm functions and zone 4 as a manual release alarm function;... - Page 40 1) Continuous – The output will be on continuously. 2) Gentex Sync – Select this option if using Gentex appliances and you want the strobes in sync. 3) March Code – This option will produce a pattern of 5 seconds on, 5 seconds off 4) Temporal Code –...
- Page 41 Figure 5.1 – Agent Release 1 Configuration Agent Releasing Truth Table Normal Standby Common Alarm Common Alarm Common Alarm and Release Common Alarm and Release Common Alarm and Release Common Alarm and Release Common Alarm and Release Figure 5.2 – Agent Releasing Truth Table HCA Series Installation Manual Page 41 of 58 V2.15...
-
Page 42: Agent Release 2
5.4.2 Agent Release 2 The Agent Release 2 option provides a second agent releasing option with the following special features: Notification appliance circuit (NAC) 3 is automatically configured as resettable auxiliary power. Relay 1 activates during the pre-discharge period (zone 2 and 3 in alarm). ... - Page 43 5.4.2.1 Configuring the HCA for Agent Release 2 The Agent Release 2 option configures the panel for an alternate cross zone releasing configuration as described in section 5.4.2. Figure 5.2 is a truth table that shows the cross alarm or manual release inputs that are needed for agent releasing to occur.
-
Page 44: Water Releasing
5.4.3 Water Releasing There is both a single interlock and double interlock water releasing programming option. The single interlock release has similar behavior to the agent release programming options. The difference between single interlock and agent releasing is that zone 1 is configured as a supervisory zone for single interlock vs. - Page 45 The releasing cadence patterns are: 1) Continuous – The output will be on continuously. 2) Gentex Sync – Select this option if using Gentex appliances and you want the strobes in sync. 3) March Code – This option will produce a pattern of 5 seconds on, 5 seconds off 4) Temporal Code –...
- Page 46 Double Interlock Truth Table Single Interlock Truth Table Normal Standby Normal Standby Common Alarm Common Alarm Common Alarm Common Alarm Common Alarm Common Alarm and Release Common Alarm Common Alarm and Release Common Alarm Common Alarm and Release Common Alarm Common Alarm and Release Common Alarm...
-
Page 47: How To Install The Disconnect Switch On The Releasing Circuit
(NFPA 72 2010 Edition, 23.13.5). This section explains how to connect the disconnect switch to the HCA. You will need a Hochiki America SOM-R-DS Disconnect Switch for this application. The disconnect switch is connected in-line with the releasing circuit (NAC 1). When the switch is operated, it creates an open-circuit condition which prevents the release of the extinguishing agent. - Page 48 Additional notes about Releasing: The only programmable options for zones 1 – 5 are the relay settings when releasing is selected. The 4-zone HCA panel does not have the capability of supporting a disconnect switch because the panel only has four zones; there is no zone 5. The 4-zone HCA may be used for applications where a disconnect switch is not required.
-
Page 49: Remote Annunciator
5.5 Remote Annunciator The programming option to indicate the presence of a remote annunciator is located in option 5 of the programming menu. The HCA panel supports up to 1 remote annunciator. PROGRAMMING MENU Pressing 5 will select the remote annunciator menu. Pressing the Next key will display the next programming menu option. -
Page 50: Low Ac Reporting Delay
The next DACT programming screen is the minute within the hour of the day for the auto test. Auto Test Time Enter the minute the auto test will occur followed by Enter. Minute(0-59): 00 Default time is 2:00AM. The next DACT programming screen sets the interval for the auto test. AutoTest Period: The auto test interval may be set to 24 hours or 6 hours. - Page 51 You may enter blanks or spaces in the account number by pressing the Silence key for the 2 most significant digits. The ESC key will back the cursor left one position until you reach the left most digit and then it will escape out of the account edit menu. Account Number: Enter the account number you want to use for reporting.
- Page 52 5.6.4.7 Fire Drill Reporting Filter The fire drill reporting filter determines if this account will report fire drill begin and fire drill end events to the central station. Report FireDrill Select Y if you want fire drill events reported to this account. Select N if you do not want test events reported.
-
Page 53: Edit Phone Lines
5.6.5 Edit Phone Lines The DACT has 2 phone lines for reporting to a central station receiver. Both lines must be used for proper operation of the DACT. In addition, both phone lines must be supervised for the panel installation to be compliant with UL864 –... -
Page 54: Panel Factory Default Setup
5.7 Panel Factory Default Setup If there is ever a need to start over with the programming process the panel can be brought back to the default factory programming settings. From the programming menu select option 7 PROGRAMMING MENU Pressing 7 will select the programming options to restore the factory default options. -
Page 55: Dact Reporting Codes And Compatible Receivers
6. DACT Reporting Codes and Compatible Receivers This section lists all reporting codes that are used for SIA and Contact ID reporting. The HCA control panel is compatible with central station receivers that support SIA and/or Contact ID reporting formats, such as those manufactured by ADEMCO, Silent Knight and Sur-Gard. -
Page 56: Compatible Devices For The Hca Series Panel
7. Compatible Devices for the HCA Series Panel 7.1 Compatible Conventional Initiating Devices Hochiki America Initiating Devices Maximum number per zone Detectors SOC-24V Photoelectric smoke detector SOC-24VN Photoelectric smoke detector SLV-24V Photoelectric high velocity smoke detector SLV-24N Photoelectric high velocity smoke detector... -
Page 57: Compatible Heat Detector Cable
7.3 Compatible Heat Detector Cable Compatible Devices Manufacturer Models Description Maximum Length Proline Protection Fixed Temp. line type heat detector cable 68⁰C TH 68 8,000 feet (2,438m) Systems LTD (155⁰F) Proline Protection Fixed Temp. line type heat detector cable 88⁰C TH 88 8,000 feet (2,438m) Systems LTD... -
Page 58: Warranty
Hochiki America Corporation manufactured equipment is guaranteed to be free from defects in materials and workmanship for a period of three (3) years from date of original shipment. HOCHIKI will repair or replace, at its option, any equipment which it determines to contain defective material or workmanship. Said equipment must be shipped to HOCHIKI prepaid.
Need help?
Do you have a question about the HCA-2 and is the answer not in the manual?
Questions and answers