Tigersecu 302 Series User Manual
5mp professional hd
Hide thumbs
Also See for 302 Series:
- User manual (38 pages) ,
- User manual (39 pages) ,
- Manual (16 pages)

Subscribe to Our Youtube Channel
Related Manuals for Tigersecu 302 Series


Summary of Contents for Tigersecu 302 Series
- Page 1 5MP Professional HD Video Security DVR System User Manual www.tigersecu.com Copyright © 2017 TIGERSECU, Inc...
-
Page 2: Table Of Contents
Contents Contents ....................1 3. Advance ..................14 Important Information .................3 Playback Menu ......................15 Installation Guide.…................4 1. Playback ..................15 Remote Control.…................6 2. Backup ..................16 Chapter 1. Start-up Wizard ..............7 Network Menu ..................16 Chapter 2. Live View Screen ..............8 1. - Page 3 2. Playback and backup on App ............27 Chapter 5. View DVR remotely on your computer ......29 1. TIGERSECU (CMS) User Guide for Windows Users ......30 2. TIGERSECU (CMS) User Guide for Mac Users ......32 Chapter 6. Q&A ………..............34...
-
Page 4: Important Information
Contact Us Thank you for purchasing a TIGERSECU Security product. If you require any assistance with your new TIGERSECU product, we're here for you. Your TIGERSECU Operation product is backed by a full two-year warranty and Lifetime Support and we may be 1. -
Page 5: Installation Guide
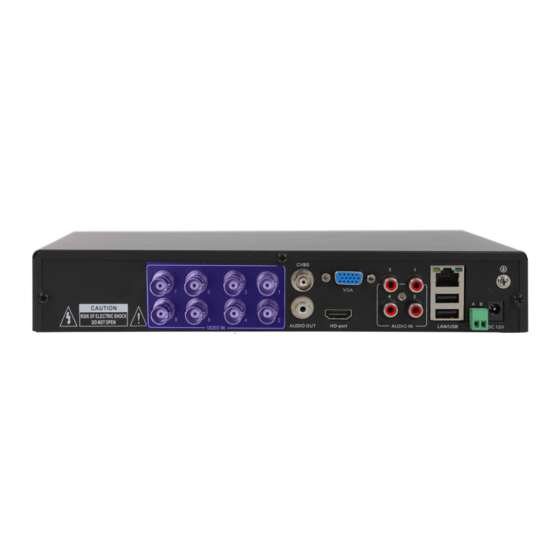
Installation Guide 1. Connect the cameras with the DVR 2. Connect the Network Cable with the DVR (Network cable not included in the package) Prepare the DVR, router and network cable. Connect the network cable as above. 3. Connect a display device to the DVR (VGA/HDMI cable not included in the package) A) Prepare the DVR, cameras, 5-way/9-way power splitter, BNC cables and the power adapter(s). - Page 6 B) Power on the monitor. C) Connect the mouse to the USB slot on the DVR back panel. D) You will see TIGERSECU LOGO in a few seconds, then the Live View Screen and Start-up wizard. E) The Start-up wizard will guide you through the basic settings.
-
Page 7: Remote Control
Remote Control 01) POWER: Power on/off the DVR. 10) PTZ: Control PTZ cameras. 02) PIP: Swap PIP screen with main screen. 11) MUTE: Enable or disable the audio output. This won't have any effect on recordings. If you've 03) RECORD: Enter the scheduled recording menu. configured the DVR to record audio, then it will 04) SEARCH: Search recording files. -
Page 8: Chapter 1. Start-Up Wizard
Start-up Wizard Chapter 1. Start-up Wizard To help you get set up quickly, there is a start-up wizard the first time you log on. Step 1. Select your Language. Step 4. Format the hard drive. Choose the hard drive and click Format. Wait a few minutes until complete. -
Page 9: Chapter 2. Live View Screen
Chapter 2. Live View Screen Live View is where you can watch live feeds from the cameras. It displays one or all the channels available to you. This is useful if you have someone monitoring the channels in real time or you need to check on a specific location. -
Page 10: Status Icons
Live View Screen: Icons Status Icons Menu Bar Icons These icons are used to indicate different camera status. The Menu Bar at the bottom of the screen is a handy place to change Check the table below to learn about these icons: the view format of the Live View screen. - Page 11 Live View Screen: Icons Icon Description Display the DVR Main Menu. Show video from one camera in full screen. Show multiple screens on the same page. Show the picture of one channel in the picture of another channel. Playback the 24 hours of recordings for the chosen day. Take a snapshot of the screen.
-
Page 12: Chapter 3. Main Menu
Chapter 3. Main Menu From the Main Menu, you can access the major functions of the DVR including channel settings, recording settings, playback of recordings, network settings, motion detection settings, hard drive settings, configuration for the system, and maintenance. -
Page 13: Channel Menu
Main Menu To go to the Main Menu, click the icon as below. Channel Menu The Channel Menu is where you setup how to display the video from the cameras. (This DVR supports PTZ cameras.) 2. Image Setting In Image Settings page, you can configure settings for video and volume. 1. -
Page 14: Privacy Mask
Main Menu 3. Privacy Mask Don’t forget to check the Enable box. If you want to copy these settings to Use Privacy Mask if cameras are mounted at home or in an office that requires other channels, click the Copy button. Select the channels you wish to apply privacy. -
Page 15: Schedule
Main Menu (High, Medium, Low). This give you some options to choose a suitable recording quality based on the hard drive’s capacity. A higher Quality level means higher resolution and consumes larger storage on your hard drive. 3. Advance 2. Schedule In the Advanced page, the Recycle Recording function is enabled by default. -
Page 16: Playback Menu
Main Menu Playback Menu ② Here’s the playback interface. The Continuous record timeline is marked in From the Playback Menu, you can easily playback the recordings. You can purple. The Event Record timeline is marked in blue. also backup the recording to USB flash drive (to view elsewhere or save space on the hard drive). -
Page 17: Backup
Main Menu 2. Backup Network Menu From the Backup page, you can back up your recordings to an external source (USB). Using the Network Menu, you can manually configure network settings for the DVR. NOTE: The USB drive needs to be inserted into the USB slot at the back of the DVR to back up files. -
Page 18: Qr Code
DVR is connecting to the Internet and you may view the DVR on your phone Check Enable. using the App named TIGERSECU HD Viewer and CMS called TIGERSECU CMS. If OFF, contact us via service@tigersecu.com. For more instruction, please refer to the Chapter 4 and 5. -
Page 19: Motion Menu
Main Menu Motion Menu In the Motion Menu, you may set the motion detection features for each channel. This will save a lot of hard drive space and save you time reviewing playbacks. NOTE: Motion recording is disabled by default. 1. -
Page 20: Video Loss
Main Menu ② Linkage Action: Enable Event Record, Buzzer, Notification, Mail. If you’ve logged in via mobile app (TIGERSECU HD Viewer) and enabled Notify, click Notification Setup to choose the mobile devices that receive notifications. 2. Video Loss Use Trigger Setting to choose the way you want to be notified when the video feed fails. -
Page 21: Hdd Menu
Main Menu HDD Menu 2. USB Flash Drive In the HDD Menu, you will see the list of hard drives (USB Flash Drive) Basic information of the backup USB flash drive can be found on this connected to the DVR. page. -
Page 22: Configuration Menu
Main Menu Configuration Menu The Configuration Menu allows you to configure general DVR settings. 1. System ① Edit admin (default) password here. On the Settings page, basic system settings can be changed. You may setup the Language (English and Spanish supported), the Name of the DVR, Video formats (NTSC for United States, Pal for European Unions), display Resolution on the monitor, Auto Lock or not, etc. -
Page 23: Time
Main Menu Time Maintenance Menu On the Time page, you can setup basic information regarding Time such as In the Maintenance Menu, you can view the DVR information, set up the Timezone and Time/Date Format, etc. maintenance cycle, upgrade the software, check log files, reset to factory defaults, and import/export files by USB drive. -
Page 24: Import/Export
Main Menu 3. Log Log file keep records of all actions to the DVR such as Power on, Video Loss 1. Import/Export and HDD formats, etc. You may search by action(s) and channel(s) and Export the data if needed. On the Import/Export page, you can import files or export videos. A USB flash drive needs to be inserted to the USB slot at the back of the DVR to import or export data. -
Page 25: Reset Default
Main Menu 4. Reset Default Resets system configuration will erase basic settings. Please reset only in cases like when you forget your user name or password. -
Page 26: Chapter 4. View Dvr Remotely On Your Phone
At the time of the publication of this user guide, T-Mobile restricts T-Mobile Unlimited Data mobile users from using unlimited data plans for remote surveillance. T-Mobile Unlimited Data users may access TIGERSECU HD Viewer on their mobile devices by connecting to a wireless network or utilizing IP login. -
Page 27: Setup
Type in your Username and Password (default username: admin, default password: 00000000). Click Save. Step 1: Download TIGERSECU HD VIEWER from App Store or Google Play. Step 2: Go to the DVR Network > QR Code > Information page (make sure the status shows on). -
Page 28: Playback And Backup On App
View DVR Remotely on Your Phone on your phone. App Icon Description Then go to the DVR – Main Menu – Motion Menu – Motion – Trigger Setting – The app supports viewing multiple channels (1/4/9/16) on the Notification (check) – Notification Setup – Choose the name of your phone – same page, while in landscape mode (with your phone held Click OK. - Page 29 View DVR Remotely on Your Phone App Icon Description Rewind Forward Play/Pause Slow Motion Adjust image quality (Higher or Lower image quality) Multiple channels Backup videos Seek. Choose the time you want to playback. Step 2: Click Backup. Set the Start Time and End Time, Channel Name, then calculate (click) Required Space.
-
Page 30: Chapter 5. View Dvr Remotely On Your Computer
Chapter 5. View DVR Remotely on Your Computer You can view the DVR remotely from your computer whether it is a PC or Macintosh. You may want to do this for DVRs placed in remote locations from where you are. For example, you may want to monitor your cottage from home or work and likewise, monitor your business from home. -
Page 31: Tigersecu (Cms) User Guide For Windows Users
View DVR Remotely on Your Computer 1. TIGERSECU CMS for Windows Users b) Port: No need to change. Step 1: Download and install TIGERSECU CMS on your computer. c) Default User: Enter admin. Download Link: http://www.tigersecu.com/cms-win.zip d) Default Password: Enter 00000000 (eight zeros) Step 2: Open the software and you will see the login page like the one below: e) Click Connect. - Page 32 View DVR Remotely on Your Computer e) Type in External IP address into the Host field, Port you assigned for the Explorer or your browser and enter the Default Gateway number into the DVR, Default User Name: admin, Default Password: 00000000 (eight zeros) Address Bar in your browser and hit enter.
-
Page 33: Tigersecu (Cms) User Guide For Mac Users
2. TIGERSECU CMS for MAC Users Port you assigned for the DVR, default User Name: admin, default Password: 00000000. Click Connect. Step 1: Download TIGERSECU CMS to your Mac. Download Link: http://www.tigersecu.com/cms-mac.zip Step 2: Open the software. In the event you are unable to access the software on your Mac, go to System Preference >... - Page 34 View DVR Remotely on Your Computer Tips: You may check the YouTube video below regarding: How to allow your Mac applications downloaded from anywhere? (https://www.youtube.com/watch?v=c4mF4AxgXXU ) Step 3: Login. Type in the information. (Please refer to the instructions above regarding the three login types for Windows users.)
-
Page 35: Chapter 6. Q&A
00000000 (eight zeros). 4. I purchased three sets of TIGERSECU DVR, could I use the same app on 2. Can I use another brand’s camera on this DVR? They appear to have my phone to keep track of all my DVRs? the same connector. - Page 36 Chapter 6: Q&A 6. Can I buy longer cables? So that I can mount the cameras further from the DVR. Yes, this DVR kit comes with 60ft cables. You may also purchase longer cables to replace them if needed. 7. The DVR does not detect my USB flash drive when I try to download video recordings or upgrade the firmware.
Need help?
Do you have a question about the 302 Series and is the answer not in the manual?
Questions and answers