Furuno DRS6A Installation Manual
Radar sensor drs x-class series
Hide thumbs
Also See for DRS6A:
- Installation manual (52 pages) ,
- Installation manual (18 pages) ,
- Installation manual (44 pages)
Table of Contents
Advertisement
Quick Links
Installation Manual
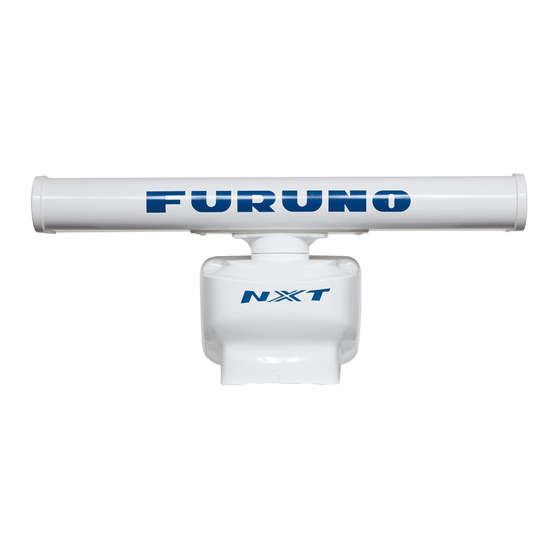
RADAR SENSOR
Model DRS6A X-Class
SAFETY INSTRUCTIONS ................................................................................................ i
SYSTEM CONFIGURATION .......................................................................................... iii
EQUIPMENT LISTS........................................................................................................ iv
1. INSTALLATION AND WIRING................................................................................... 1
1.1 Mounting Considerations ......................................................................................................1
1.2 Included Items.......................................................................................................................3
1.3 Required Tools and Materials ...............................................................................................4
1.4 Fastening the Radiator to the Radiator Bracket....................................................................5
1.5 Mounting the Antenna Unit ...................................................................................................7
1.6 Wiring..................................................................................................................................10
2. INITIAL SETUP......................................................................................................... 13
2.1 Initial Setup for TZT9/TZT14/TZTBB ..................................................................................13
2.2 Initial Setup for TZTL12F/TZTL15F ....................................................................................16
3. MAINTENANCE, TROUBLE SHOOTING ................................................................ 18
3.1 Maintenance .......................................................................................................................19
3.2 Troubleshooting ..................................................................................................................19
3.3 Replacement of Fuse..........................................................................................................20
3.4 Life of Parts.........................................................................................................................20
SPECIFICATIONS ..................................................................................................... SP-1
OUTLINE DRAWING ................................................................................................... D-1
INTERCONNECTION DIAGRAM ................................................................................ S-1
www.furuno.com
All brand and product names are trademarks, registered trademarks or service marks of their respective holders.
Advertisement
Table of Contents

Related Manuals for Furuno DRS6A


Summary of Contents for Furuno DRS6A
-
Page 1: Table Of Contents
Installation Manual RADAR SENSOR Model DRS6A X-Class SAFETY INSTRUCTIONS ....................i SYSTEM CONFIGURATION ..................iii EQUIPMENT LISTS......................iv 1. INSTALLATION AND WIRING................... 1 1.1 Mounting Considerations ......................1 1.2 Included Items........................3 1.3 Required Tools and Materials ....................4 1.4 Fastening the Radiator to the Radiator Bracket..............5 1.5 Mounting the Antenna Unit ....................7... -
Page 2: Safety Instructions
SAFETY INSTRUCTIONS The installer of the equipment must read the safety instructions before attempting to install the equipment. Indicates a potentially hazardous situation which, if not avoided, WARNING could result in death or serious injury. Indicates a potentially hazardous situation which, if not avoided, CAUTION can result in minor or moderate injury. - Page 3 Standard Steering Model the transmitting antenna at a compass compass close distance. DRS6A X-Class 1.40 m 0.90 m Distances at which RF radiation levels of 100, 50 and 10 W/m exist It is recommended that you are given in the table below.
-
Page 4: System Configuration
Multi Function Display NavNet TZtouch/Navnet TZtouch 2 NavNet TZtouch/Navnet TZtouch 2 The DRS6A X-Class is compatible with the FURUNO Multi Function Displays shown below. The combination with other models may not operate properly. • NavNet TZtouch: TZT9, TZT14, TZTBB • NavNet TZtouch2: TZTL12F, TZTL15F... -
Page 5: Equipment Lists
EQUIPMENT LISTS Standard supply Name Type Code No. Remarks Scanner Unit RSB-134 Radiator XN10A 3.4 ft XN12A 4 ft XN13A 6 ft Installation Materials For scanner unit For radiator CP03-36400 000-027-211 Power/LAN cable, 10 m CP03-36410 000-027-212 Power/LAN cable, 15 m CP03-36420 000-027-213 Power/LAN cable, 20 m... -
Page 6: Installation And Wiring
INSTALLATION AND WIRING NOTICE Do not apply paint, anti-corrosive sealant or contact spray to coating or plastic parts of the equipment. Those items contain organic solvents that can damage coating and plastic parts, especially plastic connectors. Mounting Considerations Select a mounting location, keeping in mind in the following points: •... - Page 7 1. INSTALLATION AND WIRING • In order to reduce the chance of picking up electrical interference, avoid where pos- sible routing the power cable near other electrical equipment on-board. Also, avoid running the cable in parallel with other power cables. •...
-
Page 8: Included Items
1. INSTALLATION AND WIRING Included Items Radiator • Radiator* (1 pcs): • Flat washer (M8, 4 pcs) • Spring washer (M8, 4 pcs) 3.4 ft, 4 ft or 6 ft • Hex. bolt (M8×30, 4 pcs) • O-ring (1 pcs) •... -
Page 9: Required Tools And Materials
1. INSTALLATION AND WIRING Required Tools and Materials Prepare the tools and materials shown below to install the antenna unit. Name Remarks For making the mounting holes, drill bit: 15 mm Electrical drill Phillips-head screw driver #3, for fixing the cable cover Wrench For M10 (Hex. -
Page 10: Fastening The Radiator To The Radiator Bracket
1. INSTALLATION AND WIRING Fastening the Radiator to the Radiator Bracket 1. Remove the radiator cap from the radiator bracket. Radiator bracket Radiator cap 2. Apply the silicone rubber to the surface of the radiator bracket as shown in the fig- ure below. - Page 11 1. INSTALLATION AND WIRING 4. Apply the silicone rubber to the thread holes on the bottom of the radiator (4 loca- tions). Silicone rubber Bottom view: Radiator 5. Apply the silicone rubber to the hex. bolts (M830, 4 pcs). 6. Fasten the radiator to the radiator bracket, using the hex bolts (M830), flat wash- ers (M8) and spring washers (M8).
-
Page 12: Mounting The Antenna Unit
1. INSTALLATION AND WIRING Mounting the Antenna Unit The antenna unit can be mounted using the fixing holes on the outside (200 200 mm) or inside (140 150 mm) the antenna unit. Normally, use the outside fixing holes. When 140 ... - Page 13 1. INSTALLATION AND WIRING 3. Insert four stud bolts (M1260) into the threaded holes in the antenna unit. Stud bolt 4. Put the antenna unit on the mounting platform with the BOW mark on the unit aligned with the ship’s bow. BOW mark BOW mark Stern...
- Page 14 1. INSTALLATION AND WIRING 5. Fix the antenna unit, using the flat washers (M12), spring washers (M12), and hex. nuts (M12). Flat washer Spring washer Hex. nut 6. Apply the silicone rubber to the flat washers, spring washers, and hex. nuts. Detailed view Corrosion-proof rubber pad...
-
Page 15: Wiring
• The power/LAN cable has connectors. Do not cut the power/LAN cable. • When you replace the DRS4A/6A/12A/25A with the DRS6A X-Class, the existing cable cannot be used. Use the power/LAN cable supplied with the DRS6A X-Class. 1. Unfasten two screws to remove the cable cover.
Need help?
Do you have a question about the DRS6A and is the answer not in the manual?
Questions and answers