Advertisement
WASHER INSTALLATION INSTRUCTIONS
INSTRUCTIONS POUR L'INSTALLATION DU LAVE-LINGE
INSTRUCCIONES DE INSTALACIÓN DE LA LAVADORA
ISTRUZIONI DI INSTALLAZIONE DELLA LAVATRICE
WASCHMASCHINE – INSTALLATIONSANWEISUNGEN
WASHER SAFETY ...................................................................... 2
INSTALLATION REQUIREMENTS ............................................. 3
Tools and Parts ................................................................... 3
Specifications ..................................................................... 4
Location Requirements ..................................................... 4
Drain System ...................................................................... 5
Electrical Requirements .................................................... 5
SÉCURITÉ DU LAVE-LINGE ....................................................11
EXIGENCES D'INSTALLATION ...............................................12
Outillage et pièces ...........................................................12
Caractéristiques ...............................................................13
Exigences d'emplacement ..............................................13
Système de vidange .........................................................14
Spécifications électriques ...............................................15
SEGURIDAD DE LA LAVADORA ............................................. 21
REQUISITOS DE INSTALACIÓN ............................................. 22
Herramientas y piezas ..................................................... 22
Especificationes ............................................................... 23
Requisitos de ubicación .................................................. 23
Sistema de desagüe. ........................................................ 24
Requisitos eléctricos ....................................................... 25
SICUREZZA DELLA LAVATRICE ............................................ 31
REQUISITI DI INSTALLAZIONE .............................................. 32
Utensili e parti ................................................................... 32
Specifiche Tecniche ......................................................... 33
Requisiti di collocazione .................................................. 33
Impianto di scarico .......................................................... 34
Requisiti Elettrici .............................................................. 35
WASCHMASCHINE – SICHERHEIT ........................................ 41
INSTALLATIONSANFORDERUNGEN ..................................... 42
Werkzeuge und Teile ........................................................ 42
Spezifikationen ................................................................. 43
Anforderungen an den Aufstellraum .............................. 43
Drainagesystem................................................................ 44
Elektrische Anforderungen.............................................. 45
W10849505B
TABLE OF CONTENTS (Original Instructions)
TABLE DES MATIÈRES (Instructions d'origine)
ÍNDICE (Instrucciones originales)
INDICE (Istruzioni originali)
INHALTSVERZEICHNIS (Originalanweisungen)
INSTALLATION INSTRUCTIONS ............................................... 6
Connect Drain Hose ........................................................... 7
Connect Inlet Hoses ........................................................... 7
Level Washer ...................................................................... 9
Power Cord Installation ................................................... 10
Complete Installation Checklist ...................................... 10
INSTRUCTIONS D'INSTALLATION .........................................15
Raccordement du tuyau de vidange...............................16
Raccordement des tuyaux d'arrivée d'eau ....................17
Établissement de l'aplomb du lave-linge .......................18
Installation du cordon d'alimentation .............................19
Liste de vérification pour installation terminée .............20
INSTRUCCIONES DE INSTALACIÓN ..................................... 25
Conexión de la manguera de desagüe ........................... 26
Conexión de las mangueras de entrada ........................ 27
Nivelación de la lavadora ................................................ 28
Instalación del cable eléctrico ........................................ 29
Lista de control de la instalación terminada ................. 30
ISTRUZIONI PER L'INSTALLAZIONE ..................................... 36
Connessione del tubo di scarico .................................... 37
Connessione dei tubi d'ingresso .................................... 37
Livellamento della lavatrice ............................................. 39
Installazione del cavo di alimentazione ......................... 40
Elenco di controllo completo per l'installazione ........... 40
INSTALLATIONSANWEISUNGEN ........................................... 46
Ablaufschlauch anschließen ........................................... 47
Zulaufschläuche anschließen ......................................... 47
Nivellierung der Waschmaschine ................................... 49
Installation des Netzkabels ............................................. 50
Komplette Installations-Checkliste ................................ 51
WARNING:
precautions, including the following:
Read all instructions before using the dryer.
Keep a minimum clearance of 100 mm (4 in.) between the
rear of the dryer and any wall.
IMPORTANT SAF
To reduce the risk of re, electric shock, or i
Advertisement
Table of Contents

Related Manuals for Whirlpool 3LWTW4815FW


Summary of Contents for Whirlpool 3LWTW4815FW
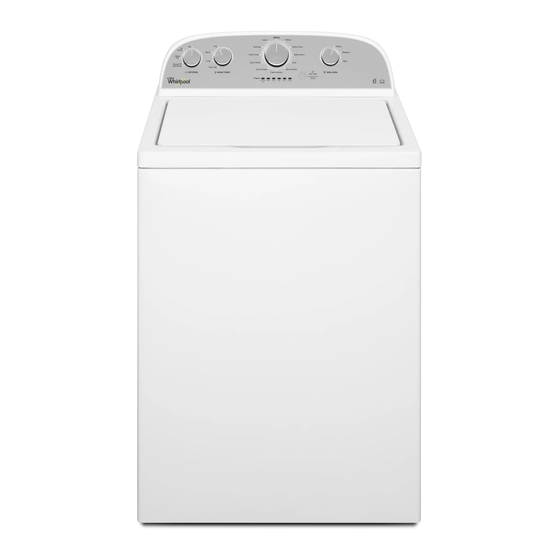
- Page 1 WASHER INSTALLATION INSTRUCTIONS INSTRUCTIONS POUR L’INSTALLATION DU LAVE-LINGE INSTRUCCIONES DE INSTALACIÓN DE LA LAVADORA ISTRUZIONI DI INSTALLAZIONE DELLA LAVATRICE WASCHMASCHINE – INSTALLATIONSANWEISUNGEN TABLE OF CONTENTS (Original Instructions) WASHER SAFETY ..............2 INSTALLATION INSTRUCTIONS ..........6 Connect Drain Hose ............7 INSTALLATION REQUIREMENTS ..........
-
Page 2: Washer Safety
The nal part of a tumble dryer cycle occurs without heat by Whirlpool or its service agent or a similarly washing will reduce, but not eliminate, the hazard. responsible for their safety. Such persons must also (cool down cycle) to ensure that the items are left at a qualified person in order to avoid a hazard. -
Page 3: Tools And Parts
(4" min) (102 mm) Plugs and cord lock cover Alternate parts: (Not supplied with washer) IMPORTANT: Use only Whirlpool authorized parts. Wood block Ruler or measuring tape WARNING: To avoid electrical shock, disconnect washer from power source before replacing parts. -
Page 4: Location Requirements
Location Requirements Specifications Select proper location for your washer to improve performance These units are sold in multiple regions with different and minimize noise and possible “washer walk”. Install your requirements for measuring capacity. Below are a few washer in a basement, laundry room, closet, or recessed area. of the valid forms of measure posted on this product: 699 mm 686 mm... -
Page 5: Drain System
Drain System Electric Requirements Drain system can be installed using a floor drain, wall standpipe, floor standpipe, or laundry tub. Select the method you need. Floor standpipe drain system 990 mm (39") 114 mm (4.5") Minimum diameter for a standpipe drain: 51 mm (2"). Minimum carry-away capacity: 64 L (17 gal.) per minute. -
Page 6: Installation Instructions
INSTALLATION INSTRUCTIONS Remove packing tray from tub Before you start: Remove shipping materials. It is necessary to remove all shipping materials for proper operation and to avoid excessive noise from washer. Move washer Remove tape from washer lid, open lid and remove cardboard packing tray from tub. -
Page 7: Connect Inlet Hoses
Connect Drain Hose Remove drain hose form (floor drain installations only) Attach drain hose to drain port Remove the red plastic plug from the black drain port on the For floor drain installations, you will need to remove the back of the washer. drain hose form from the end of the drain hose. - Page 8 Check for leaks Connect inlet hoses to “Y” connector Attach the brass female end of the “Y” connector to the cold water faucet. Use pliers to tighten couplings an additional two-thirds turn. One end of the long hose has a wire mesh strainer inside the coupling. Turn on water faucets to check for leaks.
-
Page 9: Level Washer
Level Washer Adjust leveling feet IMPORTANT: Level washer properly to reduce excess noise and vibration. Check levelness of washer Models with Place level here Place level here metal feet Jam nut Models with Move the washer to its final location. Place a level on top plastic feet edges of washer. -
Page 10: Power Cord Installation
Power Cord Installation Secure power cord IMPORTANT: Installation must be performed by Whirlpool qualified service personnel only. Secure the power cord by seating the connection on the cord lock. Place the cord lock cover and push until it snaps. Make sure the power cord connection is seated on the cord lock and that the cord lock clamps correctly.
Need help?
Do you have a question about the 3LWTW4815FW and is the answer not in the manual?
Questions and answers