Table of Contents
Advertisement
Advertisement
Table of Contents

Related Manuals for Lexicon DD-8+


Summary of Contents for Lexicon DD-8+
- Page 1 DD-8+ Network Amplifier Owner’s Manual...
-
Page 2: Important Safety Instructions
DD-8+ Power IMPORTANT SAFETY INSTRUCTIONS Read these instructions. DO NOT EXPOSE THIS EQUIPMENT TO DRIPPING OR SPLASHING AND ENSURE THAT NO OBJECTS FILLED Keep these instructions. WITH LIQUIDS, SUCH AS VASES, ARE PLACED ON THE EQUIPMENT. Heed all warnings. 18. THE MAINS PLUG OF THE POWER SUPPLY CORD SHALL REMAIN Follow all instructions. -
Page 3: Declaration Of Conformity
Title: Director of Engineering Obtaining Other Language Versions: To obtain information in another language about the use of this product, please contact your local Lexicon Distributor. If you need assistance locating your local distributor, please contact Lexicon at 888-691-4171. This manual does not include all of the details of design, production, or variations of the equipment. Nor does it cover every possible situation which may arise during installation, operation or maintenance. -
Page 4: Documentation Conventions
DD-8+ Power DOCUMENTATION CONVENTIONS This document contains general safety, installation, and operating instructions for the DD-8 Power Amplifier. It is important to read this user guide before attempting to use this product. Pay particular attention to safety instructions. The following symbols are used in this document: Appears on the component to indicate the presence of uninsulated, dangerous voltage inside the enclosure –... -
Page 5: Getting Started
This important information will help you make certain that your DD-8+ is properly configured for operation with the rest of the equipment in your system. Be sure to check Lexicon.com periodically for the latest DD8+ updates. -
Page 6: Installation Considerations
DD-8+ Power GETTING STARTED Installation Considerations To ensure optimal performance, pay particular attention to the instructions below and to other precautions that appear throughout this user guide. DO install the DD-8+ on a solid, flat, level surface such as a table or shelf. The DD-8+ can also be installed in a standard 19-inch equipment rack using the rack-mount ears included with the product. -
Page 7: Basic Operation
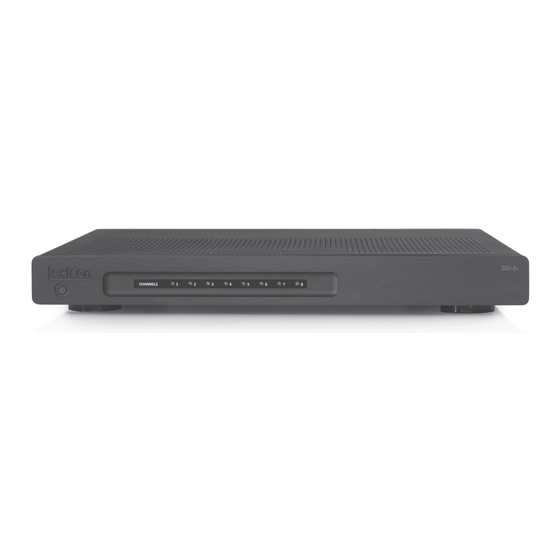
DD-8+ Power BASIC OPERATION Front Panel Figure 3. Standby Button Channel Status Indicator LED’s 1. Standby Button Activates and deactivates standby mode when the DD-8+ amplifier is connected to AC power. When the DD-8+ is connected to AC power, the standby button LED will glow RED indicating that the unit is in the standby mode. -
Page 8: Back Panel
DD-8+ Power BASIC OPERATION Back Panel Figure 4. Bus Output Ethernet Port Bus Input Trigger In/Out Analog Inputs AC Main Power Connector S/PDIF Digital Inputs MAC ID Label Speaker Outputs 10. Reset CAUTION: Never make or break connections to the DD-8+ unless the DD-8+ and all associated components are powered off WARNING: Do not connect the outputs... -
Page 9: Connection Terminals
DD-8+ Power BASIC OPERATION The DD8+ is a network amplifier and must be connected to a network router via the Ethernet jack on the back of the unit. Most of the controls normally found on the front and rear panels of an amplifier can be found in the Configuration Dashboard that is accessed via a PC/Mac connected via web browser. - Page 10 DD-8+ Power BASIC OPERATION 5. Speaker Outputs Provides connection for up to four pair of stereo speakers (eight speakers total) to the DD-8+. Connection is provided via phoenix-type connectors that accept bare wire terminations. The connectors are grouped in pairs with one connector each for output pair 1-2, 3-4, 5-6 and 7-8. Each pair consists of four wire terminations: positive (+) and negative (–) for the Left channel and positive (+) and negative (–) for the Right channel.
- Page 11 DD-8+ Power BASIC OPERATION To install a trigger cable: • Power the controlling source and DD-8+ amplifier off. • Connect the trigger cable to the controlling source and the DD-8+ amplifier. • After the connections are made, power on the controlling source and the DD-8+ amplifier. After the source unit is fully powered up, the LED power indicator on the front of the DD-8+ should be lit BLUE.
- Page 12 Identify DD8+ IP Address for Web Configuration Dashboard Access Overview The Lexicon DD8+ features a web-based Configuration Dashboard for system set-up. As long as the DD8+ is connected to the same network as the controlling device (PC, Mac or Mobile device), the Configuration Dashboard can be accessed via an Internet Browser such as Chrome, Safari or Firefox.
- Page 13 DD-8+ Power BASIC OPERATION Identifying the IP Address – Windows 7, 10 1. Download an IP Scanner ( search “ ip scanner for PC” there are several). 2. Make sure you are on the same network as the DD-8+. 3. Once program is open, click “Scan” 4.
- Page 14 DD-8+ Power BASIC OPERATION Configuration Dashboard — Set-Up, Inputs And Processor Channels The Configuration Dashboard is a highly convenient means of accessing the Digital Signal Processor (DSP) to configure the DD-8+ for maximum usability and performance. Several vital features, functions and controls can be found only within the Configuration Dashboard.
- Page 15 DD-8+ Power BASIC OPERATION IMPORTANT! 3. Green Mode Enables the extreme low-power ½ Watt automatic standby mode of the DD-8+. The default value is ON (Green Mode engaged). To turn this off you must deselect the check box. Save as a preset in order to preserve the state in the event of a power outage.
- Page 16 DD-8+ Power BASIC OPERATION 9. Input Labels Each Input channel may be relabeled simply by typing in the output label field. Best practice is to rename inputs with the name of the source, such as CD Player L&R, Spotify, & etc. 10.
- Page 17 DD-8+ Power BASIC OPERATION 16. Mute When selected, completely mutes any inputs routed through that processor channel. Default is unchecked or OFF (not muted). 17. Channel Volume Provides speaker-level volume control for each processor channel or stereo pair. Any inputs routed through the processor will be affected by this volume control.
- Page 18 DD-8+ Power BASIC OPERATION Configuration Dashboard — Outputs 4 5 6 Figure 7. Outputs Dashboard 1. Output Labels Each output channel may be relabeled simply by typing in the output label field. Best practice is to assign the room or zone names in place of the default output labels of 1 - 8 etc. 2.
- Page 19 DD-8+ Power BASIC OPERATION 8. Turn On Vol Sets the initial volume upon initial turn-on or restoration from Powerdown mode from -70dB (softest) to +12dB (loudest). Volume level changes are effected either by directly typing in the desired value, sliding the indicator icon or using the arrow up/down buttons.
-
Page 20: Advanced Operation
DD-8+ Power ADVANCED OPERATION Matrix Switcher The DD-8+ offers a powerful matrix switcher that allows complete control of signal routing configurations. Any input can be routed through any processor channel and then routed to any individual or multiple output channels. It is beyond the scope of this manual to describe every possible scenario and signal routing possibility. - Page 21 DD-8+ Power ADVANCED OPERATION Figure 9 illustrates an example signal flow from inputs through signal processing channels through speaker outputs. In the illustrated scenario, Analog inputs 1, 2, 3 and 4 are routed through Linked processing channels A and B where Volume Controls, Bass, Treble, Parametric EQ and other audio parameters are applied, and then routed out to speaker OUTPUTS 1, 2, 7 and 8 (renamed with their locations and channel IDs).
-
Page 22: Parametric Equalizer
Figure 11. Pink Noise routing Parametric Equalizer The Lexicon DD-8+ features a 10-band parametric equalizer (PEQ) on each processor channel that can be used to compensate for loudspeaker deficiencies, room acoustics, asymmetrical speaker placement and other factors. Equalization can vastly improve the sound quality of an audio system when skillfully used. Used incorrectly, an EQ can make a system sound bad and may damage the loudspeakers. - Page 23 DD-8+ Power ADVANCED OPERATION Figure 12. 1. Route Identification Indicates the input channels that the EQ are acting upon and the output(s) to which the equalized signal is being routed. 2. Reset Equalizer Turns off all EQ bands and resets all controls to flat. Does not return Bass, Treble controls nor High- Pass and Low- Pass filters to flat.
- Page 24 DD-8+ Power ADVANCED OPERATION 5. Q (Bandwidth) The “Q” expresses the width of the frequency range being manipulated, usually referred to as the bandwidth. Directly input a value in the text box or use the slider icon or up/down arrows to select Q values from .3 to 6 with increments of 0.1.
- Page 25 DD-8+ Power ADVANCED OPERATION HPF / LPF Output Filters And Delay Output filters allow you to limit the bandwidth or range over which the amplifier and loudspeakers operate. This is especially useful with small loudspeakers that have limited bass response. Limiting the range of frequencies that the loudspeakers attempt to play may result in better sound quality and greater speaker reliability.
- Page 26 The DD-8+ may be connected to third party (AMX, Crestron, Control 4, Savant) IP control systems via the Ethernet port. Software drivers and modules and instructions for specific IP control systems can be found on www.lexicon.com or programed by your custom integrator.
-
Page 27: Troubleshooting And Maintenance
DD-8+ Power TROUBLESHOOTING AND MAINTENANCE Troubleshooting Please visit www.lexicon.com for the latest technical bulletins and documentation. The amplifier does not power on. Attempt to power on the amplifier with the front panel Standby/On button. Examine the power cord to ensure a good connection between the rear panel AC input connector and the wall outlet. - Page 28 DD-8+ Power TROUBLESHOOTING AND MAINTENANCE Audio sounds “thin” and is lacking proper bass response. Check to ensure proper polarity of the speaker cables and connections. Open the Configuration Dashboard Check the Bass control setting in the appropriate processing channel. If set to a minus (-) value, raise it by at least 3dB.
- Page 29 DD-8+ Power TROUBLESHOOTING AND MAINTENANCE If all else fails… Visit the Lexicon DD-8+ resource web page for update notices, latest manual, and other resources that may help. www.lexicon.com Push the RESET button on the rear panel of the DD-8+ NOTE: The RESET button will erase all custom configurations enacted up to that point in time.
-
Page 30: Specifications
DD-8+ Power APPENDIX Specifications Output Power: 125W RMS per channel into 8 ohms from 20Hz – 20kHz Frequency Response: 20Hz - 20kHz +0.2dB/–1.5dB Total Harmonic Distortion (THD): <0.02%, 1kHz (at full rated power) <0.1%, 20Hz-20kHz (at full rated power) Signal-to-Noise Ratio: <... -
Page 31: Limited Warranty
LIMITED WARRANTY Lexicon products are warranted against defects. The duration of a warranty depends on the laws in the country in which it was purchased. Your local Lexicon retailer can help you determine the duration and coverage of your warranty. - Page 32 8500 Balboa Boulevard, Northridge, CA 91329 USA © 2017 HARMAN International, Incorporated. All rights reserved. Lexicon and the Lexicon logo are trademarks of HARMAN International Industries, Incorporated, registered in the United States and/or other countries. Features, specifications and appearance are subject to change without notice.
Need help?
Do you have a question about the DD-8+ and is the answer not in the manual?
Questions and answers