Sign In
Upload
Download
Table of Contents
Contents
Add to my manuals
Delete from my manuals
Share
URL of this page:
HTML Link:
Bookmark this page
Add
Manual will be automatically added to "My Manuals"
Print this page
×
Bookmark added
×
Added to my manuals
Manuals
Brands
Advent Manuals
Digital Camera
MP5
Instruction book
Advent MP5 Instruction Book
Hide thumbs
1
2
3
Table Of Contents
4
5
6
7
8
9
10
11
12
13
14
15
16
17
18
19
20
21
22
23
24
25
26
27
28
29
30
31
32
33
34
35
36
37
38
39
40
41
42
43
44
45
46
page
of
46
Go
/
46
Contents
Table of Contents
Troubleshooting
Bookmarks
Table of Contents
Fcc Compliance and Advisory
Safety Information
Table of Contents
Getting Started
Standard Accessories
Attaching the Wrist Strap
Using the Soft Case
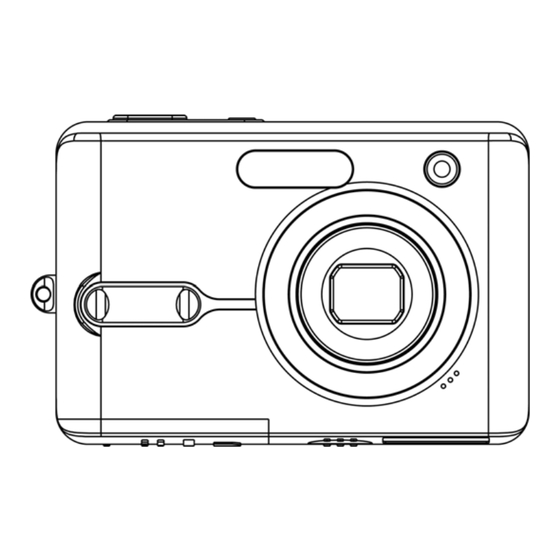
Names of Parts
Inserting the Batteries
Low Battery Indicator
Inserting a Memory Card
About Camera Memory
DCF Protocol
Setting the Date and Time
Basic Operations
Turning the Power on and off
Power Saving Function
Switching between Record and Playback
In Record Mode
In Playback Mode
Using the Menus
Recording Menu / Playback Menu
ADJ. Menu
Setup Menu
Using the Lcd Monitor
LCD Screen Indicator
Switching the Screen Display
Recording
Recording Still Images
Using the Zoom Function
Using the Flash
Using the Self-Timer & Burst
Using the Macro Mode
Recording Movie Clips
Voices Recording
Setting the Recording Functions
Using the Scene Mode
Setting the Resolution and Quality
Setting the Movie Size
Setting the White Balance
Setting the ISO
Setting the Exposure
Setting the Metering
Setting the Sharpness
Setting the Photo Effect
Setting Date Stamp
Playback
Playing Back Images
Using the Thumbnail
Magnifying Still Images
Playing Back Movie Clips
Playing Back Sounds
Recording a Voice Memo
Playing Back a Voice Memo
Deleting Files
Deleting a Single File
Deleting All Files
Protecting Files
Editing Images
Rotating Still Images
Changing the Image Size
Adding Stickers to a Still Image
Setting the Dpof
Playing a Slide Show
Copying the Files
Setup Settings
Adjusting Sounds
Setting Auto Review
Setting the Power Save
Setting the Language
Resetting the File Numbers
About the Folder & File Name
Folder Structure
File Naming
Setting the Tv out
Setting Usb Port
Choosing a Startup Image
Formatting the Memory
Resetting to Default Settings
Making Connections
Connecting the Camera to Atv
Connecting the Camera to Apc
Using the Card Reader
Connecting the Camera to a Computer with a USB Cable
Software Installation
System Requirements
Installing the Software
Installing the Software Driver
Se Basic
Installing Videostudio 7 SE VCD
Using the Software
Appendix
Troubleshooting
Specifications
Advertisement
Quick Links
1
Fcc Compliance and Advisory
2
Inserting a Memory Card
3
About Camera Memory
4
Connecting the Camera to a Computer with a Usb Cable
Download this manual
MP5/MP8
Digital Camera
Instruction Book
- 1 -
Table of
Contents
Previous
Page
Next
Page
1
2
3
4
5
Advertisement
Table of Contents
Need help?
Do you have a question about the MP5 and is the answer not in the manual?
Ask a question
Questions and answers
Related Manuals for Advent MP5
Digital Camera Advent MP82 Instruction Manual
(61 pages)
Digital Camera Advent MP8 Instruction Book
(46 pages)
Digital Camera Advent MP51 Manual
(13 pages)
Digital Camera Advent MP71 Manual
(13 pages)
Digital Camera Advent ADV1182E Instruction Manual
(15 pages)
Digital Camera Advent ADV1172E Manual
(58 pages)
Digital Camera Advent ADVMP78 Quick Start Manual
(15 pages)
Digital Camera Advent ADVMP61 Quick Start Manual
(16 pages)
This manual is also suitable for:
Mp8
Table of Contents
Print
Rename the bookmark
Delete bookmark?
Delete from my manuals?
Login
Sign In
OR
Sign in with Facebook
Sign in with Google
Upload manual
Upload from disk
Upload from URL


Need help?
Do you have a question about the MP5 and is the answer not in the manual?
Questions and answers