Table of Contents
Advertisement
Quick Links
Download this manual
See also:
User Manual
Advertisement
Table of Contents

Subscribe to Our Youtube Channel
Related Manuals for Ubiquiti airFiber 11FX


Summary of Contents for Ubiquiti airFiber 11FX
- Page 1 11 GHz FDD Backhaul Radio Models: AF‑11FX‑H, AF‑11FX‑L...
-
Page 2: Package Contents
Quick Start Guide (50V, 1.2A) 1. High‑band Duplexer (AF‑11FX‑H) or low‑band Duplexer (AF‑11FX‑L) TERMS OF USE: Ubiquiti radio devices must be professionally installed. Shielded Ethernet cable and earth grounding must be used as conditions of product warranty. TOUGHCable ™ is designed for outdoor installations. It is the customer’s responsibility to follow local country regulations, including operation within legal frequency channels, output power, and Dynamic Frequency Selection (DFS) requirements. -
Page 3: Installation Requirements
Antenna Compatibility The airFiber AF‑11FX radio is designed for use with the following airFiber X antenna models: • AF‑11G36 Installation Requirements • Clear line of sight between airFiber radios • Vertical mounting orientation • Mounting point: • At least 1 m below the highest point on the structure •... -
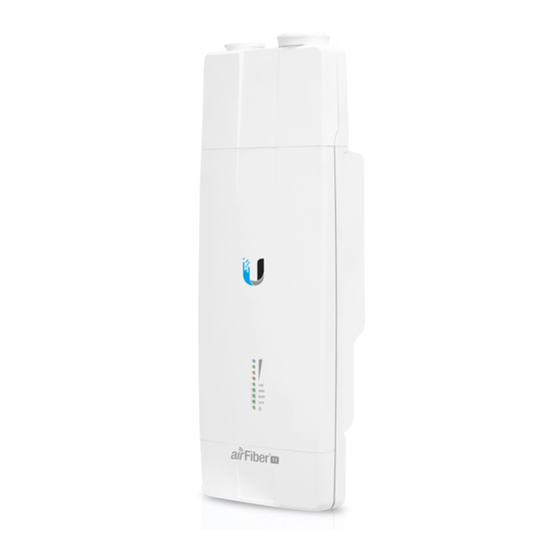
Page 4: Hardware Overview
Hardware Overview CH0 Port: CH1 Port Connects to (Under Cap) AF-11G36 Antenna Duplexer Shroud Panel Port Cover... - Page 5 Ports Management Data Port Port Reset Button Management Port 10/100 Mbps, secured Ethernet port for configuration. In-Band Management is enabled by default in the airFiber Configuration Interface. When In-Band Management is disabled, the MGMT port is the only port that can monitor, configure, and/or update firmware.
- Page 6 Duplexer Ports AF-11FX Radio (Duplexer Shroud removed) TX0, RX0 Transmit and Receive SMA ports for low‑band Duplexer (SISO mode) or high‑band Duplexer (MIMO mode). RX1, TX1 Receive and Transmit SMA ports for high‑band Duplexer (MIMO mode only). Duplexer N Connector SMA Port SMA Port N Connector...
-
Page 7: Signal Leds
LEDs Signal LEDs Signal 4 LED will light blue when on. Signal 3 LED will light green when on. Signal 2 LED will light yellow when on. Signal 1 LED will light red when on. Bootup to airOS When powering on, the Power, MIMO, LINK, and Signal 1-4 LEDs light on. -
Page 8: Additional Leds
Additional LEDs State Status RF Off Short Flash* Syncing LINK Normal Flash* Beaconing Long Flash* Registering Operational Radio configured in SISO mode MIMO Radio configured in MIMO mode No Ethernet Link MGMT Ethernet Link Established Random Flashing Ethernet Activity No Ethernet Link DATA Ethernet Link Established Random Flashing Ethernet Activity... -
Page 9: Installation Overview
Installation Overview We recommend that you configure your paired AF‑11FX radios before site installation. The overview below summarizes the installation procedure, and the subsequent sections provide detailed installation information. • Install the Duplexer(s) in the AF‑11FX radio. • Connect power (PoE or DC) to the AF‑11FX and connect your computer to the MGMT port. - Page 10 2. Insert the TX and RX ports of the Duplexer into the TX0 and RX0 ports of the AF‑11FX radio. 3. If you will be using the AF‑11FX in SISO mode, go to step 5. 4. To use the AF‑11FX in MIMO mode: a.
-
Page 11: Connecting Power
Connecting Power Follow the instructions for the source of power that you are using: Power over Ethernet or DC Power. Power over Ethernet 1. Lift the release latch on the bottom of the AF‑11FX and slide the Port Cover off. 2. - Page 12 4. Connect the Power Cord to the adapter’s power port. Connect the other end of the Power Cord to a power outlet. DC Power To use DC input power instead of PoE, follow these steps: 1. Lift the release latch on the bottom of the AF‑11FX and slide the Port Cover off.
-
Page 13: Airfiber Configuration
airFiber Configuration The instructions in this section explain how to access the airFiber Configuration Interface and configure the following settings: Wireless Mode • Configure one AF‑11FX as the Master and the other as the Slave. • Frequency Setting The TX Frequency and RX Frequency settings must be the reverse of each other on both the Master and the Slave. - Page 14 4. The login screen will appear. Enter ubnt in the Username and Password fields. Select your Country and Language. You must agree to the Terms of Use to use the product. Click Login. 5. Click the Wireless tab. 6. Configure the Basic Wireless Settings: a.
- Page 15 8. Configure the Wireless Security: a. Select the AES Key Type, HEX or ASCII. b. For the Key field: ‑ Enter 16 bytes (eight, 16‑bit hexadecimal digits: 0‑9, A‑F, or a‑f ). You can omit zeroes and use colons, similar to the IPv6 format. Note: The airFiber Configuration Interface supports IPv6 formats excluding dotted quad...
-
Page 16: Hardware Installation
Hardware Installation Install a Ground Wire 1. Remove the nut from the Ground Bonding Point located on the back of the AF‑11FX. Ground Bonding Point 2. Attach a ground wire (min. 10 AWG or 5 mm ) to the lug and replace the nut to secure the wire. - Page 17 3. At the installation site, secure the other end of the ground wire to a grounded mast, pole, tower, or grounding bar. WARNING: Failure to properly ground your airFiber radio will void your warranty. Note: The ground wire should be as short as possible and no longer than one meter in length.
- Page 18 2. Attach the RF connector labeled V to the radio’s CH0 port. If you are using MIMO mode, attach the RF connector labeled H to the radio’s CH1 port. 3. Attach the protective shroud. a. Align the hash mark on the top of the shroud with the notch on the dish antenna.
-
Page 19: Connecting Data
Connecting Data Note: Skip this section if you are using DC power which was already connected as described in DC Power. 1. Lift the release latch on the bottom of the AF‑11FX and slide the Port Cover off. 2. Connect an outdoor, shielded Ethernet cable to the DATA port. -
Page 20: Surge Protection
Surge Protection For added protection, install two surge suppressors, such as the Ubiquiti Ethernet Surge Protector, model ETH‑SP, at the end of each link. Install the first surge protector within one meter of the airFiber DATA port, and install the second surge protector at the ingress point of the location housing the wired network equipment. -
Page 21: Establishing A Link
Alignment Tips • To accurately align the airFiber radios for best performance, you MUST align only one end of the link at a time. • You may need to use additional hardware to compensate for issues such as the improper orientation of a mounting pole or significant elevation differences between airFiber radios. - Page 22 Adjust the elevation angle: a. Loosen the six hex head bolts to so that the washers can spin freely by hand. b. Tighten or loosen the Elevation Adjustment Bolt to set the desired tilt. c. Tighten the six hex head bolts. Elevation Adjustment Bolt Note:...
- Page 23 Slave Aim the Slave at the Master to achieve the strongest signal level on the Master. Note: Refer to the Signal LEDs section for details on the signal values. Note: Maximum signal strength can best be achieved by iteratively sweeping through both azimuth and elevation.
-
Page 24: Installer Compliance Responsibility
Installer Compliance Responsibility Devices must be professionally installed and it is the professional installer’s responsibility to make sure the device is operated within local country regulatory requirements. The Output Power, Antenna Gain, Cable Loss, TX Frequency and RX Frequency fields are provided to the professional installer to assist in meeting regulatory requirements. -
Page 25: Specifications
Specifications airFiber AF‑11FX Dimensions 327 x 112 x 86 mm (12.87 x 4.41 x 3.39") Weight 2.26 kg (5.0 lb) RF Connectors (4) RP‑SMA Weatherproof, Two per Chain: TX0, RX0 (CH0) and TX1, RX1 (CH1) (2) N‑Type Waterproof, One per Duplexer Power Supply 50V, 1.2A PoE Gigabit Adapter (Included) Power Method... - Page 26 Radio Operating Frequency 10.7‑11.7 GHz Max. Conducted TX 30 dBm Power Frequency Accuracy ± 1 ppm Channel Bandwidth 3.5/5/7/10/14/20/28/30/40/50/56 MHz Selectable Programmable Uplink and Downlink Duty Cycles Depends on Regulatory Region Channel widths may vary according to country/region regulations.
-
Page 27: Rf Exposure Warning
Compliance This device has been verified by Ubiquiti Networks as being in compliance with the requirements of the rules of the Federal Communications Commission (FCC), 47 C.F.R. Part 101, and may not be operated without a station license. In the United States such licenses are issued by the FCC to entities other than agencies of the United States government. - Page 28 RoHS/WEEE Compliance Statement English European Directive 2012/19/EU requires that the equipment bearing this symbol on the product and/or its packaging must not be disposed of with unsorted municipal waste. The symbol indicates that this product should be disposed of separately from regular household waste streams.
- Page 29 Español La Directiva 2012/19/UE exige que los equipos que lleven este símbolo en el propio aparato y/o en su embalaje no deben eliminarse junto con otros residuos urbanos no seleccionados. El símbolo indica que el producto en cuestión debe separarse de los residuos domésticos convencionales con vistas a su eliminación.
-
Page 30: Declaration Of Conformity
[German] Anforderungen und den anderen relevanten Vorschriften der Richtlinie 1999/5/EG befindet. Ελληνική Δια του παρόντος, UBIQUITI NETWORKS, δηλώνει ότι αυτή η συσκευή UBIQUITI NETWORKS, είναι σε συμμόρφωση με τις [Greek] βασικές απαιτήσεις και τις λοιπές σχετικές διατάξεις της οδηγίας 1995/5/ΕΚ. - Page 31 NETWORKS zariadenie, je v súlade so základnými požiadavkami a [Slovak] ďalšími relevantnými ustanoveniami smernice 1999/5/ES. Español Por medio de la presente UBIQUITI NETWORKS declara que este dispositivo UBIQUITI NETWORKS, cumple con los requisitos [Spanish] esenciales y cualesquiera otras disposiciones aplicables o exigibles de la Directiva 1999/5/CE.
-
Page 32: Online Resources
Ubiquiti U logo, the Ubiquiti beam logo, airFiber, airOS, EdgeRouter, INVICTUS, and TOUGHCable are trademarks or registered trademarks of Ubiquiti Networks, Inc. in the United States and in other countries. All other trademarks are the property of their respective owners.
Need help?
Do you have a question about the airFiber 11FX and is the answer not in the manual?
Questions and answers