Table of Contents
Advertisement
In-Ground Fence
™
GIG00-16349 | Product Manual
Have questions about your In-Ground Fence or need training tips for your pet?
Our Customer Care representatives are here to help you.
Call our USA-based Customer Care Center at
+1 (866) 381-2785
USA & Canada: Mon–Fri 8am-8pm EST | Sat 9am–5pm EST
This product includes a one year warranty.
Call, click, or chat with us before you return your product.
premierpet.com
Advertisement
Table of Contents

Related Manuals for Premier Pet GIG00-16349


Summary of Contents for Premier Pet GIG00-16349
- Page 1 In-Ground Fence ™ GIG00-16349 | Product Manual Have questions about your In-Ground Fence or need training tips for your pet? Our Customer Care representatives are here to help you. Call our USA-based Customer Care Center at +1 (866) 381-2785 USA & Canada: Mon–Fri 8am-8pm EST | Sat 9am–5pm EST This product includes a one year warranty.
- Page 2 Important Safety Information Explanation of Attention Words and Symbols used in this guide This is the safety alert symbol. It is used to alert you to potential personal injury hazards. Obey all safety messages that follow this symbol to avoid possible injury or death. WARNING indicates a hazardous situation which, if not avoided, could result in death or serious injury.
-
Page 3: Table Of Contents
TABLE OF CONTENTS Components How It Works Key Definitions Locate the Fence Transmitter Lay Out the System Position the Boundary Wire Connect the Wires to the Surge Protector and Fence Transmitter Prepare the Receiver Collar Set the Boundary Width and Test the Receiver Collar Install the Boundary Wire Place the Boundary Flags Fit the Receiver Collar... -
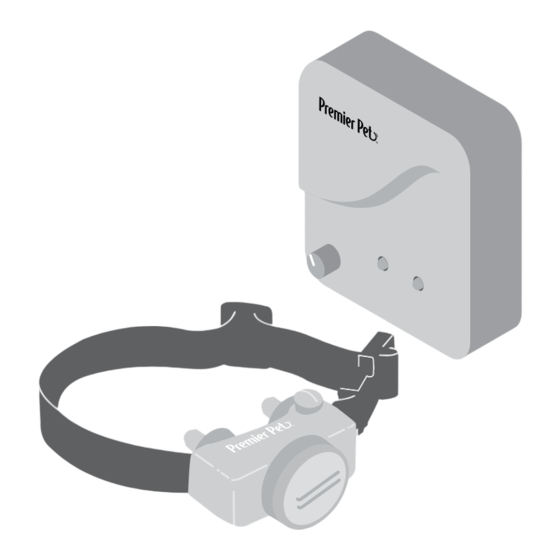
Page 4: Components
• Circular saw with masonry blade • Staple gun • Non-metallic collar and leash Set up and training help: www.premierpet.com How It Works The Premier Pet In-Ground Fence system has been proven safe, comfortable, and effective for pets ™ ™... -
Page 5: Key Definitions
Key Definitions Fence Transmitter: Transmits the radio signal through the boundary wire Pet Area: The area within the warning zone where your pet can roam freely Warning Zone: The outer edge of the pet area where your pet’s receiver collar begins to beep, warning him not to go into the static correction zone Static Correction Zone: The zone beyond the warning zone where your pet’s receiver collar will emit a static correction, signaling him to return to the pet area... -
Page 6: Locate The Fence Transmitter
Locate the Fence Transmitter • Place the fence transmitter: • In a dry, well ventilated, protected area (1A, 1B). • In an area where temperatures do not fall below -10°F (-23°C) (e.g., garage, basement, shed, closet). • Secured to a stationary surface using appropriate mounting hardware (not included). A mounting template is included in the back of this guide. -
Page 7: Sample Layouts
Sample Layouts Sample 1: Perimeter Loop (Single Loop) The perimeter loop is the most common layout. This will allow your pet to freely and safely roam your entire property (2C). It can also protect gardens, pools and landscaping (2D). Sample 2 (2E): Perimeter Loop Using Existing Fence (Single Loop) This layout allows you to include your existing fence as part of your layout and keep your pet from jumping out or digging under your existing fence. -
Page 8: Position The Boundary Wire
Double Loop A double loop must be used when you are not establishing the boundary zone on all sides of your property. When using a double loop, the boundary wire must be separated by a minimum of 5 ft. to avoid canceling the signal. -
Page 9: Connect The Wires To The Surge Protector And Fence Transmitter
To Twist the Boundary Wire Twisting the boundary wire cancels the signal and allows your pet to cross over that area safely (3B). The signal cannot be canceled by running the wire through plastic or metal piping. Using shielded cable in place of the boundary wire will also not cancel the signal. - Page 10 Install the Surge Protector & Connect the Wires (4A) • Do not install, connect, or remove your system during a lightning storm. If the storm is close enough for you to hear thunder, it is close enough to create hazardous surges. •...
-
Page 11: Prepare The Receiver Collar
To Insert and Remove the Receiver Collar Battery Note: Do not install the battery while the receiver collar is on your pet. This receiver collar utilizes a replaceable Premier Pet battery (GAC11-16351). ™ This unique battery is designed to make battery replacement easier and increase water protection. -
Page 12: Set The Boundary Width And Test The Receiver Collar
Anti-Linger Prevention The anti-linger prevention feature keeps your dog from staying in the warning zone for long periods of time and draining the receiver collar battery. Your dog will hear a warning tone when he reaches the warning zone. If your dog does not return to the pet area after 2 seconds, he will receive a continuous static correction until he returns to the pet area. -
Page 13: Install The Boundary Wire
Use a blunt tool such as a wooden paint stick to push the boundary wire into the trench. Be careful not to damage the boundary wire. To Attach the Boundary Wire to an Existing Fence The boundary wire of the Premier Pet In-Ground Fence system can be ™... -
Page 14: Place The Boundary Flags
To assure a proper fit, please follow these steps: Make sure that the battery is not installed in the receiver collar. Start with your pet standing comfortably. Place the receiver collar on your pet so that the Premier Pet logo is facing your pet’s chin. ™... - Page 15 Center the contact points underneath your pet’s neck, touching the skin. If your pet has a long or thick coat, use the enclosed long contact points to reach through the hair. Note: It is sometimes necessary to trim the hair around the contact points to make sure that contact is consistent. The receiver collar should fit snugly, yet loose enough to allow one finger to fit between a contact point and your pet’s neck (9A).
-
Page 16: Training Guide
• Proper training of your pet is essential to the success of the system. • Remove the collar after each training session. • Be sure to place the collar on your dog’s neck with the Premier Pet logo facing up. -
Page 17: Troubleshooting
TROUBLESHOOTING The receiver collar is not • Check battery to make sure it is installed properly. beeping or correcting. • Check that both lights are lit on the fence transmitter. If not, perform the “System Test.” The receiver collar is beeping, •... -
Page 18: Additional Information
TROUBLESHOOTING The power light is on, the • Check boundary wire connections at the fence transmitter for proper connection. loop indicator light is off. • Check for broken or damaged boundary wires at outside entry to the house. • Perform the system test to determine if the fence transmitter or surge protector needs to be replaced. -
Page 19: Wire Break Location Test
11. When testing is complete reconnect and verify that the boundary wire is plugged into the Loop Terminals on the surge protector and the transmitter is connected to the surge protector. 12. Return the boundary width control knob setting to the position noted earlier. 13. -
Page 20: Terms Of Use And Limitation Of Liability
Terms of Use and Limitation of Liability Terms of Use This Product is offered to you conditioned upon your acceptance without modification of the terms, conditions and notices contained herein. Usage of this Product implies acceptance of all such terms, conditions, and notices. -
Page 21: Perchlorate Battery
Perchlorate Battery Perchlorate Material – special handling may apply. See www.dtsc.ca.gov/hazardouswaste/perchlorate. Battery Disposal Separate collection of spent batteries is required in many regions; check the regulations in your area before discarding spent batteries. The collar receiver operates on a 6-volt lithium coin cell battery. -
Page 22: Layout Grid
Layout Grid +1 (866) 381-2785... -
Page 23: Mounting Template
Mounting Template Drill Here 3.000 in. (7.62 cm) Drill Here premierpet.com... - Page 24 Radio Systems Corporation 10427 PetSafe Way | Knoxville, TN 37932 | +1 (866) 381-2785 | premierpet.com L400-2162/1 ©2017 Radio Systems Corporation...
Need help?
Do you have a question about the GIG00-16349 and is the answer not in the manual?
Questions and answers