Advertisement
Table of Contents
- 1 Table of Contents
- 2 System Overview
- 3 Cb7 Overview
- 4 Compatibility
- 5 Cb7 Setup
- 6 Daikin (Cb7 Dk) Setup
- 7 Fujitsu (Cb7 Fj) Setup
- 8 Mitsubishi Electric (Cb7 Me) Setup
- 9 Panasonic (Cb7 Pa) Setup
- 10 Toshiba (Cb7 To) Setup
- 11 Hitachi (Cb7 Hit) Setup
- 12 System Configuration
- 13 Home Screen
- Download this manual
See also:
User Manual
Advertisement
Table of Contents

Related Manuals for ADVANTAGE AIR MyAir


Summary of Contents for ADVANTAGE AIR MyAir
- Page 1 Welcome to the Connected Home Installation Guide V1.2...
-
Page 3: Table Of Contents
MyAir Installation Guide Contents 1 - SYSTEM OVERVIEW 2 - CB7 OVERVIEW 3 - COMPATIBILITY 4 - CB7 SETUP 5 - DAIKIN (CB7 DK) SETUP 6 - FUJITSU (CB7 FJ) SETUP 7 - LG (CB7 LG) SETUP 8 - MITSUBISHI ELECTRIC (CB7 ME) SETUP... -
Page 4: System Overview
All On All Off Entry Rocco Jade Bathroom Guest Kitchen Dining Living Indoor EXT MY+ Unit Zone MyAir+ Only Motor EXT MY+ 10x Zone Motors [CLIP24] EXT8 MyLights (if installed) RF Wall Sensor EXT 8 (if installed) Wired Wall Sensor (if installed) PART NO. -
Page 5: Cb7 Overview
Below is the CB7 control box with each of its ports and setting switches labled. EXT8 Connection System ID Tablet (Used for wired Dipswitch Power Supply Connection wall sensors) Settings Connection Dipswitch (MyAir+ only) (PSU-ACDC) Link to MOTORS LINK Indoor Unit CM / SAM OTHER 2 Pin Samsung / 4 Pin Carrier / Midea... -
Page 6: Compatibility
3 - COMPATIBILITY The following table lists the air conditioner brands that the CB7 supports. Some brands require a special version of the CB7 in order to communicate with their units. The part numbers are listed in the second column. BRAND CB PART NO. -
Page 7: Cb7 Setup
4 - CB7 SETUP The standard CB7 Control Box will control units from the following suppliers: • Carrier; • Midea; • Rinnai; • Haier or • Samsung (14kW or less.) The CB7 setup uses a LINKSAM cable for Samsung, Rinnai and Haier units and a LINKCM cable for the Carrier and Midea units. - Page 8 CB7 SETUP CB7 Setup for Rinnai units: 1. Ensure power to the air conditioner is OFF. 2. Connect Rinnai remote, then turn power ON. 3. Run unit in cooling / heating to test, then power OFF. 4. Disconnect the Rinnai remote from the indoor unit and replace with LINKSAM cable.
-
Page 9: Daikin (Cb7 Dk) Setup
5 - DAIKIN (CB7 DK) SETUP CB7 DK setup steps are as follows: 1. Connect the Daikin wired remote to the indoor unit in the roof space. 2. Power up the air conditioner & run the unit to test correct operation of indoor & outdoor unit. -
Page 10: Fujitsu (Cb7 Fj) Setup
CB7 FJ setup steps are as follows: Optional: Connect a Fujitsu remote control and check unit works, before installing MyAir controls. 1. Ensure power to the air conditioner is off & the Fujitsu wired remote control is not connected to the system. -
Page 11: Mitsubishi Electric (Cb7 Me) Setup
CB7 ME setup steps are as follows: Optional: Connect a Mitsubishi remote control and check the unit works, before installing MyAir controls. 1. Ensure power to the air conditioner & controls is off. 2. Check that the Mitsubishi Electric wired remote control is not connected to the system. -
Page 12: Panasonic (Cb7 Pa) Setup
10 - PANASONIC (CB7 PA) SETUP CB7 PA setup steps are as follows: 1. Connect the Panasonic wired remote to the indoor unit in the roof space. 2. Using the Panasonic wired remote change the fi eld settings for use with either the Return Air Sensor or a MyZone Sensor (if supplied) Panasonic Remote Panasonic Remote... -
Page 13: Toshiba (Cb7 To) Setup
11 - TOSHIBA (CB7 TO) SETUP CB7 TO setup steps are as follows: 1. Connect the Toshiba wired remote to the indoor unit in the roof space. 2. Power up the air conditioner & run the unit to test correct operation of indoor & outdoor unit. - Page 14 12 - HITACHI (CB7 HIT) SETUP CB7 HIT setup steps are as follows: 1. Connect the Hitachi wired remote to the indoor unit in the roof space. 2. Power up the air conditioner & run the unit to test correct operation of indoor & outdoor unit.
-
Page 15: Hitachi (Cb7 Hit) Setup
13 - HITACHI (CB7 HIT) SETUP 5. Connect the supplied cable from the CB to the indoor unit. Wire the cable cores to the terminals as shown below: CABLE CORE COLOUR INDOOR UNIT TERMINAL BLACK 6. Go to Section 15 SYSTEM CONFIGURATION to complete install 14 - MITSUBISHI HEAVY IND. -
Page 16: System Configuration
15 - SYSTEM CONFIGURATION Now the CB7 (and variants) have been paired to the indoor unit. The following steps will complete the system confi guration. IMPORTANT: Due to heat transfer in summer, the CB should be installed at least 1m away from roofing materials, such as roof tiles. 1. - Page 17 16 - SYSTEM CONFIGURATION 6. Power up the air conditioning system. 7. Open the MyPlace app on the home page of the wall mounted touch screen 8. Press the SETUP button 9. Press the TECH SETUP button. 10. Enter password 22369 to access the setup. 11.
- Page 19 MyAir+ Installation Guide Contents 1 - SYSTEM OVERVIEW 2 - MASTER / SLAVE CB 3 - HOME SCREEN Installation Guide V1.2...
- Page 20 (ie. Up to 10 RFWS & (if installed) Wired Wall 10 Zone Motors per CB) [RFWS] Sensor (if installed) MyAir+ allows for an installation to include up to 4 Air Conditioner (AC) units all controlled from the same TSP (touchscreen.) Installation Guide V1.2...
- Page 21 2 - MASTER / SLAVE CB There can only be one TSP connected per system. The Master is the CB that is connected to the TSP. NOTE: If MyLights is to be installed the LM’s need to connect to the Master CB and not a Slave CB.
-
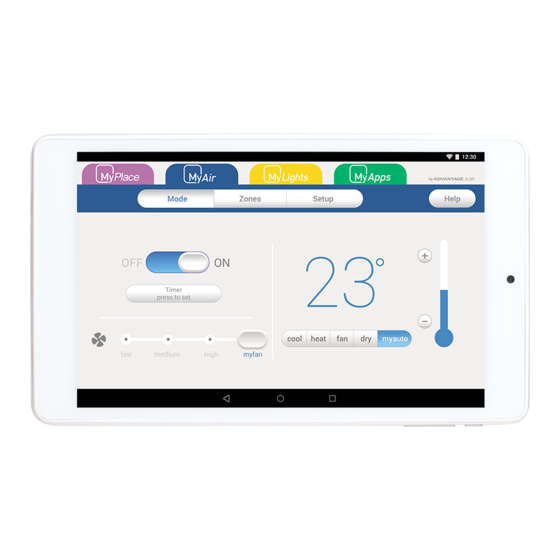
Page 22: Home Screen
Each icon set represents a single Air Conditioner, pressing in the top left area of the icon will open that Air Conditioning unit. Each AC unit operates as a MyAir system and can be setup as per the MyAir section of this manual.
Need help?
Do you have a question about the MyAir and is the answer not in the manual?
Questions and answers