Axis 216FD-V Installation Manual
Axis communications fixed dome network camera installation guide
Hide thumbs
Also See for 216FD-V:
- Installation manual (75 pages) ,
- User manual (69 pages) ,
- Product manual (40 pages)
Table of Contents
Advertisement
Available languages
Available languages
Quick Links
Download this manual
See also:
User Manual
Advertisement
Table of Contents

Related Manuals for Axis 216FD-V


Summary of Contents for Axis 216FD-V
- Page 1 AXIS 216FD AXIS 216FD-V AXIS 216MFD AXIS 216MFD-V Fixed Dome Network Camera Installation Guide...
-
Page 3: Installation Steps
AXIS 216MFD/216MFD-V Installation Guide This installation guide provides instructions for installing the AXIS 216FD, AXIS 216FD-V, AXIS 216MFD and AXIS 216MFD-V Fixed Network Dome Camera on your network. For all other aspects of using the product, please see the User’s Manual, available on the CD included in this package, or from www.axis.com/techsup... -
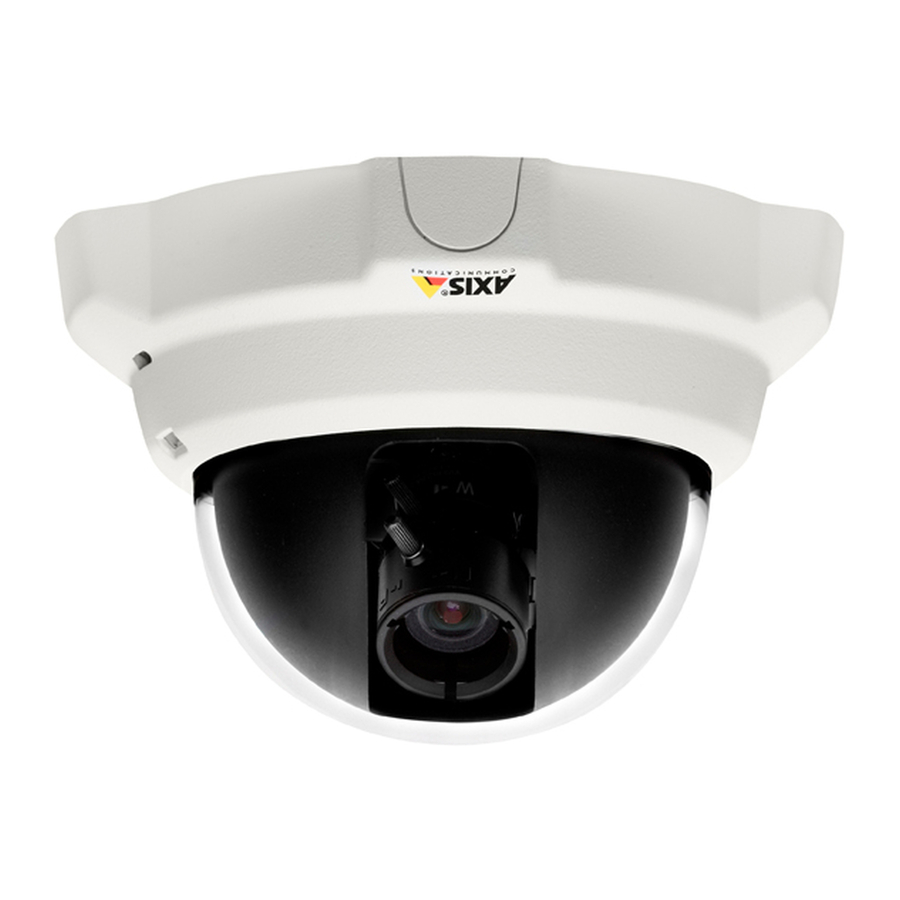
Page 4: Hardware Overview
HxWxD = 94 x 144 x 132mm (3.7" x 5.7" x 5.2") Weight AXIS 216FD/AXIS 216MFD = 425g (0.94 lb) (power supply not included) Weight AXIS 216FD-V/216MFD-V = 580g (1.28 lb) (power supply not included) AXIS 216FD/216FD-V/216MFD/216MFD-V Installation Guide 16mm cable conduit... -
Page 5: Install The Hardware
There are cover plates for the openings on both sides of the dome cover. The AXIS 216FD-V/216MFD-V can also be fitted with a metal conduit for protecting the cabling when connected via the side openings. See the illustrations on page 4. -
Page 6: Connect The Cables
Connect the supplied indoor power supply to the power connector on the camera. 5. Check that the indicator LED:s indicate the correct conditions. See the table on page 15 for further details. Note that some LEDs can be disabled and may be unlit. AXIS 216FD/216FD-V/216MFD/216MFD-V Installation Guide... -
Page 7: Assign An Ip Address
• If assigning the IP address fails, check that there is no firewall blocking the operation. • For other methods of assigning or discovering the IP address of the AXIS 216FD/216FD-V/216MFD/ 216MFD-V, e.g. in other operating systems, see page 13. -
Page 8: Axis Ip Utility - Single Camera/Small Installation
6. See page 10 for instructions on how to set the password. Note: AXIS 216FD and AXIS 216FD-V will display in AXIS Camera Management as AXIS 216FD. AXIS 216MFD and AXIS 216MFD-V will display in AXIS Camera Management as AXIS 216MFD. -
Page 9: Axis Camera Management - Multiple Cameras/Large Installations
3. Click the OK button. Note: AXIS 216FD and AXIS 216FD-V will display in AXIS Camera Management as AXIS 216FD. AXIS 216MFD and AXIS 216MFD-V will display in AXIS Camera Management as AXIS 216MFD. Page 9... -
Page 10: Set The Password
3. Enter the password as set above, and click OK. If the password is lost, the AXIS 216FD/ 216FD-V/216MFD/216MFD-V must be reset to the factory default settings. See page 16. 4. If required, click Yes to install AMC (AXIS Media Control), which allows viewing of the video stream in Internet Explorer. -
Page 11: Adjust The Image And Focus
AXIS 216FD/216FD-V/216MFD/216MFD-V Installation Guide Adjust the image and focus Open the Live View page in the web interface and make the following adjustments to the camera: 1. Loosen the locking screw and tilt adjustment screws. 2. Turn the lens to the desired position. -
Page 12: Accessing The Camera From The Internet
AXIS 216FD/216FD-V/216MFD/216MFD-V Installation Guide Accessing the camera from the Internet Once installed, your AXIS 216FD/216FD-V/216MFD/216MFD-V is accessible on your local network (LAN). To access the camera from the Internet, network routers must be configured to allow incoming traffic, which is usually done on a specific port. Please refer to the documentation for your router for further instructions. -
Page 13: Other Methods Of Setting The Ip Address
Set the IP address with ARP/Ping 1. Acquire an IP address on the same network segment your computer is connected to. 2. Locate the serial number (S/N) on the AXIS 216FD/216FD-V/216MFD/216MFD-V label. 3. Open a command prompt on your computer and enter the following commands: Windows syntax arp -s <IP Address>... -
Page 14: Unit Connectors
3.3V DC Power Digital Input Transistor Output AXIS 216FD/216FD-V/216MFD/216MFD-V Installation Guide Notes Can be used to power auxiliary equipment. Note: This pin can only be used as power out. Connect to GND to activate, or leave floating (or unconnected) to deactivate. -
Page 15: Connection Diagram
AXIS 216FD/216FD-V/216MFD/216MFD-V Installation Guide Connection diagram AXIS 216FD/216FD-V/216MFD/216MFD-V 3.3V max. 50mA LED indicators Color Indication Network Green Steady for connection to a 100 Mbit/s network. Flashes for network activity. Amber Steady for connection to 10 Mbit/s network. Flashes for network activity. -
Page 16: Resetting To The Factory Default Settings
Network Video Product CD supplied with this product. Tip! Visit www.axis.com/techsup to check if there is updated firmware available for your AXIS 216FD/216FD-V/216MFD/216MFD-V. To see the currently installed firmware version, see the Basic Configuration web page in the product’s Setup tools. AXIS 216FD/216FD-V/216MFD/216MFD-V Installation Guide... -
Page 17: Guide D'installation
AXIS 216MFD/216MFD-V Guide d'installation Ce guide d'installation vous explique comment installer la AXIS 216FD, AXIS 216FD-V, AXIS 216MFD, et AXIS 216MFD-V sur votre réseau. Pour d'autres informations sur l'utilisation de ce produit, consultez le Manuel de l'utilisateur, disponible sur le CD fourni, ou visitez le site www.axis.com/techsup... -
Page 18: Présentation Du Matériel
Témoin DEL d’état Dimensions H x L x P = 94 x 144 x 132mm Poids AXIS 216FD/AXIS 216MFD = 425g (alimentation exclue) Poids AXIS 216FD-V/216MFD-V = 580g (alimentation exclue) AXIS 216FD/216FD-V/216MFD/216MFD-V Guide d’installation Conduit de 16mm (non fourni) adaptable à... -
Page 19: Installation Du Matériel
L’AXIS 216FD-V/216MFD-V peut aussi equipé avec un conduit en métal afin de protéger le câblage lorsqu'il est connecté par les ouvertures latérales. Consultez les figures de la page 18. -
Page 20: Branchement Des Câbles
Branchez l'alimentation intérieure fournie au connecteur d'alimentation de la caméra. 5. Vérifiez que les témoins DEL indiquent les conditions correctes. Pour plus d'informations, consultez le tableau à la page 29. Notez que certains témoins DEL peuvent être désactivés et éteints. AXIS 216FD/216FD-V/216MFD/216MFD-V Guide d’installation... -
Page 21: Attribution D'une Adresse Ip
Aujourd'hui, la plupart des réseaux comportent un serveur DHCP qui attribue automatiquement des adresses IP aux dispositifs connectés. Si ce n'est pas le cas de votre réseau, l'AXIS 216FD/216FD-V/216MFD/216MFD-V utilisera l'adresse IP par défaut 192.168.0.90. Si vous souhaitez affecter une adresse IP statique, sous Windows nous recommandons l'utilisation de l'application AXIS IP Utility ou de l'application AXIS Camera Management. -
Page 22: Axis Ip Utility - Une Seule Caméra/Petite Installation
6. Consultez la page 24 pour savoir comment définir le mot de passe. Remarque: AXIS 216FD et AXIS 216FD-V vont être visulaisées dans AXIS IP Utility comme AXIS 216FD, AXIS 216MFD et AXIS 216MFD-V comme AXIS 216MFD. AXIS 216FD/216FD-V/216MFD/216MFD-V Guide d’installation... -
Page 23: Axis Camera Management - Plusieurs Caméras/Grandes Installations
1. Vérifiez que la caméra est connectée au réseau et que l'alimentation est activée. 2. Démarrez AXIS Camera Management. Double-cliquez sur l'icône de l'AXIS 216FD/ 216FD-V/216MFD/216MFD-V lorsqu'elle apparaît dans la fenêtre de façon à ouvrir la page d'accueil. 3. Consultez la page 24 pour savoir comment définir le mot de passe. -
Page 24: Définition Du Mot De Passe
La page Live View (Vidéo en direct) de la caméra AXIS 216FD/216FD-V/216MFD/216MFD- V s'affiche, avec des liens vers les outils de configuration pour adapter la caméra à vos besoins. AXIS 216FD et AXIS 216FD-V vont être visulaisées dans le navigateur comme AXIS 216FD, AXIS 216MFD et AXIS 216MFD-V comme AXIS 216MFD AXIS 216FD/216FD-V/216MFD/216MFD-V Guide d’installation... -
Page 25: Réglage De La Mise Au Point
AXIS 216FD/216FD-V/216MFD/216MFD-V Guide d’installation Réglage de la mise au point Ouvrez la page Live View (Vidéo en direct) dans l'interface Internet et effectuez les réglages suivants sur la caméra: 1. Dévissez la vis de verrouillage et les vis de réglage de l'inclinaison. - Page 26 AXIS 216FD/216FD-V/216MFD/216MFD-V Guide d’installation Accès à la caméra depuis Internet Une fois installée, votre caméra AXIS 216FD/216FD-V/216MFD/216MFD-V est accessible depuis votre réseau local (LAN). Pour accéder à la caméra depuis Internet, vous devez configurer les routeurs réseau afin d'autoriser l'entrée de données, ce qui se fait généralement sur un port spécifique.
-
Page 27: Autres Méthodes De Définition De L'adresse Ip
1. Trouvez une adresse IP sur le même segment de réseau que celui de votre ordinateur. 2. Repérez le numéro de série (S/N) sur l'étiquette de la caméra AXIS 216FD/216FD-V. 3. Ouvrez une invite de commande sur votre ordinateur et entrez les commandes suivantes : Syntaxe pour Windows arp -s <adresse IP>... -
Page 28: Connecteurs De L'unité
Alimentation auxiliaire 3.3V CC Entrée numérique Sortie transistor AXIS 216FD/216FD-V/216MFD/216MFD-V Guide d’installation ± Remarques Terre. Cette broche peut également servir à alimenter le matériel auxiliaire. Remarques: Cette broche ne peut être utilsée que pour l’alimentation d’un périférique par la caméra. -
Page 29: Diagramme De Connexion
AXIS 216FD/216FD-V/216MFD/216MFD-V Guide d’installation Diagramme de connexion AXIS 216FD/216FD-V/216MFD/216MFD-V 3.3V max. 50mA Témoins DEL Couleur Indication Réseau Vert Continu en cas de connexion à un réseau 100 Mbits/s. Clignote en cas d'activité réseau. Orange Continu en cas de connexion à un réseau 10 Mbits/s. Clignote en cas d'activité... -
Page 30: Rétablissement Des Paramètres D'usine Par Défaut
Conseil: Visitez le site www.axis.com/techsup pour vérifier si des micro-codes mis à jour sont disponibles pour votre caméra AXIS 216FD/216FD-V/216MFD/216MFD-V. Pour connaître la version du micrologiciel actuellement installée, reportez-vous à la page Web Basic Configuration (Configuration de base) dans les outils de... - Page 31 AXIS 216MFD/216MFD-V Installationsanleitung In dieser Anleitung wird die Installation der AXIS 216FD, AXIS 216FD-V, AXIS 216MFD und AXIS 216MFD-V Fixed Dome Network Camera in einem Netzwerk beschrieben. Alle weiteren Hinweise zur Verwendung des Produkts finden Sie im Benutzerhandbuch, das auf der mitgelieferten CD oder auf unserer Website unter www.axis.com/techsup zur Verfügung...
- Page 32 -anzeige (LED) Status-anzeige (LED) Abmessungen H × B × T = 94 x 144 x 132mm Gewicht AXIS 216FD/216MFD = 425g (ohne Netzteil) Gewicht AXIS 216FD-V/216MFD-V = 580g (ohne Netzteil) AXIS 216FD/216FD-V/216MFD/216MFD-V Installationsanleitung 16mm Kabelrohr (nicht mitgeliefert) passend zur AXIS 216FD-V/...
-
Page 33: Hardware Installieren
Stromversorgungskabel durch die Wand oder von oben bzw. unten verlegt werden. Für die Öffnungen auf beiden Seiten der Kuppelhaube sind Abdeckplatten vorhanden. Das Kabel der AXIS 216FD-V/216MFD-V kann mit einem Metallrohr geschützt werden, wenn die Kamera über die seitlichen Öffnungen angeschlossen wird. Siehe die Abbildungen auf seite 32. -
Page 34: Kabel Anschließen
Schließen Sie das mitgelieferte Netzteil an den Netzanschluss der Kamera an. 5. Überprüfen Sie, ob die LED-Anzeigen die Betriebszustände korrekt angeben. Weitere Informationen finden Sie in der Tabelle auf seite 43. Beachten Sie, dass LEDs deaktiviert sein können und deshalb nicht leuchten. AXIS 216FD/216FD-V/216MFD/216MFD-V Installationsanleitung... -
Page 35: Ip-Adresse Zuweisen
• Falls Sie die IP-Adresse nicht zuweisen können, müssen ggf. die Einstellungen der Firewall überprüft werden. • Weitere Informationen zu alternativen Methoden zum Festlegen der IP-Adresse der AXIS 216FD/ 216FD-V/216MFD/216MFD-V (z. B. in anderen Betriebssystemen) finden Sie auf seite 41. Empfohlen für Einzelne Kamera... -
Page 36: Axis Ip Utility - Einzelne Kamera/Kleine Installation
6. Anweisungen zum Festlegen des Kennworts finden Sie auf seite 38. Hinweis: Die AXIS 216FD und AXIS 216FD-V werden in der AXIS IP Utility als 216FD angezeigt. AXIS 216MFD und AXIS 216MFD-V werden in der AXIS IP Utility als 216MFD angezeigt. -
Page 37: Axis Camera Management - Mehrere Kameras/Große Installation
Standardrouter für das Geräteein. 3. Klicken Sie auf OK. Hinweis: Die AXIS 216FD und AXIS 216FD-V werden in der AXIS Camera Management Software als 216FD angezeigt. AXIS 216MFD und AXIS 216MFD-V werden in der AXIS Camera Management Software als 216MFD angezeigt. -
Page 38: Kennwort Festlegen
Die Seite „Live-View (Live-Ansicht)“ der AXIS 216FD/216FD-V/216MFD/216MFD-V wird angezeigt. Sie enthält Links zu Setup-Tools, mit denen Sie die Kamera Ihren Bedürfnissen entsprechend anpassen können. Notieren Sie Bitte, AXIS 216FD und AXIS 216FD-V werden im Browser als 216FD angezeigt. AXIS 216MFD und AXIS 216MFD-V werden im Browser als 216MFD angezeigt. -
Page 39: Installation Abschließen
AXIS 216FD/216FD-V/216MFD/216MFD-V Installationsanleitung Bildschärfe einstellen Öffnen Sie die Seite Direktübertragung, und nehmen Sie folgende Einstellungen an der Kamera vor: 1. Lösen Sie die Fests- tellschraube und die Ein- stellschrauben zur Neigung. 2. Drehen Sie das Objektiv in die gewünschte Position. -
Page 40: Über Das Internet Auf Die Kamera Zugreifen
AXIS 216FD/216FD-V/216MFD/216MFD-V Installationsanleitung Über das Internet auf die Kamera zugreifen Sobald die AXIS 216FD/216FD-V/216MFD/216MFD-V installiert ist, können Sie über Ihr lokales Netzwerk (LAN) auf die Kamera zugreifen. Um auch über das Internet auf die Kamera zugreifen zu können, müssen Sie die Netzwerk-Router so konfigurieren, dass diese den entsprechenden eingehenden Datenverkehr zulassen, was üblicherweise durch Zuweisung... -
Page 41: Andere Methoden Zum Festlegen Der Ip-Adresse
IP-Adresse per ARP/Ping zuweisen 1. Wählen Sie eine IP-Adresse aus dem Netzwerksegment, in dem sich auch Ihr Computer befindet. 2. Sehen Sie nach der Seriennummer (S/N) auf dem Produktaufkleber der AXIS 216FD/216FD-V/ 216MFD/216MFD-V. Öffnen Sie auf Ihrem Computer die Eingabeaufforderung, und geben Sie die folgenden Befehle ein: Syntax unter Windows: arp -s <IP-Adresse>... - Page 42 Masse 3,3 V Gleich- strom Digitaler Ein- gang Transistoraus- gang AXIS 216FD/216FD-V/216MFD/216MFD-V Installationsanleitung -Anschluss. ± Hinweise Dieser Kontakt kann auch für die Stromversor- gung von Zusatzgeräten mit einer maximalen Stromstärke von 50 mA verwendet werden. Heinweis: Dieser Kontakt kann nur zur externen Stromversorgung verwendet werden.
-
Page 43: Led-Anzeigen
AXIS 216FD/216FD-V/216MFD/216MFD-V Installationsanleitung Anschlussschaltbild AXIS 216FD/216FD-V/216MFD/216MFD-V 3.3V max. 50mA LED-Anzeigen Farbe Bedeutung Netzwerk Grün Leuchtet konstant bei einer Netzwerkverbindung mit 100 Mbit/s. Blinkt bei Netzwerkaktivität. Gelb Leuchtet konstant bei einer Netzwerkverbindung mit 10 Mbit/s. Blinkt bei Netzwerkaktivität. Leuchtet Keine Netzwerkverbindung vorhanden. -
Page 44: Werkseitige Standardeinstellungen Wiederherstellen
1 Minute dauern), ist die Kamera auf die werkseitigen Standardeinstellungen zurückgesetzt. 5. Installieren Sie die AXIS 216FD/216FD-V/216MFD/216MFD-V erneut. Wenden Sie dabei eines der in diesem Handbuch beschriebenen Verfahren an. Die Parameter können auch über die Weboberfläche auf die werkseitigen Einstellungen zurückgesetzt werden. -
Page 45: Guida All'installazione
Guida all'installazione Nel presente documento vengono fornite le istruzioni per installare la AXIS 216FD, AXIS 216FD-V, AXIS 216MFD e AXIS 216MFD-V nella propria rete. Per tutti gli altri aspetti sull’utilizzo del prodotto, consultare il manuale dell’utente disponibile sul CD incluso nella confezione oppure visitare il sito Web all’indirizzo www.axis.com/techsup. -
Page 46: Panoramica Dell'hardware
(LED) Dimensioni A x L x P = 94 x 144 x 132mm Peso AXIS 216FD/216MFD = 425g (senza alimentatore) Peso AXIS 216FD-V/216MFD-V= 580g (senza alimentatore) 16mm di cavo di conduttura (non incluso) che si adatta ad AXIS 216FD-V/216MFD-V... -
Page 47: Installazione Dell'hardware
Montaggio della videocamera La videocamera AXIS 216FD/216FD-V/216MFD/216MFD-V può essere montata con i cavi di rete e di alimentazione che passano attraverso la parete o il soffitto oppure inseriti dall'alto o dal basso. Su entrambi i lati del coperchio della cupola sono disponibili delle aperture. AXIS 216FD-V/216MFD-V puó... -
Page 48: Collegamento Dei Cavi
Pagina 48 Guida all’installazione di AXIS 216FD/216FD-V/216MFD/216MFD-V Collegamento dei cavi 1. Collegare la videocamera alla rete mediante un cavo di rete schermato. 2. Connettere altre periferiche esterne (facoltativo) come, ad esempio, sistemi di allarme. Per informazioni sui pin della morsettiera di alimentazione, vedere pagina 56 3. -
Page 49: Impostazione Di Un Indirizzo Ip
La maggior parte delle reti dispone di un server DHCP che automaticamente assegna gli indirizzi IP ai dispositivi connessi. Se la rete non dispone di un server DHCP, per il dispositivo AXIS 216FD/216FD-V/216MFD/216MFD-V viene utilizzato l'indirizzo IP predefinito 192.168.0.90. Per assegnare un indirizzo IP statico, si consiglia di utilizzare AXIS IP Utility o AXIS Camera Management in ambiente Windows. -
Page 50: Axis Ip Utility: Videocamera Singola/Piccole Installazioni
6. Vedere pagina 52 per istruzioni su come impostare la password. Note: AXIS 216FD e AXIS 216FD-V saranno mostrate in AXIS IP Utility come AXIS 216FD. AXIS 216MFD e AXIS 216MFD-V saranno mostrate in AXIS IP Utility come AXIS 216MFD. -
Page 51: Axis Camera Management: Più Videocamere/Grandi Installazioni
3. Fare clic sul pulsante OK. Note: AXIS 216FD e AXIS 216FD-V saranno mostrate in AXIS Camera Management come AXIS 216FD. AXIS 216MFD e AXIS 216MFD-V saranno mostrate in AXIS Camera Management come AXIS 216MFD. -
Page 52: Impostazione Della Password
Viene visualizzata la pagina Live View di AXIS 216FD/216FD-V/216MFD/216MFD-V con i collegamenti agli strumenti di configurazione che consentono di personalizzare la videocamera. Note AXIS 216FD e AXIS 216FD-V saranno mostrate in nel browser come AXIS 216FD. AXIS 216MFD e AXIS 216MFD-V saranno mostrate in nel browser come AXIS 216MFD.. -
Page 53: Regolazione Della Messa A Fuoco
Guida all’installazione di AXIS 216FD/216FD-V/216MFD/216MFD-V Regolazione della messa a fuoco Aprire la pagina Immagini dal vivo dell'interfaccia Web ed effettuare le seguenti operazioni nella videocamera: 1. Allentare la vite di fissaggio e le viti di regolazione dell'inclinazione. 2. Posizionare l'obiettivo nella posizione desiderata. - Page 54 Accesso a AXIS 216FD/216FD-V/216MFD/216MFD-V da Internet Una volta installata, la videocamera AXIS 216FD/216FD-V/216MFD/216MFD-V è accessibile dalla rete LAN. Per accedere alla videocamera da Internet, è necessario configurare i router di rete per consentire il traffico dei dati in entrata, operazione che solitamente viene effettuata su una porta specifica.
-
Page 55: Altri Metodi Di Impostazione Dell'indirizzo Ip
Impostazione dell'indirizzo IP con ARP/Ping 1. Acquisire un indirizzo IP sullo stesso segmento di rete cui è connesso il computer in uso. 2. Individuare il numero di serie indicato sull'etichetta di AXIS 216FD/216FD-V/216MFD/216MFD-V. Aprire una finestra MS-DOS sul computer e digitare i seguenti comandi:... - Page 56 Pagina 56 Guida all’installazione di AXIS 216FD/216FD-V/216MFD/216MFD-V Connettori Connettore di rete - Ethernet RJ-45. Supporti Power over Ethernet (PoE). Si consiglia l’uso di cavi schermati. Connettore di alimentazione - A basso voltaggio da 5,1V CC, massimo 3.8W. Vedere l’etichetta sul prodotto per la connessione dei poli Audio in - 3.5 mm per microfono in mono o segnale mono line-in (il canale sinistro é...
-
Page 57: Schema Delle Connessioni
Guida all’installazione di AXIS 216FD/216FD-V/216MFD/216MFD-V Schema delle connessioni AXIS 216FD/216FD-V/216MFD/216MFD-V 3.3V max. 50mA Indicatori LED Colore Indicazione Rete Verde Luce fissa: connessione di rete a 100 Mbit/s. Luce lampeggiante: attività di rete. Giallo Luce fissa: connessione di rete a 10 Mbit/s. Luce lampeggiante: attività di rete. -
Page 58: Ripristino Delle Impostazioni Di Fabbrica
(l'operazione può richiedere fino a 1 minuto) la procedura è completata e sono state ripristinate le impostazioni di fabbrica per la videocamera. 5. Reinstallare AXIS 216FD/216FD-V/216MFD/216MFD-V utilizzando uno dei metodi descritti nel presente documento. È possibile inoltre ripristinare le impostazioni di fabbrica mediante l’interfaccia Web. Per ulteriori informazioni, consultare la Guida in linea o il Manuale per l'utente. -
Page 59: Guía De Instalación
Esta guía de instalación incluye las instrucciones necesarias para instalar la AXIS 216FD, AXIS 216FD-V, AXIS 216MFD, y AXIS 216MFD-V en su red. Para obtener información sobre cualquier cuestión relacionada con el uso del producto, consulte el Manual del usuario, disponible en el CD que se incluye en este paquete, o la página www.axis.com/techsup. -
Page 60: Presentación Del Hardware
Dimensiones Alt. x Anch. x Prof. = 94 x 144 x 132mm Peso AXIS 216FD/216MFD = 425g (fuente de alimentación no incluida) Peso AXIS 216FD-V/216MFD-V= 580g (fuente de alimentación no incluida) AXIS 216FD/216FD-V/216MFD/216MFD-V Guia de instalación Conducto portacables de 16mm (no incluido) -
Page 61: Instalación Del Hardware
Existen placas de cubiertas para aberturas a los dos lados de la cubierta de la cúpula. El AXIS 216FD-V/ 216MFD-V puede instalarse con un conducto de metal para la protección del cableado si se conecta por las aberturas laterales. -
Page 62: Conexión De Los Cables
5. Compruebe que los indicadores LED anuncian las condiciones adecuadas. Para obtener información más detallada, consulte la tabla de la página 71. Tenga en cuenta que algunos LED pueden deshabilitarse y apagarse. AXIS 216FD/216FD-V/216MFD/216MFD-V Guia de instalación... -
Page 63: Configuración De Una Dirección Ip
Actualmente, la mayoría de redes disponen de un servidor DHCP que asigna direcciones IP a dispositivos conectados de forma automática. Si su red no dispone de un servidor DHCP, AXIS 216FD/216FD-V/216MFD/216MFD-V utilizará 192.168.0.90 como dirección IP predeterminada. Si desea asignar una dirección IP estática, el método de Windows recomendado es AXIS IP Utility o AXIS Camera Management. -
Page 64: Axis Ip Utility: Para Cámaras Individuales O Instalaciones Pequeñas
6. Consulte la página 66 para obtener instrucciones sobre cómo configurar la contraseña. Notas: Las AXIS 216FD y AXIS 216FD-V serán mostradas en el AXIS IP Utility como AXIS 216FD. Las AXIS 216MFD y AXIS 246MFD-V serán mostradas en el AXIS IP Utility como AXIS 216MFD. -
Page 65: Axis Camera Management: Para Varias Cámaras E Instalaciones Grandes
3. Haga click en el botón OK (Aceptar). Notas: Las AXIS 216FD y AXIS 216FD-V serán mostradas en el AXIS Camera Management como AXIS 216FD. Las AXIS 216MFD y AXIS 216MFD-V serán mostradas en el AXIS Camera Management como AXIS 216MFD. -
Page 66: Configuración De La Contraseña
Internet Explorer. Para ello, debe tener derechos de administrador en su ordenador. La página Live View de la AXIS 216FD/216FD-V/216MFD/216MFD-V aparece con enlaces a las herramientas de configuración que le permiten personalizar la cámara. Note 216FD y AXIS 216FD-V serán mostradas en... -
Page 67: Ajuste Del Enfoque
AXIS 216FD/216FD-V/216MFD/216MFD-V Guia de instalación Ajuste del enfoque Abra la página En vivo en la interfaz Web y realice los ajustes siguientes en la cámara: 1. Afloje el tornillo de blo- queo y los tornillos de ajuste de la inclinación. - Page 68 Acceso a la AXIS 216FD/216FD-V/216MFD/216MFD-V desde Internet Una vez instalada, puede acceder a la AXIS 216FD/216FD-V/216MFD/216MFD-V desde su red local (LAN). Para acceder a la cámara desde Internet, los routers de red deben estar configurados para permitir el tráfico de datos de entrada, que normalmente se efectúa en un puerto específico.
-
Page 69: Otros Métodos Para Configurar La Dirección Ip
Configuración de la dirección IP con ARP/Ping 1. Adquiera una dirección IP en el mismo segmento de red en el que está conectado su equipo. 2. Localice el número de serie (N/S) en la etiqueta de la AXIS 216FD/216FD-V/216MFD/ 216MFD-V. - Page 70 Número de pin Alimentación 3.3V CC auxiliar Entrada digital Salida del transistor AXIS 216FD/216FD-V/216MFD/216MFD-V Guia de instalación Notas Toma de tierra Este pin puede usarse para alimentar equipos auxiliares. Nota: Este pin puede utilizado solamente como salida de poder. Conecte una toma de tierra para activarla o déjela suelta (o desconectada) para desactivarla.
-
Page 71: Diagrama De Conexiones
AXIS 216FD/216FD-V/216MFD/216MFD-V Guia de instalación Diagrama de conexiones AXIS 216FD/216FD-V/216MFD/216MFD-V 3.3V max. 50mA Indicadores LED Color Indicación Verde Fijo para indicar conexión a una red de 100 Mbit/s, parpadeo para indicar actividad de red Ámbar Fijo para indicar conexión a una red de 10 Mbit/s, parpadeo para indicar actividad de red Apagado Desconectada de la red. -
Page 72: Restablecimiento De Los Valores Iniciales
1 minuto), ha finalizado el proceso y se han restablecido los valores iniciales de la cámara. 5. Vuelva a instalar la AXIS 216FD/216FD-V/216MFD/216MFD-V utilizando uno de los métodos descritos en este documento. También es posible restablecer los valores predeterminados de la cámara mediante la interfaz Web. - Page 74 AXIS 216FD/FD-V/MFD/MFD-V Installation Guide v4.0 May 2007 Copyright © Axis Communications AB, 2007 Part No. 28752...
Need help?
Do you have a question about the 216FD-V and is the answer not in the manual?
Questions and answers