Table of Contents

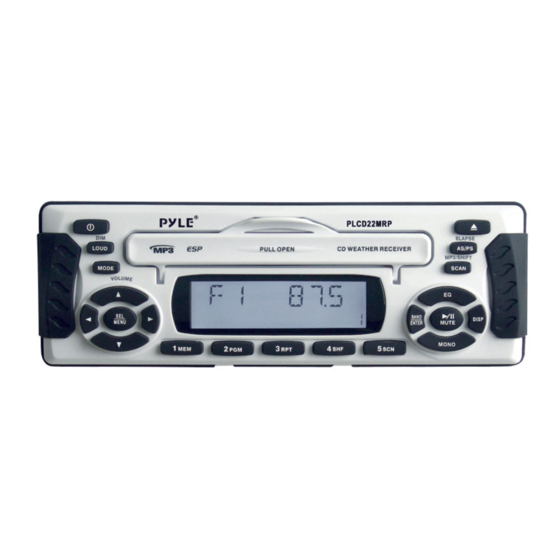
Summary of Contents for Pyle PYLE Hydra Series PLCD22MRP
- Page 1 PLCD22MRP OWNER'S MANUAL Shipboard Audio System • PLL Synthesizer Stereo Radio • Digital Compact Disc Player • Automatically Memory Storing • Direct Track Access • Program CD Tracks • Electronic Shockproof (ESP) Function www.pyleaudio.com...
-
Page 2: Table Of Contents
CONTENTS Installation...3 Take out screw before installation ..3 Installing the unit ...3 Wiring Connection ...4 Operation...5 Location of keys ...5 Control & function keys ...6 Installation hardware ...8 Switching on/off the unit ...10 Display the disc slot ...10 Sound adjustment ...10 Menu selection function ...10 Set the clock...11 Mute...11... -
Page 3: Installation
INSTALLATION TAKE OUT SCREW BEFORE INSTALL Before install the unit, please remove the two screws. Take out screw before install. NOTE: This unit is installed on the ship, so you should use two pieces of plastic film (30mmX20mm) supplied with the unit to seal the two holes after remove the screws. -
Page 4: Wiring Connection
WIRING CONNECTION ANTENNA CONNECTOR FRONT Lch SPEAKER REAR Lch SPEAKER FUSE RCA CABLE (GREY) WHITE GREY WHITE/BLACK GREY/BLACK GREEN VIOLET GREEN/BLACK VIOLET/BLACK (BLACK) WIRING REMOTE CONNECTOR SOCKET (YELLOW) RED Rch (YELLOW) WHITE Lch AUX IN CABLE WHITE BLUE POWER ANTENNA IGNITION SWITCH (ACC+) YELLOW MEMORY BACK-UP (B+) -
Page 5: Operation
OPERATION When pull open the disc cover:... -
Page 6: Control & Function Keys
OPERATION CONTROL & FUNCTIONS KEYS This unit is a marine rated wired remote control made using a modified controller or similar layout. It is capable of operation specified functions on the marine AM/FM/CD receiver and the marine AM/FM/Cassette receiver. The body, buttons, controls and display need to be UV and water-resistant. -
Page 7: Operation
OPERATION 4 MODE SELECTION button Press the MODE button (4) to step sequentially through the following sources: e.g. radio mode to CD mode (or cassette mode) to AUX in mode. 5 BAND SELECTION button FOR WEATHER BAND VERSION ONLY: Press the BAND button (5) to step sequentially through the following bands: FM1, FM2, AM, WX. -
Page 8: Installation Hardware
OPERATION INSTALLATION HARDWARE HOLDER SCREW (ø4X50) INSTALLATION DIAGRAM 1. First insert the hooks on the base into the slots of the holder to install the base to the holder. 2. Select the proper object, then place the remote mounting bracket on the base and let the object go through the base and the mounting bracket. - Page 9 OPERATION 3. Align the screw holes on the holder with the screw holes on the base and the screw holes on the bracket, then use the two screws (ø4X50) and nuts to fix the bracket, the base and holder to the proper location. 4.
-
Page 10: Switching On/Off The Unit
OPERATION • SWITCHING ON/OFF THE UNIT Switch on the unit by pressing any button (except EJECT (4)). When system is on, press POWER button (9) to turn off the unit. When system power turns on, the system is returned to previous mode. -
Page 11: Set The Clock
OPERATION button (11) or VOLUME button (12) to select USA or European radio frequency spacing. - USA radio spacing is 200k for FM and 10k for AM. This is the default frequency spacing. - European radio spacing is 50k for FM and 9k for AM. -
Page 12: Reset Function
OPERATION of the LCD display backlight. RESET FUNCTION When you pull out the plastic panel covering the CD opening, you will see the reset button (26) is placed above the disc slot (5). It must be activated with either a ballpoint pen or thin metal object. -
Page 13: Cd Operation
OPERATION CD OPERATION • SWITCHING TO CD MODE If there is no CD inserted in the driver: Gently insert the CD with the printed side uppermost into the CD compartment until you feel some resistance. The CD will be drawn into the driver automatically. -
Page 14: Track/Time Display
OPERATION for several seconds will exit PGM mode. - When the disc is playing in programmed order, pressing MEM button (20) for several seconds will cancel the all programmed content and “CLR” appears on the display. - If you don’t press MEM button (20) to carry out program setting, then press PGM button (21) for several seconds, “NO-P”... -
Page 15: Pause
OPERATION Normal In MP3 searching SCAN MP3 Searching Mode Select BAND ENTER A, B, C, 1 D, E, F, 2 G, H, I, 3 J, K, L, 4 M, N, O, 5 P, Q, R, 6 S, T, U, 7 V, W, X, 8 Y, Z, SPACE, 9 _,-,+,0... -
Page 16: Disc Notes
OPERATION Note: A. Notes on discs: 1. Attempting to use non-standard shape discs (e.g. square, start, heart) may damage the unit. Be sure to use round shape CD discs only for this unit. 2. Do not stick paper or tape, etc, onto the label side or the recording side of any discs, as it may cause a malfunction. -
Page 17: Specification
SPECIFICATION GENERAL Power Supply Requirements Chassis Dimensions Tone Controls - Bass (at 100 Hz) - Treble (at 10 KHz) Maximum Output Power Current Drain CD PLAYER Signal to Noise Ratio Channel Separation Frequency Response RADIO Frequency Coverage Sensitivity (S/N = 30 dB) Stereo Separation Frequency Coverage Sensitivity (S/N = 20 dB) -
Page 18: Trouble Shooting
TROUBLE SHOOTING Before going through the check list, check wiring connection. If any of the problems persist after check list has been made, consult your nearest service dealer. Symptom No power. The ignition switch is not The fuse is blown. Disc cannot be Presence of CD disc inside loaded or ejected.


Need help?
Do you have a question about the PYLE Hydra Series PLCD22MRP and is the answer not in the manual?
Questions and answers