Table of Contents
Advertisement
Quick Links
Advertisement
Table of Contents

Related Manuals for AntennaTek LPDA 100

Summary of Contents for AntennaTek LPDA 100
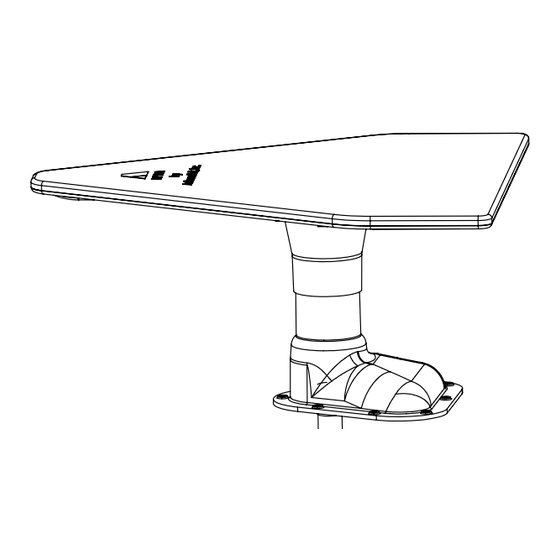
- Page 1 OWNER'S MANUAL THIS MANUAL CONTAINS LPDA 100 INSTRUCTIONS FOR: - INSTALLATION - OPERATION - TROUBLESHOOTING - EXPLODED PARTS DIAGRAM - WARRANTY AntennaTek, Inc. 425 S. Bowen, # 4 Longmont, CO 80501 (303)772-9591 FAX (303) 774-9533 www.antennatek.com Form: manv10...
-
Page 2: Electrical Installation
SECTION I INSTALLATION INSTRUCTIONS INSTALLATION KIT CONTENTS: TOOLS AND SUPPLIES REQUIRED: Mechanical Installation Qty. Description - Electric Drill (1/2" capacity) Amplified Head Assembly - Drill bits: 1/16" and 1/2" Dia. Base Assembly - 1 1/4” Diameter Hole Saw 15' Coaxial Cable - Phillips screwdriver 6' Coaxial Cable - Extension Cord... - Page 3 2. Installation WARNING! Warning: If the set screw is not installed properly the antenna will come loose. Electricity Kills! Step 4: Measure the thickness of the roof. Using the Power lines may be overhead. table and illustrations on page 4, cut the elevation Care must be taken when installing the shaft and rotation handle to the correct length for the antenna.
- Page 4 Shaft Length Roof Thickness Roof Shaft Rot. Handle Thickness Length Length 1" Min. 7/8" 1/2" 1 1/2" 1 3/8" 1" 2" 1 7/8" 1 1/2" 2 1/2" 2 3/8" 2" Rot. Handle Length 2 7/8" 2 1/2" 3 1/2" 3 3/8" 3"...
- Page 5 Warning: Use of this power supply with any product other than AntennaTek amplified RV antenna could result in fire or other damage. Warning: Do not connect high current devices to 12 Volt receptacle. Maximum current rating of this receptacle is: 7.5 Amps at 12...
- Page 6 SECTION II OPERATING INSTRUCTIONS 1. To Rotate Antenna A : Pull the rotation handle down to disengage gear from ceiling plate, rotate the antenna to align with the sta- tions. The pointer on the Roation Handle indicates the Antenna direction. B: Switch ON the main power supply.
- Page 7 Australia / New Zealand P/N 045070 Dometic Australia 1 800 21 21 21 sales@dometic.com.au web: www.dometic.com.au Canada Danzy Distributors (877) 326-9966 Arrow (800) 228-1001 Keller Marine (570) 374-8169 Pantera (800) 456-0123 Key-Stone Automotive (800) 289-0919 P/N 011020 AntennaTek (303) 772-9591...
- Page 8 Company is available as an optional, and return the product to the Company: customer paid service. AntennaTek, Inc., 425 S. Bowen St., #4, Longmont, Colorado 80501. 5. What is not covered under this warranty? D. Use reasonable care in the maintenance, operation, A.
Need help?
Do you have a question about the LPDA 100 and is the answer not in the manual?
Questions and answers