Table of Contents
Advertisement
Advertisement
Table of Contents

Related Manuals for Brinno TLC130


Summary of Contents for Brinno TLC130
- Page 1 TLC130 Time Lapse Camera User Manual...
- Page 2 1. Install Brinno App on Smartphone http://www.brinno.com/tlc130#app Smartphone OS: Android 4.4, iOS 8.0 or later. Camera Wi-Fi and BLE SSID# is required when connecting the camera SSID: to smartphone. The TLC130-XXXXXX information is on a sticker inside the device package.
-
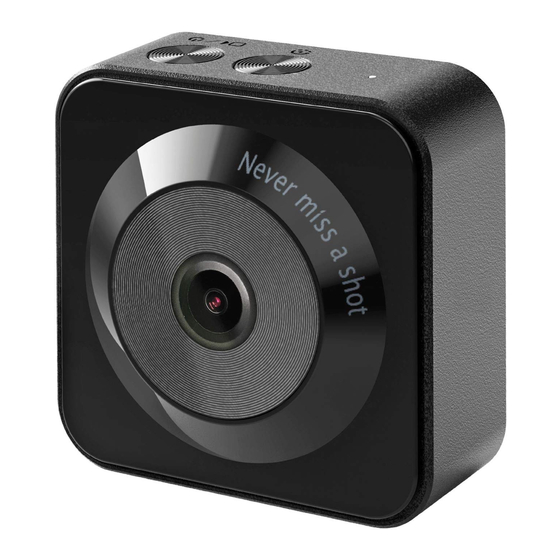
Page 3: Camera Parts
2. Camera Parts 1. Power/ Step Video Recording Button 2. Time Lapse Recording Button 3. Memory Card Cover 3-1. Micro SD Card Slot 3-2. Camera Reset Button 3-3. USB-C Socket 4. Lens 5. LED Status Indicator*¹ 6. Tripod Mount (size: 1/4”) -
Page 4: Led Status Indicator
*¹ LED Status Indicator: • Power/ Memory Card Status - Power on: Green light turns on. - Battery Low: Red light flashes slowly. - Micro SD Card Not Inserted: Red light flashes. - Micro SD Card Full or Error: Red light flashes with buzzer alert. - Page 5 3. Charge Camera Battery 1. Insert Micro SD card. Micro SD/ Micro SDHC/ Micro SDXC card (Up to 64GB) 2. Fully charge the battery. • First time charging requires 3 hours. • LED indicator: Red: Battery charging Green: Battery fully charged. DC IN, 5V 500MA...
-
Page 6: Operation Button
4. Operation Button Power on and off 1. Power ON: Hold “POWER” button for 5 secs. The green LED light turns on and the buzzer emits one long beep. 5 secs 2. Power OFF: Hold “POWER” button for 3 secs. The green LED light turns off and the buzzer emits one long beep. -
Page 7: Time Lapse Recording
Time Lapse Recording 1. Press “Time Lapse Recording” button to trigger recording (short beeps *3). The orange LED light starts flashing one time in every 3secs. 2. Hold “Time Lapse Recording” button for 3 secs to stop recording (short beeps *3). Step Video Recording 1. - Page 8 (Details in Section 7). 2. Preview and download videos: through Wi-Fi connection (Disconnected during recording). 6. Brinno App 1. CAMERA: Connect your smartphone to Brinno camera. 2. EDIT: Edit single video clip. 3. Brinno: Brinno website. 4. App Settings 4-1. Change language.
- Page 9 1. Power on camera (Hold “POWER” button for 5 secs, green LED light turns on). 2. Turn on Bluetooth and Wi-Fi on smartphone. 3. Open Brinno App. CAMERA 4. Press “CAMERA” button. 5. Select the camera’s SSID: TLC130-XXXXXX 6. Press “CONNECT”.
- Page 10 8. Select “AP Mode”, press “SCAN”. Smartphone is auto connecting to camera Wi-Fi. 9. Once Wi-Fi is connected, you see PREVIEW screen in the app.
- Page 11 8. Select “AP Mode”, press “CONNECT”. 9. Follow connection guide to connect Wi-Fi: Go to Settings > Wi-Fi> select: TLC130-XXXXXX -> Password: 12345678. 10. Once Wi-Fi is connected, go back to Brinno App, press “OK”. 11. You see PREVIEW screen in ] the app.
- Page 12 8. Record Time Lapse Video 1. When camera is successfully connected to smartphone. 2. Press “SCENE” button. 3. Select a capture scene. 4. Press “<” button to confirm and go back to PREVIEW screen. Recommend for first time user: Choose “Scenery” scene, place your camera on a location and record any subject for 15 mins to experience the time lapse...
- Page 13 5. Press “SHUTTER” button to record. 6. When camera is recording, the screen shows a flashing “REC” icon. Exit app. 7. Press “SHUTTER” button to stop recording. Camera offers 3 capture modes: Photo, Time Lapse, Step Video When camera is recording, Wi-Fi is automatically turned off to save power.
- Page 14 9. Record Step Video 1. When camera is successfully connected to smartphone. 2. Press “STEP VIDEO” button. 3. Select video burst length and capture interval. 4. Press “<” button to confirm and go back to PREVIEW screen. 5 mins STEP VIDEO <...
- Page 15 5. Press “SHUTTER” button to record. 6. When camera is recording, the screen shows a flashing “REC” icon. Exit app. 7. Press “SHUTTER” button to stop recording.
- Page 16 10. Replay Videos (Reconnect to Your Smartphone) For power saving purpose, camera disconnects Wi-Fi when recording. To re-enable camera preview or replay time lapse video, you MUST RECONNECT TO camera’s Wi-Fi after you are done with recording. 1. Press “SETTING” button at PREVIEW screen.
- Page 17 4. Reconnect camera Wi-Fi to see image in the PREVIEW screen. (Details in Section 7). 5. When camera is successfully connected to a smartphone, select “FILE” icon. 6. Select a video at View Movie screen. 7. Press “PLAY” button to replay <...
- Page 18 11. Save Videos to Smartphone 1. When camera is successfully connected to smartphone. 2. Press “FILE” button. 3. Press “SELECT” button. 4. Select videos. 5. Press “TRANSFER”. < It takes longer when multiple video files are transferred at one time.
- Page 19 6. For iPhone users: Press “OK” to allow Brinno App to access to your photos. 7. Do not leave or exit App while videos are transferring. Transmission in Progress 8. When file transmission is done, you can replay or edit it in App.
- Page 20 12. Edit Videos 1. At App home page, press “EDIT” button. 2. Press “SELECT” button. 3. Select one video. 4. Press “+” button to go to editing page. < The App supports one video editing at one time.
- Page 21 < Editing Page: 1. TRIM: Trim your video (see page 21). 2. TEXT: Add text to video 3. SPEED: Change video playback speed. 4. MUSIC: Add music to video (see page 22). 5. REVERSE: Reverse video clip and save frames from last to first. 6.
- Page 22 < TRIM: 1. Move the 2 sliders to get your desired video clip. 2. Select “OK” to confirm.
- Page 23 MUSIC: 1. Select “Add Music”. 2. My Music: Select music from your phone. 3. Featured Music: Select music from Brinno App. My Music Featured Music SHARE: When editing is done, upload your video to social media for sharing. Or save it to camera roll.
-
Page 24: Capture Mode
App Interface: Preview Screen Home Screen Camera Setting Wi-Fi Connection Status Battery Status Time Stamp On Storage Status Scene File (In-Camera) (Time Lapse Mode) SCENERY Capture Mode Photo Time Lapse Step Video... -
Page 25: Camera Settings
Camera Settings Custom Image: Saturation / Contrast / Sharpness Image Quality: Best / Better / Good Resolution: Full HD / HD Time Stamp: ON / OFF LED Indicator: ON / OFF Advanced Settings: Band Filter 50 Hz / 60 Hz / None Firmware Version Firmware Upgrade SD Card Format... - Page 26 QR code www.brinno.com Please use the link below to download the latest user manual. www.brinno.com/support The product features, specifications sheets and instructions may differ from actual products. Please refer to Brinno official site for the latest version of user manual.
- Page 27 FEDERAL COMMUNICATIONS COMMISSION INTERFERENCE STATEMENT. This equipment has been tested and found to comply with the limit s for a Class B digital device, pursuant to Part 15 of the FCC Rules. These limits are designed to provide reasonable protection against harmful interference in a residential installation.
- Page 28 FCC RF Radiation Exposure Statement: 1. This Transmitter must not be co-located or operating in conjunction with any other antenna or transmitter. 2. This equipment complies with FCC RF radiation exposure limits set forth for an uncontrolled environment. This equipment should be installed and operated with a minimum distance of 20 centimeters between the radiator and your body.
- Page 29 This device complies with Industry Canada licence-exempt RSS standard(s). Operation is subject to the following two conditions: (1) this device may not cause interference, and (2) this device must accept any interference, including interference that may cause undesired operation of the device. Le présent appareil est conforme aux CNR d’Industrie Canada applicables auxappareils radio exempts de licence.L’exploitation est autorisée aux deux conditions suivantes:...
- Page 30 EN_A1 HTLCQIG00003...
Need help?
Do you have a question about the TLC130 and is the answer not in the manual?
Questions and answers