
Related Manuals for Grundig GWD 59400 CW


Summary of Contents for Grundig GWD 59400 CW
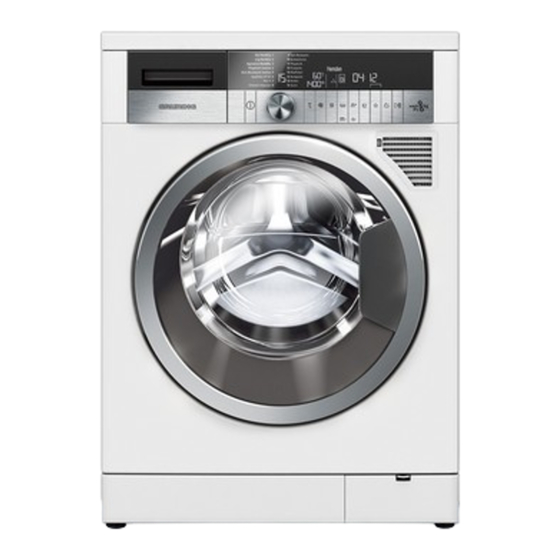
- Page 1 WASHER-DRYER USER‘S MANUAL GWD 59400 CW www.grundig.com Document Number 2820525156/ 26-12-16.(13:39)
- Page 2 Please read this manual first! Dear Customer, Thank you for preferring a Grundig product. We hope that you get the best results from your product which has been manufactured with high quality and state-of-the-art technology. Therefore, please read this entire user manual and all other accompanying documents carefully before using the product and keep it as a reference for future use.
-
Page 3: Table Of Contents
TABLE OF CONTENTS Important instructions for safety and environment General safety ......................6 1.1.1 Electrical safety ........................7 1.1.2 Product safety........................8 1.1.3 Warnings for dryer ........................ 9 Intended use......................11 Children's safety ....................11 Compliance with WEEE Directive................12 Package information ....................12 Your washer-dryer Overview .........................13 Package Contents ....................14 Technical specifications ..................15... - Page 4 TABLE OF CONTENTS 4.7.7 Using gel and tablet detergent ..................... 30 4.7.8 Using starch .......................... 30 4.7.9 Using bleaches ........................31 4.7.10 Using limescale remover ....................31 Operating the product Control panel......................32 Display symbols .....................33 Preparing the machine ..................33 Program selection and tips for washing ...............34 Washing programs ....................35 •...
- Page 5 TABLE OF CONTENTS 5.16 Loading door lock ....................53 5.17 Changing the selections after programme has started ........53 5.17.1 Adding laundry after the programme has started: ............53 5.17.2 Switching the machine to pause mode: ................53 5.17.3 Changing the programme selection after programme has started: ........ 54 5.17.4 Changing the auxiliary function, speed and temperature settings ........
-
Page 6: Important Instructions For Safety And Environment
Important instructions for safety and environment This section contains safety instructions that will help protect from risk of personal injury or property damage. Failure to follow these instructions shall void any warranty. General safety CAUTION • This product can be used by children at and above 8 years old and by persons whose physical, sensory or mental capabilities were not fully developed or who lack experience and knowledge provided that they are supervised or trained on the safe usage... -
Page 7: Electrical Safety
1.1.1 Electrical safety DANGER • If the product has a failure, it should not be operated unless it is repaired by the Authorised Service Agent. There is the risk of electric shock! • Never wash the product by spreading or pouring water onto it! There is the risk of electric shock! CAUTION • If the power cable is damaged, it must be replaced by the... -
Page 8: Product Safety
1.1.2 Product safety DANGER • Never open the loading door or remove the filter while there is still water in the drum. Otherwise, risk of flooding and scalds from hot water will occur. CAUTION • The water supply and draining hoses must be securely fastened and remain undamaged. -
Page 9: Warnings For Dryer
DANGER • Oil-affected items can ignite spontaneously, especially when exposed to heat sources such as in a tumble dryer. The items become warm, causing an oxidation reaction in the oil. Oxidation creates heat. If the heat cannot escape, the items can become hot enough to catch fire. - Page 10 CAUTION • Do not stop the machine before the drying programme is completed. If you have to stop it, take out all laundry promptly and spread them on somewhere appropriate where they can cool down. • Do not dry tulle curtains, rugs and blankets in the machine. • Your product is suitable to operate under ambient temperatures between 0°C and +35°C.
-
Page 11: Intended Use
Intended use NOTE • This product has been designed for domestic use. It is not suitable for commercial use and it must not be used out of its intended use. • Use the product only for washing, rinsing and drying of textile products that are marked accordingly. -
Page 12: Compliance With Weee Directive
Compliance with WEEE Directive • This product complies with EU WEEE Directive (2012/19/ EU). This product bears a classification symbol for waste electrical and electronic equipment (WEEE). • This product has been manufactured with high quality parts and materials which can be reused and are suitable for recycling. -
Page 13: Your Washer-Dryer
Your washer-dryer Overview 1- Power cable 2- Top panel 3- Control panel 4- Air inlet filter 5- Draining filter lid 6- Adjustable feet 7- Loading door 8- Detergent drawer 9- Drain hose... -
Page 14: Package Contents
Package Contents 1- Power cable 2- Drain hose 3- Air discharge section 4- Transportation safety bolts* 5- Mains water inlet hose (One of the following filter types is used for the mains hose connection.) a- Electronic water shut-off b- Mechanical water shut-off c- Standard 6- Liquid detergent container** 7- User Manual... -
Page 15: Technical Specifications
Technical specifications Complying Commission Delegated Regulation (EU) No.96/60/EC/1996 Supplier name or trademark GRUNDIG Model name GWD59400CW Washer Dryer Energy efficiency class Washing Energy efficiency class (Washing & Drying) Energy Consumption - full load per cycle (kWh) 6,12 Washing Energy Consumption - full load per cycle (kWh) 1,03 Annual (Washing &... -
Page 16: Installation
Installation To make the product ready for use, review the information in the user manual and take care that the electricity, tap water supply and water drainage systems are appropriate. If they are not, call a qualified technician and plumber to have any necessary arrangements carried out. -
Page 17: Removing Packaging Reinforcement
Removing packaging reinforcement Tilt the machine backwards to remove the packaging reinforcement. Remove the packaging reinforcement by pulling the ribbon. DANGER • The product is heavy. Remove the packaging reinforcement as illustrated. • Pay attention not to squeeze your hand under the machine during this procedure. -
Page 18: Flush Usage With The Bench
Flush usage with the bench 65,5 cm 59,5 cm 84,0 cm 1,4 cm CAUTION • Your machine should never be operated without the top plate. • When the Washer-Dryer is placed under the bench, front of the machine should never be blocked by the cupboard door. • When the Washer-Dryer is placed under the bench, air vents must be bored into the left and right sides of the cupboard. -
Page 19: Connecting Water Supply
Connecting water supply NOTE • The water supply pressure required to run the product is between 1 to 10 bars (0.1 – 1 MPa). It is necessary to have 10 – 80 litres of water flowing from the fully open tap in one minute to have your machine run smoothly. -
Page 20: Connecting To The Drain
Connecting to the drain • Connect the end of the drain hose directly to the wastewater drain, sink or to the washbasin. CAUTION • Your house will be flooded if the hose comes out of its housing during water discharge. Moreover, there is risk of scalding due to high washing temperatures! To prevent such situations and to ensure smooth water intake and discharge of the machine, fix the end of the discharge hose tightly so that it cannot come out. -
Page 21: Adjusting The Feet
Adjusting the feet CAUTION • In order to ensure that the product operates more silently and vibration-free, it must stand level and balanced on its feet. Balance the machine by adjusting the feet. Otherwise, the product may move from its place and cause crushing and vibration problems. -
Page 22: Electrical Connection
Electrical connection Connect the product to a grounded outlet protected by a 16 A fuse. Our company shall not be liable for any damages that will arise when the product is used without grounding in accordance with the local regulations. •... -
Page 23: Transportation Of The Product
Transportation of the product • Unplug the product before transporting it. • Remove water drain and water supply connections. • Drain all water that has remained in the product. • Install transportation safety bolts in the reverse order of removal procedure; DANGER •... -
Page 24: Preparation
Preparation LAUNDRY WASH SYMBOLS Machine Wash Symbols WASH Maximum Water Temperatures Symbol(s) Drying Suitable for No Iron Do not dry- Sensitive / Do not dry Do not dry Symbols dryer clean Delicate dry with dryer DRYING Drying Settings Iron - Iron at high Iron at medium Iron at low... -
Page 25: Preparing Laundry For Washing
Preparing laundry for washing • Laundry items with metal attachments such as, underwired bras, belt buckles or metal buttons will damage the machine. Remove the metal pieces or wash the clothes by putting them in a cotton laundry bag or cotton pillow case. -
Page 26: Things To Be Done For Energy Saving
Things to be done for energy saving Following information will help you use the product in an ecological and energy- efficient manner. • Operate the product in the highest capacity allowed by the programme you have selected, but do not overload. See, “Programme and consumption table”. -
Page 27: Correct Load Capacity
Correct load capacity The maximum load capacity depends on the type of laundry, the degree of soiling and the washing programme desired. The machine automatically adjusts the amount of water according to the weight of the loaded laundry. WARNING • Follow the information in the “Programme and consumption table”. -
Page 28: Using Detergent And Softener
Using detergent and softener NOTE • When using detergent, softener, starch, fabric dye, bleach or limescale remover read the manufacturer's instructions on the package carefully and follow the suggested dosage values. Use measuring cup if available. 4.7.1 Detergent drawer The detergent drawer is composed of three compartments: –... -
Page 29: Choosing The Detergent Type
4.7.3 Choosing the detergent type The type of detergent to be used depends on the type and colour of the fabric. • Use different detergents for coloured and white laundry. • Wash your delicate clothes only with special detergents (liquid detergent, wool shampoo, etc.) used solely for delicate clothes. -
Page 30: If The Product Does Not Have A Liquid Detergent Cup
4.7.6.2 If the product does not have a liquid detergent cup • Do not use liquid detergent for the prewash in a programme with prewash. • Liquid detergent stains your clothes when used with Delayed Start function. If you are going to use the Delayed Start function, do not use liquid detergent. 4.7.7 Using gel and tablet detergent •... -
Page 31: Using Bleaches
4.7.9 Using bleaches • Select a programme with prewash and add the bleaching agent at the beginning of the prewash. Do not put detergent in the prewash compartment. As an alternative application, select a programme with extra rinse and add the bleaching agent through an empty compartment of the detergent drawer as soon as the first rinsing step appears on the display, and add 1 glass of water in the same compartment. -
Page 32: Operating The Product
Operating the product Control panel 1 - Programme Selection display 2 - Display 3 - Start / Pause button 4 - End Time Adjustment button 5 - Auxiliary Function buttons 6 - Drying Level Adjustment button 7 - Spin Speed Adjustment button 8 - Temperature Adjustment button 9 - Programme Selection knob 10 - On / Off button... -
Page 33: Display Symbols
Display symbols 88:88 180’ 1880 a - Key Locked symbol b - Door Locked symbol c - Time indicator (hours:minutes) d - Display Information line e - Start / Pause indicator f - Delayed Start indicator g - Auxiliary Function indicators h - Drying Degrees indicator (minutes) i - Spin Speed indicator (rpm) j - Temperature indicator (°C ) -
Page 34: Program Selection And Tips For Washing
Program selection and tips for washing • Select the programme suitable for the type, quantity and soiling level of the laundry in accordance with the "Programme and consumption table" and the temperature table below. • Select the desired programme with the knob. -
Page 35: Washing Programs
Washing programs Depending on the type of fabric, use the following main programmes. NOTE • You can make drying directly after washing by pressing the Drying button after selecting the programme you want to wash your laundry with. The step in which the drying will be made will be displayed on the information line every time you press the button, and the related symbol lights. -
Page 36: Synthetics
• Synthetics 04:15 1200 Step 1 Use this programme to wash your synthetic clothes (shirts, blouses, synthetic/ cotton blends, etc.). It washes with a gentle action and has a shorter washing cycle compared to the Cotton programme. For curtains and tulle, use the Synthetic 40˚C programme with prewash and anti- creasing functions selected. As their meshed texture causes excessive foaming, wash the veils/tulle by putting little amount of detergent into the main wash compartment. -
Page 37: Cottons Eco
• Cottons Eco 03:45 1200 Step 1 Use this programme to wash your normally soiled, durable cotton and linen laundry. Although it washes longer than all other programmes, it provides high energy and water savings. Actual water temperature may be different from the stated wash temperature. -
Page 38: Mini 14
• Mini 14’ 03:14 90’ 1200 Step 1 Use this programme to wash your small amounts of lightly soiled cotton laundry in a short time. It washes your laundry in 14 minutes. NOTE • You can dry your laundry immediately after washing them (Automatic or scheduled drying can be made after washing). -
Page 39: Waterproofing
• Waterproofing Use this programme to make your synthetic, synthetic/cotton and cotton laundry water-repellent, or stain-repellent against water-based stains such as fruit juice, coke, wine etc Use the programme only on clean laundry as indicated below: Load the clean laundry. Do not load more than 2.5 kg of laundry. Select the finishing programme. -
Page 40: Temperature Selection
Temperature selection 03:15 1000 Whenever a new programme is selected, the recommended temperature for the programme appears on the temperature indicator. It is possible that the recommended temperature value is not the maximum temperature that can be selected for the current programme. Press the Temperature Adjustment button to change the temperature. -
Page 41: Selecting The Spin Speed
Selecting the spin speed 03:15 1000 Whenever a new programme is selected, the recommended spin speed for the selected programme is displayed on the indicator. Spin Speed NOTE • It is possible that the recommended spin speed value is not the maximum spin speed that can be selected for the current programme. -
Page 42: Drying Programmes
Drying Programmes WARNING • Piles coming from the clothes during drying are automatically cleaned by the machine. Water is automatically taken in to perform cleaning. For this reason, water tap of the machine should also be open during drying programmes. NOTE • Spinning step already exists in the drying programmes. -
Page 43: Cotton Drying
• Cotton drying 04:15 Step 1 This programme is used to dry humid or previously spun cotton clothes whose dry weight corresponds to 6 kg. This programme performs drying only. The highest spinning process possible should be applied to wet synthetic clothes prior to the drying programme. -
Page 44: Washing And Drying Programmes
Washing and Drying Programmes WARNING • Piles coming from the clothes during drying are automatically cleaned by the machine. Water is automatically taken in to perform cleaning. For this reason, water tap of the machine should also be open during drying programmes. •... -
Page 45: Mini Wash&Wear
• Mini Wash&Wear 04:15 1200 Step 1 Use this programme to wash and dry 0.5 kg of laundry (2 shirts) in 34 minutes and 1 kg of laundry (5 shirts) in 55 minutes. NOTE • Use this programme to quickly wash and dry daily clothes worn for a short time and taken off recently. -
Page 46: Tips For Efficient Drying
5.9.1 Tips for efficient drying Programmes Cloth Types... -
Page 47: Programme And Consumption Table
5.10 Programme and consumption table (For washing) Auxiliary functions Selectable temperature Programme (°C) range °C 2,55 1400 • • • • 90-Cold Cottons 2,05 1400 • • • • 90-Cold 1,35 1400 • • • • 90-Cold 60** 1,03 1400 •... - Page 48 Program and consumption table (For drying) Auxiliary Drying level functions Selectable Programme (°C) temperature range °C Cotton Dry 2,7 1400 • • • • Synthetic Dry 2,45 • • • • HygieneCare Wash&Dry 2,9 1400 • • • • 90-30 6 Kg Wash&Dry 5,3 1400 •...
-
Page 49: Auxiliary Function Selection
5.11 Auxiliary function selection 04:15 180’ 1200 Select the required auxiliary functions before starting the program. Whenever a programme is selected, frames of the auxiliary function symbols that can be selected together with it illuminate. And when you select an auxiliary function, the interior area of the auxiliary function symbol also starts to illuminate and the name of the selected function appears on display for "3"... -
Page 50: Prewash
• Prewash A Prewash is only worthwhile for heavily soiled laundry. Not using the Prewash will save energy, water, detergent and time. • Extra Rinse This function enables the machine to make another rinsing in addition to the one already made after the main wash. Thus, the risk for sensitive skins (babies, allergic skins, etc.) to be effected by the minimal detergent remnants on the laundry can be reduced. -
Page 51: Time-Based Drying
NOTE • Dryness level may change due to the blend, weave/knit type, amount and dampness level of the laundry. • Products that contain accessories such as lace, tulle, stone, bead, spangle, wire and products with high content of silk should not be dried in the machine. -
Page 52: End Time
5.14 End Time End time setting Finish Time On 16:15 16:15 1200 1200 With the End Time function, the startup of the programme may be delayed up to 24 hours. After pressing button, the displayed time is the programme's End Time estimated end time. -
Page 53: Loading Door Lock
5.16 Loading door lock Door locked There is a locking system on the loading door of the machine that prevents opening of the door in cases when the water level is unsuitable. "Door is Locked" appears on the display when the loading door is locked. NOTE • Door also remains locked when the temperature is high. -
Page 54: Changing The Programme Selection After Programme Has Started
5.17.3 Changing the programme selection after programme has started: The programme change is not allowed when the current programme is running. If you turn the knob while the programme is running, "Pause Programme Selection to make changes" appears on the display. You can select the new programme after switching the current programme to pause. -
Page 55: To Activate The Child Lock
5.18.1 To activate the Child Lock: Child lock enabled 04:15 1200 button for 3 seconds. After the countdown as Press and hold 2 Auxiliary Function "Child Lock 3-2-1" on the display is over, "Child Lock Enabled" appears on the display. You can release button when this warning is displayed. -
Page 56: Cancelling The Programme
5.19 Cancelling the programme Cancel 04:15 1200 The programme is cancelled when the machine is turned off and on again. Press and hold button for 3 seconds. After the countdown as "Cancel 3-2-1" on the On / Off display is over, the machine turns off. NOTE • If you press On / Off button when the Child Lock is enabled, the programme will not be cancelled. -
Page 57: Entering The Settings Menu
5.21 Entering the Settings menu You can perform the following operations in Settings menu: • Changing the language selection, • Changing the screen brightness setting, • Muting and unmuting the sound, 88:88 1200 Press and hold 1st Auxiliary Function button for 3 seconds to open the Settings menu. -
Page 58: Changing The Screen Brightness Setting
5.21.2 Changing the screen brightness setting • Press and hold button for 3 seconds to open the 1st Auxiliary Function Settings menu. Open “Brightness” menu using 2nd Auxiliary Function buttons. Auxiliary Function • Press button until the desired brightness option 3rd Auxiliary Function appears on the display in Brightness menu. -
Page 59: Memory Programme Setting
5.22 Memory programme setting You can create a favourite programme by saving frequently used programme and other settings. Use this function when you want to select quickly the same settings you use for the laundry that you wash regularly. Favourite programme will remain at the factory set programme until you make a new favourite programme setting. -
Page 60: Maintenance And Cleaning
Maintenance and cleaning Service life of the product extends and frequently faced problems decrease if cleaned at regular intervals. Cleaning the detergent drawer Clean the detergent drawer at regular intervals (every 4-5 washing cycles) as shown below in order to prevent accumulation of powder detergent in time. •... -
Page 61: Cleaning The Air Suction Filter
After every washing check that no foreign substance is left in the drum. If the holes on the bellow shown in the figure is blocked, open the holes using a toothpick. NOTE • Foreign metal substances will cause rust stains in the drum. Clean the stains on the drum surface by using cleaning agents for stainless steel. -
Page 62: Cleaning The Body And Control Panel
CAUTION • Never use sponge or scrub materials. These will damage the painted and plastic surfaces. • After every 50 washing and drying operation (approx. 3 months), clean the air suction filter of the machine. • If the machine is operated only for drying for 10 times in a row, always perform an empty washing afterwards by using 1 short programme. -
Page 63: In Order To Clean The Dirty Filter And Discharge The Water
CAUTION • Foreign substances left in the pump filter may damage the machine or may cause noise problem. • If the product is not in use, turn the tap off, detach the supply hose and drain the water inside the machine against any freezing possibility in the region of installation. -
Page 64: Troubleshooting
Troubleshooting Programme cannot be started or selected. • Machine has switched to self protection mode due to a supply problem (line ƒ Press and hold Start / Pause / Cancel button voltage, water pressure, etc.). >>> for 3 seconds to reset the machine to factory settings. (See "Cancelling the programme") Water in the machine. - Page 65 No water can be seen in the machine during washing. • The water level is not visible from outside of the washing machine. This is not ƒ a failure. Loading door cannot be opened. Drain the • Door lock is activated because of the water level in the machine. >>> ƒ...
- Page 66 Machine does not switch to spinning step. (*) Automatic • There might be an imbalance of laundry in the machine. >>> ƒ unbalanced load detection system might be activated due to the unbalanced distribution of the laundry in the drum. Check the •...
- Page 67 Colour of the clothes faded. (**) Do not load the machine in excess. • Excessive laundry was loaded in. >>> ƒ Keep detergents closed in an environment free • Detergent in use is damp. >>> ƒ of humidity and do not expose them to excessive temperatures. Select the proper programme and •...
- Page 68 There is detergent left on the laundry. (**) Do not load the machine in excess. • Excessive laundry was loaded in. >>> ƒ Select the proper • Wrong programme and temperature were selected. >>> ƒ programme and temperature for the laundry to be washed. Select the proper detergent for the laundry to •...
- Page 69 Drying process lasts long. Wash the Air • Pores of the Air inlet filter in front of the machine might be clogged. >>> inlet filter with lukewarm water. Remove everything, if • The Air inlet filter in front of the machine might be blocked. >>> any, that is blocking ventilation in front of the Air inlet filter.
- Page 70 Accidental damage, misuse or abuse of a product. An attempted repair of a product by anyone other than a Grundig Approved Engineer (the “Engineer”). Installation or use of a product where such installation or use fails to meet the requirements contained in this guarantee or the User Instructions Booklet.
- Page 71 Optional extras, where available (i.e. extendable feet) are supplied on a chargeable basis only. Does Grundig offer replacements? This is a repair-only guarantee. On occasion, the Manufacturer may at its sole discretion, replace your product with a new product instead of carrying out a repair. Where a replacement is offered, this would normally be an identical model, but when this is not possible, a model of similar specification will be provided.
- Page 72 Will there be any charge for the repairs? It is your responsibility to provide evidence to the Engineer that your product is covered by this guarantee with a proof of purchase. The Manufacturer reserves the right to charge for the reasonable cost of any service call if: You cannot provide evidence that your product is covered by this guarantee.
- Page 73 Should you experience any difficulty in obtaining service contact the Grundig Customer Helpline on Tel: 0333 207 9920 or e-mail: customerservice@support.grundig.co.uk...
- Page 76 www.grundig.com...
Need help?
Do you have a question about the GWD 59400 CW and is the answer not in the manual?
Questions and answers