
Related Manuals for Quality Espresso GAGGIA Vetro


Summary of Contents for Quality Espresso GAGGIA Vetro
-
Page 1: Operating Instructions
MAQUINA DE USO ATENCIÓN: MANUAL DE INSTRUCCIONES EXCLUSIVAMENTE PROFESIONAL MACHINE FOR OPERATING INSTRUCTIONS ATTENTION: PROFESSIONAL USE ONLY Ver.25-01/2017 08714700... -
Page 2: Table Of Contents
Indice Antes de poner en marcha esta maquinaria, es necesario leer las instrucciones de uso y conexión. Página 1. Indicaciones de seguridad 1.1 Símbolos ..................1.2 Indicaciones de seguridad . -
Page 3: Indicaciones De Seguridad
Guarde estas instrucciones en lugar seguro donde pueda consultarlas en caso ne- cesario. La utilización inadecuada de esta máquina exime a Quality Espresso de cualquier responsabilidad. 1.2 Indicaciones de seguridad Instalación La máquina sólo debería ser instalada por personal técnico autoriza-... - Page 4 Tiene que asegurarse que la instalación eléctri- ca tiene una conexión fiable a tierra de acuerdo con las normas ante- riormente mencionadas. Quality Espresso declina toda responsabili- dad por los posibles daños causados por una instalación o conexión a tierra defectuosa.
- Page 5 Instalar la máquina sobre una base sólida. Este equipo pueden utilizarlo personas con capacida- des físicas, sensoriales o mentales reducidas o falta de experiencia y conocimiento, si se les ha dado la supervisión o formación apropiadas respecto al uso del aparato de una manera segura y comprenden los peligros que implica.
-
Page 6: Descripción General
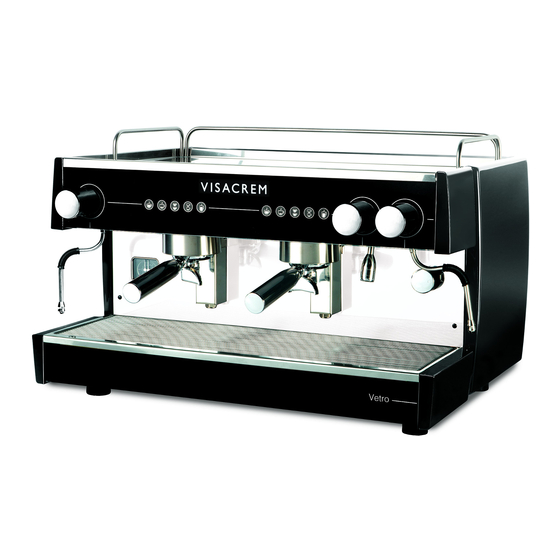
Descripción general 2.1 Vista general CARACTERÍSTICAS TÉCNICAS Nº de grupos 2Gr. 3Gr. Largo (B) 730 mm 900 mm Alto (A) 470 mm 470 mm Ancho (C) 530 mm 530 mm Peso 54 Kg 66 Kg Alim. hidráulica 3/8” G 3/8” G Potencia elect. -
Page 7: Instalación Y Puesta En Marcha
Instalación y puesta en marcha 3.1 Antes de la instalación Verificar antes de la instalación: 1. Tubo para desagüe con diámetro interior no inferior a 35 mm. 2. Tubo alimentación hidráulico de red a descalcificador. 3. Grifo de paso con salida 3/8” G - macho. 4. - Page 8 Instalación del tubo de desagüe Conexión eléctrica Conectar la máquina a una base de conexión ade- cuada según la normativa eléctrica vigente del lugar. Conectar la máquina según la tensión de red del establecimiento de acuerdo con las indicaciones de la etiqueta que se adjunta al cable de instala- ción, ver figura a).
-
Page 9: Programación De Las Dosis De Café
Nota: Antes de programar las diferentes dosis de café, asegurarse que el punto de molido y la cantidad de café son los correctos. Tam- bién comprobar que la bomba está ajustada correctamente a 9 bares de presión, haciendo café en un solo grupo. Para visualizar la presión de la bomba, dirigirse al manómetro ubicado en el frontal de la máquina a la izquierda y ver que marca la aguja de presión situada a la izquierda. -
Page 10: Limpieza Automática De Los Grupos
4.2 Limpieza automática de los grupos Limpieza de todos los grupos a la vez 4.2.1 Inicio del Ciclo de Limpieza a. Quitar la alimentación de la máquina a través del interruptor general. b. Colocar el accesorio de limpieza de la máquina en cada uno de los porta-filtros e insertarlos en cada grupo de la máquina. Accesorio para la Es recomendable hacer la limpieza limpieza del grupo... -
Page 11: Selección Modo Indicación Botoneras E Iluminación Zona De Trabajo
Selección modo indicación botoneras e iluminación zona de trabajo Modos de indicación botoneras e iluminación de la zona de trabajo - Podemos elegir entre 3 modos de iluminación distintos para las teclas de selección de producto y activar o desactivar la iluminación de la zona de trabajo. -
Page 12: Procedimiento Para Cambiar El Modo De Indicación Botoneras
5.2 Procedimiento para cambiar el modo de indicación botoneras 1. Desconectar la alimentación de la máquina a través del interruptor general. 2. Poner en marcha la máquina a través del interruptor general y esperar que el botón de un café largo del grupo 1 (botonera izquierda) se apague. -
Page 13: Avisos De Alarma
Avisos de alarma Alarma de seguridad de nivel La alarma se muestra con el parpadeo de todos los leds de las teclas de café programables (un café corto, un café largo, dos cafés cortos y dos cafés largos). Indica que la sonda de nivel ha excedido el tiempo de seguridad establecido sin detectar agua en la caldera. Mientras la alarma esté... - Page 15 Index Before using this machine, read these user and connection instructions. Page 1. Safety instructions 1.1 Symbols..................16-18 1.2 Safety instructions.
- Page 16 Keep these instructions in a safe place where you can consult them when neces- sary. Quality Espresso shall not be held liable for any problems arising from the inappro- priate use of this machine. 1.2 Safety instructions...
- Page 17 You must ensure that the electrical installation is reliably grounded in accordance with the above- mentioned regulations. Quality Espresso does not accept any respon- sibility for any injuries caused by faulty installation or grounding con- nection.
- Page 18 Install the machine on a solid base. This machine may be used by people with reduced physical, sensory or mental abilities or with a lack of ex- perience and knowledge, if they have received appro- priate supervision or training in how to use the device safely and they understand the risks involved.
- Page 19 General description 2.1 Overview TECHNICAL CHARACTERISTICS No of Gr. 2Gr. 3Gr. Width (B) 730 mm 900 mm Height (A) 470 mm 470 mm Depth (C) 530 mm 530 mm Weight 54 Kg 66 Kg Hydr. supply 3/8” G 3/8” G Electric power 2600 W 3700 W...
- Page 20 Installation and operation 3.1 Before installing Check before installing: 1. Drain hose with internal diameter not less than 35 mm. 2. Mains water feed connected to water purifier. 3. Stopcock with 3/8” G - male outlet. 4. Earthed plug protected with magnetic circuit breaker. 5.
- Page 21 Installation of the drain hose Electrical connection Connect the machine to a suitable connection, in line with current electrical regulations. Connect the machine according to the mains volt- age of the establishment as indicated on the label attached to the installation cable, see figure a). Electrical connection label...
-
Page 22: Coffee Dose Programming
Note: Before programming the different coffee doses, make sure the grind fineness and amount of coffee are correct. Also check that the pump is correctly adjusted to a 9 bar pressure, making coffee on one group head. To view the pump pressure, check the gauge located on the front of the machine to the left and see what the pressure needle to the left marks. -
Page 23: Daily Maintenance
4.2 Automatic cleaning of group heads Cleaning all the group heads simultaneously 4.2.1 Starting the Cleaning Cycle a. Turn off the machine with the main switch. b. Place the cleaning accessory of the machine in each of the porta-filters and insert them in each group head. Accessory for cleaning You should clean the machine with the group head... - Page 24 Selecting push-button indicator and lighting modes in work area 5.1 Push-button indicator and lighting modes in work area - You can choose from 3 different indicator modes for the beverage selection keys and activate or deactivate the work área’s lighting. By default the machine will be in mode 2 for the touch-buttons and the lit work area.
- Page 25 5.2 Procedure for changing the Push-button indicator mode 1. Turn off the machine with the main switch. 2. Turn on the machine with the main switch and wait until the long coffee button from group 1 (left push-button) goes out. 3.
- Page 26 Warning signals Level safety alarm The alarm is displayed by the flashing of all the LEDs of all the programmable coffee button. It Indicates that the level gauge has ex- ceeded the safety time established without detecting water in the boiler. While the alarm is on, you will only be able to make coffee with the continuous coffee button, but the other buttons will remain locked.
Need help?
Do you have a question about the GAGGIA Vetro and is the answer not in the manual?
Questions and answers
Hola !! No se enciende la botonera pero el resto funciona normal
If the button panel is not turning on while the rest of the GAGGIA Vetro machine is functioning normally, it may be due to an alarm condition. If the electronic control unit does not detect the water level in the boiler within a certain time, all the LEDs of the programmable buttons will flash continuously. This alarm can cause the button panel to appear non-functional. To clear the alarm, turn the machine off and then on again. If the issue persists, technical service may be required.
This answer is automatically generated
How to reset