Table of Contents
Advertisement
Available languages
Available languages
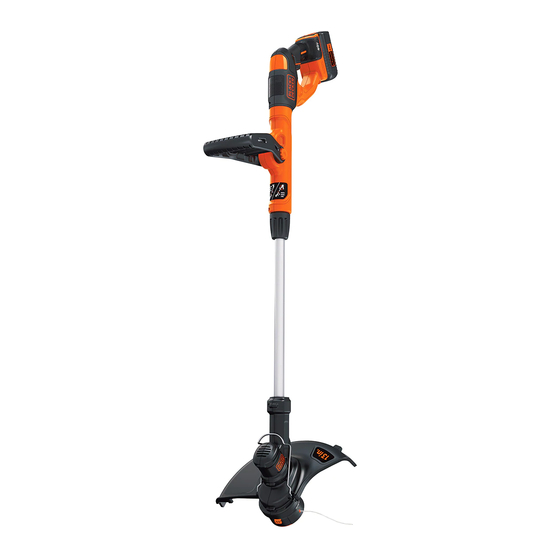
40v MAX* Lithium Trimmer/Edger
INSTRUCTION MANUAL
CATALOG NUMBER
LST140
KEY INFORMATION YOU SHOULD KNOW
WARNING:
trimming. Operating this trimmer without the guard will violate the product warranty.
CAUTION:
round line. Other sizes may degrade performance or cause damage to the trimmer.
• For use only with BLACK+DECKER 40v batteries.
IF YOU HAVE ANY QUESTIONS OR COMMENTS ABOUT THIS OR ANY
BLACK+DECKER appliance, CALL US TOLL FREE AT: 1-800-544-6986.
Thank you for choosing BLACK+DECKER!
PLEASE READ BEFORE RETURNING THIS PRODUCT FOR ANY REASON.
If you have a question or experience a problem with your BLACK+DECKER purchase, go to
http://www.blackanddecker.com/instantanswers
If you can't find the answer or do not have access to the Internet, call 1-800-544-6986
from 8 a.m. to 5 p.m. EST Mon. - Fri. to speak with an agent. Please have the catalog
number available when you call.
SAVE THIS MANUAL FOR FUTURE REFERENCE.
VEA EL ESPANOL EN LA CONTRAPORTADA. INSTRUCTIVO DE OPERACIÓN, CENTROS DE SERVICIO Y
PÓLIZA DE GARANTÍA. ADVERTENCIA: LÉASE ESTE INSTRUCTIVO ANTES DE USAR EL PRODUCTO.
*Maximum initial battery pack voltage (measured without a workload) is 40 volts. The nominal voltage is 36.
To register your new product, visit
www.BlackandDecker.com/NewOwner
Do not remove guard. The guard must be attached when
When replacing the line, use only .065 inches (1.65 mm) diameter
Advertisement
Table of Contents

Related Manuals for Black+Decker LST140


Summary of Contents for Black+Decker LST140
- Page 1 Thank you for choosing BLACK+DECKER! PLEASE READ BEFORE RETURNING THIS PRODUCT FOR ANY REASON. If you have a question or experience a problem with your BLACK+DECKER purchase, go to http://www.blackanddecker.com/instantanswers If you can’t find the answer or do not have access to the Internet, call 1-800-544-6986 from 8 a.m.
- Page 2 Definitions: Safety Alert Symbols and Words This instruction manual uses the following safety alert symbols and words to alert you to hazardous situations and your risks of personal injury or property damage. DANGER: Indicates an imminently hazardous situation which, if not avoided, will result in death or serious injury.
- Page 3 • DO NOT charge appliance in rain, or in ADDITIONAL SAFETY WARNINGS wet locations. a ) Prevent unintentional starting. • Use only with BLACK+DECKER LB Ensure the switch is in the off-position series 36V or 40V Max batteries. before connecting to battery pack, •...
- Page 4 BLACK+DECKER rechargeable battery • Do not mount charger on wall or packs. Other types of batteries may permanently affix charger to any overheat and burst resulting in personal surface.
- Page 5 IF EXPOSED TO SPARK OR FLAME. • Charge the battery packs only in NOTE: Do not store the battery packs BLACK+DECKER chargers. in a tool with the trigger switch locked • DO NOT splash or immerse in water on. Never tape the trigger switch in the or other liquids.
-
Page 6: Functional Description
LED CHARGING PROCEDURE remaining on continuously. The pack is BLACK+DECKER chargers are designed to fully charged and may be used at this charge BLACK+DECKER battery packs. time or left on the charger. - Page 7 connected with the green LED glowing variation based on product components, indefinitely. The charger will keep the battery temperature and end-user application. pack fresh and fully charged. Checking state of charge during use: IMPORTANT CHARGING NOTES • Press the state of charge indicator 1.
-
Page 8: Save These Instructions
SAVE THESE INSTRUCTIONS • To attach the handle (6), press in on the buttons (13) on both sides of the upper INTENDED USE housing as shown in figure F. This string trimmer is designed for residential • Position the handle as shown in figure trimming applications. - Page 9 • Remove the tape holding the cutting line to the spool housing. OPERATION WARNING: ALWAYS USE PROPER EYE PROTECTION THAT CONFORMS TO ANSI Z87.1 (CAN/CSA Z94.3) WHILE OPERATING THIS APPLIANCE. WARNING: To reduce the risk of serious personal injury, turn unit off and remove the battery pack before making any adjustments or removing/installing attachments or accessories.
- Page 10 M. To acheive • For best results, replace spool with this distance adjust the overall height of BLACK+DECKER model # AF-100. the trimmer as shown in figure H. • Grasp empty spool with one hand and spool housing with other hand and pull spool out.
- Page 11 NOTE: Hand wound spools from bulk line are likely to become tangled more frequently than BLACK+DECKER factory wound spools. For best results, replace spool with BLACK+DECKER model # AF-100. TO INSTALL BULK LINE, FOLLOW THE STEPS BELOW: •...
-
Page 12: Troubleshooting
Troubleshooting PROBLEM SOLUTION Trimmer runs slowly. • Fully depress the variable speed trigger. The level of trigger depression affects speed. • Remove battery from trimmer. • Check that the spool housing can rotate freely. Carefully clean it if necessary. • Check that the cutting line does not protrude more than approximately 4-13/16 inches (122mm) from the spool. - Page 13 (12) in the trimmer head (figure O). useful life have already been paid by • Grasp spool with one hand and spool BLACK+DECKER. In some areas, it is housing with other hand and pull spool illegal to place spent nickel cadmium,...
-
Page 14: Service Information
Black+Decker and its Authorized NOTE: This equipment has been tested Service Centers. A defective product and found to comply with the limits for... - Page 15 apply to products sold in Latin America. For products sold in Latin America, check country specific warranty information contained in the packaging, call the local company or see the website for such information. Imported by Black & Decker (U.S.) Inc., 701 E.
- Page 16 1,65 mm (0,065 po) de diamètre. Des tailles différentes pourront appauvrir les performances du taille-bordure ou l’endommager. • À utiliser seulement avec les blocs-piles BLACK+DECKER de 40 v. POUR TOUTE QUESTION OU TOUT COMMENTAIRE SUR CET APPAREIL OU TOUT AUTRE APPAREIL BLACK+DECKER, COMPOSEZ GRATUITEMENT LE 1-800-544-6986.
- Page 17 LIGNES DIRECTRICES EN MATIÈRE DE SÉCURITÉ - DÉFINITIONS est important que vous lisiez et compreniez ce mode d’emploi. Les informations qu’il contient concernent VOTRE SÉCURITÉ et visent à ÉVITER TOUT PROBLÈME. Les symboles ci-dessous servent à vous aider à reconnaître cette information. DANGER : Indique une situation dangereuse imminente qui, si elle n’est pas évitée, causera la mort ou des graves blessures.
- Page 18 déflagrant. Les moteurs de ces outils bornes. Court-circuiter les bornes produisent normalement des étincelles comporte des risques de brûlures ou qui pourraient enflammer des vapeurs. d’incendie. • RANGER LES OUTILS INUTILISÉS f) Sous certaines conditions À L’INTÉRIEUR – Lorsqu’ils ne sont inappropriées, le bloc-piles pourra pas utilisés, les outils doivent être rangés à...
- Page 19 Les symboles et leurs définitions sont dommages corporels, ne recharger que indiqués ci-après : des blocs-piles rechargeables V ....volts BLACK+DECKER. Tout autre type de A ....ampères bloc-piles pourrait surchauffer et éclater Hz ....hertz posant ainsi des risques de dommages W ....
- Page 20 • Pour utiliser un chargeur a l’extérieur, piles ne réduira pas ces risques. le placer systématiquement dans un • NE JAMAIS tenter de connecter 2 endroit sec. chargeurs ensemble. • Le chargeur a été conçu pour être • Si l’utilisation d’une rallonge est alimenté...
- Page 21 MANIÈRE QUE CE SOIT (P. EX. PERCÉ avant réutilisation. PAR UN CLOU, FRAPPÉ D’UN COUP DE Procédure de charge MARTEAU, PIÉTINÉ). LES BLOCS-PILES Les chargeurs Black+Decker ont été ENDOMMAGÉS DOIVENT ÊTRE ENVOYÉS conçus pour recharger les blocs-piles AU CENTRE DE RÉPARATION POUR ÊTRE Black+Decker.
- Page 22 à la source d’alimentation. BLACK+DECKER Systèmes batteries et chargeur Le type de clignotement de la DEL indique Chargeurs/Durée de charge** (Minutes) (0% - 100% charger) les problèmes. PILE EN MAUVAIS ÉTAT 40V MAX* Chargeurs Bloc-piles Heures Le chargeur est en mesure de...
- Page 23 complètement chargé. SERVICE CENTER FOR RECYCLING. REMARQUES IMPORTANTES SUR LE INDICATEUR DE L’ÉTAT DE CHARGEMENT 1. Pour augmenter la durée de vie du bloc- CHARGE- FIGURE A piles et optimiser son rendement, le charger La partie arrière du bloc-piles est pourvue à...
- Page 24 INSERTION ET RETRAIT DU BLOC-PILES AVERTISSEMENT : NE JAMAIS AVERTISSEMENT : UTILISER L’OUTIL SANS LE PARE-MAIN VEILLER À NE PAS SOLIDEMENT FIXÉ. Le pare-main doit ACTIONNER LA DÉTENTE LORS DE LA POSE OU DU toujours être attaché correctement à RETRAIT DU BLOC-PILES. l’outil pour protéger l’utilisateur.
- Page 25 Réglage de la hauteur (Figure H) AVERTISSEMENT : pour réduire MISE EN GARDE : ajustez la tout risque de dommages corporels longueur du taille-bordure jusqu’à obtenir graves, adopter SYSTÉMATIQUEMENT la la position de travail adéquate, comme position des mains illustrée. illustré...
- Page 26 coupe devrait se trouver dans la position Utilisation du taille- illustrée en figure J. Si ce n’est pas le bordure (Figures L, M) cas : • Alors que l’appareil • Retirez le bloc-piles du taille-bordure. est en marche, • Desserrez le collier (8), comme illustré inclinez l’appareil en figure H.
- Page 27 à la main à partir de fil en vrac ont boîtier (figure Q). tendance à s’emmêler plus fréquemment • Poussez le couvercle à fond sur que les bobines enroulées d’usine le boîtier jusqu’à ce qu’il soit bien BLACK+DECKER. Pour optimiser les enclenché. résultats, remplacez la bobine avec le...
- Page 28 # AF-100 de BLACK+DECKER. Pour installer le fil en vrac, suivez les étapes ci-après : • Retirez le bloc-piles du taille-bordure. • Retirez la bobine vide du taille- bordure, comme expliqué à la section « CHANGEMENT DE BOBINE ».
- Page 29 (ou boîtier (12) situé dans tête de coupe celui du bloc-piles) à la fin de sa vie utile (figure O). est déjà payé par BLACK+DECKER. • Attrapez d’une main la bobine et de La SRPRC , en collaboration avec l’autre le boîtier de la bobine, puis...
- Page 30 REMARQUE : ce matériel a été testé et a été déclaré le personnel de Black+Decker et de ses conforme aux limites en vigueur concernant les centres de réparation agréés. Un produit dispositifs numériques de classe B, en vertu de la...
- Page 31 • S’assurer de fixer les fils dans les encoches capuchon est enlevé. de retenue (figure R) avant le retrait. Pour de l’aide avec l’outil, consulter notre site Web www.blackanddecker.com pour l’emplacement du centre de réparation le plus près ou communiquer avec l’assistance Black+Decker au 1-800-544-6986.
- Page 32 LEA EL MANUAL ANTES DE DEVOLVER ESTE PRODUCTO POR CUALQUIER MOTIVO: Si tiene una consulta o algún inconveniente con su producto BLACK+DECKER, visite http://www.blackanddecker.com/instantanswers para obtener respuestas instantáneas las 24 horas del día. Si no encuentra la respuesta o no tiene acceso a Internet, llame al 1-800-544-6986 de lunes a viernes de 8 a.
- Page 33 LIGNES DIRECTRICES EN MATIÈRE DE SÉCURITÉ - DÉFINITIONS Il est important que vous lisiez et compreniez ce mode d’emploi. Les informations qu’il contient concernent VOTRE SÉCURITÉ et visent à ÉVITER TOUT PROBLÈME. Les symboles ci-dessous servent à vous aider à reconnaître cette information. DANGER : Indique une situation dangereuse imminente qui, si elle n’est pas évitée, causera la mort ou des graves blessures.
- Page 34 de cualquier otro tipo de batería puede NO SE UTILICEN EN EL INTERIOR: cuando no las utilice, las herramientas crear un riesgo de lesión o de incendio. deben guardarse en un lugar seco, alto e ) Cuando no se esté utilizando la o bajo llave, fuera del alcance de los batería, manténgala alejada de otros niños.
- Page 35 V .......voltios quemaduras. Para reducir el riesgo de A .......amperios lesiones, cargue solo baterías Hz .....hertz W ......vatios recargables BLACK+DECKER. Otros min ....minutos tipos de baterías pueden calentarse en o AC..corriente alterna exceso y explotar provocando lesiones o DC..corriente directa corporales y daños materiales.
- Page 36 enchufes dañados: reemplácelos de • No exponga el cargador a la lluvia ni inmediato. a la nieve. • No opere el cargador si éste ha • Tire del enchufe y no del cable al recibido un golpe fuerte, se ha desconectar el cargador.
- Page 37 AGRIETADA O DAÑADA, NO LA recargarse antes de usarse. INTRODUZCA EN EL CARGADOR. NO PROCEDIMIENTO DE CARGA COMPRIMA, DEJE CAER NI DAÑE EL Los cargadores Black+Decker están PAQUETE DE BATERÍAS. NO UTILICE UN diseñados para cargar baterías PAQUETE DE BATERÍAS O UN Black+Decker.
- Page 38 BLACK+DECKER Sistemas de cargador y batería retraso por paquete caliente / frío. Cargadores de baterías/Tiempo de carga DEJAR EL PAQUETE DE BATERÍAS EN (Minutos) (0% - 100% cargar) EL CARGADOR El cargador y el paquete de baterías se...
- Page 39 DESCRIPCIÓN DE LAS FUNCIONES 1. Gatillo de velocidad variable 2. Mango 3. Botón de bloqueo en apagado 4. Batería 5. Indicador de carga 6. Mango auxiliar 7. Botón de mango auxiliar 8. Collar de ajuste 9. Cabezal de la podadora 10.
- Page 40 paquete de baterías y extraiga el paquete estar correctamente instalado en la de baterías de la herramienta (FIgura C). herramienta para proteger al usuario. • Quite el tornillo del protector. • Mientras mantiene el protector alineado con el cabezal de la podadora, deslícelo a su posición hasta que la lengüeta de retención encaje y haga clic en su lugar (asegúrese de que los...
- Page 41 que su brazo delantero esté recto ADVERTENCIA: Para disminuir el cuando la podadora esté en posición riesgo de lesiones corporales graves, de funcionamiento. apague la herramienta y extraiga la batería antes de realizar cualquier ajuste o de quitar o instalar accesorios. La puesta en marcha accidental puede causar lesiones.
- Page 42 MODO DE BORDEADO (FIGURA J) ADVERTENCIA: Cuando se usa ENCENDIDO Y APAGADO (FIGURA K) como bordeadora, la cuerda puede • Para encender la podadora, empuje despedir piedras, trozos de metal u otros el botón de bloqueo en apagado (que objetos a gran velocidad. La podadora y el se muestra en el recuadro de la figura J) protector están diseñados para reducir el peligro.
- Page 43 (8) como se cambie el carrete por el modelo muestra en la figura H. BLACK+DECKER n.º AF-100. • Sujete el eje metálico y gire la cubierta • Agarre el carrete vacío con una mano y inferior 180° hasta que la podadora esté...
- Page 44 NOTA: Es más probable que los carretes enrollados a mano con cuerda a granel se enreden con más frecuencia que los carretes BLACK+DECKER enrollados en fábrica. Para obtener los mejores resultados, cambie el carrete por el modelo BLACK+DECKER n.º AF-100.
- Page 45 • Mantenga la podadora inclinada hacia el área que se corta; ésta es la mejor área de corte. • La podadora corta al mover la unidad de derecha a izquierda. Esto evitará que se arrojen restos al usuario. • Evite árboles y arbustos. La cuerda puede dañar fácilmente la corteza de árboles, las molduras de madera, los revestimientos exteriores y los pilares de...
- Page 46 • Ponga el carrete y la cuerda en la RBRC™ en cooperación con cubierta del carrete con la cuerda BLACK+DECKER y otros usuarios de “estacionada” en la ranura de baterías, ha establecido programas retención (20) como se muestra en la en los Estados Unidos para facilitar figura R.
- Page 47 Solamente para Propósitos de México Para conocer la ubicación del centro de servicio más cercano a fin de recibir ayuda con su producto, visite nuestro sitio Web www.blackanddecker.com.mx o llame a la línea de ayuda BLACK+DECKER al 01 800 847 2309/01 800 847 2312.
- Page 48 Black+Decker. Es posible que se autorización del usuario para operar el requiera un comprobante de compra. Los equipo. Este aparato digital de la clase B centros de mantenimiento de propiedad se conforma con ICES-003 canadiense.
- Page 49 · GARANTÍA BLACK+DECKER · BLACK+DECKER WARRANTY . SOLAMENTE PARA PROPOSITOS DE MEXICO Distributor Name · Sello firma del distribuidor Date of purchase · Fecha de compra Invoice No. · No. de factura PRODUCT INFOMATION · IDENTIFICACIÓN DEL PRODUCTO Cat. No. · Catalogo ó Modelo Serial Number ·...
- Page 52 Cd. Madero, Tamaulipas Tel. 01 833 221 34 50 Boca del Rio, Veracruz Tel. 01 229 167 89 89 Perfiles y Herramientas de Morelia Servicio de Fabrica BLACK+DECKER, Gertrudis Bocanegra No. 898 Col. Ventura Puente S.A. de C.V. Lázaro Cardenas No. 18 Morelia, Michoacán...
Need help?
Do you have a question about the LST140 and is the answer not in the manual?
Questions and answers
Battery Number LBX2240 cannot find this number . Can I use a different number. Also. I lost the charger. Which charger should I buy
Alternative battery numbers that can be used for the Black+Decker LST140 include LBX2040, LBXR36, LBXR2036, LST540, LCS1240, and LBX1540. Compatible chargers for these batteries include LCS36, LCS40, and LCS436.
This answer is automatically generated
Model LST140 trimmer/edger will not automatically feed the line. Have replaced cap, spring and small rocker arm but still will not feed