Table of Contents
Advertisement
Advertisement
Table of Contents

Related Manuals for Bosch HSG737357Z


Summary of Contents for Bosch HSG737357Z
- Page 1 Free standing cooker HSG737357Z Instruction manual...
- Page 3 Saving energy with the hob ..... 9 www.bosch-home.com and in the online shop Environmentally-friendly disposal ....9 www.bosch-eshop.com...
-
Page 4: Intended Use
Intended use Always slide accessories into the cooking 8Intended use compartment the right way round. ~ "Accessories" on page 13 Read these instructions carefully. Only then The appliance is adjusted to operate on I n t e n d e d u s e will you be able to operate your appliance specific details that are indicated in the rating safely and correctly. -
Page 5: Important Safety Information
Important safety information General information (Important safety information Warning – Risk of fire! A draught is created when the appliance ■ door is opened. Greaseproof paper may Warning – WHAT TO DO IF YOU SMELL come into contact with the heating element i n f o r m a t i o n I m p o r t a n t s a f e t y GAS! - Page 6 Important safety information Warning – Risk of burns! Warning – Risk of injury! The appliance becomes very hot. Never Scratched glass in the appliance door may ■ ■ touch the interior surfaces of the cooking develop into a crack. Do not use a glass compartment or the heating elements.
- Page 7 Important safety information Warning – Risk of electric shock! Warning – Risk of overheating! Incorrect repairs are dangerous. Repairs Covering the ventilation openings in the ■ ■ may only be carried out and damaged floor of the appliance may cause it to power cables replaced by one of our overheat.
-
Page 8: Causes Of Damage
Causes of damage Warning – Important Information for the ]Causes of damage user! This appliance may only be installed by a registered LP Gas installer. All registered C a u s e s o f d a m a g e installers are issued with a card carrying their Caution! Only use the burners when cookware has been... -
Page 9: Oven
Environmental protection Oven 7Environmental protection Caution! Accessories, foil, greaseproof paper or ovenware on Your new appliance is particularly energy-efficient. Here ■ the cooking compartment floor: do not place t e c t i o n E n v i r o n m e n t a l p r o you can find tips on how to save even more energy accessories on the cooking compartment floor. -
Page 10: Getting To Know Your Appliance
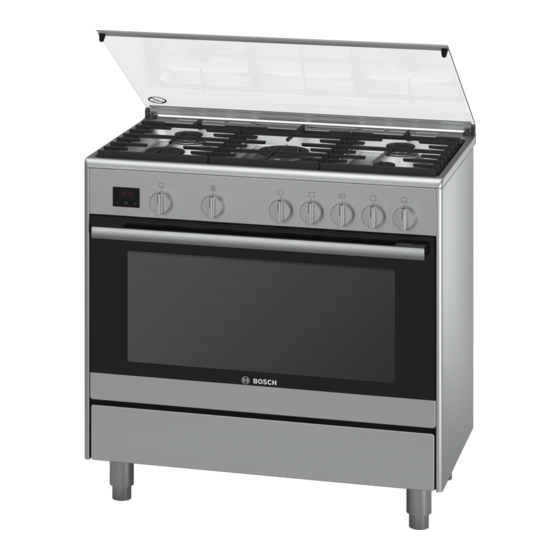
Getting to know your appliance *Getting to know your appliance Use this section to familiarise yourself with your new y o u r a p p l i a n c e G e t t i n g t o k n o w appliance. -
Page 11: The Electronic Clock
Getting to know your appliance The electronic clock Precautions for use The following advice is intended to help you save With the electronic clock, you can set a cooking time. energy and prevent pan damage: An audible signal sounds once the cooking time has Use pans which are the elapsed. -
Page 12: The Oven
Getting to know your appliance The oven Cooling fan The hot air escapes via the ventilation opening. The cooling fan switches on and off as required. Caution. Do not cover the ventilation slots. Otherwise the oven will overheat. To ensure that the cooking compartment cools down more quickly after operation, the cooling fan continues to run for a certain period afterwards. -
Page 13: Accessories
Accessories Locking function _Accessories The accessories can be pulled out approximately halfway until they lock in place. The locking function Your appliance is accompanied by a range of prevents the accessories from tilting when they are A c c e s s o r i e s accessories. -
Page 14: Before Using For The First Time
Before using for the first time Special accessories KBefore using for the first You can buy accessories from the after-sales service. time Accessories Description Enamel baking tray For tray bakes and small baked prod- In this section, you can find out what you must do t h e f i r s t t i m e B e f o r e u s i n g f o r ucts. -
Page 15: Cleaning The Burner Caps And Cups
Operating the appliance Cleaning the burner caps and cups 1Operating the appliance You have already learnt about the controls and how p l i a n c e O p e r a t i n g t h e a p they work. -
Page 16: Oven
Operating the appliance Oven Switching on the grill gas burner Open the appliance door. Operating the oven Press the control knob for the oven and turn it to the Note that, in the case of appliances with a hob cover, ( position. - Page 17 Operating the appliance Rotary spit Preparing the rotary spit Slide a retaining clip onto the rotary spit and screw on the handle. Slide the universal pan into shelf position 1 and slide the rotary spit into the motor mount. Place the roast as close as possible to the centre of the rotary spit.
-
Page 18: Time-Setting Options
Time-setting options OTime-setting options DCleaning agent With good care and cleaning, your appliance will retain Setting the time i o n s T i m e - s e t t i n g o p t C l e a n i n g a g e n t its appearance and remain fully functioning for a long After the appliance has been connected to the mains time to come. - Page 19 Cleaning agent Notes Aluminium and Glass cleaner: Slight differences in colour on the front of the ■ plastic Clean with a soft cloth. appliance are caused by the use of different Gas hob and pan Hot soapy water. materials, such as glass, plastic and metal. supports Use very little water.
-
Page 20: Rails
Rails qAppliance door pRails Removing the hook-in racks With good care and cleaning, your appliance will retain R a i l s A p p l i a n c e d o o r its appearance and remain fully functional for a long The hook-in racks are each fixed to the side panels of time to come. -
Page 21: Removing And Fitting The Appliance Door
Appliance door Fitting the door panels Fitting the appliance door Reinsert the inner panel. Grip the oven door on either side with both hands. Slide the hinges into the slots in the oven (a). All four fastening pins must engage in the Note: holders provided for them. -
Page 22: Trouble Shooting
Trouble shooting 3Trouble shooting Warning – Risk of injury! Incorrect repairs may cause serious hazards. Repairs to the appliance must only be carried out by a qualified Faults often have simple explanations. Refer to the table technician. If repairs are required, contact the after- T r o u b l e s h o o t i n g before calling the after-sales service, as you may be sales service. -
Page 23: Customer Service
Customer service 4Customer service Our after-sales service is there for you if your appliance C u s t o m e r s e r v i c e needs to be repaired. You will find the address and telephone number of your nearest after-sales service centre in the phone book. -
Page 24: J Tested For You In Our Cooking Studio
Tested for you in our cooking studio A lot of steam can build up in the cooking Note: JTested for you in our compartment when cooking food. cooking studio Your appliance is very energy-efficient and radiates very little heat to its surroundings during operation. Due to the high difference in temperature between the Here, you can find a selection of dishes and the ideal appliance interior and the external parts of the... -
Page 25: Tips For Using Your Appliance
Tested for you in our cooking studio Tips for using your appliance Here you will find a selection of tips on ovenware and preparation methods. Notes Use the accessories provided. Additional ■ accessories may be obtained as special accessories from specialist retailers or from the after-sales service. -
Page 26: Acrylamide In Foodstuffs
Tested for you in our cooking studio Tips for Roasting and Braising The roast is too dark and the crack- Check the shelf position and temperature. Select a lower temperature the next time and reduce the roasting ling is burned in places, and/or the time if necessary. - Page 28 *9001161507* 9001161507 970331...
Need help?
Do you have a question about the HSG737357Z and is the answer not in the manual?
Questions and answers