
Subscribe to Our Youtube Channel
Related Manuals for Ambu aView JANUS2-W08-R10


Summary of Contents for Ambu aView JANUS2-W08-R10
- Page 1 Instruction for Use Ambu® aView™ For use by trained clinicians/physicians only. For in-hospital use. For use with Ambu® visualization devices. Further instruction details are available online: www.ambu.com...
- Page 2 Contents Page English (Instruction for Use) .........................4-17 Deutsch (Bedienungsanleitung) ......................18-31 aScope 3 aScope 2 aScope 4 Broncho Pat. Pending Ambu is a registered trademark and aScope and aView are trademarks of Ambu A/S.
- Page 3 Physicians must interpret and substantiate any finding by other means and in the light of the patient's clinical characteristics. The aView monitor can be connected with a range of Ambu visualisation devices (cf. section 2.2 for compatible devices) to display the video image from an Ambu visualisation device. The aView Do not use the aView monitor if it is damaged in any way or if any part of the functional monitor is reusable.
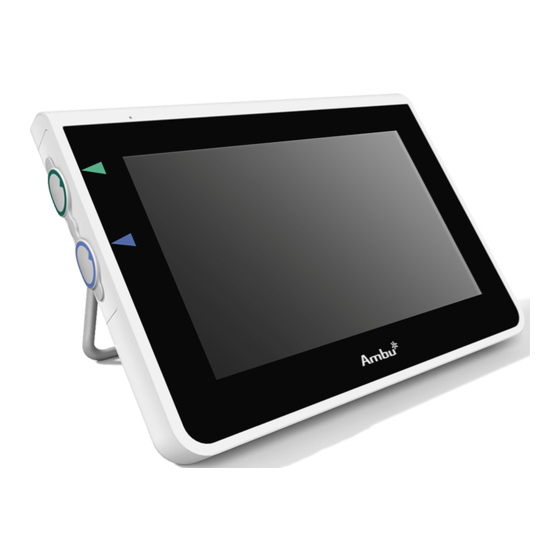
- Page 4 PC / ABS Rubber Consult Instruction Date of Manufacture, Touch Screen Displays the image PET / Glass for Use. followed by YYYY-MM-DD. from the Ambu visualization device and a touch screen Caution. Manufacturer. interface. Stand To place the display ZDC3 on a solid surface.
- Page 5 5a or 5b . Align the arrows on the visualisation device and aView before insertion. www.ambu.com). Please consult the manual of the external monitor for further information on Verify that a live video image appears on the screen. Point the distal end of the Ambu how to connect an external video source by composite.
- Page 6 – IEC 60601-1 ed 2 Medical electrical equipment – Part 1: General requirements for safety. aView is cleaned and disinfected before and after use following the instructions below. Ambu has validated these instructions in accordance with AAMI TIR 12 & 30. Any deviation from the –...
- Page 7 Possible cause Recommended action Atmospheric pressure 80-109 kPa No live image An Ambu visualization Connect an Ambu visualization device to on the screen device is not connected the blue or green port on aView. Altitude ≤ 2000 m but User to aView.
- Page 8 Video out is No live image on the Make sure the external monitor is connect- Guidance and manufacturer’s declaration – electromagnetic immunity not working. external screen. ed to aView using the composite cable and that the external monitor is displaying the The system is intended for use in the electromagnetic environment specified below.
- Page 9 Appendix 2. Warranty and Replacement Program b). Interference may occur in the The warranty period for the aView is one year from delivery to the customer. Ambu agrees vicinity of equipment marked with to replace an aView free of charge if proof can be provided of faulty materials or faulty the following symbol.
- Page 10 Ein Nichtbeachten dieser Warnhinweise und Vorsichtsmaßnahmen kann zu Verletzungen Gegenstände auf das Stromkabel stellen. des Patienten oder Beschädigungen der Geräte führen. Ambu lehnt jegliche Haftung für Der aView ist nicht zur Reparatur vorgesehen. Ist der aView defekt, muss er entsorgt werden.
- Page 11 Monitorgehäuse PC/ABS Gummi Bedienungsanleitung Herstellungsdatum, Touchscreen Zeigt das Bild des PET/Glas beachten. gefolgt von JJJJ-MM-TT. Ambu-Visualisierungsgeräts und eine Touchscreen-Ober- fläche an. Warnung. Hersteller. Untergestell Zum Aufstellen des Monitors ZDC3 auf einer ebenen Oberfläche. CE-Kennzeichnung. Feuchtigkeitsbeschränkung: Anschluss für...
- Page 12 ANSI/AAMI ES60601-1:2005/(R):2012 Vergewissern Sie sich, dass das Live-Bild auf dem Bildschirm angezeigt wird. Zeigen CAN/CSA-C22.2 No. 60601-1:08 (R2013) Sie mit dem distalen Ende des Ambu-Visualisierungsgeräts auf ein Objekt, z. B. auf Ihre IEC 60601-2-18:2009. UL60601-1, Handfläche 6 . 1st ed.: 2006 Passen Sie ggf.
- Page 13 Der aView sollte vor und nach der Anwendung gemäß aView separat gemäß den geltenden örtlichen Vorschriften. der nachstehenden Anleitung gereinigt und desinfiziert werden. Ambu hat diese Anleitung 7. Technische Daten gemäß AAMI TIR 12 & 30 genehmigt. Jede Abweichung von dieser Anleitung sollte vom Wiederaufbereiter gründlich auf Wirksamkeit und mögliche negative Auswirkungen überprüft...
- Page 14 Dänische Konfiguration: 2-5a, Netzstecker geerdet Konfiguration für die Schweiz: Typ J, Netzstecker geerdet Stromversorgung Eingangsspannung 18 V, 1,67 A Gleichstrom Weitere Informationen erhalten Sie von Ambu. 8. Fehlerbehebung Akkutyp 10,8 V 4300 mAh Falls Probleme mit dem aView-Monitor auftreten, versuchen Sie mithilfe dieser Anleitung die Die normale Akku-Laufzeit eines neuen vollständig gela-...
- Page 15 Videoausgang Auf dem externen Vergewissern Sie sich, dass der externe Monitor Empfehlungen und Herstellererklärung – elektromagnetische Störfestigkeit funktioniert Bildschirm ist kein mit einem Composite-Kabel an den aView Das System ist für die Verwendung in den im Folgenden genannten elektromagnetischen nicht. Live-Bild zu sehen.
- Page 16 Reparaturen des aView aufgrund von Material- oder Herstellungsfehlern werden Personen beeinflusst. angeboten, falls diese Option verfügbar ist. Es liegt in jedem Fall im Ermessen von Ambu, ob das Gerät repariert oder ersetz wird. a) Die Feldstärke stationärer Sender, wie z. B. Basisstationen von Funktelefonen und mobilen Ambu behält sich das Recht vor, die technische Abteilung, oder eine ähnliche Abteilung, am...
- Page 17 Ambu A/S Baltorpbakken 13, DK-2750 Ballerup, Denmark +45 72 25 20 00 +45 72 25 20 50 www.ambu.com...
Need help?
Do you have a question about the aView JANUS2-W08-R10 and is the answer not in the manual?
Questions and answers