Table of Contents
Advertisement
Quick Links
Advertisement
Table of Contents

Summary of Contents for ClearView HD4660
- Page 1 HD4660 DVB-T HD MODULATOR User Manual...
- Page 2 3.2.6 Step 5: IP Configuration Tab 3.2.7 Step 6: Save IP Configuration 3.2.8 Step 7: Administration 4 MENU TREE 4.1 Menu Tree of Front panel ..................10 4.2 Menu Tree of Web UI ....................11 5 MODULATOR CONFIGURATION VIA FRONT PANEL LCD HD4660 Manual Rev 1.0...
-
Page 3: General
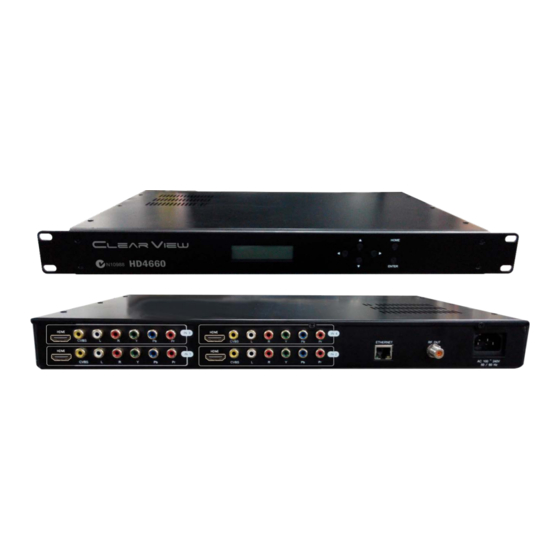
DIGITAL MODULATOR 1. GENERAL 1.1 Description The HD4660 module able to generate a signal in DVB-T format (Digital Terrestrial Television) from HDMI and YPbPr (RCA) and CVBS(RCA) input. HD4660 is MPEG-4 and MPEG-2 encoding, DVB-T modulation integrated device to convert HDMI and YPbPr (RCA) and CVBS(RCA) signal to DVB-T RF out. -
Page 4: Specifications
6 Local keys on front panel Web Management RJ-45 Ethernet port GENERAL Power Supply AC 100~240V 50/60Hz Consumption 25 W Languages English Dimensions 19” x 12.5” x 1.75” Weight 2.8Kg *Specifications subject to change without prior notice. HD4660 Manual Rev 1.0... -
Page 5: Installation
One power cable 2.2 Connection The HD4660 unit comes standard with HDMI, Component, and Composite video inputs. Component Connection: Connect the Y (Green), Pb (Blue), and Pr (Red) video source cable to the unit’s Component input ports. If using a Composite Video source, use a 75Ω coaxial cable with RCA connectors to connect the video source to the unit’s CVBS port. -
Page 6: Operating Instructions
3 OPERATING INSTRUCTIONS 3.1 Description of controls and components <Front> <Rear> HD4660 Model name LCD Display Configuration and system status Key PAD / Home Return to start menu. Key PAD / Left & Right Move Right / Left between menu / characters. -
Page 7: Starting
1 9 2 . 1 6 8 . 1 . 1 3 8 4. Key in the IP address in web browser. 3.2.2 Step 1: Login Login Password: Default User Name: admin Default Password: 0000 Encoder Programming and Setup via GUI Interface: HD4660 Manual Rev 1.0... -
Page 8: Step 2: Right Click And Select "Status
PAL 576i Video PID Audio PID CH 1 CH 2 CH 3 CH 4 RF Status Guard Code Encode Frequency Constellation Bandwidth Interval Rate Carrier Rate(Kbps) Power ON/OFF CH29 536.5 64QAM 1/32 7 MHz 27686 dBmV HD4660 Manual Rev 1.0... -
Page 9: Step 3: Setting Tab
Perform apply once all parameters are set. Changes made to an individual setup tab may require the installer to perform a apply to the device if you are only making changes to one parameter of the encoder. HD4660 Manual Rev 1.0... -
Page 10: Step 5: Ip Configuration Tab
To upload a configuration file- simply click “Choose File” then locate the file you want to upload. Click “Upload” to install the configuration files. This function is helpful to the installer when installing a large number of encoders in a single system. HD4660 Manual Rev 1.0... -
Page 11: Menu Tree
RF Power 46 dBmV 10,12,14,16,18,20,22,24,26,28,3 0,32,34,36,38,40,42,44,46 RF ON/OFF ON,OFF IP Edit Connection Mode Static DHCP, Static IP Address 192.168.1.138 Mask 255.255.255.0 Gateway 192.168.1.1 Load YES / NO Default Change New Password 0000 Password Apply Password Yes No HD4660 Manual Rev 1.0... - Page 12 User name/ Change , Reset Password/ New Password/ Confirm Password IP setting Connection Mode Static DHCP, Static IP Address 192.168.1.138 Mask 255.255.255.0 192.168.1.1 Gateway Apply / Reset 192.168.1.1 Log Out Log-Out User Name / Password Log-In, Reset HD4660 Manual Rev 1.0...
-
Page 13: Modulator Configuration Via Front Panel Lcd
L o a d D e f a u l t C h a n g e P a s s w o r d 5.10 Change Password Menu: Use the Right/Left buttons & Up/Down to select new password. HD4660 Manual Rev 1.0... - Page 14 1. Use the Home button to save the changed channel value. 2. Press the Home button again and then select “Yes” item for confirming the Apply Setting. Step 4: Save the parameter 3. Use the Enter button to store the Frequency edit. HD4660 Manual Rev 1.0...


Need help?
Do you have a question about the HD4660 and is the answer not in the manual?
Questions and answers