Table of Contents
Advertisement
Quick Links
Advertisement
Table of Contents

Related Manuals for Spice S-900


Summary of Contents for Spice S-900
-
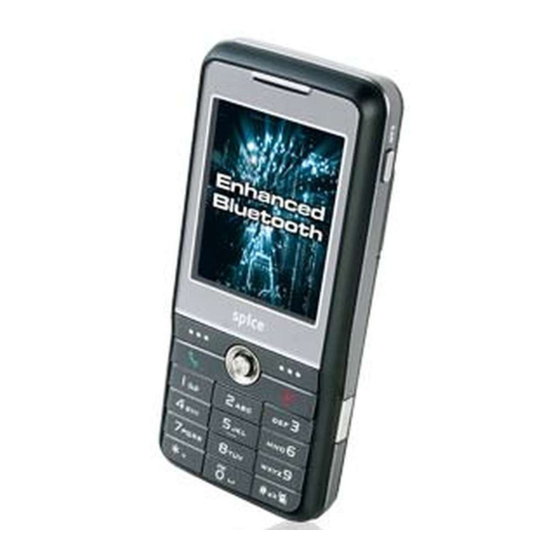
Page 1: User Manual
Spice S-900 User Manual 15G06C048000... - Page 2 Contents Welcome Call time/cost Options during a call Package contents Other call options Overview Phonebook Getting started Adding contacts Searching for a contact Inserting the SIM card, miniSD™ card, and Shortcut to contact entries battery Copying contacts Charging the battery Deleting contacts Turning the phone on/off Caller Groups...
- Page 3 Tone Settings Tasks List Call Settings Calculator Network Settings World Clock Bluetooth Settings Voice Recorder Security Settings AB Repeater Factory Settings Stopwatch Countdown Camera Units Converter Taking photos Currency Exchange Viewing and managing photos Health Manager Photo capture settings Flashlight Recording videos Network Viewing and managing videos...
-
Page 4: About This Manual
Preface Congratulations on your purchase of an Spice S-900 mobile phone. Read this manual carefully and keep it in a safe place for future reference. About this manual Every effort has been made to ensure that the contents of this manual are correct and up to date. -
Page 6: Overview
Overview The S-900 is a stylish and fashionable new phone from Spice , with all the functions and utilities to make it a useful tool in today’s mobile world. The S-900 comes equipped with a built-in camera, MMS/SMS messaging capability, organizer, Java games, audio player, WAP, GPRS, and a miniSD™... - Page 7 System supported GSM900/1800/1900; GPRS Class 10 Dimensions 101 x 44 x 16 mm Weight 80 g Battery 750 mAh Li-ion Standby time 200 ~ 300 hours Talk time 2 ~ 5 hours Color black Main display 2.0” TFT, 262K colors, 176 x 220 Sub display Phonebook 1000 sets + SIM card...
-
Page 9: Getting Started
Getting started Inserting the SIM card, 3. Push the SIM card holder in the direction miniSD™ card, and battery of the “Open” arrow, When you register with a service provider, you then lift it using your card. Your phone must have a SIM card in order Notched edge 4. -
Page 10: Charging The Battery
3. Place the battery Turning the phone on/off back into the battery To turn the phone on: compartment noting the • Hold down the power/end key until correct polarity. the screen lights up. If needed, enter your SIM card PIN code and press the enter key. -
Page 11: Function Keys
Function keys Joystick key The following table lists the phone keys and their functions. Upward Joystick key Power/end key Forward Backward • Hold to turn the phone on or off. • Press to stop an incoming call or Downward cancel a call you are dialing. •... -
Page 12: Front View
Front view Screen Joystick key Right soft key Left soft key Enter key Power/end key Call key NOTE: Refer to the previous page for function key descriptions. -
Page 13: Rear View
Rear view Bottom view Charger/ Camera mini-USB socket Headset port Flashlight Locking/unlocking the keypad You can lock the phone keypad to prevent tampering or accidental pressing of any buttons. www.spicemobile.in To lock the keypad: 1. Put the phone on standby mode. 2. -
Page 14: Standby Mode
Standby mode When your phone is on, but not in use, it is in standby mode. During standby mode, the upper Indicates battery charge status. part of the display screen shows various icons. Phone is using GPRS network. Phone is in roaming mode. Ringtone is enabled. -
Page 15: Using The Menu
Using the Menu 3. Press the left soft key to select the Missed Calls option. A list of missed calls To view the main menu, go to standby mode, opens. then press Enter. Follow these tips to navigate through the menu and menu options. The following table provides a list of all the •... -
Page 16: Text Entry
individually or with predictive text entry, which Camera: Enables you to take helps you complete words as you enter them. pictures as well as record video with You can enter letters in upper case, lower case, your phone. You can also access and or both, or insert symbols. - Page 17 W X Y Z 9 Smart ABC 0, inputs space Smart ABC is a predictive text entry method, which uses a built-in dictionary to predict the word you are typing. You can choose the Choosing text entry methods correct word by pressing the keys repetitively From any text entry screen, such as a text and scrolling through the words suggested message window, select Options >...
-
Page 18: Connecting To A Computer
want to type in. To set the language, go to Settings > Phone 3. Press to enter space. The phone Settings > Language. automatically checks if “oic” exists in Numeric text entry the build-in dictionary. If not, the word is added to the dictionay. -
Page 19: Making A Call
Calls Making a call Answering a call To place a call: When you receive a call, the phone alerts 1. Enter the number you want to dial using you by sounding the ring tone and vibration the keypad. If you make a mistake, select Clear to delete at any time. -
Page 20: Rejecting An Incoming Call
Rejecting an incoming call Call logs To reject an incoming call, press the Power/end Call logs consist of information about missed, dialed, and received calls. To view lists of key. Depending on your service provider, missed, dialed calls or received calls, select the call may be transferred to your voice mail or Calls from the main menu, then select Missed your calling party may hear a busy signal. -
Page 21: Call Time/Cost
To dial a number from the received or dialed call 2. Select the list you want to delete: logs, follow the same procedure in the previous Missed Calls section “Returning a missed call.” Dialed Calls Received Calls Call log options Delete All While viewing a number from the dialed, received or missed call logs, you can select... -
Page 22: Options During A Call
Options during a call When a call is in progress, the following options are available: • Hold / Retrieve: Puts a current call on hold or retrieves a call on hold. • End: Ends a call. • New Call: Places a new call. •... -
Page 23: Adding Contacts
Phonebook Adding contacts NOTE: entries in Phonebook > Settings > Fields. See the section “Phonebook Settings” in this chapter for more information. Read this section to learn how to add new contacts to your phonebook. Searching for a contact Adding a new entry Read this section to learn how to search for Use the Add function to add a new contact to contacts in your phonebook. -
Page 24: Copying Contacts
4. Press the right soft key to return to Copying contacts the previous screen. You can move contacts from your SIM card to phone memory or from phone memory to SIM Search Entry card. Use the Search Entry function to search for To move contacts: 1. -
Page 25: Caller Groups
You can also select Options > Move transfer Caller Groups a SIM contact entry to the Handset, and vice You can separate contacts into groups to versa. Friends, Family, VIP, Business, and Others. Deleting contacts You can change the name of any caller group. You can add contacts from your phonebook to You can delete individual contacts using the Delete function. -
Page 26: Extra Number
Each tone is played as it is displayed. 7. Press the left soft key The chosen ringtone will sound when NOTE: If you selected the Delete option, you must press the left someone from the current caller group you must highlight a new member from the displayed list and calls. -
Page 27: Phonebook Settings
Phonebook settings My vCard The phonebook settings menu enables you to A vCard is a virtual calling card that you can view memory status, set the preferred storage send to people. It can contain your name, cell phonebook, and edit/send a vCard. fax number, company name, and e-mail address. -
Page 28: Password Protection
Password Protection If you want to protect your phonebook from unauthorized use and viewing, you may enable the password protection function through pressing Phonebook > Settings > Password Protection and selecting On; otherwise, select Off to disable the function. When the password protection function is enabled, a password is required to open the phonebook. -
Page 29: Messages
Messages Read this section to learn how to use the SMS 3. Press the enter key to edit the Send List, and MMS messaging features of your new or press the left soft key to display phone. You can even send e-mail and use text the Options menu. - Page 30 message in the outbox so you can 3. Use the joystick to highlight the Edit recover it later for editing or sending. option to modify the wording, or select Delete to clear it completely. Message Template The edit screen displays the phrase you chose The message template feature contains and lets you change it.
- Page 31 Settings a GSM or GPRS network, the phone then uses the network of your preference. To set the preferred bearer option: message settings. You can set the service 1. From the main menu, select Messages > center, view the memory status, set the way of SMS >...
- Page 32 contains a combination of text, image, or audio. highlight the Done option with the joystick, then press the enter key to To create an MMS message: 1. From the main menu, select Messages > You have just created one slide. Repeat MMS >...
-
Page 33: Chatting Rooms
size of the template. 4. To enter a nickname, select Edit, then use the keypad to enter your nickname. Select Write Message to edit the Select Options > Done message. 3. Edit the To, Cc, Bcc, and Subject Search. The as described in the previous procedure. -
Page 34: Cell Broadcast
Select Edit > OK you are not able to answer your phone. To set up a voice mail server: 1. From the main menu, select Messages > server, the incoming server, and your Voice Mail. signature. A list of voice mail accounts is displayed. 4. - Page 35 4. Use the joystick to highlight the Languages option then press the enter key to display the language menu. Use the joystick to check the language options that you want to receive. 5. Use the joystick to highlight the Topics option then press the enter key to 6.
- Page 37 The phone can be set to behave in a number 4. Select a feature to customize from the list and is designed to be used in a particular The feature submenu is displayed. environment. For instance, if you are in a For example, for Ring Mode, you can meeting, you may want your phone to alert you select Ring only, Vibrate, Vib.
-
Page 39: Phone Settings
Settings Phone Settings used in menus. The Phone Settings menu enables you to Shortcut To edit the shortcut list: and date, language, preferred input method, 1. From the main menu, select Settings > default encoding type, shortcuts, greeting text, Phone Settings > Shortcut. A list of current shortcuts is displayed. -
Page 40: Display Settings
tags following the instructions. And you Enter or edit the greeting text using the keypad. also can check the SD tag status or Auto Update of Date and Time delete all SD tags recorded. NOTE: Press and hold the right soft key, you can record your Auto update of date and time is a network voice command after the message “... - Page 41 seasonally. Power On/Off Animation To set a theme: This item allows you to choose the animation 1. From the main menu, press Settings > display each time you turn the phone on/off. Display Settings >Themes. You may choose from the available animations A list of themes is displayed.
-
Page 42: Tone Settings
joystick to highlight your preference, then press select a line. Enter or press the left soft key The Call Settings menu features include Hide the setting. My No., Call Waiting, Call Forwarding, Call Barring, Line Switching, Call Time Reminder, Sleep Timer Call Time Display, Auto Redial, Closed User Group, and Call Filter. - Page 43 Call Forwarding also use this option to select a line to use. This option can be used when line quality differs or With call forwarding, you can divert calls directly to your voice message box when you are busy of busy lines. and cannot take calls.
- Page 44 To enable call time display, go to Settings > You can also input text if desired. Call Settings > Call Time Display. Select the Call Time Display option. Use the joystick to Call Filter highlight your choice between On and Off, then press the enter key to set.
-
Page 45: Network Settings
Network Settings ring tones, color graphics, games, and software. The default network settings in the phone are If a GPRS network is available, you can set for automatic detection of the best available your usage preference with the GPRS option. lines for the type of content you are sending. - Page 46 connect with, and click Bond to bond 2. Once the device is detected, it is shown the device with your phone. You may be on the list of devices to choose from. asked to put in a Bluetooth password Click Bond to bond the divice with your to successfully complete the bonding.
-
Page 47: Security Settings
phone, and determine whether or not you want Security Settings to set the phone audio path to the earphone or The Security Settings menu contains features leave the audio in the handset. You also can to prevent information from being accessed make FTP Setting: to choose the shared folder or calls being charged to your account. -
Page 48: Factory Settings
Auto Keypad Lock NOTE: This option requires a password. Consult your service provider if you do not know your password. Not all service Go to Settings >Security Settings > Auto providers support this function. Keypad Lock to lock the keypad after a Change Password To set the auto keypad lock: Go to Settings >... -
Page 49: Taking Photos
Camera The phone is equipped with a high quality camera for capturing still pictures and video. Taking photos Capture button To capture still pictures with your phone: 1. The fastest way to take a photo is to press the capture button while in idle mode. -
Page 50: Photo Capture Settings
From the main menu, select Camera > Image Size My Album. To set the image size: A list of stored images is displayed. 1. While in capture mode, select Option > 2. To view an enlarged thumbnail, highlight Image Size. an image and press the Enter key. - Page 51 To apply frames to photos: Multi-Capture 1. While in capture mode, select Options > The Multi-Capture enables multiple capture Frame. 2. Highlight a frame from the list. shots with a single click of the button. You can press the joystick key upward To enable the multi-capture function: or downward to scroll through the other 1.
-
Page 52: Recording Videos
The keys are assigned as follows: stop recording, press the left soft key or end key. Effect White Balance NOTE: You can long press the MP3 key to switch between Camera and Video Reorder. Flash Light Zoom function Capture Timer Multi-Capture The phone’s video recorder also has a zoom function. -
Page 53: Video Capture Settings
Press + to increase volume, and - to decrease power on/off animation, or set the default volume. storage location. Capturing a still photo Some video playing features are explained in You can capture a still photo from a video by the following sections. - Page 54 NOTES: memory, or on a miniSD™ card if installed. • EV stands for exposure value. The EV option enables you to To set the storage option: manually raise or lower the exposure value. 1. While in video recorder capture mode, select Options >...
-
Page 55: Photo Artist
My Secret Album method. Add Effect: Highlight an effect from the My Secret Video list using the joystick and press the Enter key to view the effect on the picture. Left My Secret Album and My Secret Video allow and press the joystick key forward to toggle between effects, and press the left securely, preventing unwanted viewers from soft key... -
Page 56: Qr Code Decoder
QR Code Decoder soft key This feature allows you to easily record and forward/backward to change the position obtain some useful informations anytime and of the text, then press the Enter key to anywhere through capturing the barcodes. apply. Press the left soft key For example, when you see a movie post on the streets, you may capture the barcode on the post with the phone, it tells you about the... -
Page 57: Media Center
Media Center Audio Player corresponding on-screen symbol lights The phone is equipped with a high quality audio Joystick key assignments are as follows: • Upward: Open the current playlist To start the audio player • Downward: Play , Pause 1. From the idle screen, press the enter key •... -
Page 58: Video Player
card memory, or a sub-folder in the Music the songs in the playlist. • . Select On to randomly repeat than these, you will not be able to play songs in the playlist. Select Off to play them with the phone’s Audio Player. the songs in order. - Page 59 To pause, press the enter key. Press FM Radio options the enter key again or select Resume to When the radio is displayed, press the left soft resume. to display the Options menu. There are options to access preset stations, to manually select a frequency, search for stations, create a list of preset frequencies, change the radio storage location.
-
Page 60: Schedule Fm Record
To search and create a list of preset channels Press the left soft key on the FM Radio screen automatically: and select Append 1. Start the radio, then select Options > and press the left soft key to record the radio Preset List. -
Page 61: Java Settings
Center > Java Games and Application. A list of Java games appears. 2. Highlight a Java game from the list and press the enter key to launch the game. Java Settings You can alter a number of Java settings and view the resources available to Java applications using the Java Settings option. -
Page 63: File Manager
Organizer Viewing drive contents The organizer menu gives you access to a number of features including alarms, calendar, task list, calculator, world clock, sound recorder, manager. converter, currency converter, and health To view the contents of a drive: manager. the “File Manager” section of this chapter. File Manager 2. -
Page 64: Alarm
Alarm Power On/Off Timer The phone can function as an alarm clock. You The phone can be set to turn on or off can set up to three alarm events. automatically. The Organizer > Power On/Off Timer option enables you to schedule times to To program an alarm. -
Page 65: Tasks List
To select a date on the calendar: Tasks List. Stored tasks are then displayed. date 2. Select Add to add a new task. There are on the calendar, OR Select Options > Go to Date and enter the year, month, and day. The selected date then appears highlighted on the the keypad. -
Page 66: Calculator
4. In the Alarm Type OK or the Enter key. For example, compute Day, Days, Weekly, or Monthly. 239 + 1,238 + 439 as follows: 1. Enter 239 with the number keys. The task is then recorded for all relevant dates after the starting date. -
Page 67: World Clock
World Clock can be stored in AMR or WAV formats. The world clock function enables you to see the 3. Highlight an item from the option menu time in various major cities of the world. To open the world clock: From the main menu, select Organizer >... -
Page 68: Countdown
of the screen. The Lap Timer, like the Split Timer, records portions, or laps, of a main timing. The Split To use the stopwatches: Timer, however, displays cumulative time 1. From the main menu, select Organizer > elapsed, whereas the lap timer displays Stopwatch. -
Page 69: Units Converter
1. From the main menu, select Organizer > centimeters, and kilometers. Countdown > Set. 4. Highlight either of the measurement 2. Use the joystick key to navigate the hours, minutes, and seconds. Input the and downward. values you want using the keypad, the You can convert in either direction, select Done >... -
Page 70: Health Manager
decimal point. Flashlight 5. Press the Enter key to display the result. This feature allows you to set the phone as Health Manager Organizer > Flashlight, then select Turn On to enable this function or Turn Off to disable this The health manager includes a Body Mass function. -
Page 71: Network
Network Viewing Links The Network menu gives you access to wireless services, such as WAP web browsing Web links appear as colored or underlined, or WAP push. just as on a computer. To view a link, press the enter key. WAP Settings Use the WAP menu to set the homepage, Many important WAP settings are dependent... -
Page 72: Data Account
WAP Push WAP Push is a method for sending multimedia content to your phone. If your service provider offers WAP push services, you can use WAP push to receive such content as wallpaper, ringtones, or java games. The message is sent as a WAP accessible URL, or web address. -
Page 73: Handset Manager
• To uninstall software, click the Add/Remove Programs icon Ensure that the following system requirements in the control panel. Select the Spice S-900 are met: USB-Handset Manager from the list. Click the Remove button and follow the instructions on screen. -
Page 74: Main Panel
Panel. • Select Help Topics to open online help. You can also open online help from the program list: Spice S-900 USB—Handset Manager> User’s Guide. • Under Settings, you can select whether to run the Handset Manager automatically when you start the computer. -
Page 75: Navigating The Handset Manager Tools
• Select Handset Version to see the model NOTE: You must exit one tool before launching another. Navigating Media Files when the phone is connected. Select About Handset Manager to see the The interfaces for media tools—MMS, Sound, version of Handset Manager installed in or Album and Video —are quite similar. - Page 76 NOTE: Organizer > File Manager. selected location are shown in the lower right pane. Handset Manager Icon A Handset Manager icon appears in the Transferring Files to system tray, even when the Handset Manager and from the Handset is minimized. By right-clicking the Handset Manager icon in the system tray, you can select the following Handset Manager functions: Download icon in the upper right.
-
Page 77: Music Manager
Music Manager Control panel columns The Music Manager allows you to transfer and Add playlist Add smart playlist create playlists, upload, maintain, and playback Browse by Genre/ Delete playlist Artist/Album digital music through an easy-to-use interface. To launch the Music Manager, simply launch the Handset Manager from your desktop and on This column the main panel, click the Music Manager icon. -
Page 78: Important Notes
the Local Folder. Messages to be moved to the mobile phone should be placed in the Unsent folder. NOTE: Make sure the handset is turned on and the device • Use Insert Objects to add the MIDI ring drivers are installed. tones or animations to the message. - Page 79 function while the handset is in the MMS 3. Select My computer > Mass Storage, menu or sending and receiving MMS.” and select from Audio, Images, Photos, File Manager • You need to select the appropriate folder • When installing Java games, download “Java Game.jar”...
- Page 80 Sound • The handset must be connected to the computer in order to save an MP3 clip or update an MP3 clip to the handset. location on your computer, though saving to the assigned Handset Manager folders correct location in your handset. called “Audio.
-
Page 81: Appendix
Appendix HM Bluetooth interface settings SOP 1-1 Press "Question Mark"after PC/NB connects to handset via BT 1-2 Select Settings 1-3 click Interface Setup... - Page 82 2. Select COM port to COM 11...
- Page 83 3. HM start to connect and transmit...
-
Page 85: Gprs Internet Setting Sop
GPRS Internet Setting SOP A. Hardware Connection 1. Make sure the handset is currently in Standby mode. 2. Insert one end of the USB Data Cable into the handset’s system connector port, and the other end to your PC’s USB port. 3. - Page 86 2. Phone and Modem Options window appears. Click New. 3. Create a name for Location Name add the Area code according to your present location. are there, input 755 in the Area code Apply and then Ok.
- Page 87 4. The new added item appears in the Location list. 5. Choose Modems, and then click Add.
- Page 88 6. Choose “Don’t detect my modem; I will select it from a list”, and then click Next to go on. 7. Choose Standard 33600 bps Modem, and then click Next.
- Page 89 8. Click COM 6 Next to go on. NOTE the dialog box above. If so, you need to install the USB2 9. Click Finish.
- Page 90 10. In Modems tab, choose Standard 33600 Modem COM6 and then click Properties to open the window. 11. Click Diagnostics.
- Page 91 12. Click Query Modem.You should see results in Command and Response list. 13. Click Advanced. Enter the Extra initialization commands, and then click OK. In this example, service provider dependent. Contact your service provider for this setting.
- Page 92 14. Double click Network Connections in Control Panel. 15. In Network Tasks box, click Create a new connection.
- Page 93 16. New Connection Wizard starts. Click Next. 17. Choose Connect to the Internet, and then click Next.
- Page 94 18. Choose Set up my connection manually. Click Next. 19. Choose Connect using a dial-up modem. Click Next.
- Page 95 20. Enter the ISP name. You can create your own ISP name. Click Next. 21. Fill *99# in the Phone number Next.
- Page 96 22. Click Next. 23. Choose “Add a shortcut to this connection to my desktop”, and then click Finish.
- Page 97 24. On the desktop, double click the shortcut icon to open Connect Dial-up Connection window. 25. Click Dial to activate GPRS connection.
-
Page 98: Additional Information
Additional Information (SAR) The use of this equipment may be subject to local rules and regulations. The following rules This mobile phone meets EU requirements and regulations may be relevant in some or all for exposure to radio waves. areas where your handset will be in operation. Your mobile phone is a radio transmitter and receiver, designed and manufactured to European Notice... -
Page 99: Proper Disposal
network. The closer you are to a base station, Proper Disposal the lower the device power output. The symbol of the crossed out bin indicates that The highest SAR value for this mobile phone when tested for use and compliance to international standards was 0.599 W/kg. -
Page 100: Safety Warnings
Safety Warnings You MUST exercise proper control of your vehicle at all times. Observe the following Read the following safety warnings carefully safety precautions when driving: before using your cell phone. • This equipment is intended for use with power supplied from supplied •...
Need help?
Do you have a question about the S-900 and is the answer not in the manual?
Questions and answers