Table of Contents
Advertisement
Quick Links
Advertisement
Table of Contents

Related Manuals for Omega HHTQ35


Summary of Contents for Omega HHTQ35
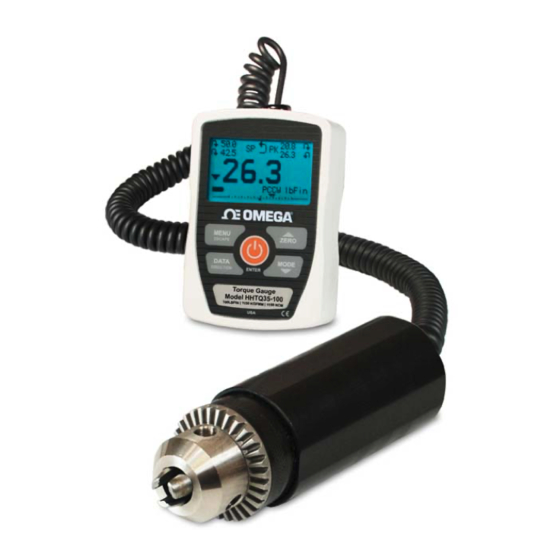
- Page 1 HHTQ35 Digital Torque Gauges...
- Page 2 HHTQ35 Digital Torque Gauges User’s Guide...
- Page 3 Our technical support and engineering teams are eager to assist you. Before use, each person who is to use a HHTQ35 digital torque gauge should be fully trained in appropriate operation and safety procedures.
-
Page 4: Overview
HHTQ35 Digital Torque Gauges User’s Guide 1 OVERVIEW 1.1 List of included items Qty. Part No. Description 12-1049 Carrying Case 08-1022 AC adapter body with US, EU, or UK prong 08-1026 Battery (inside the gauge) Certificate of calibration 09-1165 USB cable Resource CD (USB driver, user’s guide) -
Page 5: Power
User’s Guide 2 POWER The HHTQ35 is powered either by an 8.4V NiMH rechargeable battery or by an AC adapter. Since these batteries are subject to self discharge, it may be necessary to recharge the unit after a prolonged period of storage. -
Page 6: Mechanical Setup
User’s Guide 3 MECHANICAL SETUP Fig. 3.1 Proper axial loading of HHTQ35 torque gauge. 3.1 Proper alignment Load must be applied axially with respect to the sensor, as shown in Figure 3.1. If attachments are used, ensure that the sample is acted upon axially with respect to the instrument. Side loading or off-center loading can damage the instrument, whether power is turned on or off. -
Page 7: Home Screen And Controls
HHTQ35 Digital Torque Gauges User’s Guide 4 HOME SCREEN AND CONTROLS 4.1 Home Screen Name Description Measurement – indicates clockwise direction direction – indicates counter-clockwise direction indicator These indicators are used throughout the display and menu. Peaks The maximum measured clockwise and counter-clockwise readings. These readings are reset by pressing ZERO or by powering the gauge off and on. - Page 8 HHTQ35 Digital Torque Gauges User’s Guide High / low limit Correspond to the programmed set points. Indicator definitions are as follows: indicators – the displayed value is greater than the upper load limit – the displayed value is between the load limits –...
-
Page 9: Operating Modes
(if beeps are enabled) until the MENU key has been pressed or the load has been reduced to a safe level. Three operating modes are possible with the HHTQ35 torque gauge. To cycle between the modes, press MODE while in the home screen. -
Page 10: Changing The Units
HHTQ35 Digital Torque Gauges User’s Guide 6 CHANGING THE UNITS The HHTQ35 can display three different measurement units, depending on the model. To change the unit, select Units from the menu. The display will list the available units, for example: UNITS... -
Page 11: Communications
Note: Set point indicators reference the displayed reading, not necessarily the current live load. 9 COMMUNICATIONS Communication with the HHTQ35 is achieved through the micro USB port located along the left side of the housing, as shown in the illustration in the Power section. Communication is possible only when the gauge is in the main operating screen (i.e. - Page 12 5. After Windows as restarted, plug in the device. The following will occur: Windows 7 Operating Systems – When the Omega USB device has been plugged into a USB port, the driver will automatically be found. When the driver installation is complete, a message will appear as follows: “The Omega USB Device driver is now installed and ready to use”.
- Page 13 HHTQ35 Digital Torque Gauges User’s Guide Select “No, not this time”, then click “Next”. 6. The next screen appears as follows: Select “Install the software automatically (Recommended)”, then click “Next”. 7. The next screen appears as follows:...
- Page 14 8. The next, and final, screen appears as follows: Click “Finish”. The Omega USB device is now installed and ready to use. The COM port number assigned by Windows may be identified in Device Manager, or in the communication application being used.
-
Page 15: Calibration
HHTQ35 Digital Torque Gauges User’s Guide DATA FORMAT Numeric + Units Numeric Only Invert Polarity Omit Polarity Selection Description Numeric + Units Output format includes the value and unit of measure. Clockwise values have positive polarity, counter-clockwise values have negative polarity. - Page 16 HHTQ35 Digital Torque Gauges User’s Guide CALIBRATION NOT COMPLETE CANCEL EXIT W/O SAVING Selecting “CANCEL” will revert back to the Calibration setup. Selecting “EXIT W/O SAVING” will return to the menu without saving changes. 3. After the number of calibration points has been entered, press ENTER. The display will appear as...
- Page 17 HHTQ35 Digital Torque Gauges User’s Guide 6. The display will appear as follows: CALIBRATION CLOCKWISE Optionally exercise load cell a few times. THEN PRESS ENTER Optionally exercise the sensor several times (at full scale, if possible), then press ENTER. 7. The display will appear as follows:...
- Page 18 HHTQ35 Digital Torque Gauges User’s Guide CALIBRATION CLOCKWISE COMPLETE REVERSE DIRECTION FOR CCW Attach necessary weight fixtures. THEN PRESS ENTER Press ENTER. 11. At the completion of the counter-clockwise calibration, the display will appear as follows: CALIBRATION COMPLETE SAVE & EXIT EXIT W/O SAVING To save the calibration information, select “SAVE &...
-
Page 19: Other Settings
HHTQ35 Digital Torque Gauges User’s Guide CALIBRATION COUNTER-CLOCKWISE LOAD TOO CLOSE TO PREVIOUS PLEASE TRY AGAIN The entered calibration point is too close to the previous point. 11 OTHER SETTINGS 11.1 Automatic Shutoff The gauge may be configured to automatically power off following a period of inactivity while on battery power. - Page 20 HHTQ35 Digital Torque Gauges User’s Guide Note: If the AC adapter is plugged in, the gauge will ignore these settings and keep the backlight on. Selecting the On or Off setting in the Backlight menu will manually turn the backlight on or off as if the Backlight key were pressed.
-
Page 21: Specifications
HHTQ35 Digital Torque Gauges User’s Guide Digital Torque Gauge Series HHTQ35 Model No: HHTQ35-50 Serial No: 1234567 Version: 1.0 www.omega.com 12 SPECIFICATIONS 12.1 General Accuracy: ±0.5% of full scale Sampling rate: 2,000 Hz Power: AC or rechargeable battery. Low battery indicator appears when battery level is low, and gauge powers off automatically when power reaches critical stage. - Page 22 HHTQ35-100 1600 x 2 100 x 0.1 1150 x 1 12.4 Dimensions IN [MM] Ø 0.38 [9.5] MAX HHTQ35-50Z AND SMALLER Ø 0.50 [12.7] MAX HHTQ35-12 AND LARGER 2.53 [64.3] 3.50 [88.9] 3.90 [99.1] 4.82 [122.4] HHTQ35-50Z AND SMALLER 5.19 [131.8] HHTQ35-12 AND LARGER...
- Page 23 HHTQ35 Digital Torque Gauges User’s Guide...
- Page 24 HHTQ35 Digital Torque Gauges User’s Guide M-5086/0712...
Need help?
Do you have a question about the HHTQ35 and is the answer not in the manual?
Questions and answers