Table of Contents
Advertisement
Quick Links
Advertisement
Table of Contents

Related Manuals for Beko GN1306211ZDX


Summary of Contents for Beko GN1306211ZDX
- Page 1 GN1306211ZDX...
- Page 2 Please read this manual first! Dear Customer, We hope that your product, which has been produced in modern plants and checked under the most meticulous quality control procedures, will provide you with effective service. For this, we recommend you to carefully read the entire manual of your product before using it and keep it at hand for future references.
- Page 3 1 Important instructions for safety and 5 Operating the product environment 5.1 Indicator panel.....20 5.2 Dual cooling system....21 2 Your Refrigerator 5.3 Freezing fresh food .
-
Page 4: Environment
• Do not dispose of the • On delivery, check to make appliance on a fire. At Beko, sure that the product is not the care and protection of our damaged and that all the parts... -
Page 5: Electrical Requirements
Important instructions for safety and environment • Do not use mechanical devices For models with water or other means to accelerate dispenser the defrosting process, other Pressure for cold water inlet • than those recommended by the shall be maximum 90 psi (6.2 manufacturer. - Page 6 Beko authorised service in your plug proceed as follows: (See diagram). agent. Warning! This appliance 1.
-
Page 7: Important Instructions For Safety And Environment
Important instructions for safety and environment parts and materials which can be reused and are suitable for recycling. Do not dispose of the waste product with normal domestic and other wastes at the end of its service life. Take it to the collection GREEN &... -
Page 8: Your Refrigerator
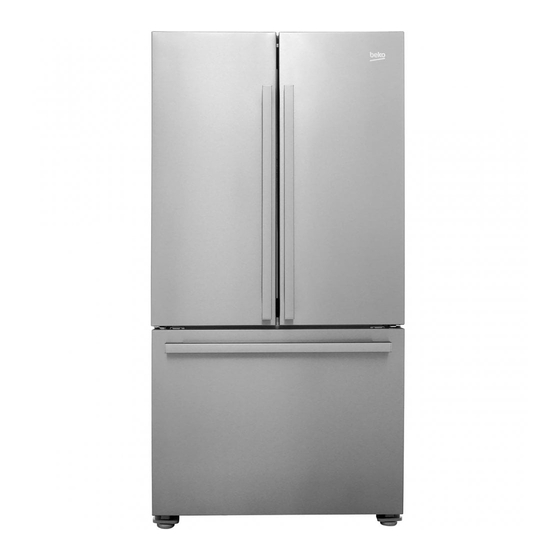
Your Refrigerator Congratulations on your choice a Beko quality Appliance which has been designed to give you service for many years. 9- Crispers 1- Fridge compartment 10- İnner water dispenser 2- ButFreezer compartment 11- Adjustable glass shelf 3- Display/indicator panel 12- Blower 4- Butter &... -
Page 9: Installation
Installation Refer to the nearest Authorised Service Agent for • Do not place the product on the materials such installation of the product. To make the product as rugs or carpets. ready for use, make sure that the electricity • Place the product on an even floor surface to installation is appropriate before calling the prevent jolts. -
Page 10: Adjusting The Feet
Installation 3.6 Door open warning WARNING: Damaged power cable must (This feature may vary depending on the door be replaced by the Authorised Service of the product and may not exist in some Agents. models.) WARNING: If the product has a failure, it An audio warning signal will be given when the should not be operated unless it is repaired door of your product is left open for 1 minute. -
Page 11: Before Installation
Installation 3.7.1 Before Installation Make sure that you have everything necessary 3.10.1 Attaching the internal to ensure proper installation before proceeding, filter into the refrigerator including: Your product comes with an internal water filter for use inside the fridge. Part number of the filter is 4918450200 and you can use this part number when ordering replacement filters. - Page 12 Installation WARNING: WARNING: Ensure that the Ice Off mode Ensure that the Ice Off mode is enabled before removing the by-pass is enabled before removing the by-pass cover. cover. It is normal that a few drops of water drip It is normal that a few drops of water drip after the cover has been removed.
-
Page 13: Connecting The Water Hose To Demijohn
Installation 3.11 Connecting the water hose to demijohn (in some models) To make the water supply connection between the refrigerator and the demijohn, you must use a water pump. Follow the instructions below after connecting one end of the water hose coming out of the pump to the refrigerator. -
Page 14: Dispenser
Installation 3.12 Before starting to use the • The first 10 glasses of water should not be water/ice dispenser consumed. • First several glasses of water may be turbid when the filter is used for the first time. • If the water pressure is below 1 bar or a Therefore, do not consume the first several demijohn will be used, than a separate must be glasses of water. -
Page 15: Transportation Of The Product
Installation • Do not attempt to clean the ice container assembly without removing it from the refrigerator. • When taking water from the water dispenser, remove the glass from the opening 1 second after releasing the trigger. Thus, water in the system will not drip into the drip tray. -
Page 16: Preparation
Preparation 4.1 Things to be done for 4.2 Recommendations for the energy saving fresh food compartment • Do not allow the food to touch the temperature Connecting the product to electric energy sensor in fresh food compartment. To allow the saving systems is risky as it may cause fresh food compartment keep its ideal storage damage on the product. -
Page 17: Initial Use
Preparation 4.3 Initial use Before starting to use the product, check that all preparations are made in accordance with the instructions in sections "Important instructions for safety and environment" and "Installation". • Clean the interior of the refrigerator as recommended in the “Maintenance and cleaning”... - Page 18 Preparation [36” F RENCH R EFRIGERATOR] DIMENSIONS PRODUCT D IMENSIONS Refrigerator / User Manual 17 / 32 EN...
- Page 19 Preparation [36” F RENCH R EFRIGERATOR] DIMENSIONS Freezer D oor O pen M ax ( Drawer) Height-‐Overall Height-‐TopOfCabinet ...
- Page 20 Preparation [36” F RENCH R EFRIGERATOR] DIMENSIONS Fresh F ood D oor O pen 9 0° Fresh F ood D oor O pen 1 30° ( Max) ...
-
Page 21: Operating The Product
Operating the product 5.1 Indicator panel Touch-control indicator panel allows you to set the temperature and control the other functions related to the product without opening the door of the refrigerator. Just press the relevant buttons for function settings. 1-On/Off function When vacation mode is activated, tempature of Press the On/Off button for 3 seconds to turn off or fresh food is hotter than 50 Fahrenheit degree(... -
Page 22: Dual Cooling System
Operating the product 5.2 Dual cooling system 11-Eco-Extra Indicator Your refrigerator is equipped with two separate Eco-Extra Indicator lits when the Eco Extra functi- cooling systems to cool the fresh food on is active. compartment and freezer compartment.Thus, 12-Quick Freeze Indicator air and odour in the fresh food compartment and This indicator lits when the Quick Freezer functi- frozen food compartment do not get mixed. -
Page 23: Food
Operating the product Freezer Fridge Compartment Compartment Explanations Setting Setting -18°C / 0°F 4°C / 39°F This is the normal recommended setting. These settings are recommended when the ambient temperature -20°C / -4°F 3°C / 37°F exceeds 30°C/86°F. Use when you wish to freeze your food in a short time. Your Quick Freeze 4°C / 39°F refrigerator will return to its previous mode when the process is... -
Page 24: Placing The Food
Operating the product 5.5 Placing the food Foods to be frozen should not be allowed to come Freezer Various frozen food such in contact with the previously frozen items to compartment as meat, fish, ice cream, prevent them from getting thawed partially. shelves vegetables and etc. -
Page 25: Removing Door Shelves
Operating the product 5.7 Removing door shelves 5.9 Glass shelves You can remove the door shelves to clean them. You can remove the glass shelves to clean them. Push the desired shelf up to remove it. Be careful when removing the shelves since they Do not remove the door shelf when there is food are heavy. -
Page 26: Crisper
Operating the product 5.11 Crisper 5.13 Ice container Crisper of the refrigerator is designed specially The ice container is used for ice collection poured ice to keep the vegetables fresh without loosing their machine. Do not put water in it to make ice as it may humidity. -
Page 27: Butter & Cheese Section
Operating the product 5.14 Butter & Cheese section (in some models) Store food such as butter, cheese and margarine in this section. 5.15 Egg holder You can install the egg holder to the desired door or body shelf. Never keep the egg holder in the freezer compartment. -
Page 28: Odour Filter
Operating the product 5.19 Odour filter Take out the glass a little while after you pull the trigger. (in some models) Odour filter in the air duct of the fridge compartment prevents build-up of unpleasant odours in the refrigerator. 5.20 Using internal water dispenser (in some models) After connecting the refrigerator to a water source or replacing the water filter, flush the water... -
Page 29: Refrigerator Shelf Weight Limitations
Operating the product 5.23 Refrigerator Shelf Weight Limitations Freshfood compartment centilever shelves, those that only have rear supports, are tested for max 25kg (55pounds) per each part. Crispers will hold up to 15kg (33pounds) per each one. Chiller zone will hold up to 20kg (44pounds). These are dynamic loads for crispers and chiller zone. -
Page 30: Maintenance And Cleaning
Maintenance and cleaning 6.1 Avoiding bad odours Service life of the product extends and frequently faced problems decrease if cleaned at regular Materials that may cause odour are not used in intervals. the production of our refrigerators. However, due to inappropriate food preserving conditions and WARNING: Unplug the product before not cleaning the inner surface of the refrigerator as... -
Page 31: Troubleshooting
Troubleshooting Please review this list before calling the service. It will save your time and money. This list includes frequent complaints that are not arising from defective workmanship or material usage. Some of the features described here may not exist in your product. The refrigerator does not operate. - Page 32 Troubleshooting • New product may be wider than the previous one. Larger refrigerators operate for a longer period of time. • The room temperature may be high. >>> It is normal that the product operates for longer periods in hot ambient. • The refrigerator might be plugged in recently or might be loaded with food.
- Page 33 Troubleshooting • The floor is not level or stable. >>> If the refrigerator rocks when moved slowly, balance it by adjusting its feet. Also make sure that the floor is strong enough to carry the refrigerator, and level. • The items put onto the refrigerator may cause noise. >>> Remove the items on top of the refrigerator.
-
Page 34: Important Notes
. • The cost of functional replacement parts, but excluding consumable items. • The labour costs of a Beko approved repairer to carry out the repair. What is not covered? • Transit, delivery or accidental damage or misuse and abuse. - Page 35 Otherwise please call the appropriate number above where service can be obtained at a charge. Should you experience any di culty in obtaining service please contact the Beko Customer Help-Line. Tel: 0845 6004911 e-mail: service@beko.co.uk...
- Page 36 BEKO plc Beko House 1 Greenhill Crescent Watford Hertfordshire WD18 8QU Tel: 0845 6004911 Fax:0 845 6004922 e-mail:service@beko.co.uk 57 7863 0000/AB website: www.beko.co.uk...
Need help?
Do you have a question about the GN1306211ZDX and is the answer not in the manual?
Questions and answers