Table of Contents
Advertisement
Quick Links
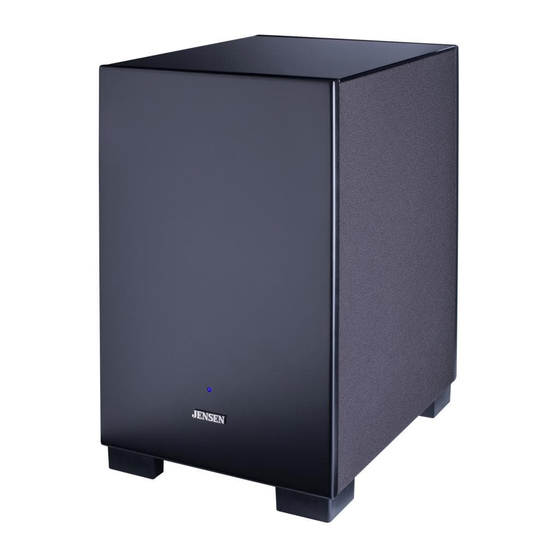
EHT-909
Your JENSEN EHT-909
extremely powerful Active Subwoofer powered
by an on-board 280 Watt RMS amplifier. Twin 10"
heavy duty "monster" drivers – one down-firing and
one rear-firing will spread Bass throughout your room.
Floor Positioning:
or across a corner. Bass response can vary slightly as Subwoofer
frequencies are mainly non-directional, and room acoustics may differ from one corner to the
next. Therefore we suggest trying two or three locations before settling on a permanent location.
This location of course, will need a Power Point.
Subwoofer amplifier features.
LEDs
on front panel are Purple when active and Red when on standby. Standby mode, like on
a TV draws next to no power.
OFF/AUTO/ON switch:
continue to draw power and purple LEDs will continue to glow.
Switch to OFF when not using for long periods or when on
holidays (RED LEDs). We recommend switching to AUTO
permanently so your EHT-909 will activate automatically when
incoming signal is received (PURPLE) then revert to standby
(RED) when signal is ceased. When powering down, it is not
uncommon to take between 15 and 40 minutes for LEDs to revert to RED from PURPLE.
AUTO can be left on indefinitely.
PHASE Switch:
from "0" to "180" and leave on setting that provides the most
Bass. Leave switch on "0" if no audible increase is detected.
If running multiple EHT-909's, ensure all are set to same position.
This will ensure all woofers are operating together in the same room
so that Bass cancellation does not occur.
FREQUENCY Knob:
to operate at. In other words, 40 Hz is a way lower and deeper frequency than 100Hz. So if you
set at say, 70Hz you will be amplifying all music 70Hz and below and filtering out everything
above which is the correct intention of a Powered Subwoofer. Take care not to advance this
control too far as overloading may occur (see below setting recommendations).
is an
Best room location is in,
Leaving your EHT-909 ON permanently will remain ON and
Once your entire speaker system is completely set-up, flick this switch
This adjusts how low (in frequency terms) you wish your EHT-909
.
.
OFF
ON
AUTO
0
180
0
PHASE
0
Advertisement
Table of Contents

Related Manuals for Jensen EHT-909


Summary of Contents for Jensen EHT-909
- Page 1 “0” to “180” and leave on setting that provides the most Bass. Leave switch on “0” if no audible increase is detected. If running multiple EHT-909’s, ensure all are set to same position. This will ensure all woofers are operating together in the same room PHASE so that Bass cancellation does not occur.
- Page 2 Receiver. The OUT (black) socket is to connect additional EHT-909’s using a 1RCA to 1 RCA lead. You may add as many EHT-909’s as you are game (see page 3). You can buy these leads in 2,5 or 10 mtr lengths from our website.
- Page 3 1 RCA lead (from our website) extra EHT-909’s can be “daisy-chained” together to operate as one. All rooms have acoustic sweet spots as well as dead-spots. Adding an extra EHT-909 will reduce the dead-spots as well as adding Bass resulting in exponentially enhancing overall Sub- Bass performance.
- Page 4 Drivers Glass Top. amp) Notes: I must not forget to Register Online to validate my 10 Year Warranty www.jensenspeakers.com.au Customer Support: info@bdimports.com.au 1300-JENSEN (1300-536736) www.jensenspeakers.com.au Distributed in Australia by B.D Imports Pty Ltd. Victoria, Australia under license from Audiovox, USA...
Need help?
Do you have a question about the EHT-909 and is the answer not in the manual?
Questions and answers